

Primitive Halloween crafts have a special charm for anyone who loves old fashioned country decorating. Instead of polished store bought decorations, these projects use worn wood, muslin, burlap, homespun fabric, twigs, rusty accents, buttons, dried plants, and other simple supplies. The finished pieces can look as though they have been collected from an old farmhouse over many Halloween seasons. Soft black, faded orange, cream, brown, and muted gray work especially well for this style.
The projects below are made for crafters who enjoy handmade seasonal décor without complicated techniques. Many can be adjusted to suit an existing farmhouse room, porch, mantel, shelf, or dining table. You can leave small imperfections in the stitching or paint because a slightly uneven finish adds to the primitive character. These primitive Halloween crafts also make thoughtful seasonal gifts, booth items, or decorations for your own collection.
Primitive Rag Doll Witch With a Homespun Dress
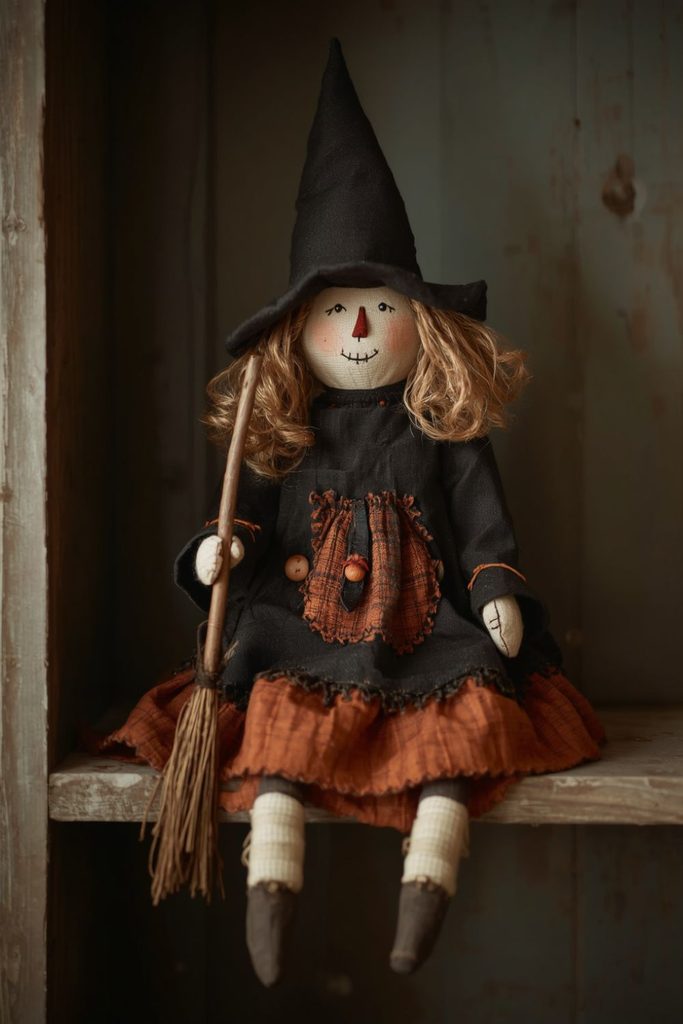
A rag doll witch brings an old country feeling to a shelf, mantel, or entry table, and homespun fabric makes her look pleasantly aged.
Materials needed: muslin, homespun fabric, black thread, stuffing, buttons, black fabric, a small twig, yarn, fabric scissors, needle, and brown acrylic paint.
- Draw a simple witch body pattern on paper with a rounded head, narrow body, arms, and legs.
- Place the pattern on folded muslin and cut two matching body pieces.
- Stitch around the pieces, leaving a small opening for stuffing.
- Turn the body right side out and fill it lightly so the doll remains soft.
- Close the opening with small hand stitches.
- Cut a simple dress from homespun fabric and stitch the sides together.
- Add a small black fabric hat and attach yarn for hair.
- Paint two small eyes and a simple mouth rather than adding a detailed face.
- Tie a thin strip of fabric around the waist.
- Place a short twig in one hand as a tiny broom.
- Rub a little brown paint around the edges of the dress and hat for an aged appearance.
- Sit the witch on a wooden stool or shelf beside a few fabric pumpkins.
The simple face is part of the charm. Avoid making her too polished or cheerful. A slightly crooked hat, uneven stitches, and loosely tied hair suit primitive Halloween crafts especially well. For a farmhouse display, pair the doll with old books, a small crock, dried corn, or a weathered wooden box. The result feels collected rather than freshly made.
- Related post 25 Stunning Halloween Crafts for Adults to Transform Your Home Into a Spooky-Chic Haven
Distressed Wooden Halloween Crow Shelf Sitter
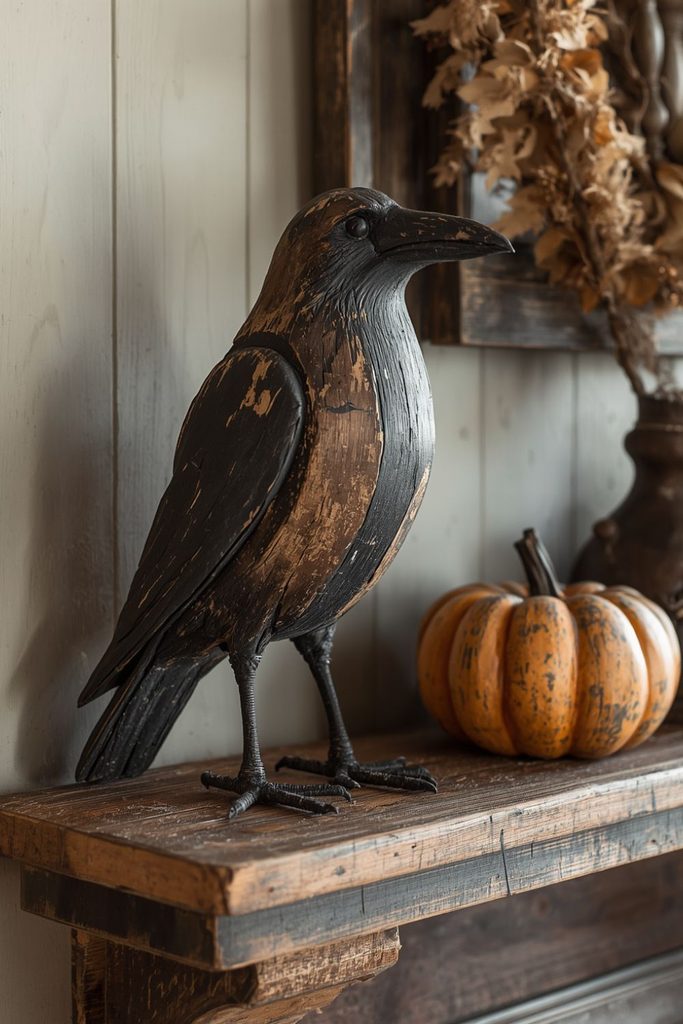
A crow shelf sitter is an easy choice for a farmhouse mantel because it takes up little space while adding a dark Halloween accent.
Materials needed: a small wooden board, crow template, jigsaw or hand saw, black paint, brown paint, sandpaper, sponge, pencil, and clear matte sealer.
- Trace a simple crow shape onto the wooden board.
- Cut around the outline carefully and smooth the edges with sandpaper.
- Paint the entire piece with a thin coat of faded black paint.
- Allow the first coat to dry before adding a second light coat.
- Rub sandpaper across the edges so some wood shows through.
- Mix a little brown paint with black and dab it lightly across the body.
- Add a small painted eye and a simple pointed beak.
- Distress the surface with a dry brush rather than adding sharp modern details.
- Apply a matte sealer if the piece will be displayed near an open porch.
- Place the crow against a small wooden block so it can stand upright.
For a stronger primitive appearance, use reclaimed wood with visible knots and marks. A perfectly smooth new board can still work, but distressing gives it an older look. This is one of the primitive Halloween crafts that works well on a mantel beside an old candle holder, muslin pumpkin, or small black cat. Keep the colors faded rather than glossy, and the crow will blend naturally with farmhouse décor.
Hand Stitched Black Cat Door Hanger
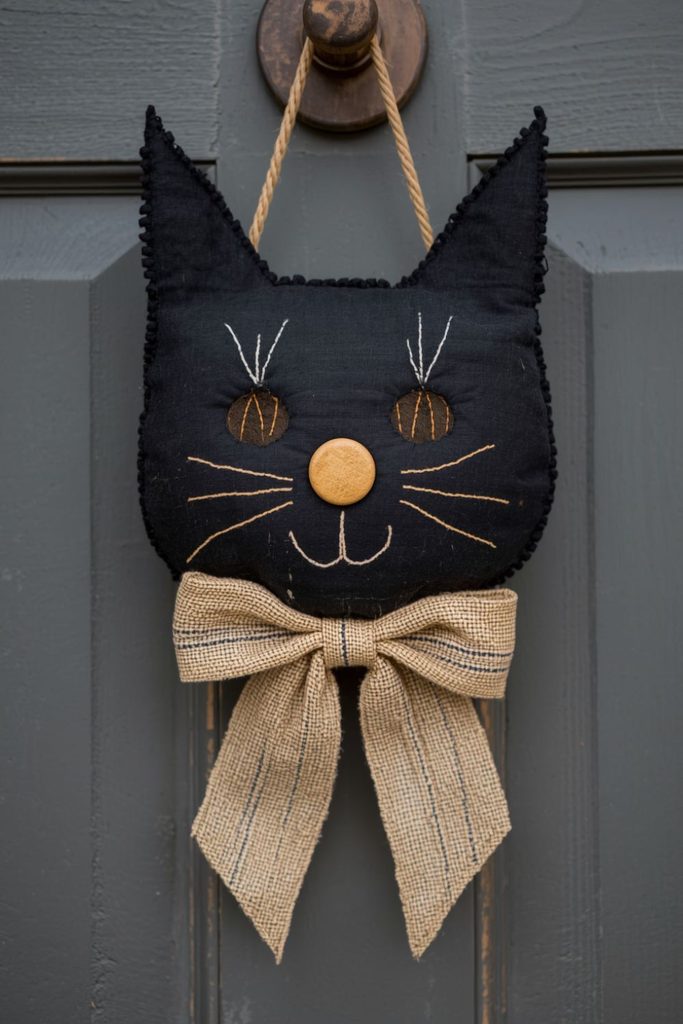
A black cat door hanger can give a farmhouse porch a playful Halloween touch without looking too modern.
Materials needed: black cotton or faded muslin, cardboard for a pattern, cotton stuffing, black thread, tan thread, twine, a wooden button, and a small piece of homespun fabric.
- Draw a simple sitting cat shape on cardboard.
- Trace the shape twice onto black fabric.
- Cut both pieces and place them with the good sides facing inward.
- Stitch around the shape while leaving a small opening.
- Turn the cat right side out and add a small amount of stuffing.
- Close the opening with hand stitches.
- Use tan thread to create two simple stitched eyes.
- Add a small wooden button for the nose.
- Tie a homespun fabric strip around the neck.
- Attach twine to the top for hanging.
- Rub a little brown paint along the edges if the fabric needs a more aged appearance.
- Hang the cat from a hook or rustic door handle.
Keep the cat shape plain, with a slightly uneven outline. Primitive Halloween crafts often look better when the handmade quality remains visible. You can make the tail longer or shorten the ears to create a different personality. A small rusty bell on the fabric tie can add another country detail. For a farmhouse porch, place the cat near a wooden crate, dried corn stalks, or a simple lantern.
Burlap Ghosts With Frayed Edges and Button Eyes

Burlap ghosts are inexpensive and easy to make, while their rough texture works beautifully with primitive Halloween crafts.
Materials needed: burlap, cotton stuffing, black buttons, twine, black thread, fabric scissors, and a small amount of cream paint.
- Cut a square of burlap large enough to form a small ghost.
- Pull several threads from the outer edges to create a frayed finish.
- Place a small amount of stuffing in the center.
- Gather the burlap beneath the stuffing.
- Tie the gathered section with twine.
- Sew two black buttons onto the front for eyes.
- Add a few small stitches below the eyes for a simple mouth.
- Dab cream paint over the burlap if you want a faded appearance.
- Leave some ghosts plain and make others slightly taller.
- Arrange them in a wooden bowl, along a mantel, or beside a farmhouse sign.
The uneven shape gives each ghost a handmade personality. Do not worry if one side hangs lower than the other. That imperfect look works well with the old country style. You can also place tiny dried leaves around the ghosts for an autumn display. These primitive Halloween crafts are especially useful for shelves because they can be made in several sizes. A row of three ghosts in cream, tan, and faded brown burlap can look charming without making the display too bright.
Primitive Scarecrow Doll for a Farmhouse Porch
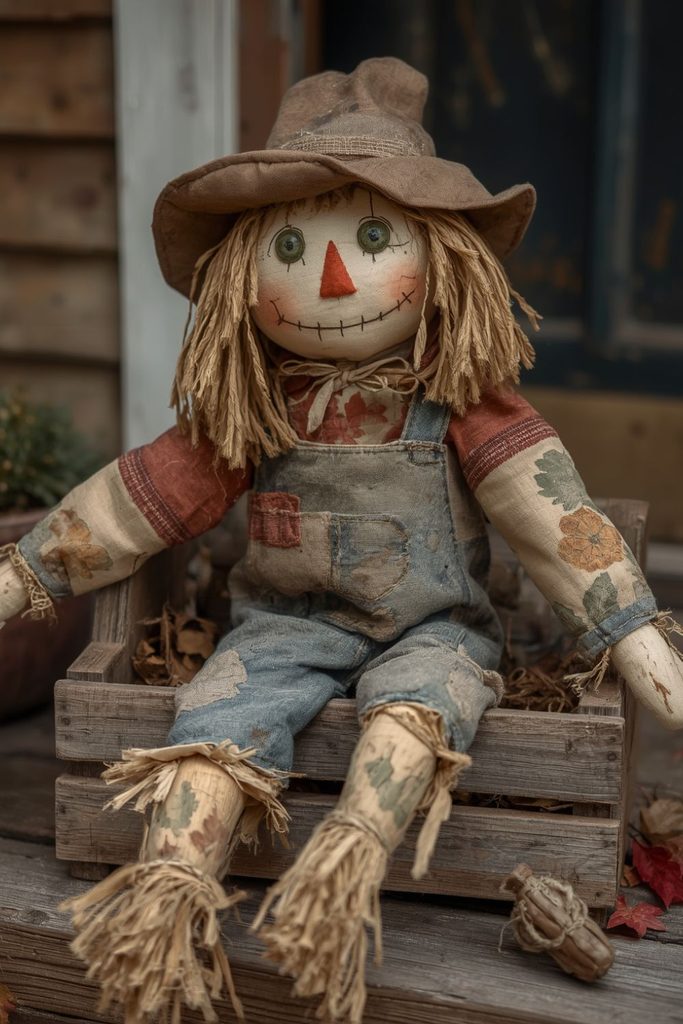
A small scarecrow doll adds autumn character while keeping the Halloween display rooted in country decorating.
Materials needed:muslin, homespun fabric, raffia, cotton stuffing, brown thread, wooden buttons, twine, and a small piece of worn denim.
- Cut two simple body shapes from muslin.
- Stitch the pieces together and leave an opening for stuffing.
- Turn the body outward and fill it loosely.
- Close the opening with uneven hand stitches.
- Make simple legs from worn denim or brown fabric.
- Add homespun patches to the shirt area.
- Stitch two wooden buttons onto the face.
- Add a few lines of brown thread for the mouth.
- Tie raffia around the head to resemble messy hair.
- Add a small homespun hat.
- Tie the arms and legs loosely with twine.
- Place the finished scarecrow in a wooden crate or beside a porch chair.
The goal is a friendly old farm scarecrow rather than a polished character. Leave the patches visible and let the raffia stick out in different directions. A little faded paint around the face can make the doll look older. Among primitive Halloween crafts, this project is useful because it works from early fall through Halloween. It can sit beside pumpkins, dried corn, or a basket of apples before being moved into a Halloween display later in the season.
Twig Witch Broom With a Homespun Fabric Bow
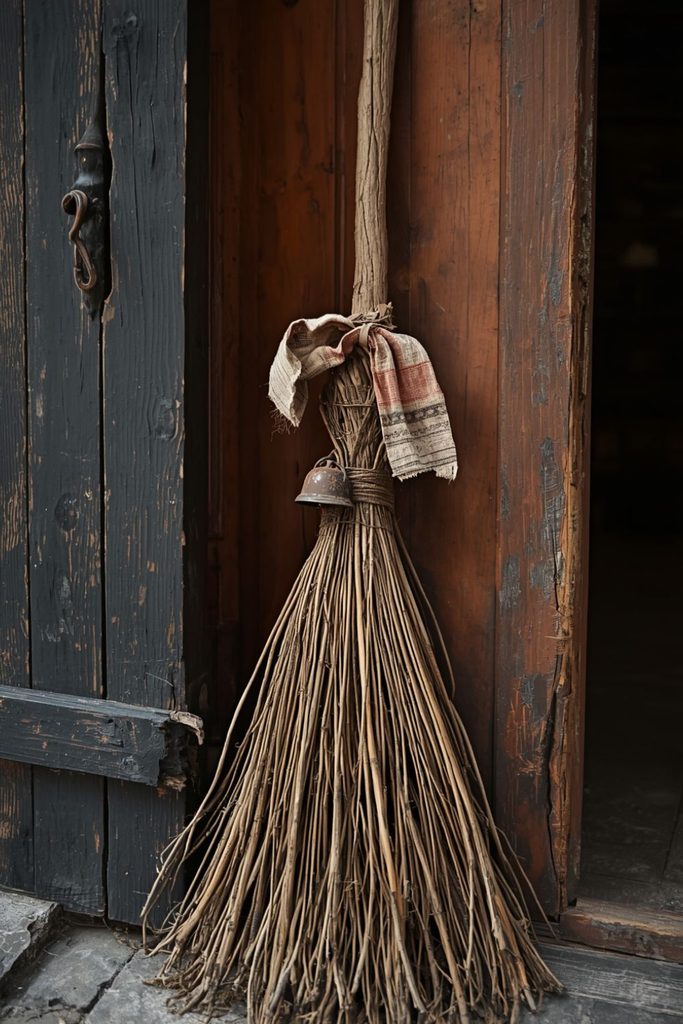
A twig broom is one of the simplest primitive Halloween crafts and can be made almost entirely from natural materials.
Materials needed: several dry twigs, garden twine, scissors, a sturdy branch for the handle, homespun fabric, and a small rusty bell.
- Gather dry twigs that are similar in length.
- Arrange them around one end of the sturdy branch.
- Wrap garden twine tightly around the bundle.
- Continue wrapping until the twigs feel secure.
- Trim any pieces that are much longer than the others.
- Cut a strip of homespun fabric.
- Tie the fabric around the twine wrapped area.
- Add a rusty bell if desired.
- Roughen the handle with sandpaper if the branch looks too smooth.
- Lean the broom beside a witch doll, porch crate, or entryway basket.
Natural irregularities make each broom look different. Avoid cutting every twig to exactly the same length because the uneven ends add character. A faded orange or brown homespun bow can connect the broom with other fall decorations. For a more aged appearance, lightly rub brown paint over the handle and wipe most of it away. The broom is small enough for a shelf but can also be made larger for a porch corner.
Old Fashioned Muslin Pumpkin Bowl Fillers
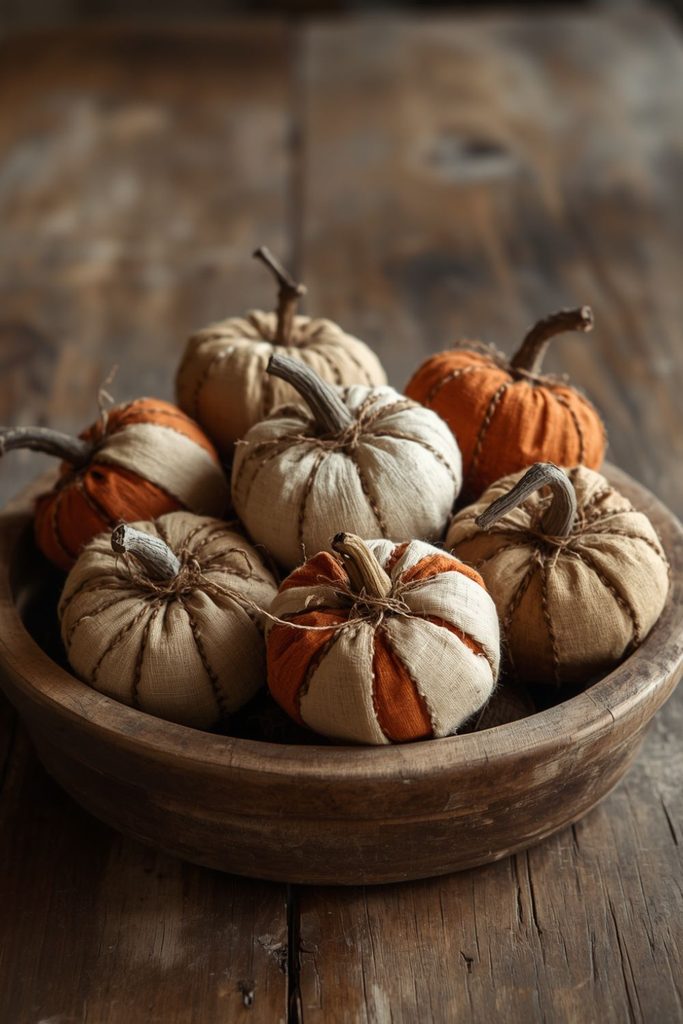
Soft muslin pumpkins are a classic choice for primitive Halloween crafts because they can be made in several sizes and colors.
Materials needed:muslin, cotton stuffing, brown thread, orange and cream fabric paint, cinnamon, twine, and small twigs.
- Cut an oval fabric shape for each pumpkin.
- Stitch around the edge while leaving a small opening.
- Turn the fabric right side out.
- Fill the pumpkin firmly enough to hold its shape.
- Close the opening with hand stitches.
- Wrap thread around the pumpkin from top to bottom to create sections.
- Add a short twig as the stem.
- Tie a small piece of twine around the stem.
- Rub diluted orange paint onto some pumpkins and cream paint onto others.
- Sprinkle a tiny amount of cinnamon onto the fabric while the paint is slightly damp.
- Place several pumpkins in a wooden bowl or old metal container.
The muted finish is much more fitting than bright orange fabric. You can make tiny pumpkins for bowl fillers and larger ones for a mantel. A few loose stitches can remain visible because they add to the handmade appearance. Among primitive Halloween crafts, these pumpkins are useful because they can be reused each year and combined with many other seasonal pieces. Their soft shape also makes them easy to store after Halloween.
Primitive Black Cat Made From Reclaimed Wood

A reclaimed wood cat offers a sturdy decoration for shelves, porch steps, or a farmhouse table.
Materials needed:a narrow piece of reclaimed wood, pencil, hand saw, sandpaper, black paint, brown paint, and a small piece of rusty wire.
- Draw a simple cat silhouette on the wood.
- Cut the shape using a hand saw.
- Smooth sharp edges without removing every rough mark.
- Paint the cat with faded black paint.
- Let the paint dry completely.
- Sand the face, ears, tail, and body edges.
- Dab a little brown paint over the sanded areas.
- Add a tiny painted eye.
- Bend rusty wire into a simple tail or whisker detail if desired.
- Set the cat on a small wooden base.
The reclaimed board should retain some of its original marks. Nail holes, knots, and scratches can make the piece look more like an old farmhouse decoration. Avoid a glossy finish because matte paint suits primitive Halloween crafts better. Place the cat beside a small pumpkin bowl, crow, or candle holder. You can also make several cats in slightly different shapes so the display looks collected over time.
Handmade Halloween Crow Garland From Weathered Wood
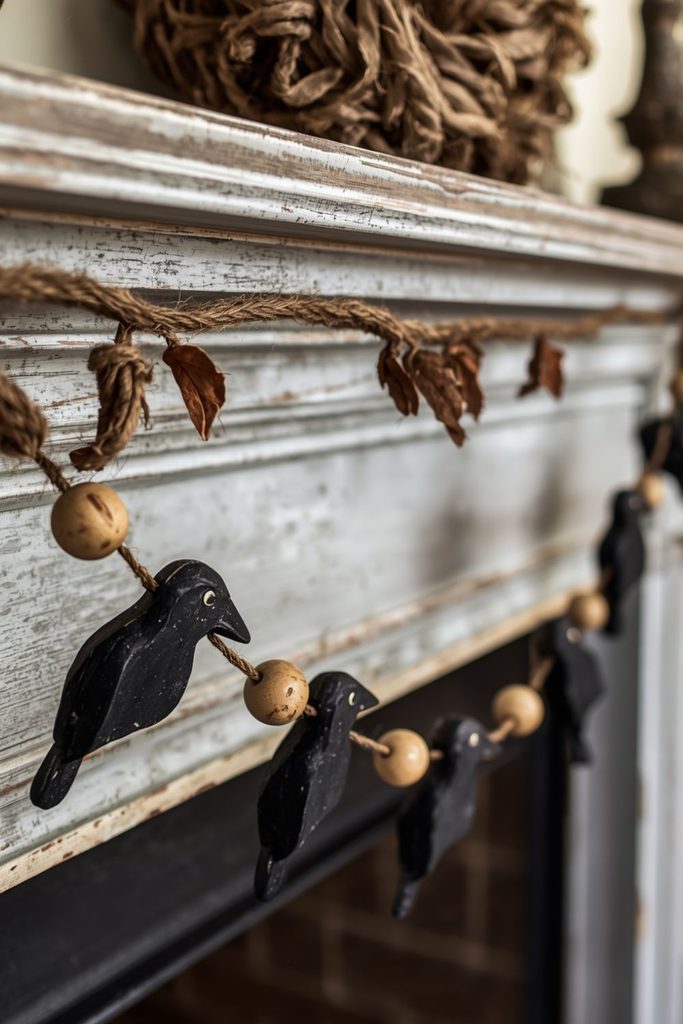
A wooden crow garland can stretch across a mantel, cabinet, or farmhouse window and bring several small primitive pieces into one display.
Materials needed:thin weathered wood, a crow template, black paint, sandpaper, twine, small wooden beads, and a hand saw.
- Trace several small crow shapes onto thin wood.
- Cut each shape carefully.
- Sand only the sharp edges.
- Paint each crow with faded black paint.
- Add small brown patches with a dry brush.
- Sand the painted surfaces lightly.
- Drill or punch a small hole near the top of each crow.
- Cut a long piece of twine.
- Thread the crows onto the twine with wooden beads between them.
- Tie simple knots around each piece so they stay in position.
- Hang the garland across a mantel or cabinet.
Vary the crow shapes slightly instead of making them perfectly identical. The little differences make the garland feel handmade. You can also add one or two small fabric leaves between the crows. This project works especially well with other primitive Halloween crafts because the dark wood provides a strong contrast against cream walls and pale farmhouse furniture. Keep the garland simple so the rough wood remains the main feature.
Primitive Witch Hat Made With Black Fabric and Rusty Bells
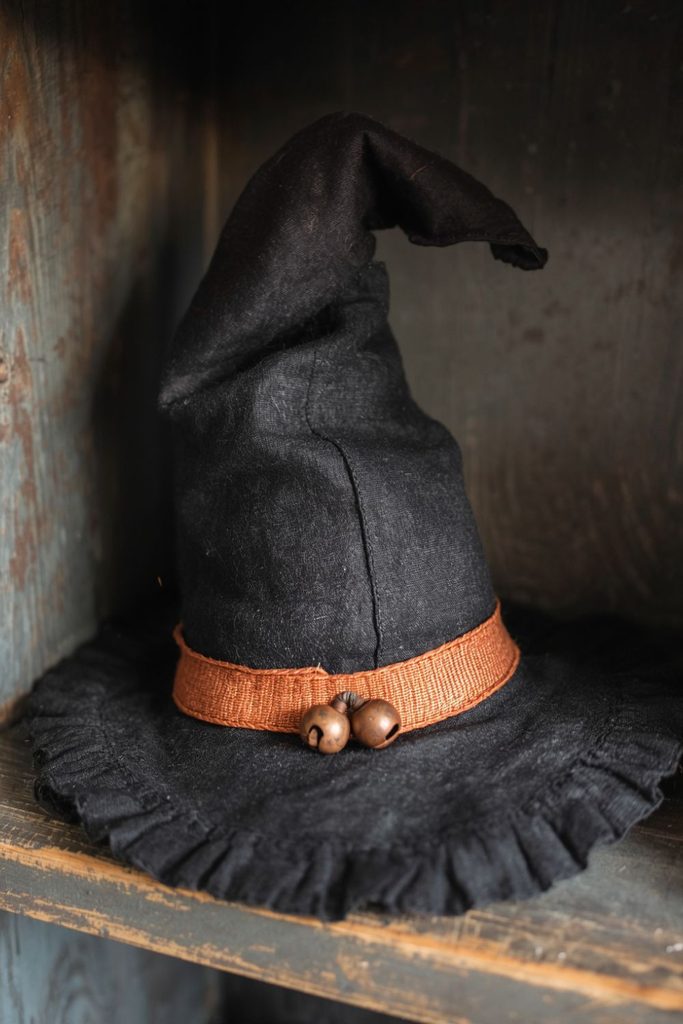
A soft witch hat made from aged black fabric can sit on a shelf, hang from a door, or become part of a larger farmhouse display.
]Materials needed: black cotton fabric, cardboard, cotton stuffing, black thread, rusty bells, twine, and a strip of faded orange homespun fabric.
- Cut a large triangle from cardboard for the hat pattern.
- Cut matching black fabric pieces.
- Stitch the long sides together.
- Turn the hat right side out.
- Add a small amount of stuffing to keep the cone upright.
- Cut a circular brim from black fabric.
- Stitch the cone to the center of the brim.
- Tie faded homespun fabric around the base.
- Sew two or three rusty bells onto the fabric.
- Roughen the edges with scissors for an aged appearance.
- Add a small amount of brown paint around the seams.
Keep the hat slightly bent rather than perfectly straight. A crooked top makes it look more like a handmade country decoration. You can place it on a primitive witch doll or display it alone on a stack of old books. The rusty bells provide a subtle old farmhouse detail. This is one of the primitive Halloween crafts that can be made in different sizes, making it useful for both small shelves and larger porch displays.
Homespun Halloween Garland With Fabric Pennants
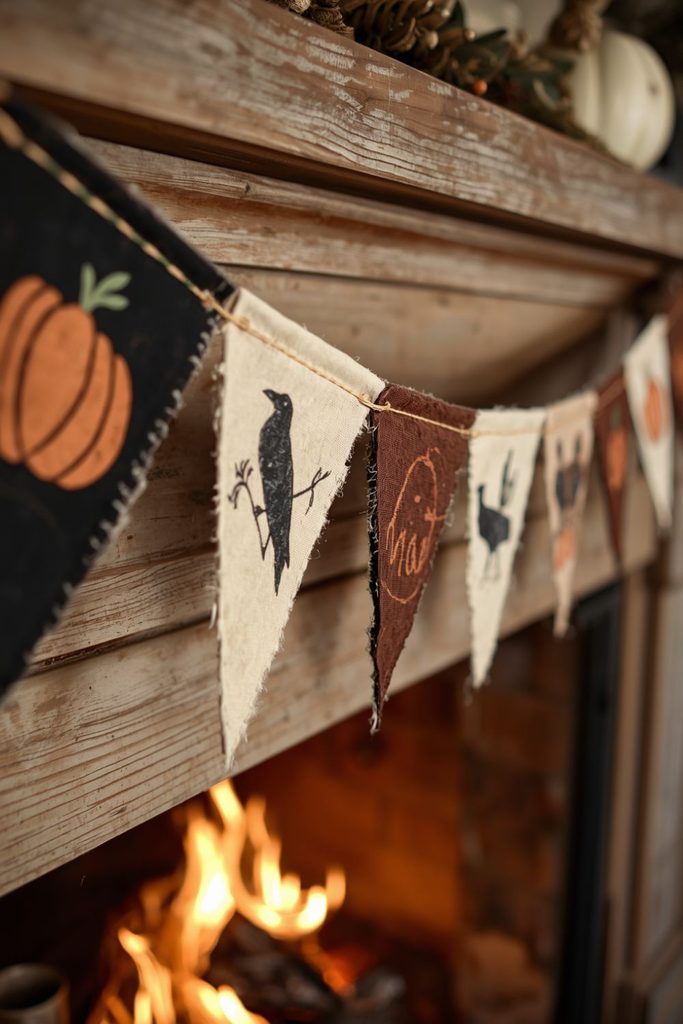
A homespun pennant garland adds soft texture to a mantel without relying on bright commercial decorations.
Materials needed: homespun fabric, muslin, faded orange fabric, black fabric, twine, scissors, needle, black thread, and small wooden beads.
- Cut several triangle pennants from the fabrics.
- Mix cream, brown, black, and faded orange pieces.
- Leave some edges raw for a primitive appearance.
- Stitch a simple letter or small Halloween symbol onto selected pennants.
- Cut a long piece of twine.
- Fold the top edge of each pennant over the twine.
- Secure the fabric with hand stitches.
- Add wooden beads between a few pennants.
- Tie small fabric strips at both ends.
- Hang the garland across a mantel, hutch, or window.
The handmade stitching is more appealing here than perfect lettering. You can use simple shapes such as pumpkins, stars, moons, or crows rather than trying to make every pennant match. Primitive Halloween crafts often benefit from a limited color palette, so keep the fabrics muted. This garland can stay up throughout the fall season and still look appropriate after Halloween has passed.
Primitive Pumpkin Doll With a Distressed Painted Face

A pumpkin doll combines the softness of fabric with the old country look of a faded painted face.
Materials needed: muslin, stuffing, orange and cream paint, brown thread, a twig, homespun fabric, and black paint.
- Cut two rounded pumpkin shapes from muslin.
- Stitch around the edges and leave a small opening.
- Turn the pieces right side out.
- Fill with stuffing.
- Close the opening with hand stitches.
- Wrap brown thread around the body to form pumpkin sections.
- Add a short twig for the stem.
- Paint the face using simple black eyes and a small mouth.
- Rub cream and brown paint around the edges.
- Tie a homespun strip around the stem.
- Add a tiny fabric patch if desired.
The face should remain simple. A pair of uneven eyes and a small crooked mouth often look more natural than a detailed painted expression. Let some thread and fabric edges remain visible. This project fits well beside old crocks, wooden boxes, or candle holders. Among primitive Halloween crafts, a pumpkin doll is especially useful because it can be made in several sizes and placed almost anywhere in a farmhouse room.
Hand Stitched Primitive Owl With Button Eyes

A small fabric owl adds a woodland note to Halloween decorating while staying within the old country style.
Materials needed: brown or gray muslin, black thread, two wooden or black buttons, cotton stuffing, cream fabric, and a small twig.
- Draw a simple owl shape with a rounded body and pointed ears.
- Cut two matching pieces from muslin.
- Stitch around the edges, leaving an opening.
- Turn the owl outward and fill it lightly.
- Close the opening with hand stitches.
- Cut two small cream fabric circles for the eyes.
- Stitch the circles onto the face.
- Sew a button in the center of each eye.
- Add a small triangle of brown fabric for the beak.
- Stitch a few simple feather lines onto the body.
- Tie the owl to a twig perch using twine.
Keep the feather stitching sparse. Too many details can make the owl look like a modern toy. A slightly uneven body and simple button eyes suit primitive Halloween crafts better. Place the owl on a mantel, beside a crow, or on a small wooden branch. Brown, gray, cream, and faded black create a calm color combination that works well with farmhouse furniture.
Reclaimed Barn Wood Halloween Moon and Crow Sign
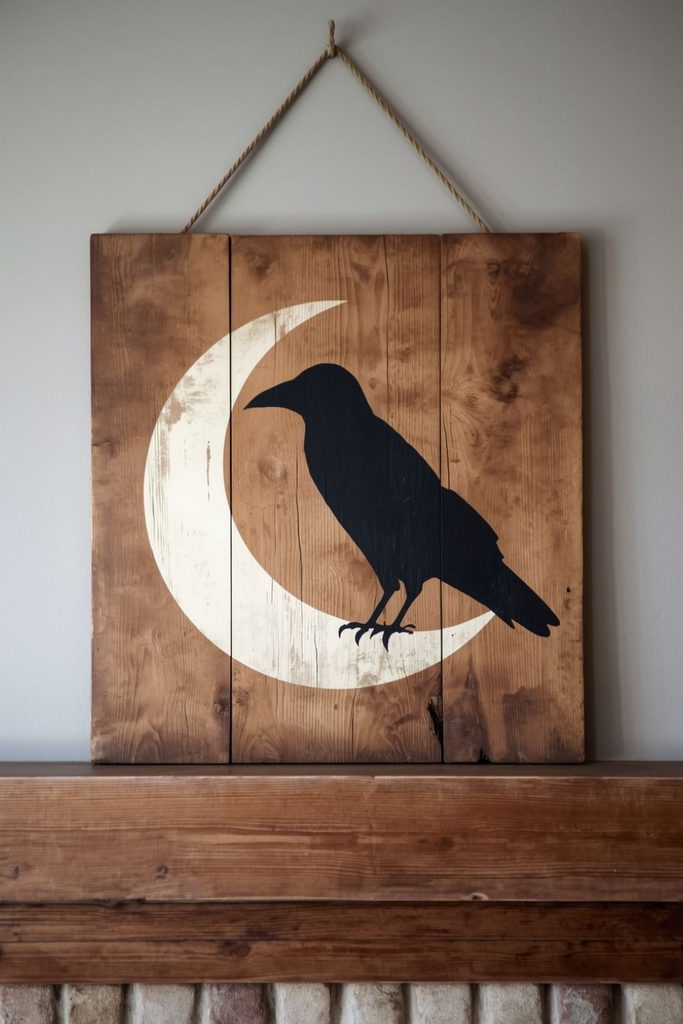
A moon and crow sign brings a classic Halloween image to a piece of old wood while retaining a simple country appearance.
Materials needed: reclaimed barn wood, pencil, black paint, faded cream paint, brown paint, sandpaper, and a small brush.
- Clean loose dirt from the wood without removing its aged surface.
- Draw a large crescent moon on one side.
- Sketch a small crow sitting on the moon.
- Paint the moon with faded cream.
- Paint the crow with muted black.
- Add a few brown marks around the crow.
- Let the paint dry.
- Sand lightly across the painted areas.
- Add a few small stars using the tip of a brush.
- Leave sections of the original wood visible.
- Add twine to the back for hanging.
The sign should not look freshly painted. Thin coats and gentle sanding help the old wood remain visible. Keep the lettering optional because the moon and crow already provide a strong Halloween image. This is one of the primitive Halloween crafts that can become a central wall piece above a mantel or entry table. A few small fabric pumpkins beneath the sign can complete the display without making it feel crowded.
Primitive Black Cat Softie Made From Aged Muslin
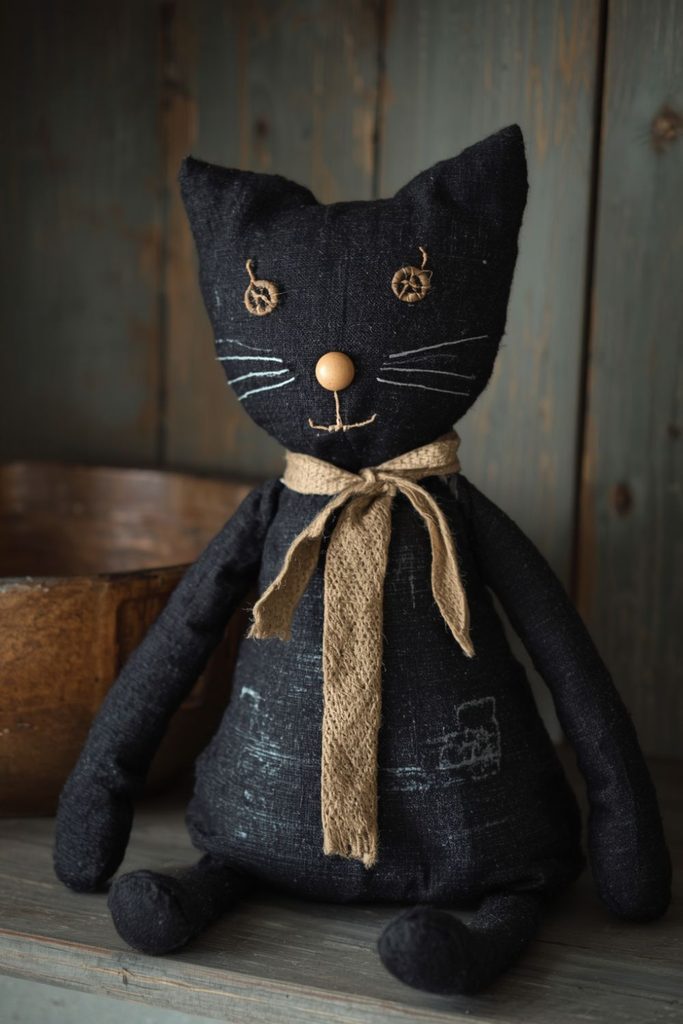
An aged muslin cat softie gives a farmhouse room a softer Halloween accent than wood or metal décor.
Materials needed: aged muslin, black thread, cotton stuffing, black and brown paint, a small button, and homespun fabric.
- Draw a simple cat shape with a long tail.
- Trace it twice onto aged muslin.
- Cut out the pieces and stitch around the edges.
- Leave a small opening near one side.
- Turn the cat right side out.
- Fill it with soft stuffing.
- Close the opening with hand stitches.
- Paint small black eyes and a simple mouth.
- Add a button for the nose.
- Tie homespun fabric around the neck.
- Rub brown paint lightly along the seams.
The aged muslin gives this project its old fashioned character. If the fabric is already naturally uneven, leave it that way. The cat can sit inside a wooden bowl, on a stack of books, or beside a primitive pumpkin. These primitive Halloween crafts work especially well in farmhouse bedrooms, living rooms, and entryways because the soft fabric does not feel too dramatic. Make the cat in cream, gray, or faded black for several decorating options.
Muslin Ghost Doll With a Vintage Lace Collar
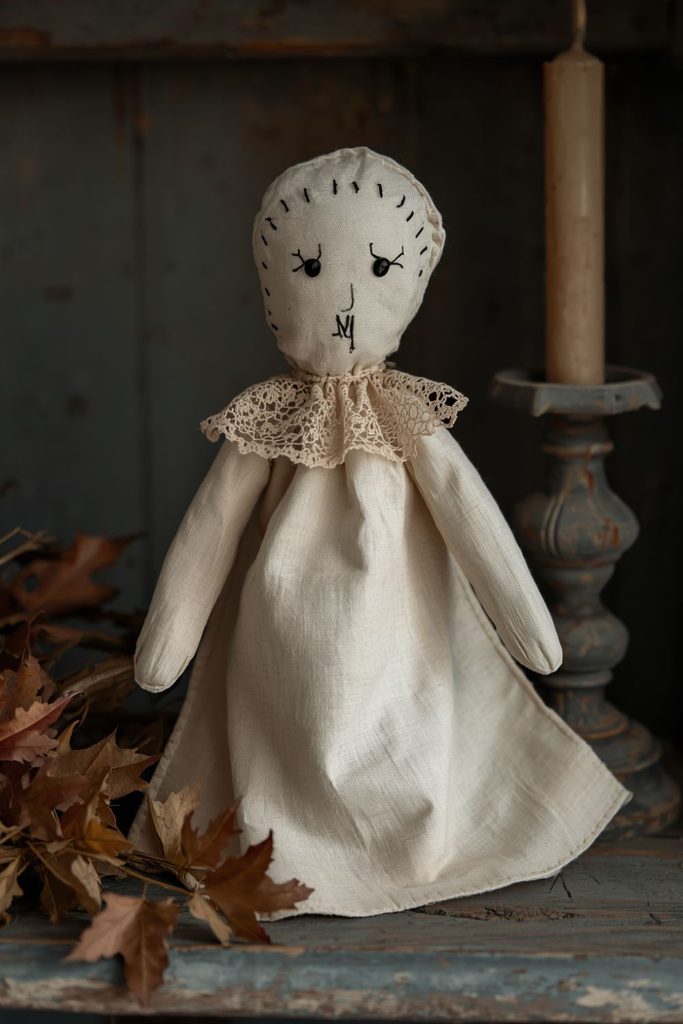
A muslin ghost doll can look sweet and slightly spooky at the same time, especially when finished with old lace.
Materials needed: cream muslin, cotton stuffing, vintage lace, black thread, a small button, twine, and brown fabric paint.
- Cut two simple ghost body shapes from cream muslin.
- Stitch the pieces together and leave a small opening.
- Turn the body outward.
- Fill it lightly with stuffing.
- Close the opening using visible hand stitches.
- Add two tiny black stitched eyes.
- Stitch a small mouth below them.
- Wrap vintage lace around the neck.
- Secure the lace with a button or twine.
- Dab diluted brown paint around the lower edges.
- Let the ghost dry before placing it on a shelf.
The lace collar gives the doll an old fashioned appearance without requiring complicated sewing. Keep the face small and simple. A little unevenness around the body can make it look handmade rather than manufactured. Place the ghost beside a candle holder or in a wooden bowl filled with dried leaves. This project fits naturally with other primitive Halloween crafts and can be stored easily from one Halloween season to the next.
Primitive Halloween Candle Holder From an Aged Wooden Spindle
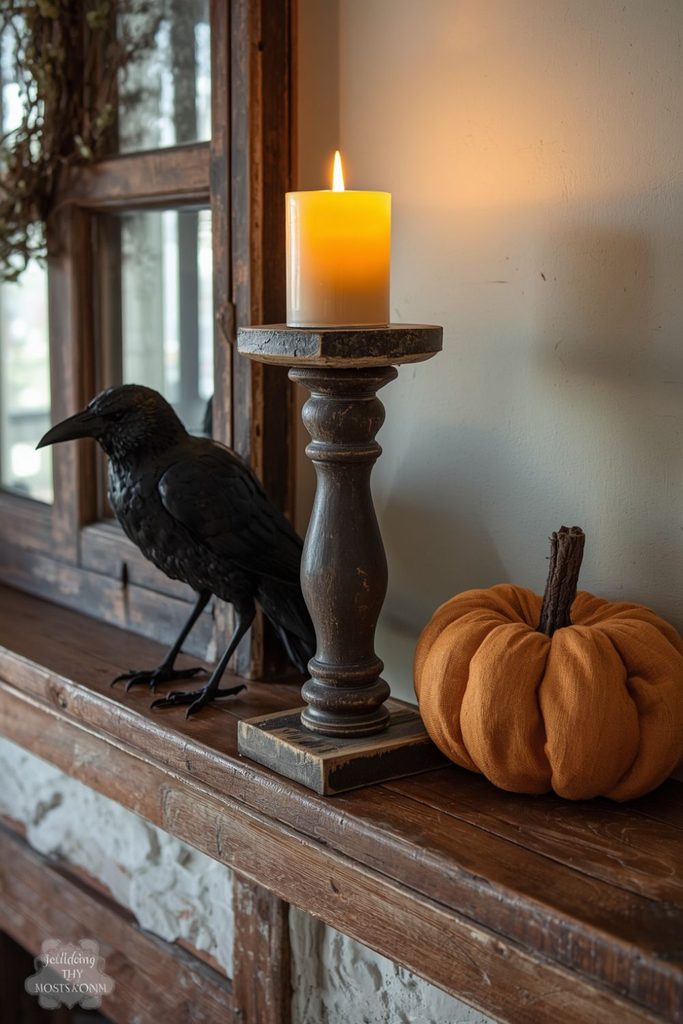
An aged wooden spindle can become a simple candle holder with a strong farmhouse appearance.
Materials needed: an old wooden spindle, wooden base, black or brown paint, sandpaper, wood glue, matte sealer, and a battery operated candle.
- Clean the wooden spindle and allow it to dry.
- Paint it with a thin coat of dark brown or faded black.
- Let the paint dry.
- Sand the raised areas and edges.
- Attach the spindle to a wooden base using suitable wood glue.
- Allow the glue to cure fully.
- Add a small wooden cup or holder at the top if needed.
- Rub a little cream paint across raised areas.
- Wipe away excess paint so the wood remains visible.
- Place a battery operated candle into the holder.
For safety, a battery operated candle is a better choice for fabric rich farmhouse displays. The aged wood can be left rough, but sharp edges should be smoothed before use. This piece can stand alone or sit beside a crow, witch, or muslin pumpkin. Primitive Halloween crafts often look best when several simple pieces are grouped rather than when every item is heavily decorated.
Rag Filled Primitive Halloween Bowl With Crow and Pumpkin Pieces

A rag filled bowl can become a flexible seasonal display filled with small handmade Halloween figures.
Materials needed: an old wooden or metal bowl, black and brown fabric scraps, cotton stuffing, twine, small wooden crow shapes, and tiny muslin pumpkins.
- Tear fabric scraps into uneven strips.
- Roll some strips loosely into small bundles.
- Tie the bundles with twine.
- Make several tiny muslin pumpkins.
- Add short twig stems to the pumpkins.
- Paint small wooden crow shapes with faded black paint.
- Sand the crows lightly around the edges.
- Fill the bowl loosely with the fabric bundles.
- Tuck pumpkins and crows between the fabric pieces.
- Add a few dried leaves for color.
- Rearrange the contents until the bowl looks naturally full.
The loose fabric gives the display a soft, old country appearance. Use scraps from previous sewing projects if possible because mixed fabrics add history to the piece. Keep the colors muted and avoid overly bright orange. This is one of the primitive Halloween crafts that can be changed every year by replacing a few small pieces. The bowl itself can remain as part of the farmhouse décor long after Halloween.
Primitive Halloween Wreath With Grapevine, Corn Husks, and Dried Berries

A natural wreath can bring together several old country materials without needing a complicated base.
Materials needed: a grapevine wreath, dried corn husks, dried berries, twine, faded fabric strips, small twigs, and a black wooden crow.
- Start with a dry grapevine wreath.
- Tuck several corn husks into the vines.
- Secure the husks with thin twine.
- Add clusters of dried berries around one side.
- Insert small twigs between the natural materials.
- Tie faded fabric strips near the bottom.
- Attach a small wooden crow with wire or twine.
- Check that all pieces feel secure.
- Trim loose ends without making the wreath too neat.
- Hang the wreath on a door or interior wall.
The wreath should feel gathered from simple country materials rather than arranged like a polished store decoration. Leave some grapevine exposed so the natural base remains visible. A faded black crow provides a clear Halloween touch while the dried plants keep the piece suitable for fall. This project works especially well with other primitive Halloween crafts made from muslin, wood, and homespun fabric.
Old Fashioned Primitive Witch Doll With a Bent Twig Broom
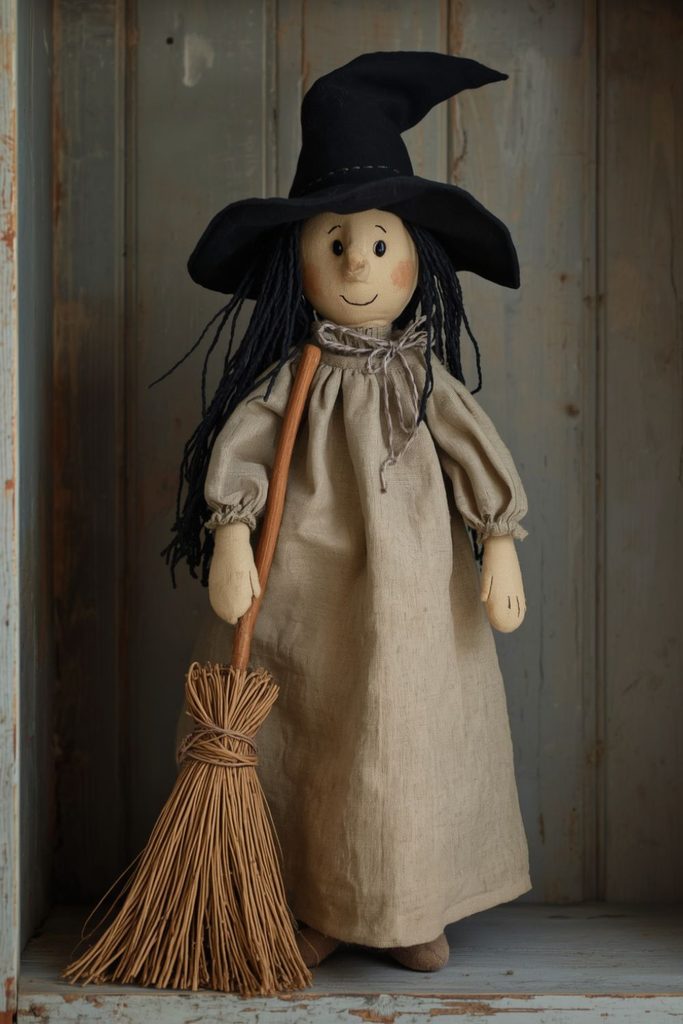
A second witch doll can have a different shape and personality by using a longer body, bent hat, and crooked twig broom.
Materials needed: muslin, black fabric, homespun scraps, stuffing, brown thread, twigs, rusty wire, and black paint.
- Cut a long simple body from muslin.
- Stitch the body and leave an opening.
- Turn it right side out.
- Fill it lightly with stuffing.
- Close the opening with visible stitches.
- Make a long black fabric hat with a bent tip.
- Attach the hat using small stitches.
- Add homespun fabric around the waist.
- Make a crooked broom from a bent twig and thin branches.
- Tie the branches to the twig with rusty wire.
- Add simple stitched facial features.
- Place the doll beside a wooden crate or chair.
This witch should look different from the rag doll witch so the two projects do not feel like copies. Give her a taller shape and a more worn appearance. A crooked hat and uneven broom create a pleasing primitive look. You can also add a small fabric patch to her dress. Among primitive Halloween crafts, handmade witch dolls are especially popular for farmhouse shelves because they combine seasonal humor with old country charm.
Primitive Halloween Tree With Hand Stitched Fabric Ornaments
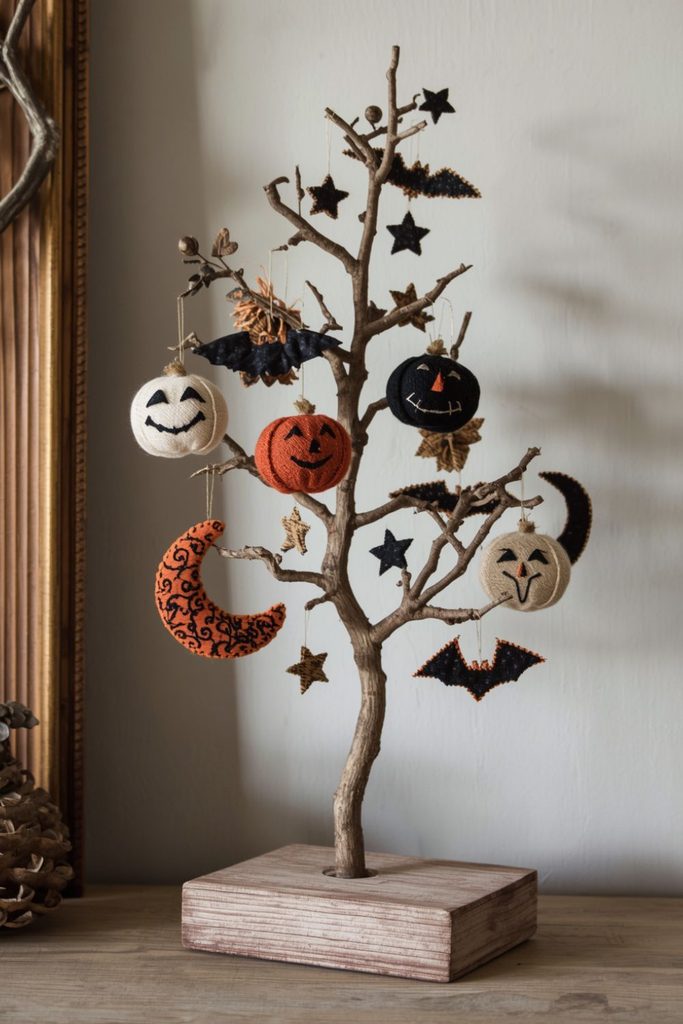
A small Halloween tree gives you a place to display tiny handmade pieces while keeping the arrangement simple and rustic.
Materials needed: a dry branch, wooden base, muslin, homespun fabric, black thread, stuffing, twine, small buttons, and faded paint.
- Choose a dry branch with several smaller branches.
- Secure the branch into a wooden base.
- Paint the base with faded brown or black paint.
- Cut small ornament shapes from muslin and homespun fabric.
- Make simple pumpkins, cats, stars, moons, and bats.
- Stitch around each shape and add a little stuffing.
- Close the openings with visible hand stitches.
- Add button eyes or small stitched faces to selected pieces.
- Tie twine loops to the tops.
- Hang the ornaments at different heights.
- Add a few bare twigs or fabric strips if the tree looks too empty.
The tree works best when the ornaments remain small and simple. You do not need glitter or shiny decorations to make it festive. A few muted fabric colors against the dark branches can look striking on a farmhouse mantel. This is also one of the primitive Halloween crafts that can grow into a yearly collection because you can add one or two new ornaments each season. Store the ornaments in a fabric pouch after Halloween so they remain ready for next year.