

Halloween is the perfect time to add a creative and personal touch to your home with handmade decorations. These easy Halloween DIY crafts help you create spooky, stylish, and budget-friendly displays using simple materials. From glowing lanterns and elegant pumpkins to eye-catching porch decorations, these ideas will help transform your space into a festive Halloween setting that your family and neighbors will love.
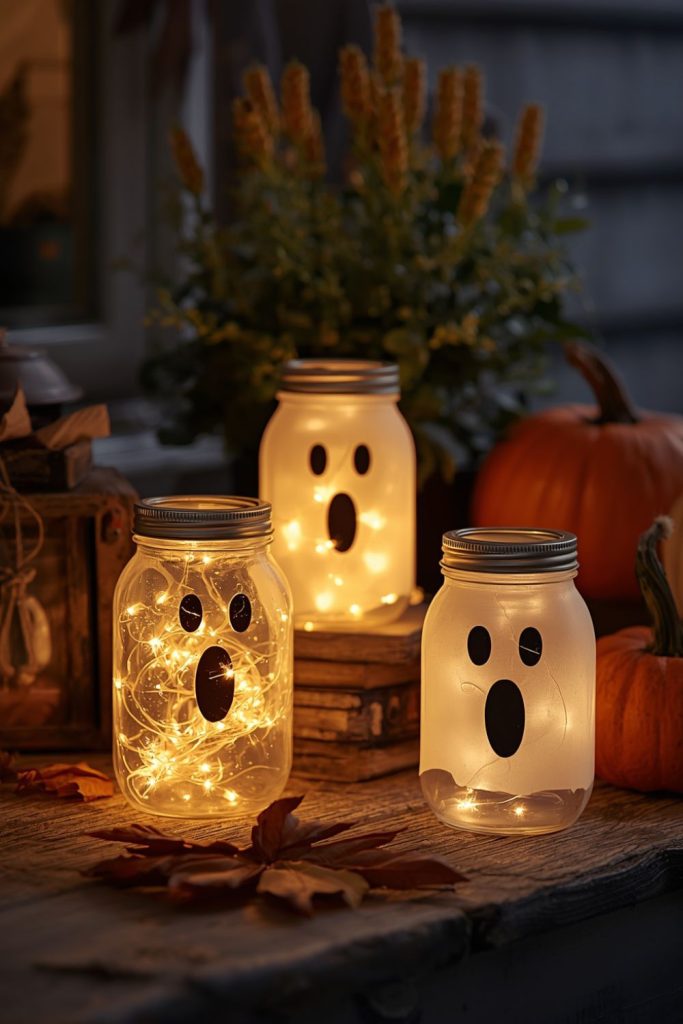
Glowing Mason Jar Ghost Lanterns with LED Fairy Lights
Glowing Mason Jar Ghost Lanterns are one of the easiest Halloween DIY crafts for creating a charming outdoor or indoor decoration. These small lanterns look adorable on porches, shelves, entry tables, or dining areas. The soft glow from LED fairy lights creates a magical Halloween feeling without requiring complicated tools. They are also safe for homes with children because they use battery powered lights instead of real flames.
Materials Needed
• Clean glass mason jars
• White tissue paper or white paint
• Black marker or black vinyl sheets
• LED fairy lights
• Paint brush
• Craft glue
• Ribbon or twine for decoration
Step by Step Method
- Clean the mason jars and remove any labels or stickers before starting the project.
- Cover the outside of each jar with white tissue paper using craft glue, or paint the jar with white paint for a solid ghost appearance.
- Allow the jar to dry completely before adding facial details.
- Draw simple ghost eyes and a mouth using a black marker or attach black vinyl shapes.
- Place LED fairy lights inside each jar and arrange them so the glow spreads evenly.
- Add ribbon, twine, or small Halloween accessories around the jar opening for extra decoration.
- Display the finished ghost lanterns on your front porch, windowsill, or party table.
These Halloween DIY crafts are perfect for beginners because they require affordable supplies and create a beautiful result quickly. The glowing ghost faces bring personality to any Halloween display and make guests smile as they arrive.
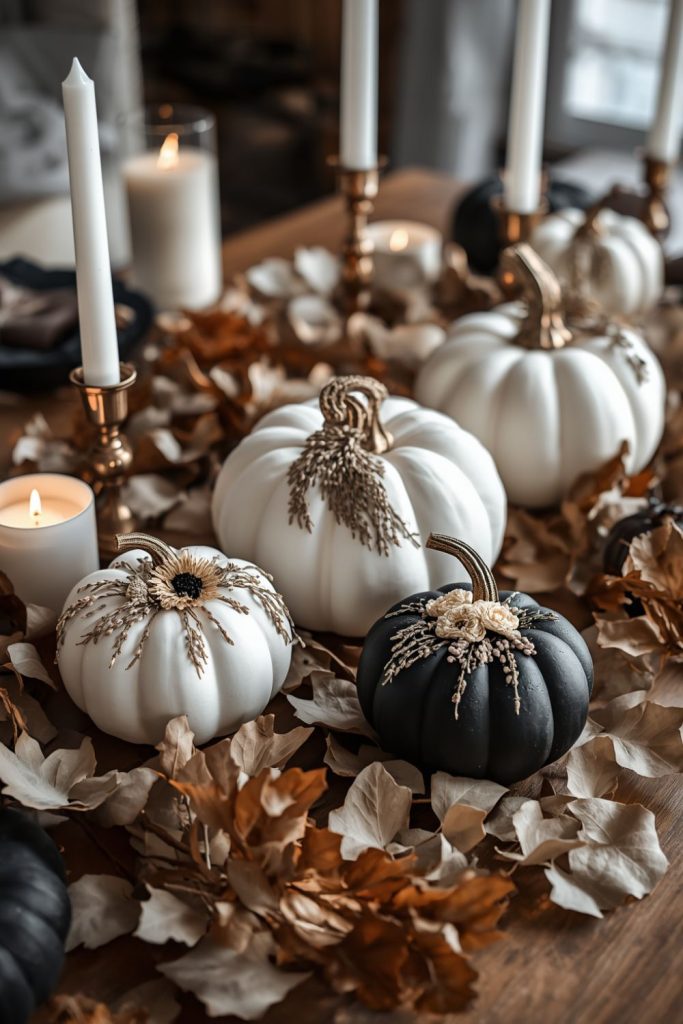
No Carve Pressed Floral Pumpkins with Dried Flowers and Gold Leaf
No carve pressed floral pumpkins are an elegant choice for homeowners who want Halloween decorations with a stylish appearance. Instead of carving pumpkins, this idea uses flowers, natural textures, and metallic details to create a decorative piece that can stay fresh throughout the season. These pumpkins work beautifully with modern, farmhouse, or traditional home décor styles.
Materials Needed
• Faux or real pumpkins
• Dried flowers
• Pressed leaves
• Gold leaf sheets
• Glue
• Small paint brush
• Clear protective spray
Step by Step Method
- Select pumpkins with a smooth surface and clean them before decorating.
- Arrange dried flowers and leaves on the pumpkin to create a balanced design.
- Apply small amounts of glue to attach the flowers securely.
- Add gold leaf accents around the floral design for an elegant finish.
- Press the gold leaf gently onto the pumpkin surface and remove extra pieces.
- Allow the decoration to dry completely before placing it on display.
- Add several decorated pumpkins together to create a beautiful seasonal arrangement.
These Halloween DIY crafts are ideal for people who enjoy sophisticated decorations that do not look overly scary. The combination of flowers and gold details creates a handmade decoration that works well on dining tables, shelves, and entryway displays.
- Related post 25 Stunning Halloween Crafts for Adults to Transform Your Home Into a Spooky-Chic Haven
Black & White Faux Pumpkin Topiary for the Front Porch
A black and white faux pumpkin topiary creates a dramatic entrance decoration that instantly attracts attention. This project is a great option for anyone who wants a stylish porch display without spending a lot of money each year. Since faux pumpkins can be stored and reused, this decoration becomes a practical seasonal favorite.

Materials Needed
• Faux pumpkins in different sizes
• Black and white paint
• Paint brushes
• Wooden pole or support rod
• Large planter pot
• Decorative moss or fabric
Step by Step Method
- Choose three or four faux pumpkins in different sizes.
- Paint the pumpkins using black, white, or mixed patterns such as stripes and dots.
- Allow each pumpkin to dry fully before stacking.
- Place a support rod inside the planter to hold the pumpkins in position.
- Stack the pumpkins from largest at the bottom to smallest at the top.
- Add moss or fabric around the base to hide the support structure.
- Place the finished topiary near your front door for a stylish Halloween welcome.
This Halloween DIY crafts idea creates a dramatic decoration that looks store bought while keeping the handmade charm. The simple color combination makes it easy to match with other porch decorations.
Crescent Moon Grapevine Wreath with Black Florals and Mini Bats
A crescent moon wreath brings a creative touch to Halloween door décor. This handmade decoration combines natural materials with spooky details, making it a beautiful addition to your entryway. The curved shape creates visual interest and works well with elegant Halloween themes.

Materials Needed
• Grapevine wreath base
• Artificial black flowers
• Small bat decorations
• Black ribbon
• Hot glue
• Artificial moss
Step by Step Method
- Select a grapevine wreath and decide which side will hold the crescent design.
- Attach black flowers along one section of the wreath.
- Add moss around the flowers to create texture.
- Glue small bats around the decorated area.
- Tie a black ribbon at the top for hanging.
- Place the wreath on your front door or interior wall.
- Adjust the flowers and decorations until the arrangement looks balanced.
This Halloween DIY crafts project gives your home a creative seasonal feature while keeping the decoration simple and affordable. The combination of flowers, bats, and natural textures creates a memorable first impression.
Floating Cheesecloth Ghosts with Invisible Fishing Line
Floating Cheesecloth Ghosts are a fun way to add a playful spooky touch to your home. These Halloween DIY crafts create the illusion of ghost figures hovering in the air, making them perfect for entryways, living rooms, porches, or party areas. The lightweight materials make this project simple enough for beginners, while the final display creates a dramatic effect that guests will notice. These ghost decorations can be reused every year and customized with different sizes, facial expressions, or lighting effects.

Materials Needed
• Cheesecloth fabric
• White fabric stiffener or liquid starch
• Small balloons or foam balls
• Plastic cups or bottles for support
• Black felt or marker
• Invisible fishing line
• LED lights (optional)
Step by Step Method
- Inflate balloons or place foam balls on top of cups to create the ghost shape.
- Drape cheesecloth over the support structure and arrange the fabric into a flowing shape.
- Apply fabric stiffener or liquid starch over the cheesecloth until it becomes firm.
- Leave the ghost shape to dry completely.
- Remove the balloon or support material carefully after drying.
- Add eyes and facial details using black felt or marker.
- Attach invisible fishing line to the top of each ghost.
- Hang the ghosts from ceilings, porch areas, or door frames.
- Add small LED lights nearby for a glowing nighttime display.
These Halloween DIY crafts are excellent for creating a magical Halloween atmosphere without complicated materials. The floating effect makes a simple decoration look creative and impressive, making it a favorite project for families who enjoy handmade seasonal décor.
Witch Hat Chandelier with Battery Candles
A Witch Hat Chandelier is a charming hanging decoration that brings a magical Halloween feeling to your home. This project works beautifully above dining tables, entryways, or covered porches. The combination of hanging hats and glowing lights creates a cozy atmosphere while adding a playful Halloween touch. This decoration is also easy to personalize with ribbons, spider webs, glitter, or small hanging ornaments.

Materials Needed
• Black witch hats
• Battery operated candles
• Clear string or fishing line
• Black ribbon
• Artificial spider webs
• Small Halloween decorations
• Scissors
Step by Step Method
- Choose lightweight black witch hats that are strong enough to hang.
- Cut small openings inside the hat tops for the lights.
- Place battery candles inside each hat.
- Attach clear string or fishing line to the hats.
- Hang the hats at different heights to create a chandelier effect.
- Add ribbons, spider webs, or small decorations around the hats.
- Secure the chandelier above a table or entrance area.
This Halloween DIY crafts idea creates a memorable decoration with very little effort. The glowing witch hats create a fun focal point that photographs beautifully and adds personality to Halloween gatherings.
Elegant Black Candle Centerpiece with Velvet Pumpkins and Moss
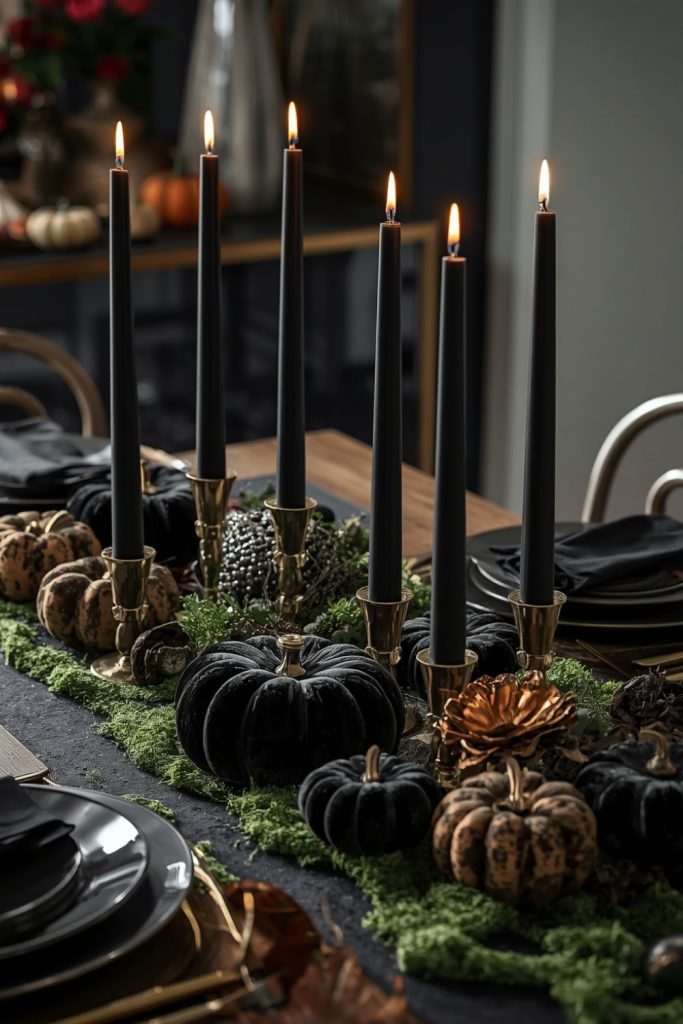
An elegant black candle centerpiece is perfect for homeowners who prefer a sophisticated Halloween style. Instead of bright colors, this decoration uses dark tones, soft textures, and warm lighting to create a cozy seasonal display. It works beautifully on dining tables, coffee tables, or fireplace mantels. This project proves that Halloween decorations can feel stylish while still keeping the spooky theme.
Materials Needed
• Black candle holders
• LED candles
• Velvet pumpkins
• Artificial moss
• Black ribbon
• Decorative tray
• Small Halloween accents
Step by Step Method
- Select a decorative tray or flat surface for the centerpiece.
- Arrange black candle holders at different heights.
- Add LED candles for a safe glowing effect.
- Place velvet pumpkins around the candles.
- Fill empty spaces with artificial moss.
- Add small Halloween decorations such as spiders or metallic accents.
- Adjust the arrangement until the centerpiece looks balanced.
These Halloween DIY crafts are ideal for people who enjoy elegant home decorating. The combination of black candles, velvet textures, and soft lighting creates a beautiful display that feels festive without looking overwhelming.
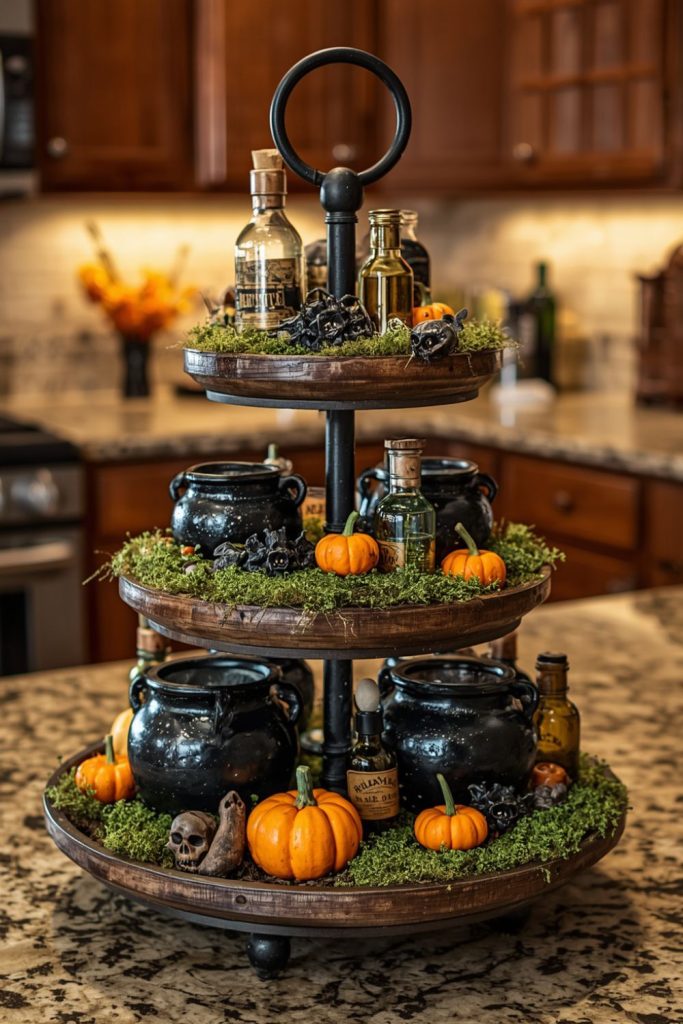
Halloween Tiered Tray with Mini Cauldrons and Potion Bottles
A Halloween tiered tray is a simple way to decorate small spaces while adding plenty of seasonal charm. This project works well for kitchens, coffee stations, entry tables, or shelves. Since tiered trays allow multiple decorations to be displayed together, they are perfect for creating a detailed Halloween arrangement without taking up much space.
Materials Needed
• Tiered serving tray
• Mini cauldrons
• Small pumpkins
• Potion bottles
• Artificial moss
• Halloween signs
• LED mini lights
Step by Step Method
- Clean the tiered tray before decorating.
- Place larger items such as mini cauldrons on the bottom level.
- Add small pumpkins and potion bottles around the tray.
- Use moss to fill empty areas and create texture.
- Add small signs or Halloween accessories.
- Place LED lights around the decorations for extra glow.
- Display the finished tray in your kitchen or living area.
These Halloween DIY crafts are popular because they allow endless creativity. You can change the colors, decorations, and theme each year while keeping the same tray base.
Vintage Apothecary Potion Bottles with Printable Labels
Vintage potion bottles are a classic Halloween decoration that adds a mysterious touch to shelves, tables, and party displays. These Halloween DIY crafts are affordable because you can reuse old glass bottles and transform them into decorative pieces. With creative labels and different bottle shapes, you can create a display that looks like a collection from a spooky old laboratory.

Materials Needed
• Glass bottles or jars
• Printable Halloween labels
• Black paint
• Twine or ribbon
• Artificial herbs or dried flowers
• Decorative stickers
• Glue
Step by Step Method
- Wash and dry the glass bottles completely.
- Paint some bottles lightly to create an aged appearance.
- Print Halloween themed labels and attach them to the bottles.
- Add twine or ribbon around the bottle neck.
- Fill bottles with dried flowers, colored water, or decorative pieces.
- Arrange bottles together on shelves or trays.
- Add candles or small decorations nearby.
These Halloween DIY crafts create a charming display that adds character to your home. They are especially attractive for people who enjoy vintage inspired decorations with handmade details.
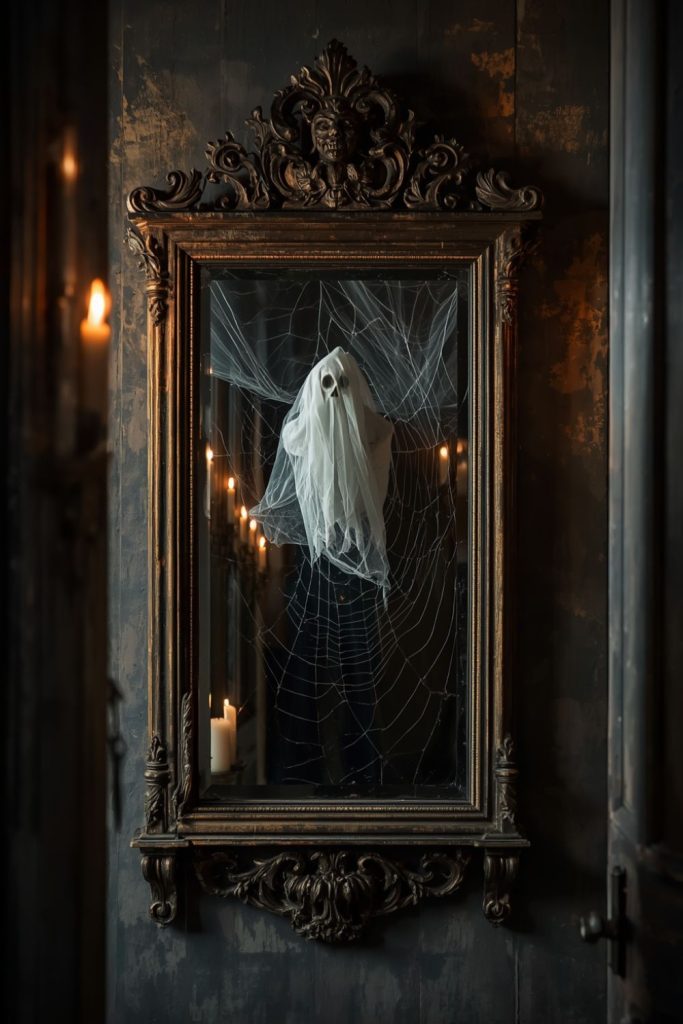
DIY Haunted Mirror with an Antique Finish
A haunted mirror creates a dramatic Halloween decoration that can transform an ordinary wall into a spooky display. This project works well in hallways, entryways, or party spaces. With a few simple materials, you can create an aged mirror appearance that looks like a mysterious antique decoration.
Materials Needed
• Old mirror or picture frame
• Black and gray paint
• Sponge brush
• Artificial cobwebs
• Plastic spiders
• Frosted glass spray (optional)
Step by Step Method
- Clean the mirror surface before decorating.
- Paint the frame with dark colors to create an aged look.
- Add gray or black details with a sponge brush.
- Apply small amounts of frosted spray if desired.
- Add artificial cobwebs around the frame.
- Attach small spiders for extra decoration.
- Place the mirror in a visible area.
This Halloween DIY crafts project creates a strong visual impact with minimal supplies. The antique appearance makes it a beautiful addition to spooky home décor.
Bat Wall Swarm in a 3D Flying Pattern
A bat wall swarm is one of the easiest Halloween DIY crafts for creating a dramatic decoration with very few materials. This project turns an empty wall into a scene that looks like a group of bats flying through your home. It works especially well above sofas, fireplaces, stairways, or entry tables. The best part is that you can create different shapes depending on your room size and decorating style.

Materials Needed
• Black cardstock or foam sheets
• Bat shape templates
• Scissors
• Double sided tape
• Pencil
• Ruler
• Optional metallic paint
Step by Step Method
- Print or draw bat shapes in different sizes.
- Trace the shapes onto black cardstock or foam sheets.
- Cut out each bat carefully using scissors.
- Fold the wings slightly to create a raised 3D appearance.
- Arrange the bats on the wall before attaching them.
- Create a flying pattern that moves upward or across the wall.
- Attach each bat using double sided tape.
- Add small painted details if you want extra decoration.
These Halloween DIY crafts are perfect for people who want a large visual effect without spending much money. The simple black shapes create a stylish decoration that photographs beautifully and instantly adds Halloween character to any room.
Black Lace Mason Jar Candle Holders
Black lace mason jar candle holders bring a soft and elegant Halloween glow to your home. These decorations are perfect for dining tables, shelves, bathroom counters, or outdoor areas. The lace creates beautiful shadow patterns when the light shines through, giving your space a cozy Halloween atmosphere. This project is simple, affordable, and easy to customize.

Materials Needed
• Mason jars
• Black lace fabric
• Craft glue
• LED tea lights
• Ribbon
• Small Halloween charms
• Scissors
Step by Step Method
- Clean the mason jars and remove any labels.
- Measure lace pieces that fit around each jar.
- Attach the lace using craft glue.
- Wrap ribbon around the top or bottom of the jar.
- Add small charms such as spiders or bats.
- Place LED tea lights inside each jar.
- Arrange the candle holders together for a glowing display.
These Halloween DIY crafts add a stylish touch without making your décor look too scary. The soft lighting and lace patterns create a welcoming feel for family gatherings and Halloween parties.
Floating LED Ghost Candles Using Toilet Paper Rolls
Floating LED ghost candles are a creative way to reuse everyday household materials. This Halloween DIY crafts idea creates a magical hanging display that looks similar to floating candles from a fantasy scene. It is a budget friendly project that works well for bedrooms, dining areas, party spaces, or entryways.

Materials Needed
• Empty toilet paper rolls
• White paint
• LED candles
• White string or fishing line
• Black marker
• Glue
• Scissors
Step by Step Method
- Paint the toilet paper rolls white and allow them to dry.
- Draw simple ghost faces on the front using a black marker.
- Place LED candles inside or above the rolls depending on the design.
- Attach string or fishing line to the top.
- Hang the ghost candles at different heights.
- Arrange several together to create a floating display.
- Turn on the LED lights during the evening for a glowing effect.
These Halloween DIY crafts are a great choice for families because they use simple supplies and create an exciting decoration that children will enjoy.
Crystal Ball Display with Glass Bowls, Fairy Lights, and Moss
A crystal ball display creates a mysterious centerpiece for Halloween decorating. This project adds a magical appearance to coffee tables, shelves, or party areas. The combination of glass, soft lighting, and natural textures creates a decoration that feels creative and artistic.

Materials Needed
• Glass bowls or clear ornaments
• LED fairy lights
• Artificial moss
• Small Halloween figures
• Decorative tray
• Black fabric
Step by Step Method
- Place black fabric or a decorative tray as the base.
- Add artificial moss around the display area.
- Arrange small Halloween figures inside or around the glass bowl.
- Add fairy lights to create a glowing effect.
- Position the glass bowl as the main feature.
- Adjust the decorations until the display looks balanced.
- Place the finished decoration on a table or shelf.
These Halloween DIY crafts are excellent for creating a conversation piece. The glowing crystal effect makes your home feel festive while keeping the decoration elegant.
Pumpkin Flower Vase Centerpiece Using a Faux Pumpkin
A pumpkin flower vase combines Halloween decoration with seasonal floral beauty. This project works perfectly for dining tables, kitchen counters, or entryway furniture. Instead of using traditional scary decorations, this idea creates a warm and welcoming display with flowers and autumn colors.

Materials Needed
• Faux pumpkin
• Artificial flowers
• Floral foam
• Knife or cutting tool
• Moss
• Ribbon
Step by Step Method
- Cut an opening at the top of the faux pumpkin.
- Place floral foam inside the pumpkin.
- Arrange flowers into the foam.
- Add moss around the base of the flowers.
- Decorate with ribbon if desired.
- Place the pumpkin vase in a visible area.
These Halloween DIY crafts are perfect for homeowners who prefer a softer seasonal style. The floral arrangement adds color while keeping the Halloween theme.
Halloween Window Silhouettes with Backlit Effects
Halloween window silhouettes are a simple way to decorate your home from the outside. They create a spooky appearance when viewed from the street while remaining easy to make. This project is especially useful for families who want their home to stand out during Halloween night.

Materials Needed
• Black poster board
• Scissors
• Window measurements
• Tape
• LED lights
• Halloween shape templates
Step by Step Method
- Measure the window area.
- Select Halloween designs such as cats, witches, ghosts, or bats.
- Cut the shapes from black poster board.
- Attach the silhouettes to the inside of the window.
- Place LED lights behind them.
- Test the lighting effect at night.
- Adjust the placement if needed.
These Halloween DIY crafts create a memorable outdoor display without requiring expensive decorations.
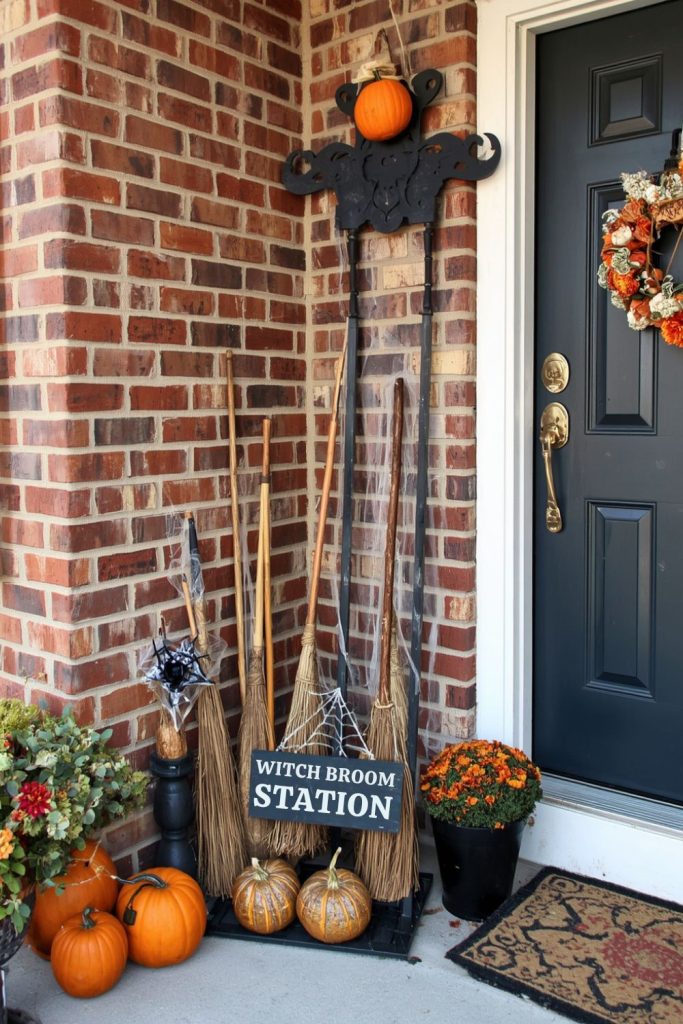
Floating Witch Broom Parking Station for the Front Porch
A witch broom parking station adds humor and creativity to your front porch. This decoration gives guests a fun welcome while making your entrance feel ready for Halloween visitors.
Materials Needed
• Small decorative brooms
• Wooden sign
• Paint
• Hooks or stands
• Artificial spider webs
• Halloween decorations
Step by Step Method
- Paint and decorate a wooden sign with a Halloween message.
- Attach hooks or create a stand for the brooms.
- Arrange decorative brooms near the entrance.
- Add spider webs and small decorations.
- Place the display near your front door.
These Halloween DIY crafts create a playful porch decoration that guests will remember.
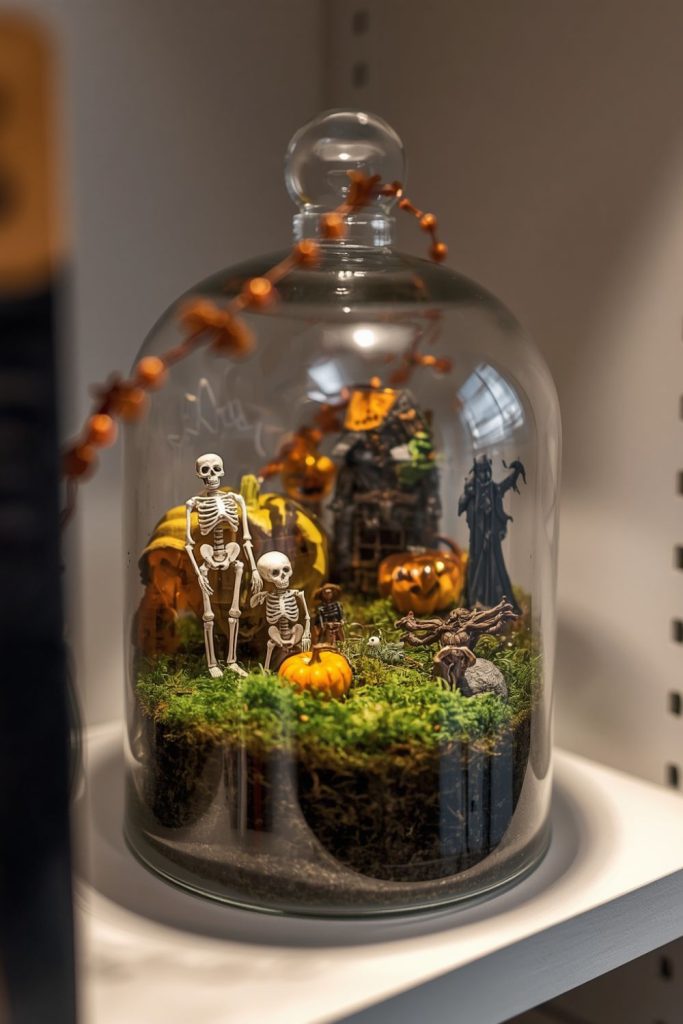
Mini Halloween Terrarium with Moss and Tiny Skeletons
A mini Halloween terrarium creates a small spooky scene inside a glass container. This decoration works well for shelves, desks, and tables where space is limited.
Materials Needed
• Glass container
• Artificial moss
• Tiny skeleton figures
• Small pumpkins
• Decorative stones
• LED light
Step by Step Method
- Add decorative stones at the bottom of the container.
- Place moss over the stones.
- Arrange skeletons and mini pumpkins.
- Add small lights if desired.
- Close the container and display it.
These Halloween DIY crafts are perfect for adding small seasonal details around your home.
Black Feather Hoop Wreath with Raven Accents
A black feather hoop wreath creates an elegant Halloween door decoration. The dark feathers and raven details create a stylish appearance that works well with modern home décor.

Materials Needed
• Embroidery hoop
• Black feathers
• Faux raven decoration
• Ribbon
• Glue
• Decorative branches
Step by Step Method
- Prepare the embroidery hoop.
- Attach feathers around one side.
- Add the raven decoration.
- Attach ribbon for hanging.
- Display the wreath on your door.
These Halloween DIY crafts create a beautiful seasonal decoration with a sophisticated style.
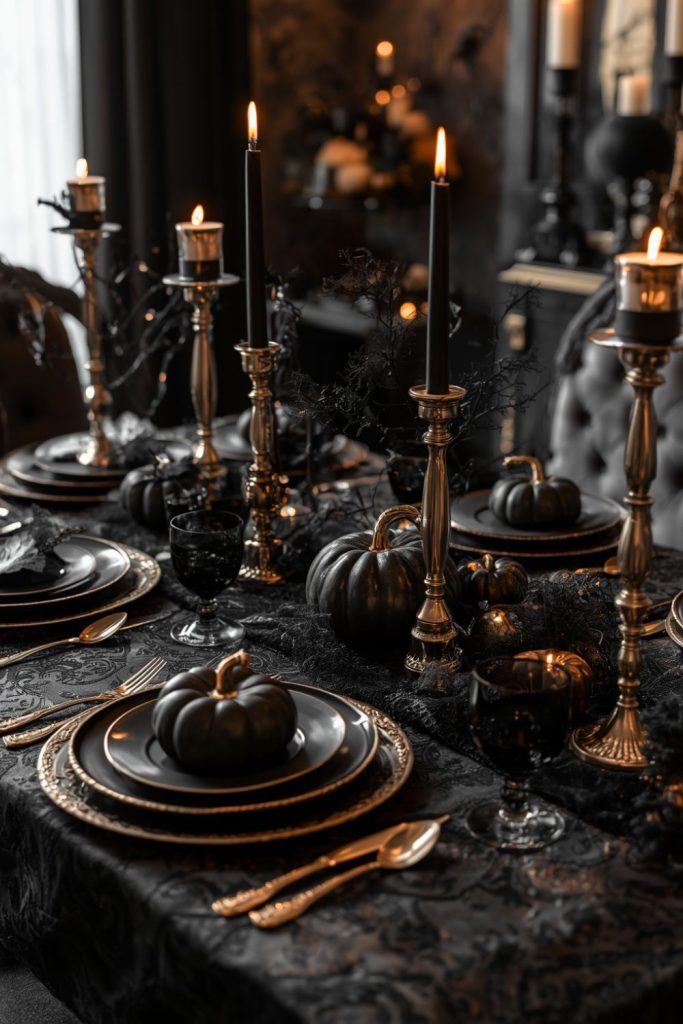
Gothic Halloween Tablescape with Black Lace and Gold Candlesticks
A gothic Halloween tablescape creates a memorable dining experience for family and guests. This decoration combines elegant materials with Halloween details.
Materials Needed
• Black tablecloth
• Lace fabric
• Gold candle holders
• Black plates
• Small pumpkins
• Decorative accents
Step by Step Method
- Cover the table with black fabric.
- Add lace details.
- Arrange gold candle holders.
- Place pumpkins and decorations around the table.
- Add finishing touches with small Halloween accessories.
These Halloween DIY crafts help create a beautiful setting for seasonal dinners and parties.
Black Branch Halloween Tree with Hanging Bats and Mini Ornaments
A black branch Halloween tree creates a dramatic decoration for corners, tables, or entryways. It works like a seasonal version of a decorative tree and can be customized every year.

Materials Needed
• Dry branches
• Black spray paint
• Vase
• Hanging bats
• Mini ornaments
• LED lights
Step by Step Method
- Collect and clean dry branches.
- Paint them black and allow them to dry.
- Place branches inside a vase.
- Hang bats and mini ornaments from the branches.
- Add LED lights for extra glow.
- Display the tree in a visible location.
These Halloween DIY crafts create a striking decoration that adds height and personality to your home.