

Preschool spider crafts can be simple, affordable, and fun using everyday classroom materials. From paper plates and toilet paper rolls to yarn and egg cartons, these activities help children explore creativity while practicing fine motor skills, counting, colors, and basic science concepts. This guide shares 15 easy spider crafts preschool teachers can prepare with minimal cost and effort.
Toilet Paper Roll Spider

A toilet paper roll spider turns an ordinary cardboard tube into a funny little classroom character. It works well for painting practice, counting, and simple hand control.
Materials needed:
- Clean toilet paper rolls
- Washable black or colored paint
- Paintbrushes
- Black construction paper
- Glue
- Googly eyes or white paper
- Child safe scissors
Step by step:
- Give each child one clean cardboard roll.
- Ask children to paint the roll and leave it to dry.
- Cut eight paper strips for each spider.
- Help children glue four legs on each side.
- Add two googly eyes or paper eyes.
- Let children draw a mouth if they wish.
- Count the eight legs together.
- Place the finished spiders on a classroom shelf or paper web.
The cardboard tube is easy for small hands to hold, so children can paint without having to manage a flat sheet of paper. Teachers can use the drying time for a short discussion about spiders. Ask children what color their spider is, how many legs it has, and where they think it might live.
For spider crafts preschool lessons, this activity also gives teachers an easy chance to talk about recycling. Children can learn that an item which might be thrown away can become something useful for art time. Some children may want very long legs, while others may make short legs, which creates a fun classroom collection.
Paper Plate Spider Web
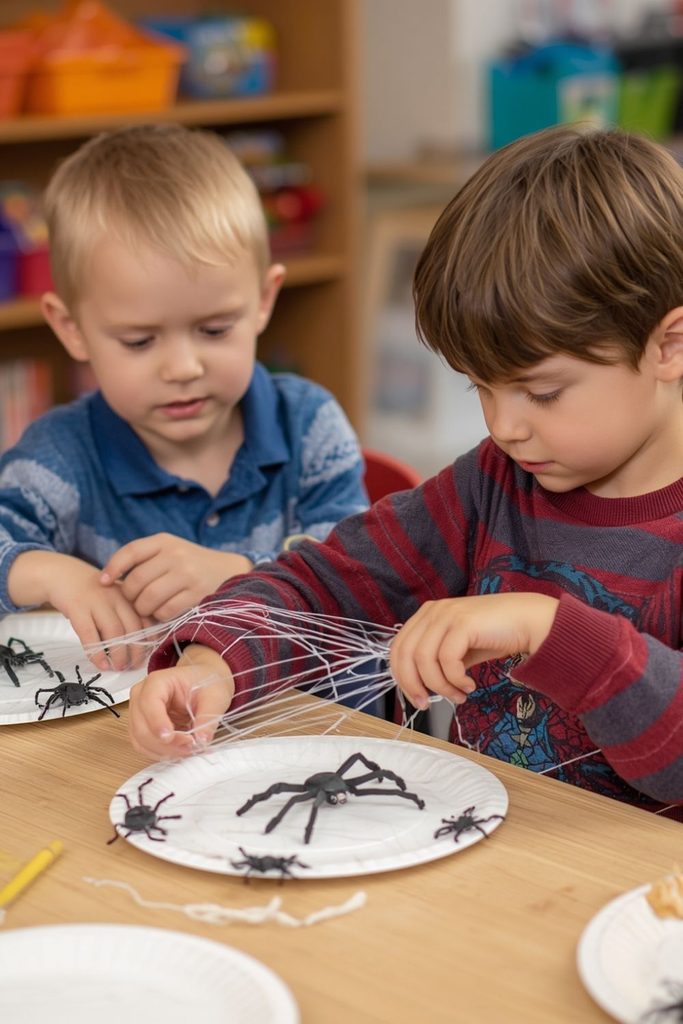
A paper plate spider web gives children a chance to work with yarn while practicing hand movement and simple weaving. The finished plates look lovely hanging together in a classroom.
Materials needed:
- Paper plates
- White or colored yarn
- Child safe scissors
- Hole punch
- Small paper spiders
- Glue
- Markers or crayons
Step by step:
- Punch holes around the inside or outside edge of each plate.
- Give each child a piece of yarn.
- Show children how to pull yarn through one hole.
- Continue moving the yarn from hole to hole.
- Let children cross the yarn in different directions.
- Tie or secure the loose end at the back.
- Add a small paper spider with glue.
- Write each child’s name on the back.
Teachers can prepare the holes before the activity to save classroom time. Children do not need to make a perfect web. The focus is on pulling, holding, and moving the yarn, which gives small fingers useful practice. Some children may need help keeping the yarn from slipping out.
This is one of the spider crafts preschool teachers can use for a fine motor activity as well as an art project. Once the plates are finished, hang them at different heights on a wall or bulletin board. Children will enjoy seeing their individual webs become part of a larger spider display.
Handprint Spider

Handprint spiders are a fun choice for children who enjoy messy painting and personal artwork. Each child creates a spider using their own hand shape, making the finished pictures easy to identify.
Materials needed:
- White or colored paper
- Black washable paint
- Paintbrush
- Paper towel
- Markers
- Googly eyes
- Glue
Step by step:
- Paint one child’s palm and fingers with black paint.
- Press the hand gently onto paper.
- Repeat with the other hand beside the first print.
- Allow the paint to dry.
- Add two eyes near the center.
- Draw a small mouth.
- Add a web around the spider with a marker.
- Write the child’s name and date on the picture.
For younger preschoolers, teachers can paint the child’s hands themselves. Older children may be able to help spread the paint with guidance. Make sure children have a clear place to wash their hands after printing.
Handprint spider pictures work well as keepsakes for families. Teachers can also place several prints together to make a class spider gallery. During the activity, count the fingers used to make the legs and explain that real spiders have eight legs, while children have ten fingers. This small comparison can turn spider crafts preschool time into a simple early math and science lesson.
Egg Carton Spider

An egg carton spider gives children a chance to reuse packaging and turn it into a small three dimensional spider. The rounded carton shape already looks like a spider body.
Materials needed:
- Clean cardboard egg cartons
- Black or colored paint
- Paintbrushes
- Pipe cleaners or paper strips
- Glue
- Googly eyes
- Child safe scissors
Step by step:
- Cut individual cups from the egg carton.
- Give each child one carton cup.
- Paint the cup and let it dry.
- Cut eight legs from paper or pipe cleaners.
- Attach four legs to each side.
- Glue two eyes on top.
- Add a small paper mouth if wanted.
- Place the spiders on a table or display board.
Teachers should do the carton cutting before children begin, since the edges can be awkward for small hands. Cardboard cartons are usually easier to paint than glossy plastic ones.
This activity can also become a color lesson. Give children several paint choices and ask them to name their selected color. Once the spiders are dry, ask children to group them by color or size. The finished spiders can sit beside a classroom book about spiders or become part of a pretend garden.
Among spider crafts preschool ideas, this one has a useful recycling connection. Children see how an everyday food package can be reused rather than thrown away. It also gives them a small object they can hold and play with after the activity.
- Related post The Ultimate Guide to Halloween Games for Kids: Creative Ideas for an Unforgettable Halloween Party
Paper Circle Spider
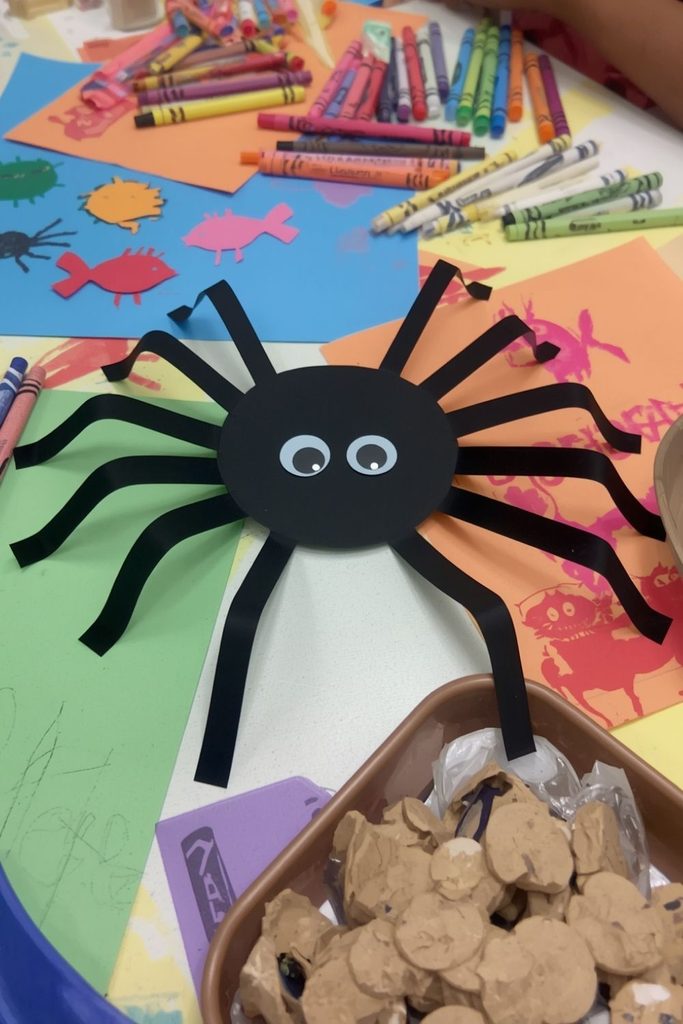
Paper circle spiders are ideal for teachers who want a quick activity with very little preparation. The basic shape is easy for preschoolers to glue together and decorate.
Materials needed:
- Black construction paper
- Colored construction paper
- Child safe scissors
- Glue sticks
- Googly eyes
- Crayons or markers
Step by step:
- Prepare one large circle and one smaller circle for each child.
- Let children glue the smaller circle onto the larger one.
- Cut eight strips for the legs.
- Help children arrange four legs on each side.
- Glue the legs in place.
- Add two eyes.
- Let children decorate the body with dots or lines.
- Display the spiders on colored paper.
The circles can be prepared ahead of time using a cup or another round object as a simple template. Teachers can also let older preschoolers help with cutting under supervision. The activity works especially well when a class needs a short project before moving to another part of the day.
To add learning, ask children to compare the two circles. Which one is bigger? Which one is smaller? How many legs are there? What happens if the legs are placed close together or far apart? Questions like these give teachers natural opportunities to bring early math into spider crafts preschool activities.
Recycled Cup Spider

A recycled paper cup can become a colorful spider with only a few basic supplies. This activity is useful after snack time because clean cups can be saved for the art table.
Materials needed:
- Clean paper cups
- Paint or colored paper
- Paper strips
- Glue
- Googly eyes
- Markers
- Scissors
Step by step:
- Turn each cup upside down.
- Paint the cup or cover it with colored paper.
- Leave the cup to dry.
- Prepare eight paper legs.
- Glue the legs around the cup.
- Add two eyes near the top.
- Draw a mouth with a marker.
- Let children give their spiders names.
Teachers can make the spiders black, but other colors can make the table look cheerful. Children can choose a body color and then select another color for the legs. This encourages simple decision making without making the project difficult.
The cups can also become pretend play characters. Children can place them around a paper garden, make spider sounds, or use them while telling a short story. A teacher might say, “Where is your spider going?” and let each child create an answer.
For spider crafts preschool sessions, recycled cups are a practical choice because the body is already formed. There is no need to fold or shape cardboard, and children can focus on painting and decorating.
Popsicle Stick Spider Web

Popsicle sticks can be arranged into a simple web shape that gives children practice with wrapping yarn. It is a nice activity for children who enjoy repeating movements.
Materials needed:
- Three popsicle sticks per child
- White yarn
- Glue
- Small paper spider
- Markers
- Paint, if desired
Step by step:
- Arrange three sticks into a six point shape.
- Glue them at the center.
- Let the glue dry.
- Tie yarn near the center.
- Wrap the yarn around each stick.
- Continue until a web pattern forms.
- Tie the yarn at the back.
- Glue a small spider in the center.
Teachers can prepare the stick shapes ahead of time if the class has a short activity period. Children can then spend their time wrapping yarn. The repeated motion can be calming for some preschoolers, although younger children may need help keeping the yarn in place.
The finished webs can be placed on a wall with different colored backgrounds. This creates an attractive classroom display without requiring expensive materials. Children can also compare their webs and talk about how each one looks different.
This spider crafts preschool activity is especially useful for fine motor practice because children need to pinch, pull, and wrap the yarn. It also gives them a chance to see how lines can cross and form a pattern.
Cotton Swab Spider Web

Cotton swabs can be used as simple painting tools for making spider webs. White paint on dark paper creates a clear contrast that looks especially good on a classroom wall.
Materials needed:
- Dark construction paper
- White washable paint
- Cotton swabs
- Black paper
- Glue
- Scissors
Step by step:
- Place a small amount of white paint on a tray.
- Give each child a dark sheet of paper.
- Dip one end of a cotton swab into the paint.
- Draw lines spreading out from one point.
- Add curved lines between the straight lines.
- Leave the web to dry.
- Cut out a small black spider.
- Glue the spider onto the finished web.
The teacher can draw a simple sample on the board before children begin. A spider web does not need to look exact, so children can make as many lines as they wish. The cotton swab also gives children a different way to hold a painting tool.
This activity works well during a spider or garden theme. Teachers can talk about how spiders make webs and why a spider might use one. Children can then place their painted webs next to one another for a large display.
For spider crafts preschool classrooms, this is a low cost project that produces strong visual results with very little paint. It also keeps the main focus on lines, shapes, and hand control.
Torn Paper Spider

Torn paper spiders are useful for children who are still developing hand strength. Tearing paper into small pieces and placing those pieces onto a shape gives their fingers plenty of practice.
Materials needed:
- Black construction paper
- Colored construction paper
- White paper
- Glue
- Googly eyes
- Markers
Step by step:
- Draw a large spider body on white paper.
- Give children black paper to tear.
- Help them make small and medium pieces.
- Spread glue over the spider body.
- Place the torn paper pieces over the glue.
- Add paper legs around the body.
- Glue on two eyes.
- Draw a web around the finished spider.
There is no need for children to tear pieces that are exactly the same size. In fact, different shapes can make the spider look more interesting. Teachers can show children how to use both hands to tear the paper rather than pulling too hard with one hand.
This activity can also support color recognition if teachers use colored paper instead of black. A purple spider on yellow paper, for example, can stand out nicely.
Torn paper is inexpensive and easy to store, making it a practical option for spider crafts preschool teachers can repeat during different classroom themes. The project also gives children freedom to work at their own pace while practicing small hand movements.
Sticker Spider Web

A sticker spider web offers a cleaner choice for teachers who want a low mess activity. It is particularly useful for a short classroom session or a table activity during free choice time.
Materials needed:
- White or colored paper
- Spider stickers
- Small round stickers
- Markers
- Crayons
- Glue
- Small paper spiders
Step by step:
- Draw a large spider web on each sheet of paper.
- Give children several small stickers.
- Ask them to place stickers along the web lines.
- Add a spider sticker in the middle.
- Let children color the empty areas.
- Add a name at the bottom.
- Display the pictures after the activity.
Teachers can use stickers in different colors to add a simple sorting lesson. Ask children to put all the red stickers on one part of the web and blue stickers on another. They can also count how many stickers they used.
This project requires less preparation than painting and can be completed with fewer cleanup supplies. It can be a useful choice for a classroom that needs a quiet table activity.
Among spider crafts preschool activities, sticker work is also helpful for children who enjoy peeling and placing small objects. Teachers should supervise younger children closely because stickers can be a choking hazard if placed in the mouth.
Coffee Filter Spider Web

Coffee filters can be turned into delicate spider webs with simple folding and cutting. This activity produces a light paper design that looks nice against a colored background.
Materials needed:
- White coffee filters
- Child safe scissors
- Glue
- Colored construction paper
- Black paper
- Markers
Step by step:
- Fold a coffee filter in half.
- Fold it again into a smaller shape.
- Cut small pieces from the folded edges.
- Open the filter carefully.
- Place the web on colored paper.
- Glue it in the center.
- Cut out a small black spider.
- Add the spider to the web.
Teachers should make a sample before class so children can see how folding changes the shape. Preschoolers may not make the same cut patterns as the teacher, and that is fine. Their webs can be displayed side by side to show different designs.
For younger children, the teacher can do the cutting while the child chooses the background paper and places the spider. Older preschoolers can try simple cuts with supervision.
Coffee filters are light, inexpensive, and easy to store. They also give spider crafts preschool activities a different texture from ordinary construction paper. Adding bright paper behind the white web makes the pattern easier to see.
Paper Bag Spider Puppet

A paper bag spider puppet can turn a simple art session into pretend play. Children can decorate their spider and then use it to act out a short story.
Materials needed:
- Brown or white paper lunch bags
- Black construction paper
- Glue
- Googly eyes
- Markers
- Scissors
- Yarn
Step by step:
- Place the paper bag with the flap facing upward.
- Cut eight paper legs.
- Glue four legs on each side.
- Add two large eyes to the flap.
- Draw a mouth below the eyes.
- Decorate the body with simple shapes.
- Add a short piece of yarn as a web if desired.
- Use the puppet during story time.
The flap becomes the spider’s mouth, which makes it easy for children to move while speaking. Teachers can ask children to give their spider a name and one thing it likes to do. This can lead to simple speaking practice.
A short classroom story might involve a spider looking for a safe place to build a web. Children can move their puppets while the teacher tells the story. This makes the activity useful beyond the art table.
Paper bag puppets are one of the spider crafts preschool teachers can use for both creative work and language development. Children get to make something and then immediately use it for play.
Spider Counting Activity
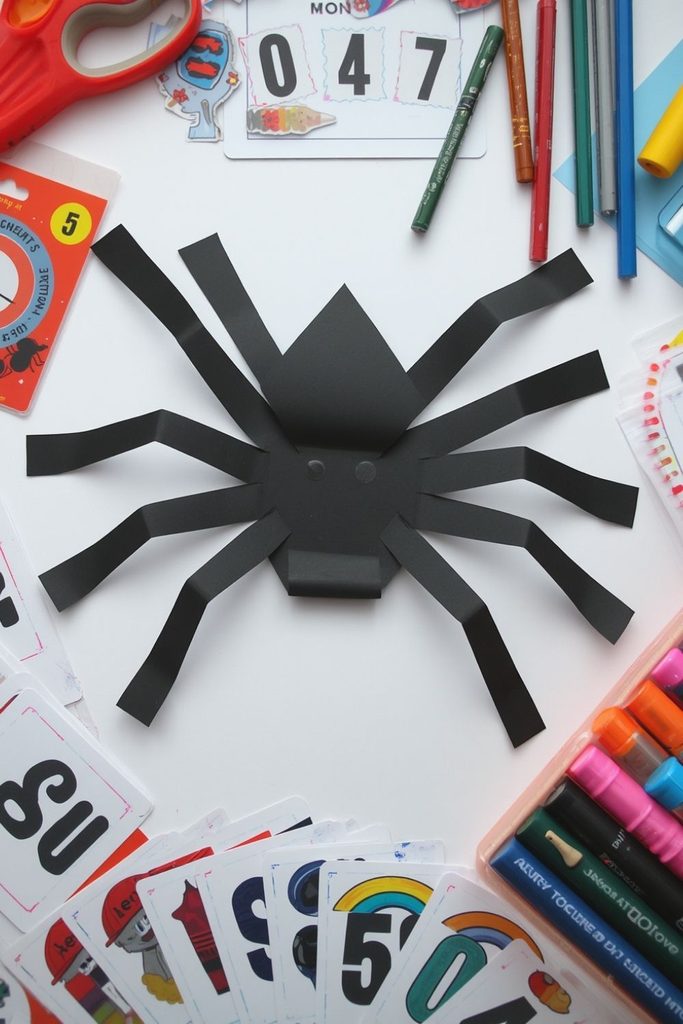
A spider counting activity gives preschool children a clear reason to count while they make a spider. It is a good choice for teachers who want an art project with an early math focus.
Materials needed:
- Black paper circles
- Paper strips
- Glue
- Number cards from 1 to 8
- Googly eyes
- Crayons
- White paper
Step by step:
- Give each child a paper spider body.
- Place number cards on the table.
- Ask each child to choose a number.
- Give them the matching number of paper legs.
- Let them glue the legs onto the spider.
- Count the legs together.
- Add two eyes.
- Compare the spiders with classmates.
Teachers can begin with smaller numbers for children who are just learning to count. Children who are ready for more can be asked to make a spider with eight legs and check the number themselves.
After the spiders are finished, place them in order from one leg to eight legs. This gives children a visual counting activity. The teacher can ask which spider has more legs and which has fewer.
The project does not need to focus on making a perfect spider. Its main purpose is to connect counting with something children can touch and move. That makes this one of the most useful spider crafts preschool activities for a basic math center.
String Painted Spider Web

String painting creates spider webs with a simple pulling technique. It can be a little messy, but children usually enjoy watching the paint make unexpected lines.
Materials needed:
- White or washable colored paint
- Short pieces of cotton string
- White or dark paper
- Paint trays
- Paper towels
- Small paper spiders
- Glue
Step by step:
- Place a piece of string into a tray of paint.
- Leave one end clean for holding.
- Put the painted string onto one half of the paper.
- Fold the paper over the string.
- Pull the clean end slowly.
- Open the paper to reveal the lines.
- Let the paint dry.
- Add a paper spider to the finished picture.
Teachers should demonstrate the technique before handing out materials. Children may pull the string quickly at first, so showing a slow movement can help.
Each print will look different, which makes this activity fun for a class display. Teachers can ask children what shapes they see in the paint lines. Some may look like webs, while others may resemble branches or flowers.
String painting supports hand control and cause and effect. Children place the string, close the paper, pull it, and then see the result. For spider crafts preschool lessons, it offers a sensory art experience while still keeping the spider theme clear.
Collaborative Classroom Spider Web Display
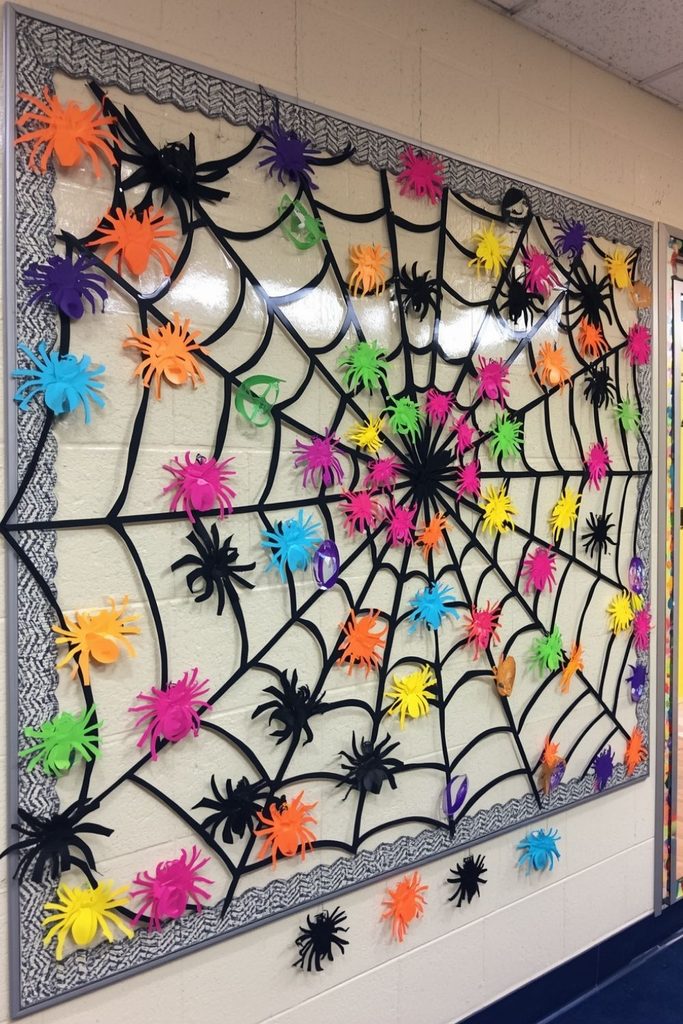
A classroom spider web display lets every child contribute to one large piece of artwork. It works well at the end of a spider themed week when several small projects can be brought together.
Materials needed:
- Large sheet of bulletin board paper
- Black and white markers
- Yarn
- Paper spiders
- Glue
- Tape
- Child made spider pictures
Step by step:
- Draw or attach a large web across the display paper.
- Give each child a paper spider to decorate.
- Let children add eyes, patterns, and colors.
- Write each child’s name on their spider.
- Place the spiders around the large web.
- Add yarn over selected sections of the web.
- Attach the finished display to a classroom wall.
- Invite children to talk about their spiders.
This group project gives children a chance to see their work as part of one classroom display. Teachers can place spiders at different positions on the web, making the finished picture feel busy and playful.
The display can also become part of a short classroom conversation. Ask children how many spiders they can see, which colors they notice, and where each spider is sitting. Teachers can use words such as above, below, beside, near, and far to introduce simple position vocabulary.
For spider crafts preschool activities, a shared display is a strong way to finish a themed lesson because every child has a visible contribution. It also gives families something interesting to see when they visit the classroom.
Conclusion
Spider activities do not need costly supplies or complicated preparation. A toilet paper roll, paper plate, egg carton, coffee filter, paper cup, or a few pieces of yarn can give preschool children plenty of opportunities to paint, cut, glue, count, tear, wrap, and create. The projects can also be adjusted for different abilities, so teachers can provide more help to younger children and greater independence to children who are ready for it.
The best spider crafts preschool activities can serve more than one purpose at a time. A paper spider can support counting, a yarn web can help with hand control, a puppet can encourage speaking, and a group display can give children a chance to work together. Teachers can also connect the projects with books, science talks, songs, or simple classroom games.
Using everyday materials keeps preparation manageable and costs down. It also shows children that ordinary objects can be reused in creative ways. With these 15 ideas, teachers have plenty of choices for a spider themed week, a single art session, or an early learning center. A few basic supplies and a little imagination can give preschoolers an enjoyable activity they will be happy to take home or display in their classroom.