
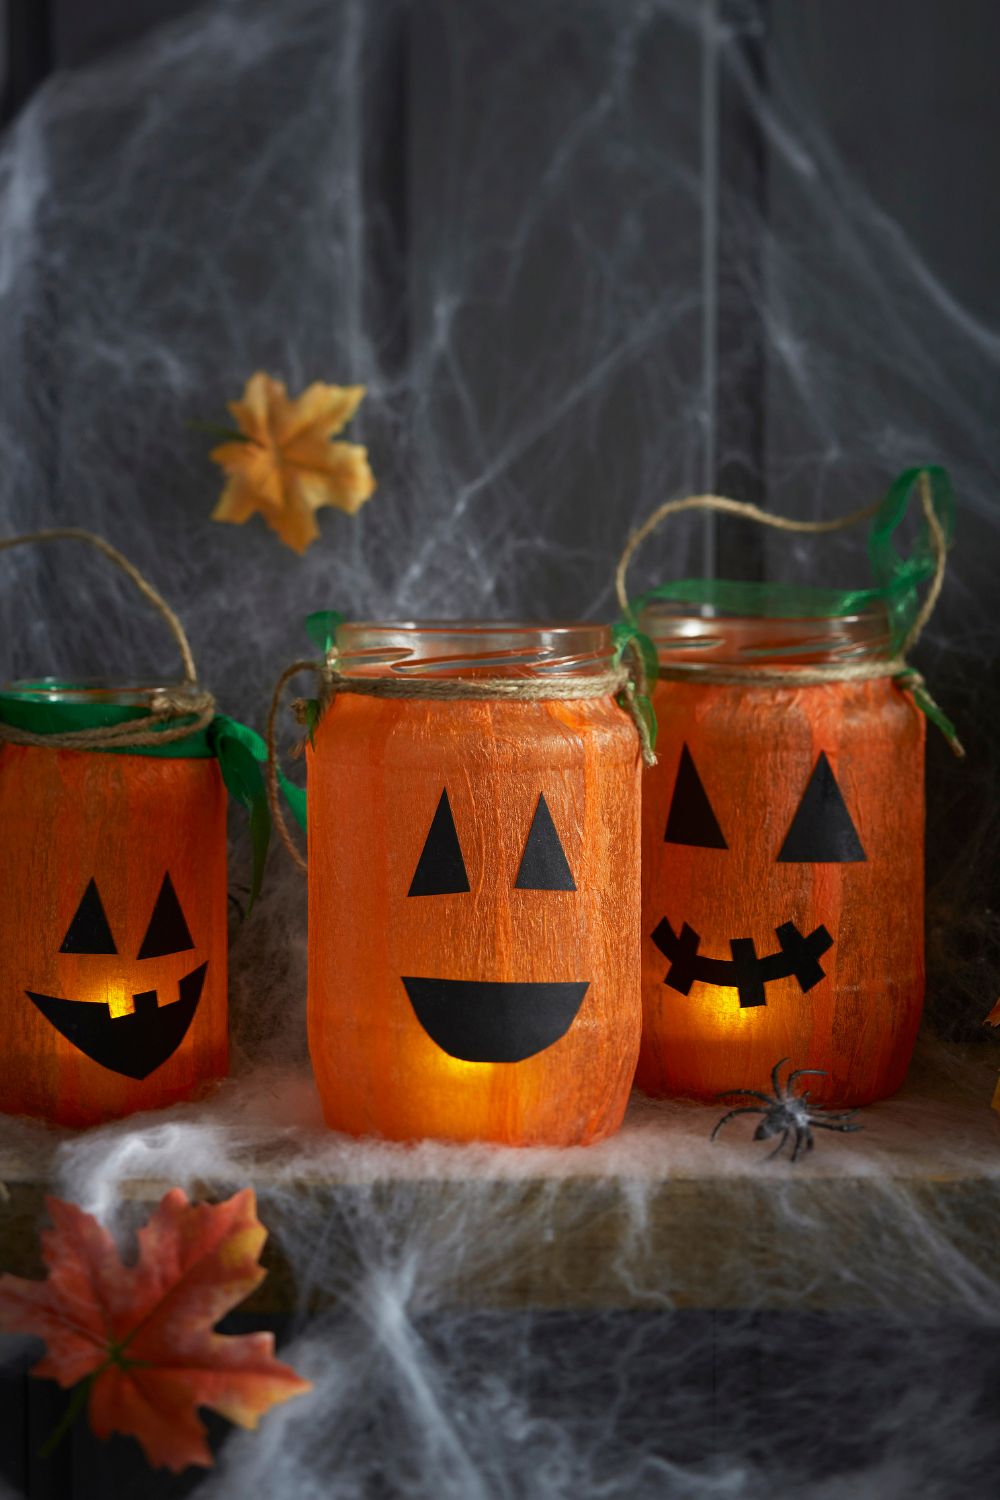
Halloween is a fun time for preschoolers to paint, glue, cut, and create colorful seasonal projects. These 21 easy halloween crafts preschool ideas are designed for ages 3 to 5, using simple materials and child friendly steps that work well at home or in the classroom.
Spider Web Paper Plate Craft

This simple Halloween activity gives preschoolers a chance to make a spooky web with a cheerful spider.
It also helps children practice hand coordination as they move yarn through holes around a paper plate.
Materials Needed
- Black paper plate
- White yarn
- Child safe scissors
- Hole punch
- Black construction paper
- Googly eyes
- Glue
- White crayon
Step by Step Method
- Punch holes around the edge of the paper plate.
- Cut a long piece of white yarn.
- Let children thread the yarn from one hole to another across the plate.
- Continue until a web pattern begins to appear.
- Cut a small spider shape from black paper.
- Add googly eyes and small paper legs.
- Glue the spider near the center of the web.
- Add small white crayon lines if children want more web details.
This project works well as one of the halloween crafts preschool activities for a classroom wall. Children can make webs with different patterns, so every finished plate looks a little different.
Ghost Footprint Art
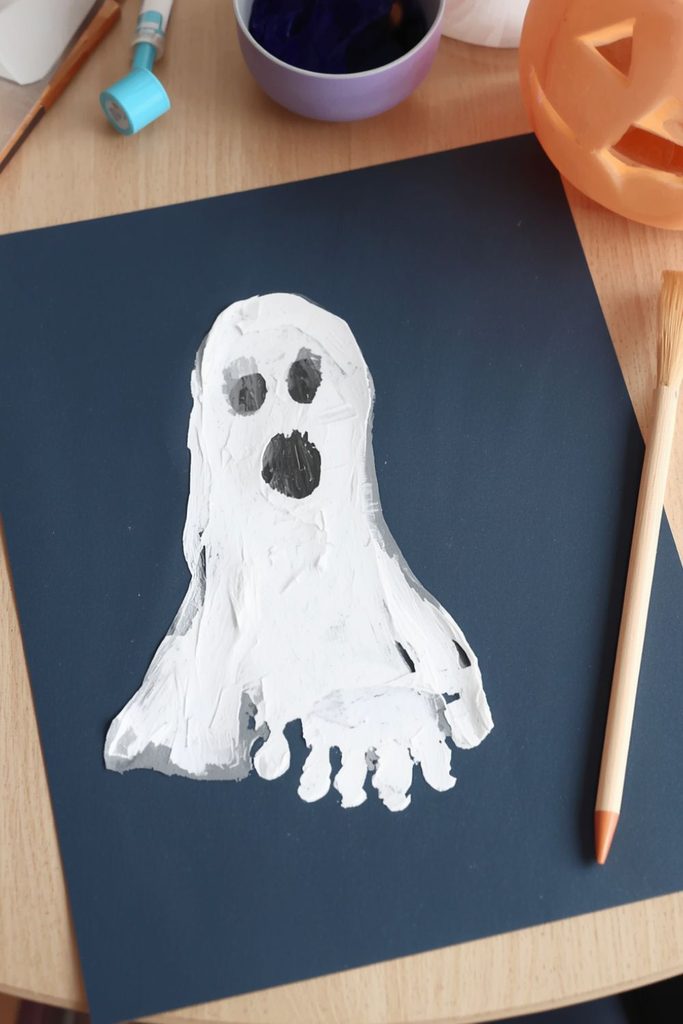
Ghost footprints turn a simple painting activity into a fun Halloween picture.
Children can use their feet to create little floating ghosts while practicing controlled painting and placement.
Materials Needed
- Dark blue or black construction paper
- White washable paint
- Paintbrush
- Black marker
- Baby wipes
- Newspaper or a washable mat
Step by Step Method
- Cover the work area with newspaper or a washable mat.
- Paint the bottom of one child’s foot with white washable paint.
- Help the child press the foot firmly onto dark paper.
- Lift the foot straight up to keep the shape clear.
- Allow the print to dry.
- Draw two eyes and a small mouth with a black marker.
- Add stars, tiny dots, or a moon around the ghost.
- Write the child’s name and date on the back.
This activity can become a memorable classroom keepsake. It is best done with one child at a time because wet footprints can make a messy floor. The finished pictures can be displayed together as a spooky Halloween gallery.
- Related post 25 Stunning Halloween Crafts for Adults to Transform Your Home Into a Spooky-Chic Haven
Popsicle Stick Monster Puppets

Popsicle sticks make a sturdy base for silly monster puppets that preschoolers can hold and move.
Children can choose their own colors, eyes, mouths, and hair, giving each puppet a funny personality.
Materials Needed
- Popsicle sticks
- Colored cardstock
- Googly eyes
- Glue
- Washable markers
- Yarn
- Child safe scissors
- Craft foam scraps
Step by Step Method
- Cut a simple monster body from cardstock.
- Give each child one or two popsicle sticks.
- Glue the paper body to the top of the stick.
- Add one, two, or several googly eyes.
- Draw a mouth, teeth, nose, and eyebrows.
- Add yarn for hair.
- Use foam scraps for horns or ears.
- Let the glue dry before children use the puppets.
After the puppets are ready, children can act out a short Halloween story. Teachers can ask simple questions such as, “What is your monster called?” or “Is your monster happy or sleepy?” This adds speaking practice to the halloween crafts preschool activity.
Paper Cup Bat Craft

An upside down paper cup can become a hanging bat with just a few paper additions.
The project is easy for small hands and gives children practice with gluing and placing shapes.
Materials Needed
- Black paper cups
- Black construction paper
- White paper
- Glue
- Scissors
- White crayon
- String
Step by Step Method
- Turn a black paper cup upside down.
- Cut two bat wings from black paper.
- Cut two small ears.
- Glue the wings onto each side of the cup.
- Attach the ears near the top.
- Add white paper eyes or draw eyes with a white crayon.
- Draw a tiny mouth.
- Attach string if the bat will hang from the classroom ceiling.
Children can make bats with open wings, folded wings, or different facial expressions. Hang several from a doorway or bulletin board for a simple Halloween display.
Witch Hat Collage

A witch hat collage lets children work with large paper shapes, colors, and textures.
The activity is simple enough for preschoolers while giving them freedom to decorate their hats in many ways.
Materials Needed
- Black construction paper
- Purple paper
- Orange paper
- Glue
- Child safe scissors
- Paper scraps
- Cotton balls
- Crayons
Step by Step Method
- Cut a large triangle for the hat.
- Cut a long strip for the hat brim.
- Let children glue the pieces onto another sheet of paper.
- Add colored strips, circles, or stars.
- Draw lines and small decorations with crayons.
- Add a paper buckle to the front.
- Glue cotton balls around the bottom if desired.
- Write each child’s name on the artwork.
Teachers can place the finished hats together for a cheerful wall display. This is one of the easier halloween crafts preschool choices because children can complete most of the decorating independently.
Monster Handprint Puppets
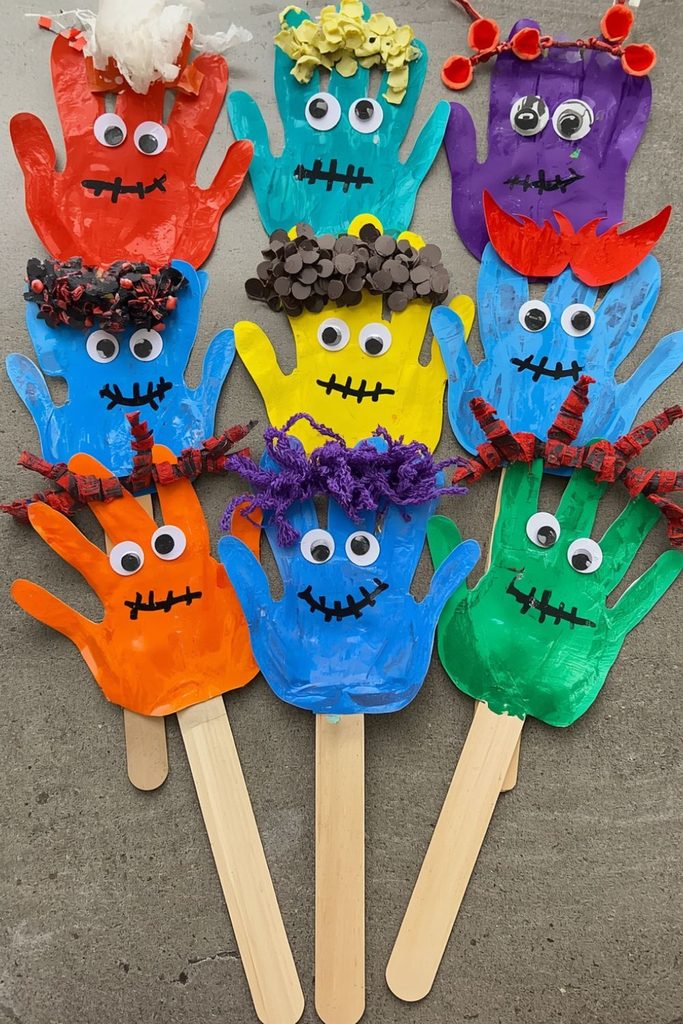
Handprints become funny monster characters in this colorful preschool activity.
Children can paint one hand, make a print, and then add simple details after the paint dries.
Materials Needed
- Washable paint
- White paper
- Paintbrush
- Googly eyes
- Glue
- Markers
- Scissors
- Colored paper
Step by Step Method
- Choose one or two paint colors.
- Paint the child’s palm and fingers.
- Press the hand onto white paper.
- Lift the hand carefully.
- Allow the print to dry.
- Add googly eyes to the fingers or palm.
- Draw a mouth, teeth, and other details.
- Cut around the print if children want a puppet.
- Glue the print onto a paper stick.
The handprint shape can become a five eyed monster, a funny creature, or even a character with colorful hair. Children usually enjoy seeing their own hand turned into a Halloween character.
Pumpkin Seed Mosaics

Pumpkin seeds give preschoolers a fun textured surface to work with while decorating a large pumpkin shape.
The activity combines glue work, sorting, and simple pattern making in a seasonal picture.
Materials Needed
- Clean pumpkin seeds
- Pumpkin outline on cardstock
- Orange and yellow paint
- Glue
- Green paper
- Paintbrushes
- Markers
Step by Step Method
- Draw or print a large pumpkin outline.
- Let children paint the pumpkin orange.
- Allow the paint to dry.
- Spread glue inside the pumpkin shape.
- Place pumpkin seeds over the glue.
- Add yellow painted seeds for small patterns.
- Cut a green stem and leaf.
- Glue the stem and leaf in place.
- Add a simple face if desired.
Children can arrange seeds closely together or leave small spaces between them. For younger preschoolers, teachers can add the glue and let children focus on placing the seeds.
Q Tip Skeleton Figures

Cotton swabs make simple bones that preschoolers can arrange into friendly skeleton figures.
This activity introduces body shapes and positioning while keeping the Halloween theme playful rather than scary.
Materials Needed
- Black construction paper
- Cotton swabs
- White glue
- Child safe scissors
- White paper
- Black marker
Step by Step Method
- Give each child a sheet of black paper.
- Place one cotton swab vertically for the body.
- Add shorter pieces for the arms and legs.
- Arrange smaller pieces for the ribs.
- Use a round white paper shape for the head.
- Draw two eyes and a small smile.
- Glue each piece carefully.
- Let the picture dry flat.
For younger children, adults can cut the cotton swabs beforehand. Older preschoolers can help decide where each bone should go. This makes a good Halloween science activity as children talk about arms, legs, hands, and feet.
Halloween Lantern Jars

Simple paper covered jars can become glowing Halloween decorations for the classroom.
Children can decorate the outside with faces and shapes while adults handle any light source.
Materials Needed
- Clean plastic jars or paper cups
- Orange or purple tissue paper
- Glue
- Water
- Paintbrush
- Black paper
- Battery operated tea lights
- Scissors
Step by Step Method
- Mix a small amount of glue with water.
- Brush the mixture over the outside of the jar.
- Place tissue paper pieces over the surface.
- Brush another thin layer over the tissue paper.
- Allow the jar to dry.
- Cut eyes, mouths, stars, or other shapes from black paper.
- Glue the shapes onto the jar.
- Place a battery operated tea light inside.
Do not use real candles with preschool children. Once finished, the lanterns can be placed on a shelf where children can see the soft glow during story time.
Jack o Lantern Emotion Faces

This activity combines Halloween art with a simple lesson about feelings.
Children can create pumpkin faces showing happiness, surprise, sleepiness, sadness, or silliness.
Materials Needed
- Orange paper
- Black paper
- Glue
- Scissors
- Crayons
- Green paper
- Emotion picture cards
Step by Step Method
- Cut large orange pumpkin shapes.
- Give children black paper shapes for eyes and mouths.
- Ask each child to choose an emotion.
- Arrange the eyes and mouth to match that feeling.
- Glue the pieces in place.
- Add a green stem.
- Draw eyebrows or cheeks if desired.
- Talk about the emotion shown.
Teachers can display the pumpkins in a row and ask children to identify each feeling. This gives the halloween crafts preschool lesson an added social learning activity.
Halloween Leaf Creatures

Autumn leaves can be turned into small Halloween characters with paint and paper details.
Children can choose the shape of each leaf and decide what sort of character it should become.
Materials Needed
- Clean dry leaves
- Washable paint
- White paper
- Googly eyes
- Glue
- Markers
- Small paper scraps
Step by Step Method
- Collect dry leaves that are not brittle.
- Paint each leaf with a Halloween color.
- Let the paint dry.
- Add googly eyes.
- Glue small paper pieces for ears, wings, or teeth.
- Draw extra details with markers.
- Glue the finished leaf onto paper.
- Add a simple background with crayons.
Children may turn one leaf into a tiny bat, another into a funny ghost, and another into a little cat. This activity also gives teachers a chance to talk about autumn leaves and changes in nature.
Toilet Roll Mummies

Empty cardboard rolls become friendly mummies with strips of paper wrapped around their bodies.
The wrapping action gives preschoolers useful hand control while producing a fun Halloween decoration.
Materials Needed
- Empty toilet paper rolls
- White paper
- Glue
- Googly eyes
- Black marker
- Scissors
- Colored paper
Step by Step Method
- Cut white paper into narrow strips.
- Give each child one cardboard roll.
- Add glue to small areas of the roll.
- Wrap the paper strips around the roll.
- Leave small gaps so the cardboard can show through.
- Glue two googly eyes near the top.
- Draw a small mouth if desired.
- Add paper arms and feet.
Children do not need to wrap the paper perfectly. Loose strips can make the mummy look even more fun. Place finished mummies around bookshelves, tables, or classroom windows.
Coffee Filter Pumpkin Art

Coffee filters create a soft surface for making colorful pumpkin pictures.
Children can use droppers, brushes, or fingers to spread orange and yellow paint across the filter.
Materials Needed
- White coffee filters
- Washable orange paint
- Yellow paint
- Green paper
- Paintbrushes
- Water
- Glue
- Black marker
Step by Step Method
- Flatten one coffee filter for each child.
- Place it on a washable work surface.
- Paint orange across most of the filter.
- Add yellow areas for a mixed color effect.
- Let the filter dry completely.
- Cut or fold it into a pumpkin shape.
- Add a green paper stem.
- Draw simple lines across the pumpkin.
- Add a face if children want one.
The thin filter dries quickly and gives the pumpkin a slightly soft appearance. Teachers can hang several pumpkins together as a classroom border or window decoration.
Egg Carton Eyeball Creatures
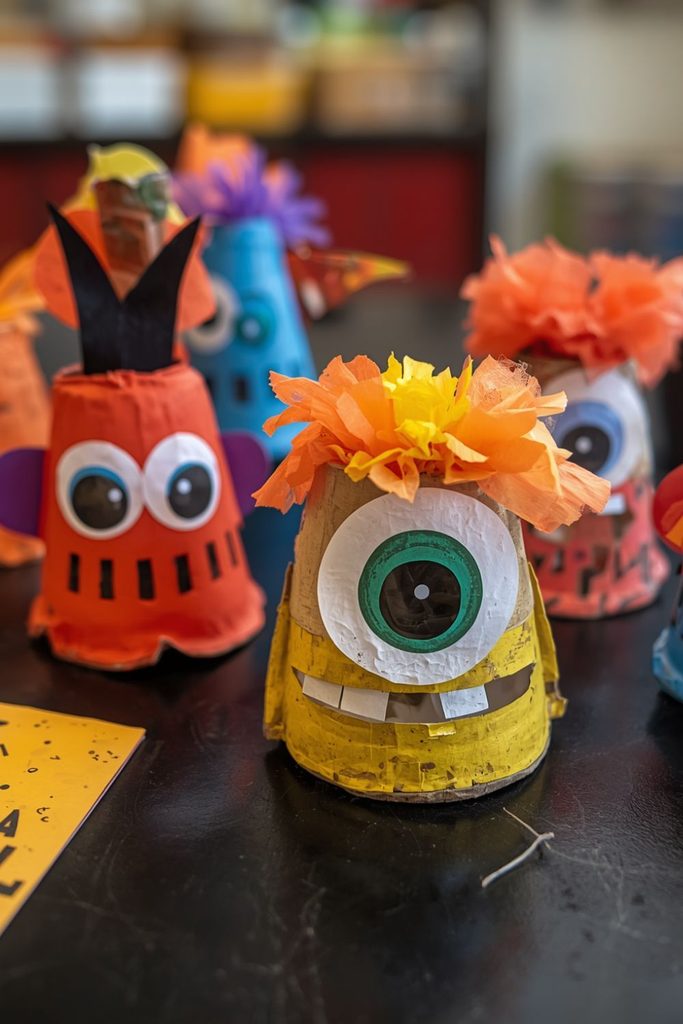
Egg carton cups can be reused to make small one eyed Halloween creatures.
The unusual shape is fun for preschoolers and gives them a chance to paint, glue, and invent silly characters.
Materials Needed
- Clean cardboard egg carton
- Washable paint
- Googly eyes
- Glue
- Colored paper
- Scissors
- Markers
Step by Step Method
- Cut individual cups from the egg carton.
- Let children paint each cup.
- Allow the paint to dry.
- Glue one large eye onto each cup.
- Add paper ears, horns, or feet.
- Draw a small mouth.
- Add spots or stripes with markers.
- Display the creatures on a classroom table.
Children can make creatures with different colors and shapes. Ask them to name their characters and describe what each one likes to eat or play with.
Black Cat Silhouette Art

Black cat silhouettes create a simple Halloween picture using basic shapes.
Preschoolers can add moons, stars, and colorful backgrounds while practicing cutting and gluing.
Materials Needed
- Black construction paper
- Orange paper
- Blue or purple paper
- Glue
- Scissors
- White crayon
- Star stickers
Step by Step Method
- Cut a simple cat silhouette from black paper.
- Provide a blue or purple sheet for the background.
- Glue the cat near the bottom of the page.
- Cut a large yellow or orange moon.
- Glue the moon behind the cat.
- Add stars with crayons or stickers.
- Draw grass or small clouds.
- Add tiny details to the cat with a white crayon.
This activity is especially nice for a classroom display because the dark cat shape stands out against the lighter background. Children can also compare the different poses of their cats.
Haunted House Shape Collage

A haunted house picture can introduce preschoolers to basic shapes in a playful Halloween setting.
Children can build a house from rectangles, squares, triangles, and circles instead of drawing every part themselves.
Materials Needed
- Construction paper
- Glue
- Scissors
- Black marker
- Orange paper
- White paper
- Crayons
Step by Step Method
- Give children a large sheet of dark paper.
- Provide paper rectangles for the house.
- Add triangles for roofs.
- Use squares or rectangles for windows.
- Add circles for moon shapes or windows.
- Glue the pieces together.
- Draw doors, paths, and small details.
- Add a large moon in the background.
As children place each shape, ask them to name it. The activity can become both an art lesson and a basic geometry exercise.
Tissue Paper Candy Corn Art

Torn tissue paper is easy for little hands to handle and works well for a bright candy corn picture.
The activity gives preschoolers practice tearing, placing, and gluing small paper pieces.
Materials Needed
- White cardstock
- Yellow tissue paper
- Orange tissue paper
- White tissue paper
- Glue
- Pencil
- Scissors
Step by Step Method
- Draw a large candy corn outline on cardstock.
- Divide it into three sections.
- Tear yellow tissue paper into small pieces.
- Tear orange and white tissue paper as well.
- Brush glue into the yellow section.
- Place yellow pieces over the glue.
- Repeat with orange and white sections.
- Allow the picture to dry.
The finished artwork has a soft raised texture and bright Halloween colors. Teachers can make several large versions for a classroom bulletin board.
Fingerprint Halloween Families

Fingerprint painting can become a small family of Halloween characters on one sheet of paper.
Each fingerprint can become a different person, creature, or tiny seasonal character.
Materials Needed
- White cardstock
- Washable ink pads or paint
- Black marker
- Colored markers
- Wipes
- Paper towels
Step by Step Method
- Give each child a clean sheet of cardstock.
- Press a fingertip lightly into washable paint.
- Make several fingerprints on the page.
- Let the prints dry.
- Add eyes, mouths, arms, and legs with markers.
- Give each character a different expression.
- Add hats, bows, or tiny accessories.
- Draw a simple Halloween background.
This activity is useful for talking about families, friends, and different feelings. Children can make a small group of characters rather than copying the same design each time.
Spooky Window Suncatchers

Tissue paper suncatchers bring Halloween colors to classroom windows without needing complicated techniques.
Children can arrange translucent paper inside a simple outline and watch sunlight pass through the finished picture.
Materials Needed
- Clear contact paper
- Black cardstock
- Orange tissue paper
- Purple tissue paper
- Yellow tissue paper
- Scissors
- Tape
Step by Step Method
- Cut a Halloween shape from black cardstock.
- Place clear contact paper behind the cutout.
- Tear tissue paper into small pieces.
- Let children arrange the pieces over the sticky surface.
- Press each piece gently into place.
- Cover the back with another sheet of contact paper.
- Trim the edges.
- Tape the finished piece to a classroom window.
Pumpkins, moons, bats, and simple houses all work well. Use only safe materials and place the finished pieces where children can see them without pulling them down.
Monster Hair Painting

This painting activity focuses on texture rather than making another three dimensional character.
Children create a simple face and then use unusual tools to give the hair lines, waves, curls, or spikes.
Materials Needed
- White cardstock
- Washable paint
- Forks
- Comb
- Cardboard scraper
- Markers
- Googly eyes
- Glue
Step by Step Method
- Draw or provide a large round face.
- Let children paint the face with a chosen color.
- Add googly eyes after the paint dries.
- Draw a mouth and nose.
- Put a small amount of paint around the top of the head.
- Drag a fork through the wet paint.
- Try a comb for another texture.
- Use cardboard to make straight or zigzag lines.
- Allow the picture to dry.
The different tools create very different hair patterns. Children can compare the textures and talk about which tool made the longest or curliest lines.
Halloween Paper Bag Puppets
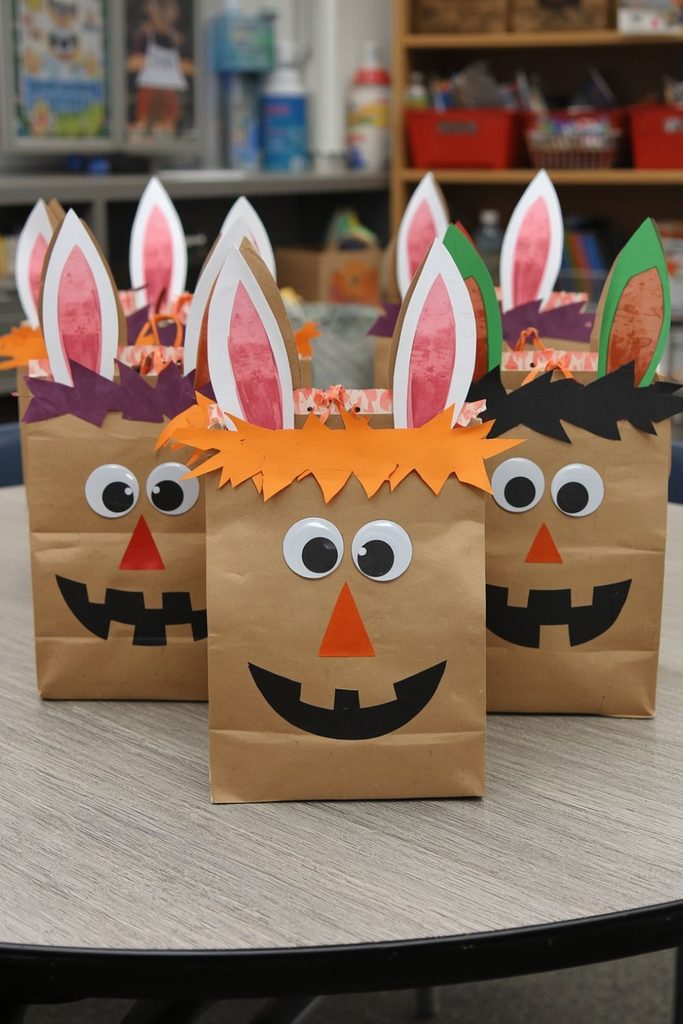
Paper bags become easy Halloween puppets that preschoolers can decorate and use for simple storytelling.
Each child can choose a character and create its face with paper shapes, crayons, and other classroom supplies.
Materials Needed
- Small paper lunch bags
- Construction paper
- Glue
- Child safe scissors
- Crayons
- Googly eyes
- Yarn
- Markers
Step by Step Method
- Place the paper bag with the flap facing upward.
- Choose a Halloween character.
- Cut paper shapes for eyes, ears, teeth, or hair.
- Glue the pieces onto the flap.
- Draw extra facial details with markers.
- Add yarn for hair if desired.
- Let the puppet dry.
- Place a hand inside the bag and move the flap to make it talk.
- Let children act out a short classroom story.
These puppets can become part of a group storytelling session. Children can practice taking turns, speaking clearly, and responding to their classmates while using their finished Halloween creations.
Conclusion
These 21 halloween crafts preschool activities offer plenty of ways for children ages 3 to 5 to paint, glue, tear, print, arrange, and create during Halloween season. The projects use common classroom supplies and can be adjusted for different skill levels. Some focus on fine motor practice, while others support shape recognition, feelings, storytelling, or simple nature lessons.
Teachers can spread the activities across several days rather than completing them all at once. A spider web can decorate one wall, leaf characters can fill a nature display, and paper puppets can become part of story time. With simple preparation and patient adult guidance, Halloween becomes a fun period for creative classroom learning. Choose the activities that best suit your group, prepare the materials ahead of time, and let children add their own colors and ideas to each project.