
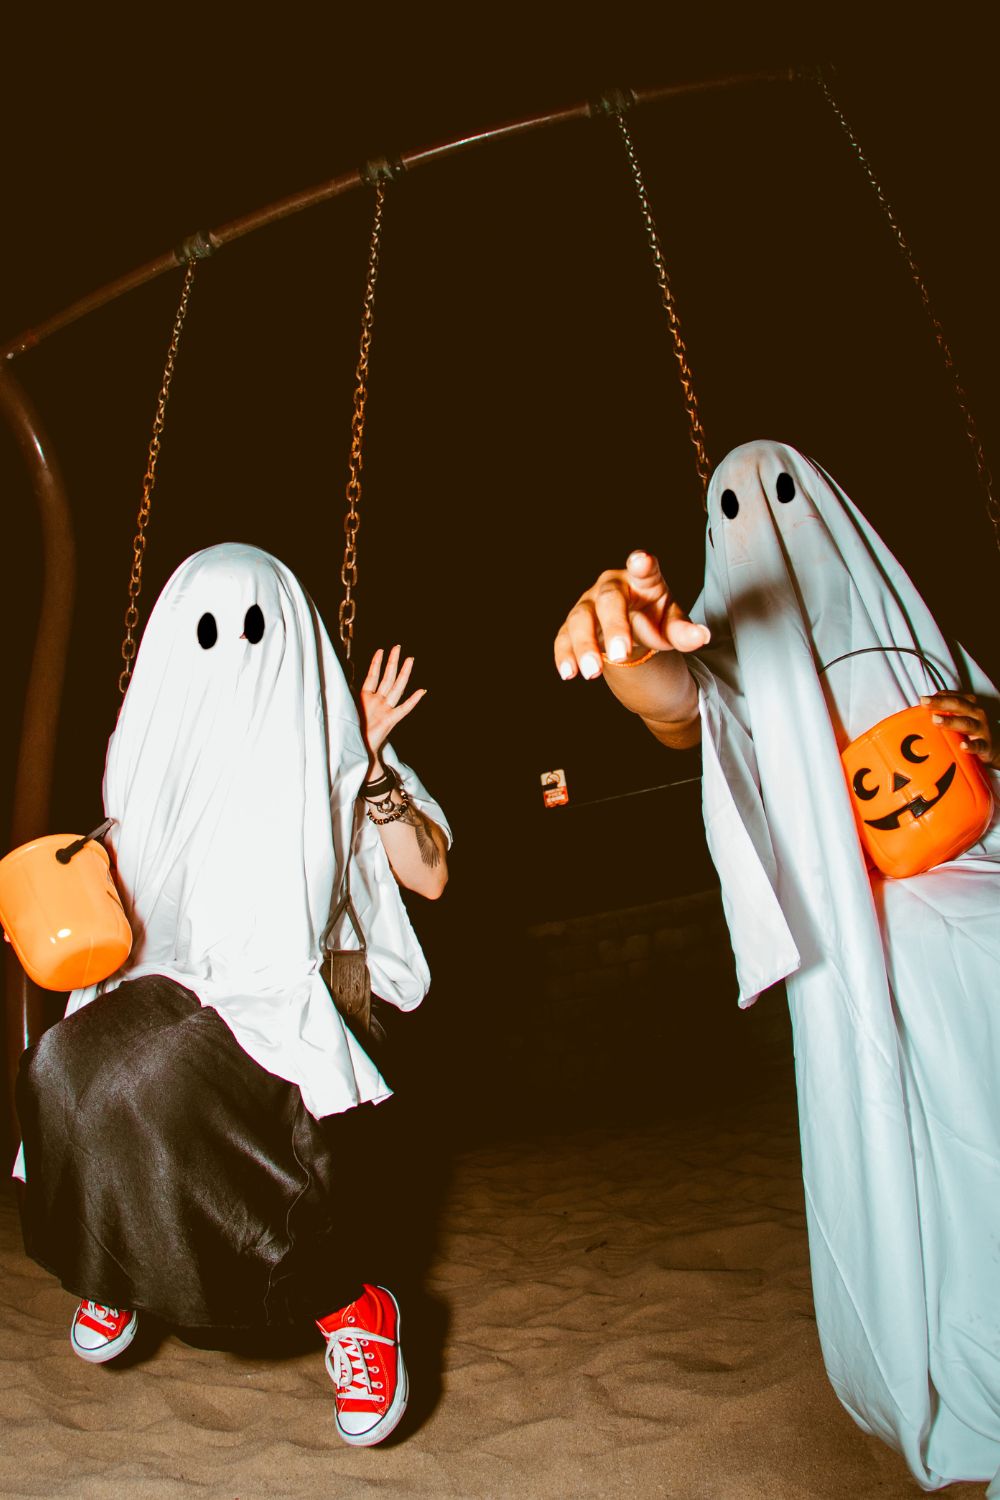
Halloween parties do not need a large budget to feel frightening. With cardboard, old fabric, recycled containers, paper, paint, thrifted items, and a few battery powered lights, you can turn ordinary rooms into a scary haunted house.
These DIY Halloween party decorations are made for hosts who want impressive results without spending much money. Each project below focuses on one part of the house, from the entrance and windows to dark corners, stairs, doors, and closets. Most can be made in an afternoon, and many use supplies you may already have at home.
1. Hanging Cheesecloth Ghosts in Doorways

A doorway is one of the easiest places to add an instant scare. Hanging cheesecloth ghosts move slightly when people walk past, making a simple entrance feel much more haunted.
Materials Needed
- Cheesecloth or old white cotton fabric
- Balloons or crumpled newspaper
- White thread
- Black marker
- Scissors
- Tape or removable hooks
Step by Step Method
- Inflate a balloon to make the ghost head, or shape crumpled newspaper into a rough ball.
- Place several layers of cheesecloth over the head.
- Tie a piece of white thread around the neck area so the fabric hangs below it.
- Use a black marker to draw simple hollow eyes and a small mouth.
- Cut the bottom of the fabric into uneven strips for a ragged appearance.
- Hang the ghosts from the top of the doorway with removable hooks or tape.
- Make three or four ghosts at different heights so they do not look identical.
- Place one slightly behind the others for a layered effect.
For extra spooky DIY Halloween party decorations, keep one ghost near a fan or open window so it moves gently. Do not place fabric close to candles, heaters, or exposed bulbs.
2. Bloody Handprints on Mirrors and Glass
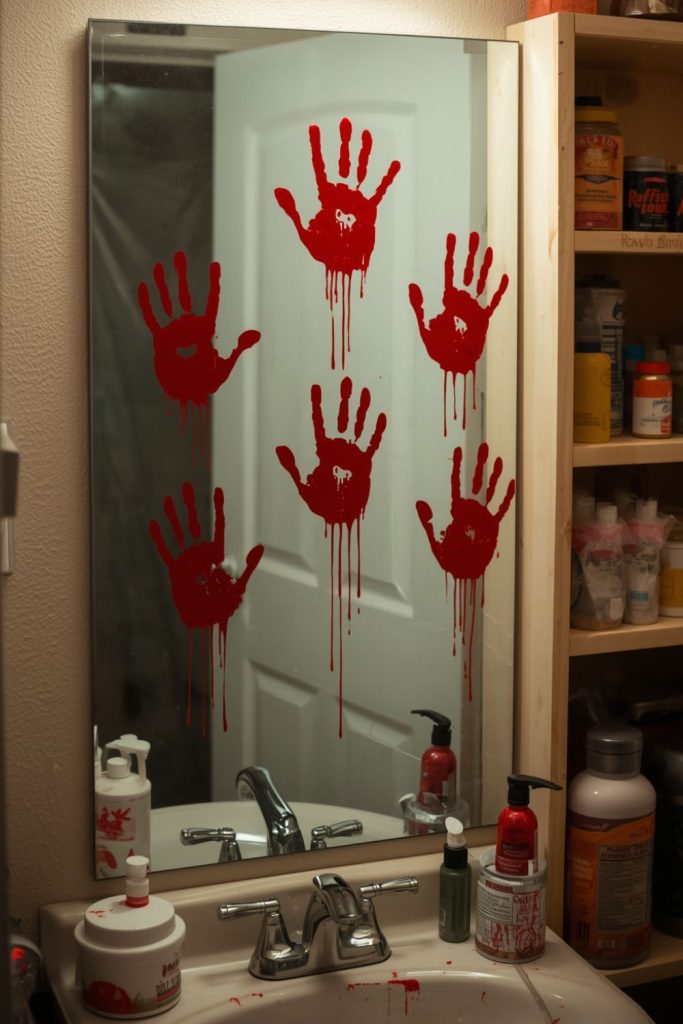
A clean mirror can become one of the creepiest parts of a haunted house with a few fake handprints. The effect works especially well in bathrooms, hallways, and dark dressing areas.
Materials Needed
- Washable red window paint or washable red poster paint
- Sponge
- Disposable gloves
- Paper
- Water and cloth for cleaning
Step by Step Method
- Put a small amount of washable red paint on a flat plate.
- Press a gloved hand lightly into the paint.
- Test the print on paper before using the mirror.
- Press the hand against the glass without sliding it.
- Add smaller fingerprints around the main print.
- Make a few partial handprints near the edges of the mirror.
- Add one or two downward streaks below selected prints.
- Keep some areas clean so the prints stand out.
Use washable paint rather than permanent paint, especially on rented property. For a stronger Halloween party effect, place a red battery light below the mirror. The glow can make the prints look much more dramatic at night.
3. Floating Candles Made From Toilet Paper Rolls

You can create the look of floating candles without buying expensive haunted house props. Empty toilet paper rolls work as lightweight candle bodies and cost almost nothing.
Materials Needed
- Empty toilet paper rolls
- White or cream paper
- Hot glue or white glue
- Battery powered tea lights
- Black or brown paint
- Fishing line
- Tape
- Scissors
Step by Step Method
- Cover each toilet paper roll with white or cream paper.
- Add uneven lines of glue around the top and sides to imitate melted wax.
- Let the glue dry completely.
- Paint a little black or brown around the lower part for an old, dirty appearance.
- Place a battery powered tea light inside the roll.
- Make a small opening at the top so the light can shine through.
- Tie fishing line around each candle.
- Hang the candles from the ceiling at different heights.
- Switch off the main lights before guests arrive.
Battery lights are a safer choice than real flames for this project. A group of candles above a hallway or dining table can make your DIY Halloween party decorations feel much more dramatic.
4. Creepy Portraits With Moving Eye Effects

Old frames become much scarier when the eyes in the portraits appear to follow guests. You can create the illusion with printed faces or simple drawings.
Materials Needed
- Cheap picture frames
- Old family photos or printed portraits
- Black and white paper
- Clear plastic sheet
- Scissors
- Tape
- Small battery light
Step by Step Method
- Find several old looking portraits or print black and white faces.
- Place each image inside a frame.
- Cover the eyes with small pieces of clear plastic.
- Draw dark pupils on the plastic rather than directly on the picture.
- Position the pupils so they face different directions.
- Hang the portraits along a hallway.
- Place a weak light below or beside the frames.
- Leave some portraits partly hidden in shadow.
For a stronger effect, cut out the eye areas from the printed image and place the clear plastic behind them. When guests move past, the fixed pupils can appear to follow them. It is a simple trick that adds personality to your DIY Halloween party decorations.
5. Glowing Ghost Jars From Recycled Containers

Empty jars can become tiny glowing ghosts that look great on shelves, tables, windowsills, or stair steps. This project uses materials that would otherwise go into the recycling bin.
Materials Needed
- Empty glass or plastic jars
- White tissue paper
- Mod podge or diluted white glue
- Black paper
- Battery powered LED lights
- Paintbrush
- Scissors
Step by Step Method
- Clean and dry the jars.
- Tear white tissue paper into small pieces.
- Brush a thin layer of glue over the outside of a jar.
- Press the tissue paper onto the surface.
- Add another thin layer of glue over the paper.
- Allow the jar to dry fully.
- Cut small black eyes and mouths from paper.
- Attach the faces to the front of each jar.
- Place a battery LED light inside.
- Arrange several jars together in a dark corner.
Try making different expressions rather than giving every ghost the same face. Grouping five or six glowing jars near a haunted doorway creates a cheap visual effect that works well in party photos.
6. Haunted Window Silhouettes Made From Black Cardboard

Windows can become creepy scenes after dark with nothing more than black cardboard. The shapes look especially effective when indoor lights are behind them.
Materials Needed
- Black cardboard
- Pencil
- Scissors
- Tape
- White paper
- Battery lights
Step by Step Method
- Measure the window area where you want the silhouette.
- Draw a crooked tree, tall figure, crow, witch, or reaching hand on cardboard.
- Cut around the drawing carefully.
- Make the shape large enough to be seen from outside.
- Tape it to the inside of the window.
- Turn on a room light behind the silhouette.
- Add smaller shapes around the main figure.
- Leave parts of the window uncovered.
A tall hand pressed against a window can be more frightening than a complicated scene. You can also create a person standing behind curtains by cutting a simple human outline. These DIY Halloween party decorations cost very little but can change how the entire house looks from outside.
7. Skeleton Hands Emerging From Flower Pots

Flower pots provide a great place to hide spooky surprises. A few cheap plastic skeleton hands can be positioned so they look like something is trying to escape from the soil.
Materials Needed
- Small flower pots
- Cardboard or plastic skeleton hands
- Black soil or shredded paper
- Moss or dry leaves
- Black paint
- Tape or glue
Step by Step Method
- Paint plain cardboard hands black, or use inexpensive plastic hands.
- Fill the flower pots with dark soil, shredded paper, or crumpled newspaper.
- Push the hands into the material.
- Angle the fingers outward as if something is climbing up.
- Add fake moss or dry leaves around the base.
- Place the pots beside the front door or along a hallway.
- Add small paper labels such as “Do Not Water.”
Use pots with different hand positions so the display does not look repeated. These DIY Halloween party decorations are especially useful when you want small scary details rather than large props.
8. DIY Monster Eyes Hidden in Dark Corners

Dark corners are perfect for hiding small surprises. A pair of glowing eyes can make guests stop and look twice without requiring a complicated decoration.
Materials Needed
- Black cardboard
- White paper
- Battery powered red or green lights
- Tape
- Scissors
- Black marker
Step by Step Method
- Cut two large oval eyes from white paper.
- Draw dark pupils in the center.
- Cut black cardboard into a wide background shape.
- Attach the eyes to the cardboard.
- Place a small battery light behind or below them.
- Hide the piece behind furniture, curtains, or a shelf.
- Keep the surrounding area as dark as possible.
- Make another pair at a different height.
Try placing one set near the floor and another above eye level. Guests may not notice them immediately, which makes the reveal more effective. This is one of the easiest DIY Halloween party decorations for rooms that already have plenty of furniture.
9. A Creepy Doll Corner Using Thrifted Dolls

Old dolls can look surprisingly frightening when placed together in a dim corner. You do not need expensive horror props because mismatched secondhand dolls already have an aged appearance.
Materials Needed
- Old dolls from a thrift store
- Small chair or table
- Old fabric
- Black marker
- Baby powder or washable pale makeup
- Battery light
Step by Step Method
- Choose dolls with different sizes and clothing.
- Clean them before use.
- Use a black marker to add tiny cracks or dark lines to some faces.
- Add a little washable pale makeup for an aged appearance.
- Dress one doll in an old dark fabric.
- Place the dolls on a chair, shelf, or small table.
- Turn one doll slightly toward the entrance.
- Put a weak light behind them.
- Leave part of the group in shadow.
Avoid using dolls that are valuable or difficult to clean. A thrifted doll display costs little and gives your haunted house a creepy story without needing complicated construction.
10. Rats and Cockroaches Made From Black Cardboard

Tiny creatures can make an ordinary floor or wall feel dirty and abandoned. Black cardboard is enough to create flat rat and cockroach shapes that look convincing from a short distance.
Materials Needed
- Black cardboard
- Pencil
- Scissors
- Black marker
- Double sided tape
Step by Step Method
- Draw simple rat shapes with pointed noses and long tails.
- Draw small cockroach shapes separately.
- Cut out each shape carefully.
- Add a few small lines to suggest legs or fur.
- Place the rats along baseboards and behind furniture.
- Put cockroaches near bins, cupboards, or a fake kitchen area.
- Use double sided tape to attach some to walls.
- Place a few where guests will notice them only after walking past.
Keep the shapes simple because they will usually be viewed from a distance. A few well placed cardboard pests can make your other DIY Halloween party decorations feel part of the same haunted setting.
11. A Haunted Family Photo Wall With Distorted Faces
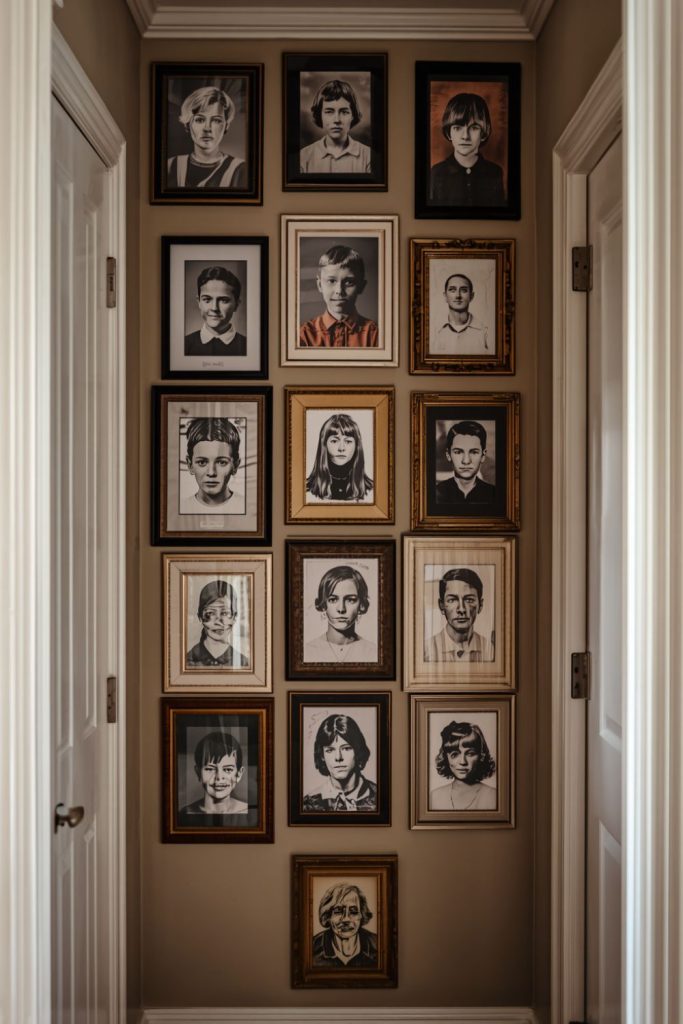
A wall filled with old family photographs can become an unsettling display when the faces are changed. You can use fictional families rather than real relatives to create a creepy story.
Materials Needed
- Printed black and white portraits
- Cheap picture frames
- Black marker
- Red marker
- Paper
- Tape
Step by Step Method
- Print several black and white portraits.
- Place them in cheap frames.
- Change a few faces by drawing oversized eyes or crooked smiles.
- Cover one face with black marker.
- Add dates and names beneath the portraits.
- Make one photograph look scratched or torn.
- Arrange the frames in rows.
- Add one empty frame with a handwritten date.
Leave enough empty wall around the photos so each image can be noticed. A strange date or altered face can make guests wonder what happened to the people in the pictures. It also gives your DIY Halloween party decorations a strong storytelling effect.
12. A Scary Door Knocker Scene With a DIY Monster Hand

The front door sets the mood before guests even enter. A fake monster hand wrapped around the door knocker can turn a normal entrance into a small horror scene.
Materials Needed
- Rubber or plastic monster hand
- Cardboard
- Black paint
- Red paint
- Strong removable tape
- Artificial moss or old fabric
Step by Step Method
- Paint the hand darker if it looks too clean.
- Add small red marks around the fingers.
- Cut cardboard into a rough broken door panel shape.
- Paint the cardboard brown or black.
- Attach the panel beside the door knocker.
- Position the hand around the knocker.
- Add old fabric or moss around the edges.
- Secure everything firmly before guests arrive.
Make sure the decoration does not prevent people from opening the door. A simple hand positioned at eye level gives the entrance a scary focal point without requiring a large prop.
13. A Cardboard Coffin for a Creepy Entryway

A cardboard coffin can become a dramatic entry decoration while using boxes that you already have. It can stand against a wall rather than taking up much floor space.
Materials Needed
- Large cardboard boxes
- Black or dark gray paint
- Tape
- Scissors or craft knife
- White paper
- Battery light
Step by Step Method
- Draw a coffin shape on large cardboard.
- Cut the front panel carefully.
- Use extra cardboard strips to create the side panels.
- Tape the pieces together.
- Paint the entire surface dark gray or black.
- Add rough white lettering such as a fictional name and date.
- Put a small battery light behind the coffin.
- Lean it securely against a wall near the entrance.
Do not make the structure heavy or block a doorway. For a more aged look, lightly brush gray paint over the black surface. This decoration can become a large visual feature without the cost of a store bought prop.
14. DIY Cobweb Curtains Made From Torn Black Fabric

Instead of buying bags of artificial webbing, old black fabric can be cut into long irregular strips and hung across a doorway. The result gives an abandoned, neglected look.
Materials Needed
- Old black fabric
- Scissors
- White thread
- Tape or removable hooks
- Baby powder or white fabric chalk
Step by Step Method
- Cut the fabric into long strips.
- Tear sections by hand so the edges look uneven.
- Cut thin slits along several strips.
- Tie white thread between selected pieces to imitate web strands.
- Dust a small amount of white fabric chalk over the material.
- Hang the strips across a doorway.
- Leave openings large enough for guests to walk through.
- Place a dim light behind the curtain.
Use lightweight fabric so people can move through it without pulling down the hooks. This project is cheap, reusable, and gives a hallway a dark abandoned appearance.
15. A Haunted Peephole With a Giant Eye Watching From Behind the Door

A fake peephole can create a fun scare because guests expect to see a normal door feature. Instead, they find a huge eye staring back at them.
Materials Needed
- Cardboard
- White paper
- Black marker
- Clear plastic sheet
- Tape
- Battery powered light
Step by Step Method
- Cut a round hole in a piece of cardboard.
- Draw a large eye on white paper.
- Add a dark pupil and red lines.
- Place clear plastic over the drawing.
- Position the eye behind the hole.
- Attach a small light behind it.
- Fix the cardboard near eye level on a door.
- Add scratches around the outside of the peephole.
Keep the light dim enough that the eye appears gradually. A guest walking past may notice the eye only after they have already entered the room. That delayed reaction is what makes this one of the more effective DIY Halloween party decorations.
16. Claw Marks on Doors Made With Cardboard and Red Paint
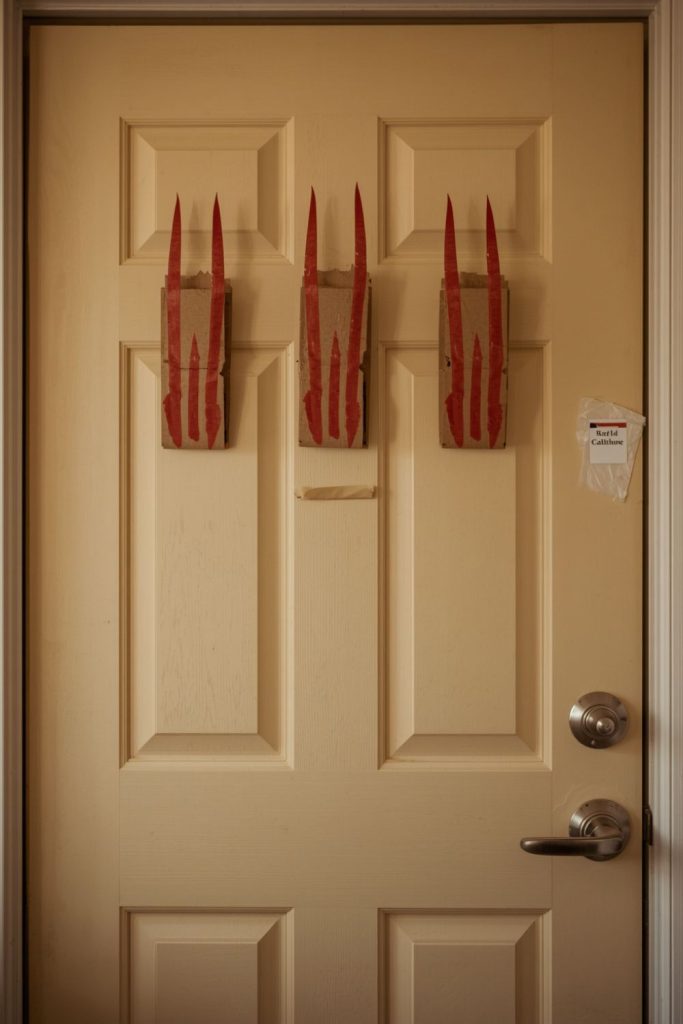
A plain door can become a scary focal point with fake claw marks. Cardboard makes it possible to create raised scratches without damaging the actual door.
Materials Needed
- Thin cardboard
- Red and black washable paint
- Scissors
- Tape
- Sponge
- Pencil
Step by Step Method
- Draw three or four long claw shapes on cardboard.
- Cut them into narrow strips.
- Paint the cardboard black around the edges.
- Add red paint along the center.
- Tape the pieces to the door.
- Add a little red paint around the cardboard edges.
- Remove the cardboard before the paint has a chance to touch the door.
Keep the marks uneven instead of making every scratch the same length. Place them near a door handle or lower section of the door to suggest that something inside has tried to get out.
17. A Flickering Candle Shadow Wall Using Cutout Shapes

You can create strange moving shadows without expensive lighting equipment. A small battery light placed behind cardboard shapes can cast silhouettes onto a wall.
Materials Needed
- Black cardboard
- Scissors
- Battery powered flickering light
- Tape
- White wall or white sheet
Step by Step Method
- Cut cardboard into crooked branches, bats, hands, or thin figures.
- Attach the shapes to a stand or cardboard box.
- Place the flickering light behind them.
- Aim the light toward a blank wall.
- Move the shapes closer or farther from the light.
- Adjust the distance until the shadows become large.
- Darken the room around the setup.
- Keep wires and batteries away from walkways.
The flickering light changes the shadow slightly, giving the wall a sense of movement. This is a smart choice for DIY Halloween party decorations because one small light can make a much larger area look active.
18. Creepy Warning Notes Covering a Haunted House Door

A door covered with strange handwritten warnings can make guests curious before they even enter. The trick is to use short messages that suggest something went wrong inside.
Materials Needed
- Old paper
- Black marker
- Red marker
- Tape
- Coffee or tea
- Scissors
Step by Step Method
- Write messages such as “Do Not Knock,” “Stay Out,” or “It Is Still Inside.”
- Crumple each paper lightly.
- Flatten them again.
- Brush weak coffee or tea over the paper.
- Let the sheets dry.
- Tear the edges unevenly.
- Add red marks to a few notes.
- Tape the notes across the door.
- Place one note upside down for an odd detail.
Avoid covering the handle, lock, or emergency exit signs. The notes work best when they appear to have been added in a hurry. This project takes very little money but adds a strong story to your haunted house.
19. A DIY Hanging Chandelier Made From Black Cardboard and Fake Spiders

A homemade hanging chandelier can turn a normal ceiling into a creepy focal point. Black cardboard, string, and fake spiders are enough to make one without buying a decorative fixture.
Materials Needed
- Black cardboard
- String
- Tape
- Scissors
- Fake plastic spiders
- Battery powered fairy lights
Step by Step Method
- Cut long strips of black cardboard.
- Curve them into a rough circular frame.
- Connect the strips with tape.
- Attach string at three or four points.
- Hang the frame securely from a safe ceiling point.
- Wrap battery fairy lights around the frame.
- Attach fake spiders to the cardboard.
- Add a few loose threads hanging down.
- Keep the decoration well away from real candles or hot lights.
Use lightweight materials so the chandelier does not become a safety problem. Hang it above a party table or in an entry area where guests can see it without touching it.
20. A Ghostly Staircase Made With White Fabric and Battery Powered Lights

A staircase can become one of the scariest areas in a haunted house because guests naturally look up and down as they move. White fabric and small lights can create a ghostly shape along the rail.
Materials Needed
- Old white sheets
- Battery powered fairy lights
- Removable clips
- Black marker
- Scissors
- White thread
Step by Step Method
- Cut the old sheets into long strips.
- Tear the bottom edges to make them uneven.
- Draw faint ghost faces on a few sections.
- Attach the fabric loosely along the staircase rail.
- Place battery fairy lights behind the fabric.
- Leave some sections hanging lower than others.
- Keep the stairs and handrail clear.
- Test the staircase before guests arrive.
Safety matters more here than appearance. The fabric should never cover steps, create a trip hazard, or block the handrail. With the lights glowing through the fabric, the staircase can become a strong part of your DIY Halloween party decorations.
21. A “Do Not Open” Closet With Glowing Eyes Hidden Inside
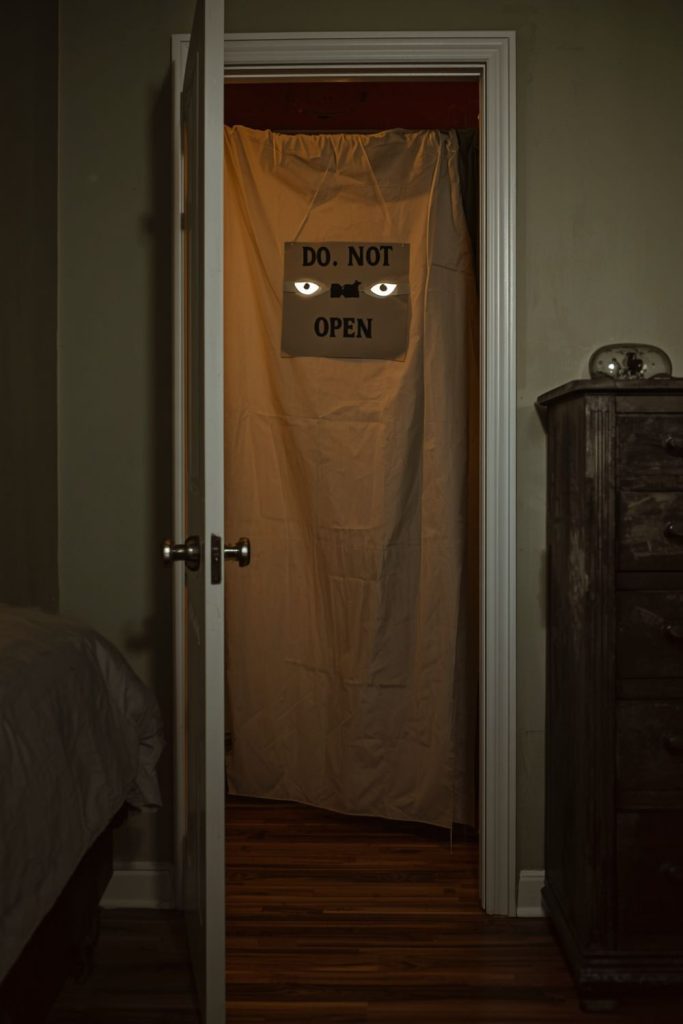
An ordinary closet can become a small haunted attraction with almost no construction. A few glowing eyes inside the darkness are enough to make guests wonder what is hiding behind the door.
Materials Needed
- Black cardboard
- White paper
- Battery powered red lights
- Tape
- Old sheets
- Marker
Step by Step Method
- Cut two large eye shapes from white paper.
- Add black pupils with a marker.
- Place red battery lights behind the eyes.
- Attach the eyes to the back wall of the closet.
- Hang an old sheet inside to cover part of the space.
- Add a large “DO NOT OPEN” sign to the outside.
- Leave the closet slightly open.
- Position the eyes so they are not immediately visible.
- Test the light level before the party begins.
Do not lock anyone inside the closet or block access to it. The best effect comes from letting guests open the door themselves and notice the eyes in the darkness.