
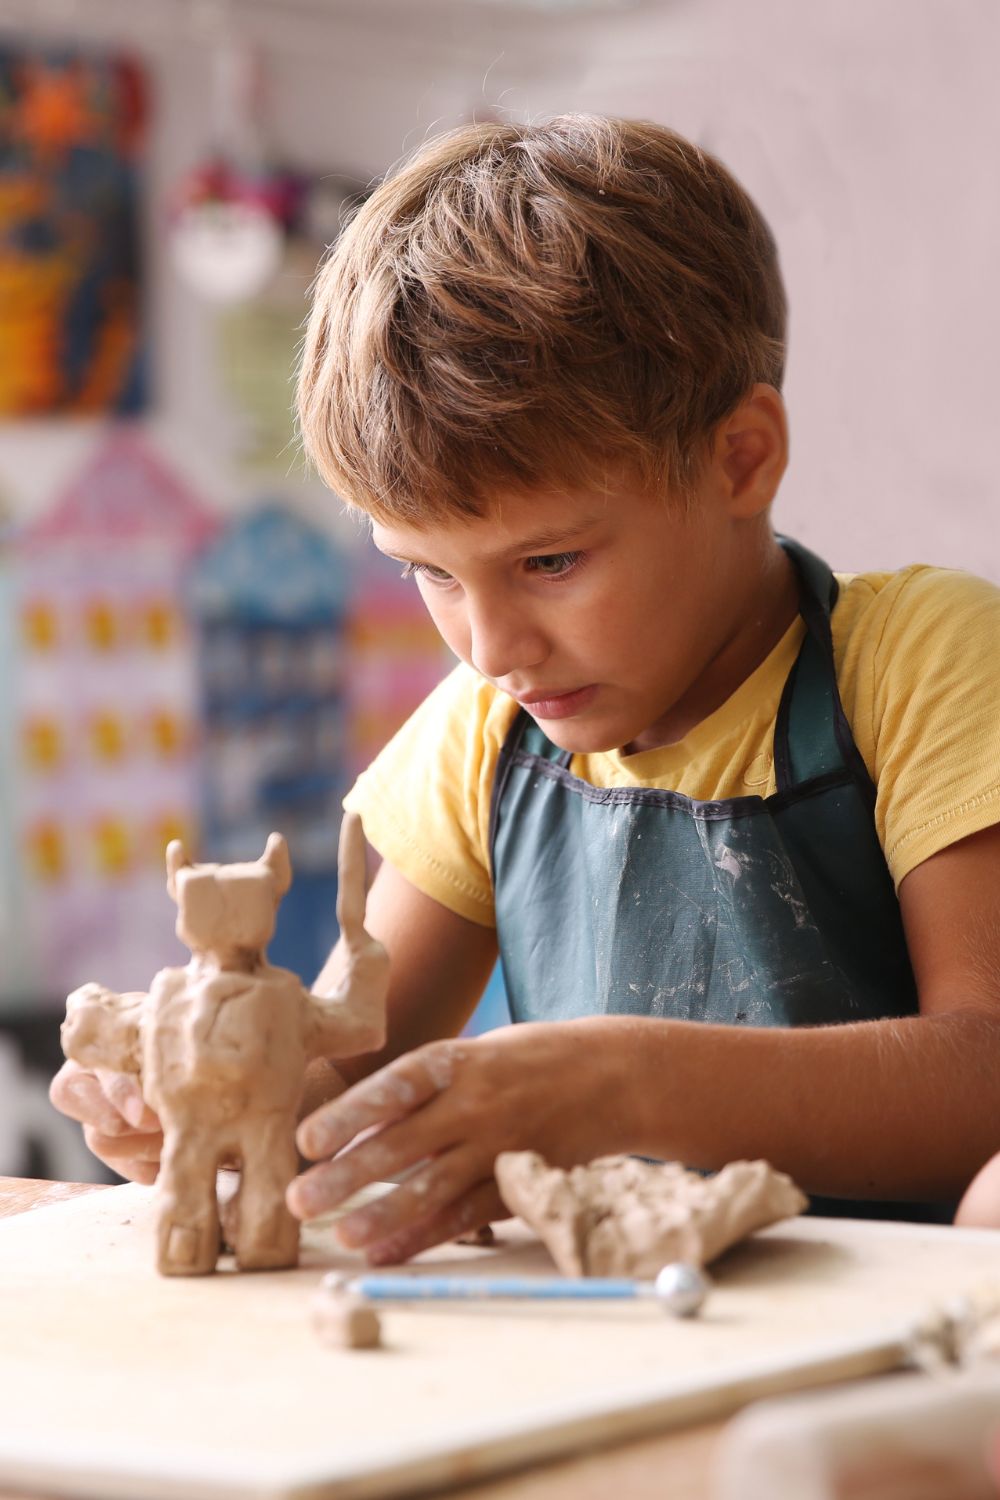
Christmas clay ideas are a fun way for moms to spend quality time with their kids during the holiday season. From Santa figurines and reindeer ornaments to personalized gift tags and miniature Christmas trees, these easy DIY projects add a handmade touch to your home. With simple materials like air dry clay, paint, and a few decorations, you and your children can create festive ornaments, thoughtful gifts, and lasting Christmas memories together.
1. DIY Salt Dough Christmas Tree Ornaments With Your Kids’ Handprints

Handprint ornaments are a sweet way to remember how small your children were at each Christmas. Their little hands become the shape of a tree, a star, or even a festive angel, and the finished ornaments can be kept for years.
Materials needed
- 2 cups all purpose flour
- 1 cup salt
- About ¾ cup water
- Mixing bowl and spoon
- Rolling pin
- Baking parchment and baking tray
- Christmas cookie cutter, optional
- Drinking straw
- Acrylic paint and paintbrushes
- Ribbon for hanging
Step by step method
- Mix the flour and salt in a bowl. Add water gradually and stir until a firm dough forms. Knead it gently until smooth.
- Roll the dough to around ¼ inch thick on a clean surface. Help your child press their hand firmly into the dough.
- Cut around the handprint with a knife, leaving a little space around each finger. An adult should do the cutting.
- Make a small hole near the top with a straw so the ornament can be hung later.
- Place the shapes on a lined tray and let them dry fully. Depending on thickness and conditions, this may take a day or longer in the air, or they can be baked at a low temperature according to a reliable salt dough method.
- Once completely dry and cool, paint the handprint green, red, gold, or white. Add a year and your child’s name.
- Thread ribbon through the hole and hang it on the tree.
Let your child choose the colors and decorations. The little differences between each handprint are what make every ornament special.
- Related post How to Win a Christmas Door Decorating Contest at Work with Festive Ideas Your Team Will Love
2. Mini Air Dry Clay Santa Claus Figurines With Cotton Ball Beards
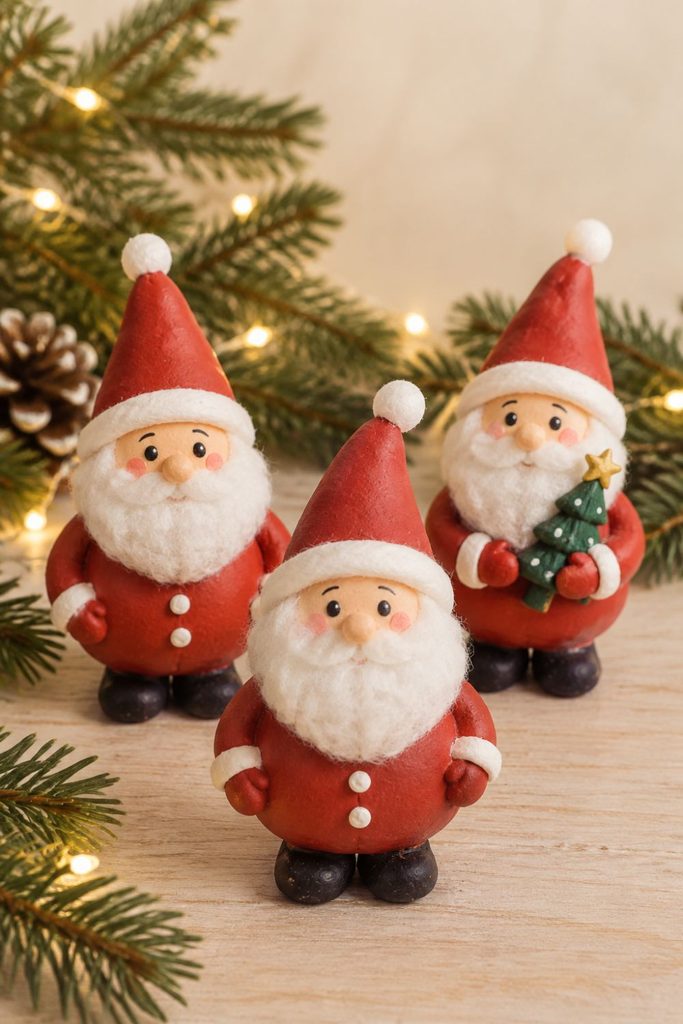
Little Santa figures look lovely on a mantel, shelf, or children’s holiday table. This project is a good choice for kids who enjoy rolling clay into simple shapes and adding small details to a familiar Christmas character.
Materials needed
- White air dry clay
- Red, peach, and black air dry clay, or white clay with suitable paints
- Small cotton balls
- Child safe craft glue used with adult help
- Modeling tool or blunt craft stick
- Small paintbrushes, if needed
- Protective table covering
Step by step method
- Roll a ball of peach clay for Santa’s face. Flatten it gently so it can sit against the body.
- Shape a larger piece of red clay into a rounded cone for Santa’s coat. Make the bottom flat so the figure can stand.
- Attach the face to the top of the coat, pressing the pieces together gently. Add a small red cone for the hat and a tiny white ball at its tip.
- Roll small pieces of black clay into boots and attach them to the bottom of the coat. Add a thin white strip around the coat as trim.
- When the figure has dried according to the clay instructions, attach a few small cotton pieces around the cheeks and chin with craft glue. An adult should handle the glue, and cotton should be kept away from very young children.
- Paint or add tiny black clay dots for the eyes. Use a small pink dot for the nose.
- Let the figure dry fully before moving it to a display shelf.
For younger children, prepare the basic body and face first, then let them choose the hat shape and place the decorations. Display the finished Santas together for a cheerful family collection.
3. Cute Clay Reindeer Ornaments With Red Pom Pom Noses
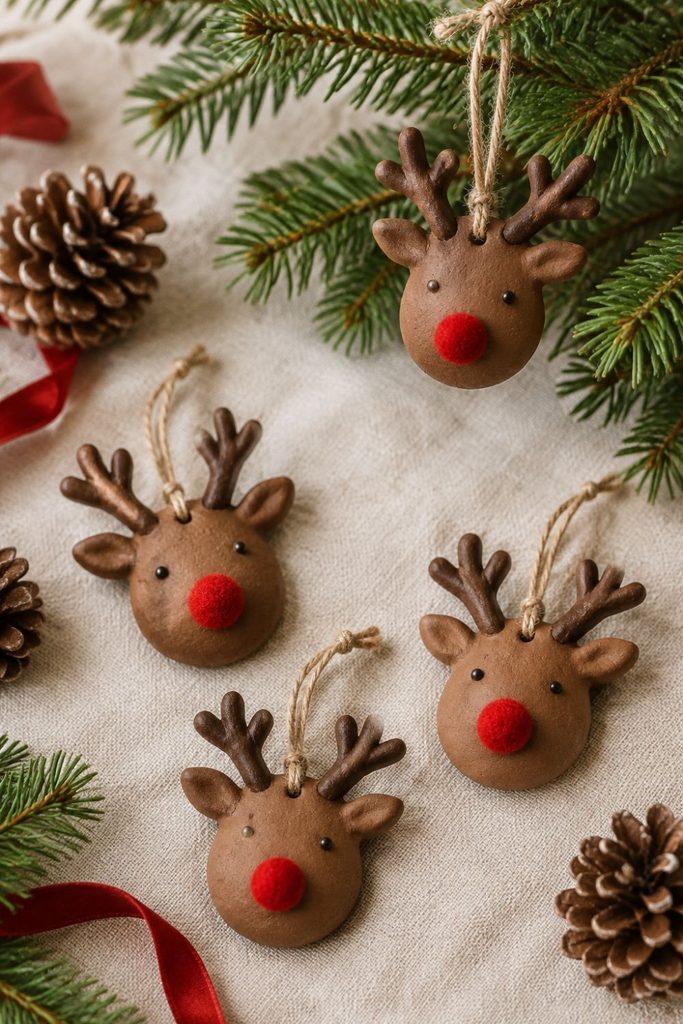
Reindeer ornaments are easy to recognize and fun for kids to decorate. With a round face, little antlers, and a bright red nose, each one can have its own expression. Hang them on a tree or tie one to a wrapped gift.
Materials needed
- Brown air dry clay
- Small red pom poms
- White and black clay or suitable paint
- Craft glue
- Rolling pin
- Round cutter or small cup
- Straw for making a hanging hole
- Ribbon
- Blunt modeling tool
Step by step method
- Roll the brown clay to about ¼ inch thick. Use a round cutter or cup to cut out a reindeer face.
- Shape two short branches from brown clay to make antlers. Press them onto the top of the face and smooth the joins gently.
- Use tiny white and black clay pieces to make eyes. Press them into place without making the face too heavy.
- Let your child choose where the nose should go. Once the clay is dry, attach a red pom pom with craft glue.
- Make a small hole near the top of the head with a straw before the clay dries. Keep the hole away from the antlers so the ornament stays strong.
- Allow the ornament to dry fully according to the package directions. Paint extra details, such as rosy cheeks or a smiling mouth.
- Thread ribbon through the hole and hang the reindeer on the tree.
Children can give each reindeer a different expression or add a tiny initial on the back. If the ornament is intended for a tree, keep pom poms and other small parts out of reach of toddlers.
4. Personalized Clay Christmas Name Tags for Family Stockings
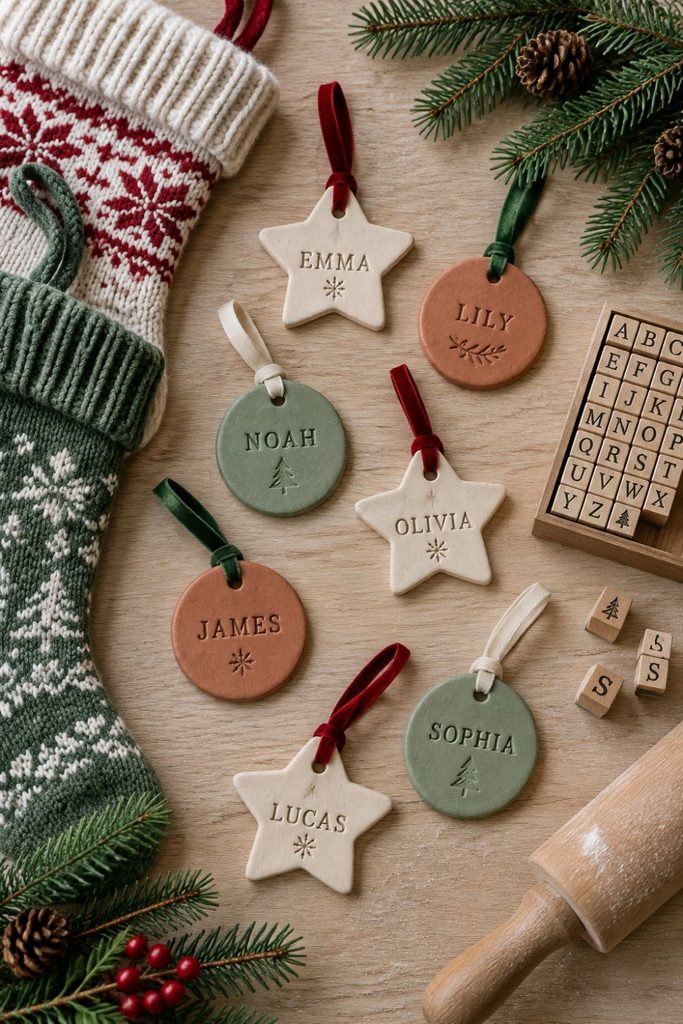
Personalized name tags help every family member find their stocking and make the decorations feel more personal. They are also useful for labeling gift bags or small holiday baskets. Each tag can match the person’s favorite color or the rest of your Christmas decorations.
Materials needed
- Air dry clay
- Rolling pin
- Alphabet stamps or a blunt modeling tool
- Cookie cutters in star, circle, or oval shapes
- Drinking straw
- Acrylic paint and paintbrush
- Ribbon or twine
- Optional small decorative shapes made from clay
Step by step method
- Knead the clay until soft, then roll it into a sheet around ¼ inch thick.
- Cut out a star, circle, or oval for each family member. Smooth the edges with a fingertip lightly dampened with water, if the clay instructions allow it.
- Press alphabet stamps into the surface to spell each person’s name. If you do not have stamps, an adult can write the letters with a blunt modeling tool.
- Make a small hole at the top of each tag using a straw. Avoid placing it too close to the edge.
- Let the tags dry fully, turning them if the package recommends it. Make sure they are firm before painting.
- Add paint around the letters, or paint the names in a contrasting color. Small stars, dots, and snowflakes can fill empty spaces.
- Thread ribbon or twine through the hole and tie each tag to a stocking.
For younger children, an adult can stamp the names while the kids choose colors and decorate the borders. The tags can be reused every year, making them a simple family keepsake.
5. Miniature Clay Gingerbread Houses With Colorful Candy Decorations
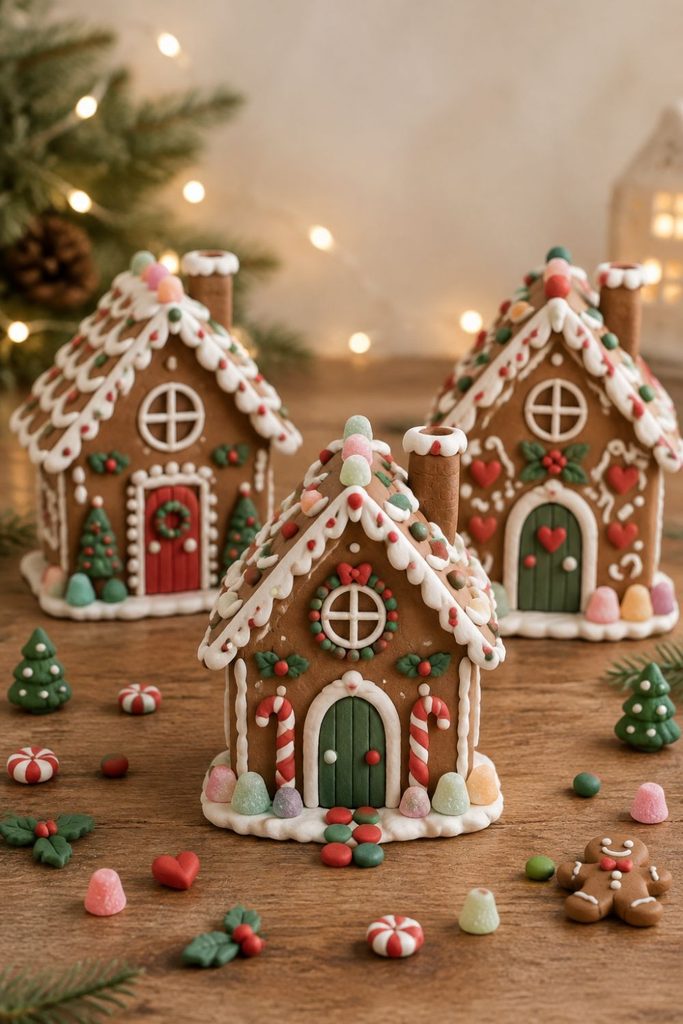
Miniature gingerbread houses bring the look of a Christmas bakery to a shelf or festive table. Unlike edible gingerbread, these clay versions can stay on display throughout the season without crumbling. Children can choose the roof color, window shapes, and tiny candy decorations.
Materials needed
- Brown air dry clay
- White, red, green, and pastel clay
- Rolling pin
- Blunt modeling tool
- Ruler
- Craft glue, if required by the clay type
- Acrylic paint and small brushes
- Protective work surface
Step by step method
- Roll out the brown clay to an even thickness. Cut two rectangles for the front and back walls, two smaller rectangles for the sides, and two sloping pieces for the roof.
- Cut a small door and windows into the front wall while the clay is still soft. Keep the openings large enough to remain visible after drying.
- Join the walls carefully, using the joining method recommended by the clay manufacturer. Support the house with small folded pieces of paper until it holds its shape.
- Attach the roof pieces and check that they meet neatly at the top. Allow the basic house to dry fully before adding delicate decorations.
- Roll tiny white ropes of clay to resemble icing and place them along the roof edges and around the windows.
- Make miniature red and green candy shapes, gumdrops, or tiny wreaths from colored clay. Attach them with suitable adhesive if needed.
- Once dry, paint extra details such as a path, snow on the roof, or a glowing yellow window.
Keep the house small and sturdy for a first attempt. Kids can make the candy shapes while an adult handles the wall assembly, which requires more patience and care.
6. Hand Stamped Clay Christmas Ornaments Using Cookie Cutters
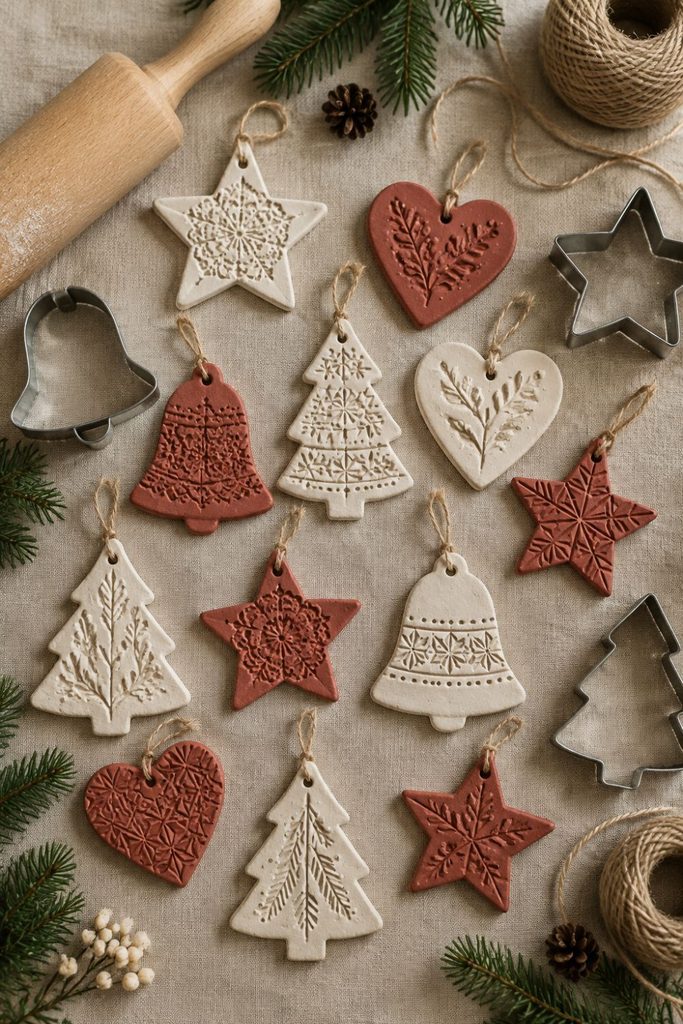
Hand stamped ornaments are a great option for children who enjoy patterns more than detailed modeling. Cookie cutters create neat stars, hearts, bells, and trees, while stamps or household textures add decoration. The same method can produce a matching set for the whole family.
Materials needed
- Air dry clay
- Rolling pin
- Christmas cookie cutters
- Rubber stamps or textured items such as clean lace and leaves
- Drinking straw
- Baking parchment or a reusable craft mat
- Paint and paintbrushes
- Ribbon
Step by step method
- Knead the clay and roll it into a sheet about ¼ inch thick. Try to keep the thickness even so the ornaments dry at a similar rate.
- Cut out several shapes using the cookie cutters. Lift away the extra clay carefully so the edges remain neat.
- Press a clean stamp, lace pattern, or leaf gently into each shape. Lift it straight up to avoid smudging the design.
- Use a straw to make a hanging hole near the top of each ornament.
- Leave the pieces to dry as directed on the clay package. Turn them if recommended, and do not hang them before they are fully firm.
- Paint the raised patterns or brush a little contrasting color into the stamped marks. Wipe the surface gently if you want the main clay color to show through.
- Thread ribbon through each hole and hang the finished ornaments on the tree or tie them to presents.
Try making a set in one color scheme, such as white and gold, or red and green. Children can stamp their own patterns, then compare the different designs when the ornaments are finished.
7. Tiny Clay Snowmen With Scarves Made From Colorful Yarn
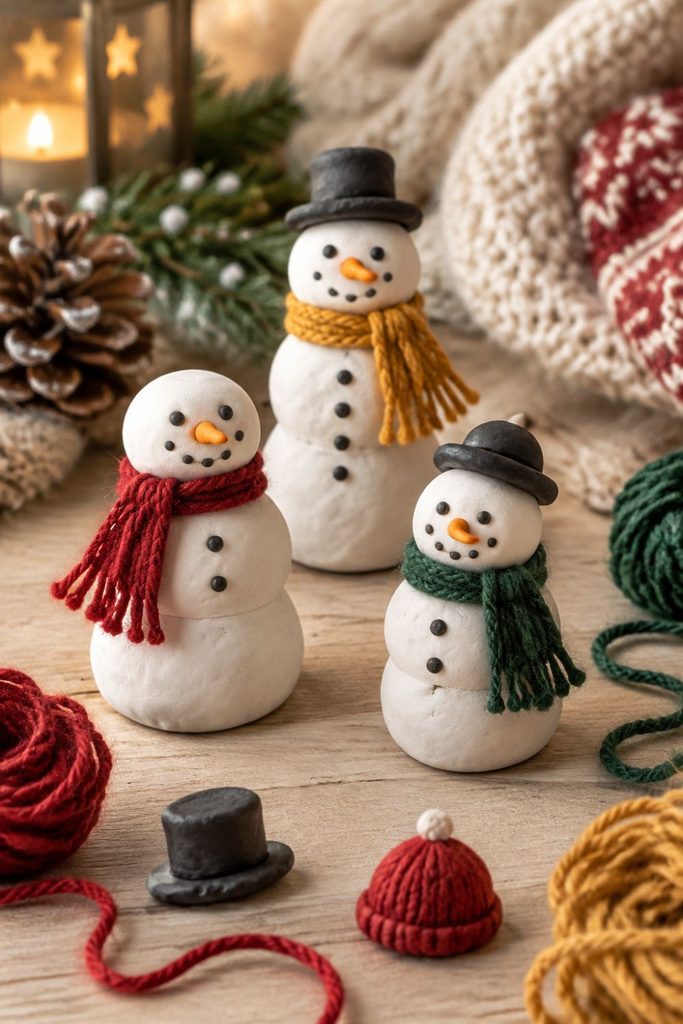
Tiny snowmen are a simple project for kids who like building with balls of clay. A yarn scarf gives each figure a soft detail, while a little hat and painted face help bring it to life. Place the finished snowmen on a shelf or beside a miniature Christmas tree.
Materials needed
- White air dry clay
- Small amounts of black, orange, and colored clay
- Colorful yarn
- Child safe scissors, used with supervision
- Blunt modeling tool
- Craft glue
- Acrylic paint and paintbrushes, optional
Step by step method
- Roll two or three balls of white clay in different sizes. Stack them from largest to smallest to form the snowman’s body.
- Press each ball gently into the next so the pieces hold together. Smooth the joins with your fingers or a suitable modeling tool.
- Add a tiny orange cone for the nose and small black dots for the eyes and buttons. Make a small black or red hat if desired.
- Let the snowman dry fully according to the clay instructions before adding yarn.
- Cut a short piece of colorful yarn and wrap it around the neck as a scarf. Tie it loosely, then trim the ends with scissors.
- If needed, secure the scarf with a small dot of craft glue applied by an adult. Keep the yarn away from very young children who might put it in their mouths.
- Add rosy cheeks or small stick shaped arms made from brown clay. Allow any paint or glue to dry before displaying the figure.
Let each child choose a different scarf color and hat style. A row of snowmen in different colors looks lovely on a windowsill or beside the family Christmas cards.
8. DIY Clay Candy Cane Ornaments With Twisted Red and White Stripes
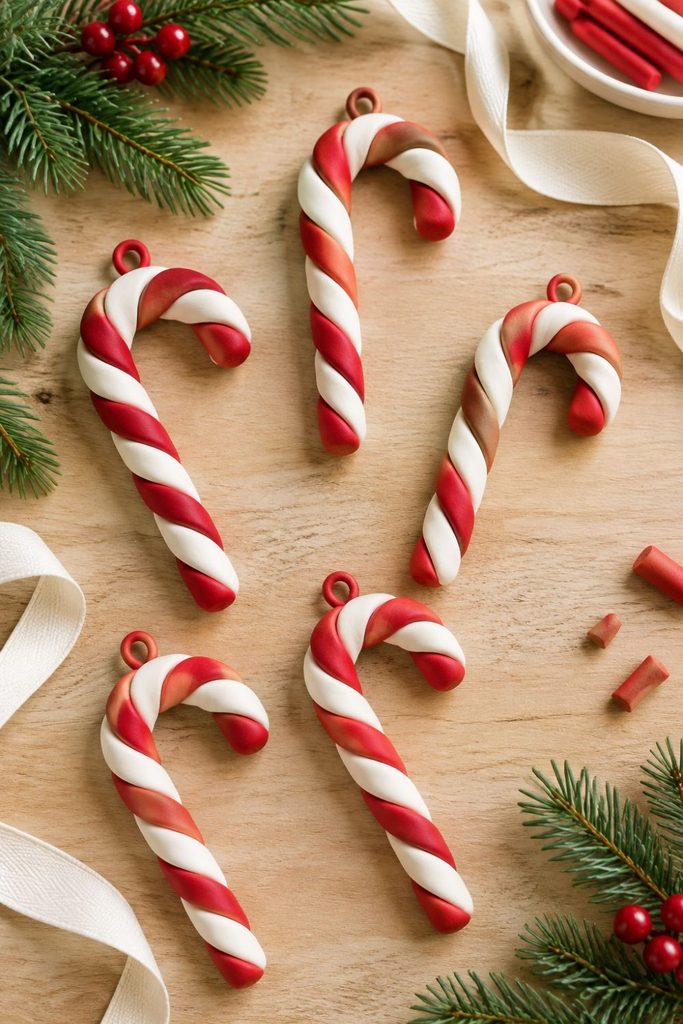
Candy cane ornaments are bright, familiar, and easy for children to make. The striped shape offers a simple way to practice rolling clay into long ropes and combining colors. These ornaments work well on a Christmas tree or tied to a holiday gift.
Materials needed
- White air dry clay
- Red air dry clay
- Rolling pin or clean work mat
- Blunt modeling tool
- Drinking straw, optional
- Ribbon, if making a hanging ornament
- Craft glue, if needed for joining pieces
Step by step method
- Take equal small portions of red and white clay. Roll each portion between your palms and the work surface until you have two ropes of similar length.
- Place the ropes side by side and gently twist them together. Avoid pulling too hard, as the clay may stretch or break.
- Bend the twisted rope into a candy cane shape, curving one end into a hook. Press the ends gently so the stripes stay together.
- Smooth any rough edges with a fingertip, taking care not to blend the red and white colors too much.
- If you want to hang the candy cane, create a small hole near the top of the hook while the clay is still soft, provided the shape is thick enough to support it.
- Let the ornament dry according to the manufacturer’s instructions. Turn it if recommended, and check that the curved end is fully firm.
- Add a ribbon through the hole once dry, or place the candy cane flat as part of a tabletop display.
Children can make short candy canes for a miniature tree and larger ones for the main tree. Remind them that the decorations are not sweets and should not be eaten.
9. Mini Clay Christmas Trees Decorated With Tiny Clay Stars and Beads
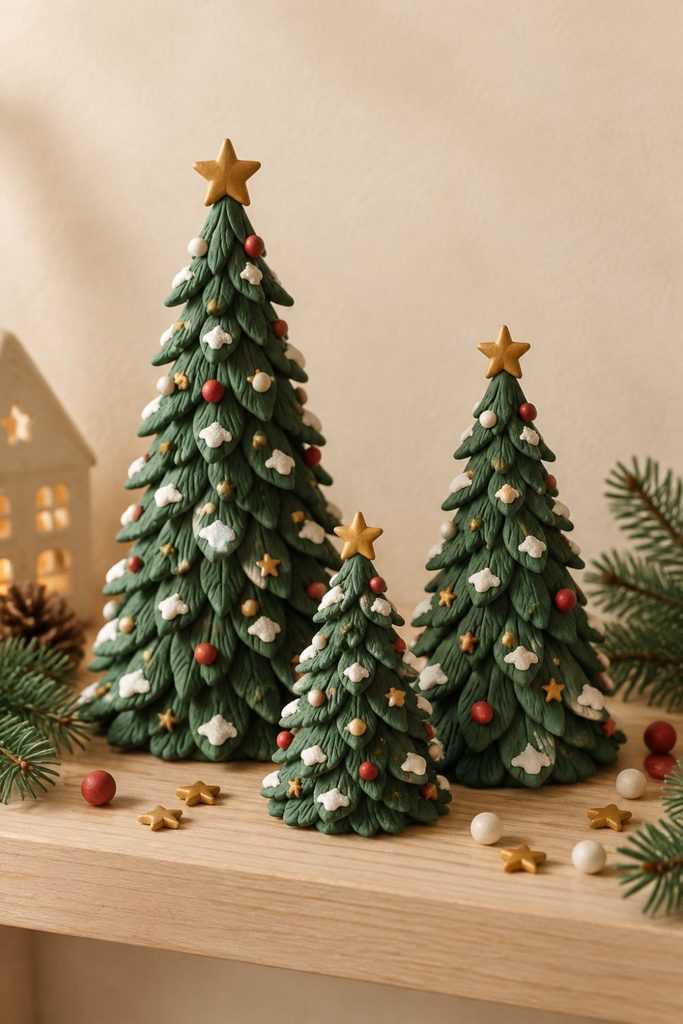
Mini Christmas trees are a fun way to create a little holiday display for a desk, shelf, or mantel. Each tree can be plain and snowy or decorated with bright stars, beads, and tiny ornaments. This project also gives kids a chance to practice making cones and small shapes.
Materials needed
- Green air dry clay
- Small amounts of yellow, red, and white clay
- Flat base made from clay
- Small beads, used with adult supervision
- Blunt modeling tool
- Craft glue, if required
- Paint and paintbrushes, optional
Step by step method
- Roll a piece of green clay into a cone, making the bottom wide enough for the tree to stand. Gently press the base against the work surface to flatten it.
- Use a modeling tool to make small lines or shallow grooves from the top toward the bottom. These marks can resemble branches.
- Make a small yellow star from clay and attach it to the top of the tree. Press gently so it stays in place.
- Roll tiny balls of red, white, or gold clay for baubles. Let children choose where to place them around the tree.
- If using beads, wait until the clay is firm and attach them securely with suitable glue under adult supervision. Avoid beads for young children who may swallow small objects.
- Leave the tree to dry fully, following the clay package directions. Check that the base is stable before moving it.
- Add a little white paint along the branches to resemble snow, or keep the tree bright green with colorful decorations.
Make several trees in different heights for a small forest display. Children can give each tree its own color theme, which makes the final arrangement feel personal and fun.
10. Handmade Clay Christmas Gift Tags With Children’s Initials

Clay gift tags add a personal touch to presents without needing complicated tools. Unlike paper tags, a dry clay tag can be saved and reused if handled carefully. They are particularly nice for grandparents, teachers, neighbors, or close family friends.
Materials needed
- Air dry clay
- Rolling pin
- Small star, circle, or rectangle cutters
- Alphabet stamps or blunt modeling tool
- Drinking straw
- Acrylic paint
- Ribbon or twine
- Optional small clay stars or hearts
Step by step method
- Roll the clay to an even thickness of about ¼ inch. Cut out small tags using a cookie cutter or a cardboard template.
- Smooth the edges with a fingertip. Keep the tags large enough for the initial to be easy to read.
- Press a letter stamp into the middle of each tag, or carefully draw an initial with a blunt modeling tool. Children can help choose which letter belongs on each present.
- Make a small hole near one edge using a straw. Avoid placing it too close to the border.
- Leave the tags to dry completely according to the package directions. If needed, turn them over so both sides can dry.
- Paint the letter in a contrasting shade. Add small stars, dots, or a simple border around the edge.
- Thread ribbon through the hole and tie the tag to a gift bag, box, or wrapped present.
For a coordinated look, use the same clay color for every tag and change only the initials. You can also write the year on the back, making the tags a small keepsake after the gifts have been opened.
11. Clay Penguin Christmas Ornaments Wearing Mini Santa Hats

Penguins with Santa hats bring a playful touch to Christmas decorations. Their rounded bodies are easy to shape, and children can make each penguin look different by changing its hat, scarf, or expression. Use them as tree ornaments or place them around a festive display.
Materials needed
- Black or dark gray air dry clay
- White clay
- Orange clay
- Red and white clay for the hat
- Blunt modeling tool
- Straw for a hanging hole
- Ribbon
- Paintbrushes and suitable paint, optional
Step by step method
- Roll a piece of dark clay into an oval shape. Flatten the bottom slightly so the penguin can stand if you prefer a tabletop figure.
- Shape a small white oval and press it onto the front of the body to make the penguin’s belly.
- Add two tiny black or dark gray wings on either side. Smooth the joins gently so the pieces stay attached.
- Make a small orange triangle for the beak and two flat orange shapes for the feet. Press them into place.
- Shape a red cone for the Santa hat, bend the tip slightly, and add a small white ball at the end. Place a thin white strip around the bottom of the hat.
- If making a hanging ornament, create a hole near the top before the clay dries. Let the entire figure dry according to the manufacturer’s directions.
- Add eyes with tiny clay dots or suitable paint, then thread ribbon through the hole once the ornament is firm.
Let children choose whether their penguin has a red, green, or blue scarf. Keep the details fairly large and securely attached, especially if the ornaments will be handled by small children.
12. DIY Clay Wreath Ornaments With Tiny Holly Leaves and Red Berries

A small clay wreath looks pretty on a Christmas tree, a cupboard handle, or the front of a gift box. The circular shape is easy to make, and decorating it with leaves and berries lets children practice arranging small shapes in a pattern.
Materials needed
- Green air dry clay
- Red clay
- Small amount of brown clay, optional
- Blunt modeling tool
- Straw or small round tool for the center
- Ribbon
- Paintbrushes and suitable paint, optional
Step by step method
- Roll green clay into a long rope of even thickness. Bend it into a circle and press the ends together, smoothing the join gently.
- Use a small round tool to open the center if it has closed up. Keep the ring thick enough so it will not break while drying.
- Pinch small pieces of green clay into pointed oval shapes to make holly leaves. Draw a line down each leaf with a modeling tool.
- Attach the leaves around the ring, overlapping them slightly. Press each leaf gently into place so it stays attached.
- Roll tiny red clay balls and arrange them in groups of three to resemble holly berries. Make sure the decorations are not too heavy for the wreath.
- Let the wreath dry fully according to the package directions. If desired, add a little gold paint to the leaves or a white dot to each berry.
- Tie a ribbon through the top of the wreath or make a hanging loop before the clay dries, if the shape is strong enough.
Children can make wreaths in different sizes and colors. A few miniature wreaths can also decorate a homemade Christmas village or a dollhouse door.
13. Miniature Clay Hot Cocoa Mugs Topped With Marshmallow Shapes
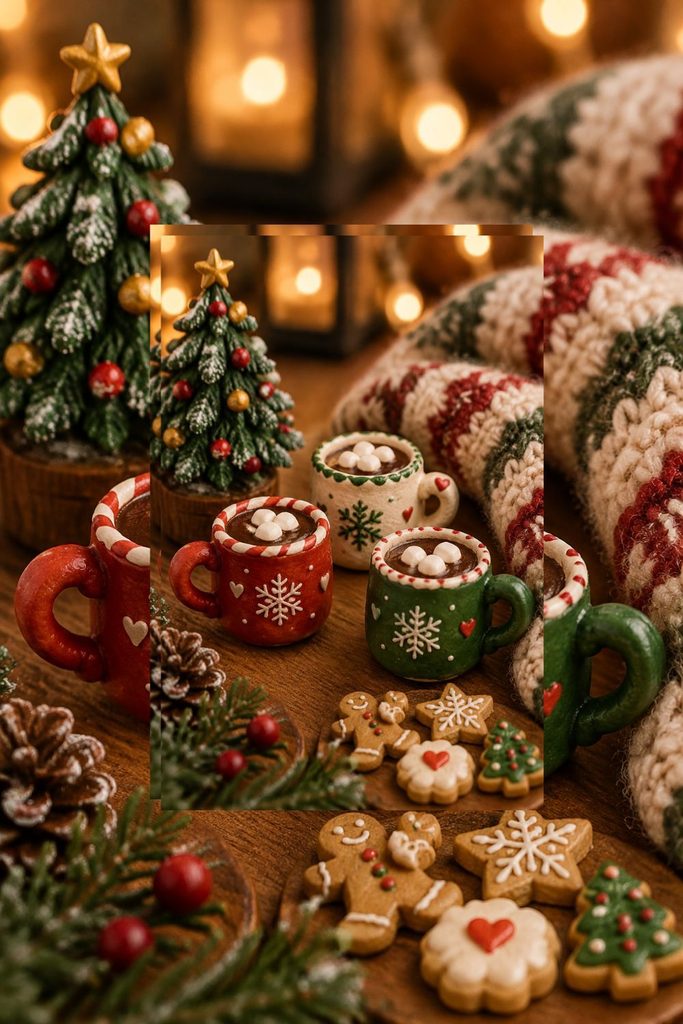
Tiny hot cocoa mugs are ideal for children who enjoy miniature objects. They can be displayed beside a dollhouse, added to a toy kitchen, or arranged on a small holiday shelf. The little marshmallows and mug handles make this project fun to decorate.
Materials needed
- Brown clay for cocoa
- Red, green, blue, or white clay for mugs
- White clay for marshmallows
- Blunt modeling tool
- Craft glue, if required
- Small paintbrush
- Suitable paint, optional
Step by step method
- Roll a small ball of colored clay and shape it into a short cylinder. Press the top gently to form the opening of the mug.
- Make a thin rope of matching clay and curve it into a handle. Attach both ends to the side of the mug and smooth the joins carefully.
- Roll brown clay into a small flat circle that fits the top of the mug. Press it into the opening to represent hot cocoa.
- Shape two or three tiny white cubes or rounded pieces for marshmallows. Place them on the cocoa surface and press gently.
- Add a small red heart, green holly leaf, or white snowflake to the front of the mug. Keep decorations light so they do not pull the handle away.
- Let the mug dry fully according to the clay package directions. If the pieces were attached with glue, allow that to dry too.
- Paint small details such as a stripe around the rim or dots on the mug. Use the finished mugs for display rather than for drinking.
This project works well with leftover clay from other Christmas ideas. Children can make a different mug for each family member and choose a matching decoration for everyone.
14. Clay Christmas Village Houses With Painted Windows and Snowy Roofs
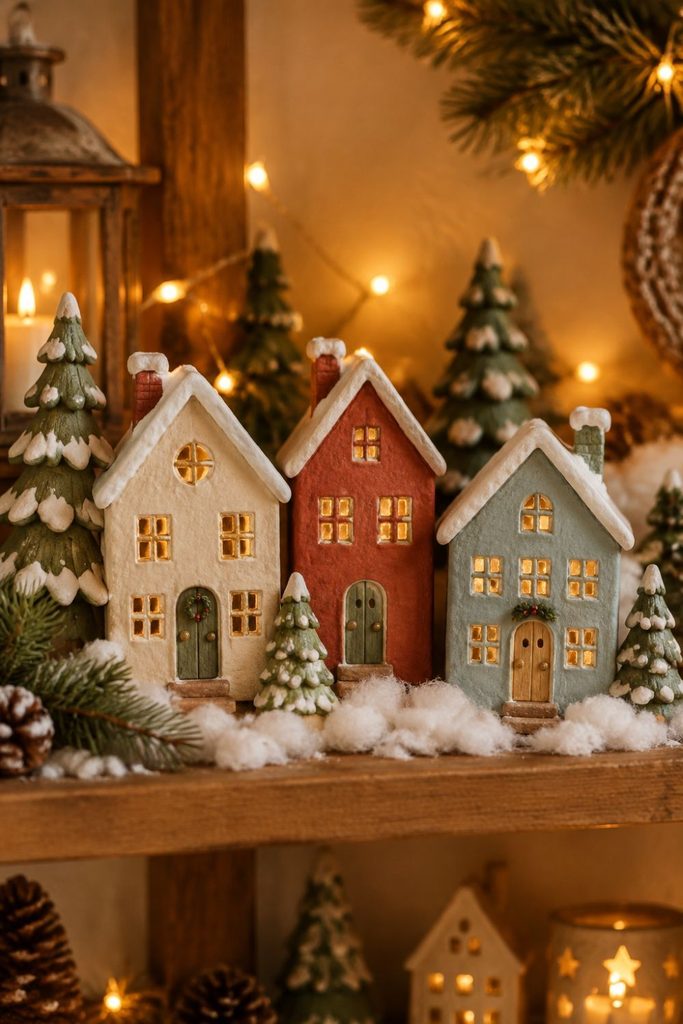
A miniature Christmas village can become a favorite part of your holiday decorations. Each little house can have a different roof, door, and window pattern, and the family can add a new building every year. Start with one simple house before making a full row.
Materials needed
- Air dry clay
- Rolling pin
- Blunt modeling tool
- Ruler
- Craft glue, if required
- Acrylic paints and small brushes
- White clay for snow details
- Paper supports for drying, if needed
Step by step method
- Roll the clay evenly and cut two rectangles for the front and back walls, two side walls, and two roof panels. Keep the pieces small enough to handle easily.
- Cut out a door and windows on the front wall while the clay is soft. Use a blunt tool to mark window frames if cutting openings feels too difficult.
- Join the walls using the method recommended for your clay. Support the house until it can stand by itself, and let it dry as instructed.
- Attach the roof panels once the walls are stable. Check that the roof edges meet neatly at the top.
- When the house is fully dry, paint the walls in warm colors such as cream, red, or pale blue. Paint the windows yellow to make them look lit from inside.
- Add white clay or white paint along the roof edges to resemble snow. A little white on the ground around the house can complete the look.
- Place the house on a stable shelf with a few other handmade decorations. Add paper trees or cotton snow nearby, keeping loose materials away from small children.
Children can name each house after a family member or make a tiny sign for the front door. Over time, the village can grow into a display filled with family memories.
15. Handmade Clay Angel Ornaments With Textured Wings

Angel ornaments are a gentle, traditional addition to a Christmas tree. Children can shape the body and decorate the wings with simple patterns, while adults help with the smaller parts. Use white, cream, silver, or gold tones for a classic look.
Materials needed
- White or cream air dry clay
- Small amount of clay for the head and halo
- Blunt modeling tool
- Clean lace or a textured leaf for the wings
- Straw for a hanging hole
- Ribbon
- Suitable paint and paintbrushes, optional
Step by step method
- Shape a cone from the main piece of clay to form the angel’s gown. Flatten the bottom slightly so it can rest securely.
- Roll a small ball for the head and attach it to the top of the cone. Smooth the join gently.
- Flatten two small pieces of clay into wing shapes. Press clean lace or a leaf lightly against them to create feather like texture.
- Attach the wings to the back of the body and press gently at the joins. Add a thin clay ring or small curved piece above the head for a halo.
- Make a hanging hole near the top if the ornament will go on the tree. Check that the hole is not too close to the edge.
- Allow the angel to dry fully according to the clay instructions. Once dry, paint the gown white and add gold details to the wings or halo.
- Tie ribbon through the hole and hang the ornament where it will not be knocked off easily.
Children can make every angel different by changing the wing texture or gown color. For younger kids, prepare the cone and head in advance and let them decorate the wings.
16. Clay Christmas Cookie Ornaments Shaped Like Stars, Bells, and Gingerbread People

Cookie shaped ornaments look just like little treats, but they can be kept from year to year. This is a fun way to use Christmas cookie cutters without turning on the oven for actual baking. Kids can add icing patterns, buttons, and tiny painted details.
Materials needed
- Air dry clay in cream, brown, red, or green
- Christmas cookie cutters
- Rolling pin
- Blunt modeling tool
- Straw for hanging holes
- Acrylic paint and small brushes
- Ribbon
- Optional small clay shapes for decoration
Step by step method
- Knead the clay until it is soft and roll it into an even sheet around ¼ inch thick.
- Press star, bell, and gingerbread person cutters into the clay. Remove the extra clay carefully so the shapes stay neat.
- Use a straw to make a hanging hole near the top of each shape. For gingerbread people, keep the hole above the head.
- Add shallow lines with a modeling tool to mark icing, buttons, or borders. Avoid making the clay too thin around the edges.
- Leave the ornaments to dry according to the manufacturer’s instructions. Turn them if recommended so both sides dry well.
- Paint the gingerbread people brown, then add white icing lines and colorful buttons. Paint stars gold or white and bells red or green.
- Thread ribbon through the holes once the ornaments are completely firm and dry.
Children can make a matching set for the kitchen or tree. Keep the finished pieces away from food, as the clay and paint are for decoration only, not eating.
17. DIY Clay Nativity Scene Figures for a Kid Friendly Christmas Display
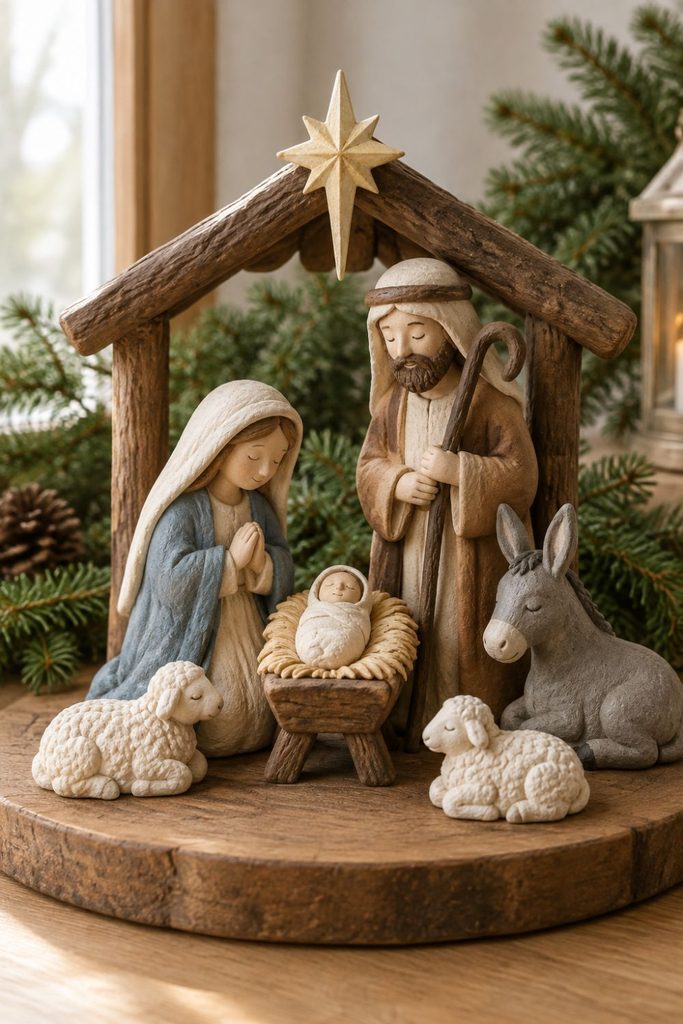
A small nativity scene can help families include a meaningful Christmas tradition in their holiday decorations. Simple figures of Mary, Joseph, baby Jesus, and the animals are easier for children to make than detailed statues. The aim is to create recognizable shapes rather than perfect faces.
Materials needed
- Air dry clay in cream, brown, blue, and other chosen colors
- Blunt modeling tool
- Small rolling pin
- Flat surface or board for display
- Suitable paints and brushes, optional
- Craft glue, if required by the clay type
Step by step method
- Shape a small oval or rounded bundle for baby Jesus and place it on a flat clay base. Add a simple blanket using a thin piece of clay.
- Make Mary and Joseph from cone shaped bodies. Add small clay heads and simple robes in blue, cream, brown, or other colors.
- Use small pieces of clay to form the animals, such as a sheep, donkey, or cow. Keep the legs short and the bodies broad so the figures can stand.
- Smooth the joins with your fingers or a modeling tool. Avoid adding very thin arms or tall narrow parts that could break during drying.
- Arrange the figures on a flat base while the clay is still workable, or allow them to dry separately if they need more support.
- Let all the pieces dry fully as directed by the clay manufacturer. Paint simple facial features and robe details once they are firm.
- Set the finished scene on a stable shelf where children can see it. If young children will handle the figures, make them larger and avoid loose small parts.
Moms can guide the shaping while children choose colors and decide where each figure belongs. It can become a family activity that encourages conversation about the Christmas story.
18. Mini Clay Presents With Sculpted Ribbons and Bows for Dollhouse Decorations

Tiny clay presents are a cheerful addition to dollhouses, miniature Christmas trees, and small holiday displays. They are made from basic cube shapes, so children can focus on choosing colors and adding ribbons. Make several in different sizes for a little pile of gifts.
Materials needed
- Air dry clay in several colors
- Rolling pin or clean work surface
- Blunt modeling tool
- Small amount of contrasting clay for ribbons and bows
- Craft glue, if required
- Suitable paint, optional
Step by step method
- Take a small piece of clay and shape it into a cube or rectangular box. Press the sides gently against a flat surface to make them even.
- Smooth the corners with your fingertips so the present looks neat. Make a few boxes in different sizes.
- Roll a thin rope of contrasting clay and lay it across the top and down the sides, as though wrapping a ribbon around the box.
- Make a bow from two small loops of clay and a tiny center piece. Attach it to the top of the present and press gently so it stays in place.
- Let the presents dry fully according to the package instructions. Support any bow loops if they are too delicate to stand on their own.
- Add small painted dots, stripes, or stars to the box. Use a different color for each present to create a festive pile.
- Arrange the finished pieces around a dollhouse tree or on a miniature shelf. They are decorations only and should not be used as toys for very young children.
Children can make a present for every family member, using favorite colors to represent each person. Because the boxes are small, an adult should supervise the use and storage of the finished pieces.
19. Clay Christmas Tree Garland Made From Stars, Hearts, and Little Bells

A handmade clay garland can decorate a mantel, a shelf, or a small tree. The shapes are simple to cut, and children can paint each piece in a matching color scheme. With careful spacing and a strong cord, the finished garland becomes a decoration to reuse each Christmas.
Materials needed
- Air dry clay
- Rolling pin
- Star, heart, and bell cookie cutters
- Straw or small round tool
- Acrylic paint and paintbrushes
- Strong ribbon or cord
- Optional small beads, used with adult supervision
Step by step method
- Roll the clay to about ¼ inch thick and cut out stars, hearts, and bell shapes. Make enough pieces to fit the length of garland you want.
- Use a straw to make two holes near the top of each shape, or one hole if you prefer to tie each piece separately. Keep the holes away from the edges.
- Smooth any rough edges and leave the shapes to dry completely according to the clay instructions.
- Paint the pieces in a simple color scheme, such as red, green, and white, or cream and gold. Allow the paint to dry before handling them again.
- Lay the cord on a table and arrange the shapes in the order you want. Alternate stars, hearts, and bells for a balanced look.
- Thread the cord through the holes, leaving a little space between each shape. Tie a small knot at either end so the pieces do not slide off.
- Hang the garland on a stable shelf or mantel, away from candles and areas where children might pull it down.
For a safer option around small children, hang the garland high and out of reach. You can also make a shorter version for a miniature tree or a holiday display on a table.
20. Keepsake Clay Ornaments Featuring Your Child’s Fingerprints and Birth Year

Fingerprint ornaments are among the most personal Christmas decorations a family can make. A small print can become a snowman, a reindeer face, or simply a reminder of your child’s age that year. Add the birth year or current Christmas year to make the ornament easier to remember later.
Materials needed
- Air dry clay or salt dough
- Rolling pin
- Round or star shaped cutter
- Drinking straw
- Blunt modeling tool
- Suitable paint and paintbrushes
- Ribbon
- Letter or number stamps, optional
Step by step method
- Roll the clay to an even thickness and cut out a circle, star, or heart. Smooth the edges gently.
- Help your child press one fingertip into the center of the shape. Press firmly enough to leave a clear mark, but not so hard that the clay becomes thin.
- If you want to turn the print into a character, add small clay ears, antlers, or a hat around it. Keep the additions light and securely attached.
- Make a hanging hole near the top with a straw. Add the year and your child’s initials with stamps or a blunt modeling tool.
- Let the ornament dry fully according to the clay package directions. Salt dough needs complete drying too, and should not be treated as edible.
- Paint the fingerprint design after the ornament is dry. A fingerprint can become a reindeer with a red nose, a snowman with a little hat, or a colorful abstract pattern.
- Thread ribbon through the hole and write your child’s name and age on the back with suitable paint or marker.
Make one each year and store them in a labeled box after Christmas. Comparing the prints as children grow can become a lovely family tradition.
21. DIY Clay Christmas Candle Holders Decorated With Snowflakes and Pine Branch Patterns
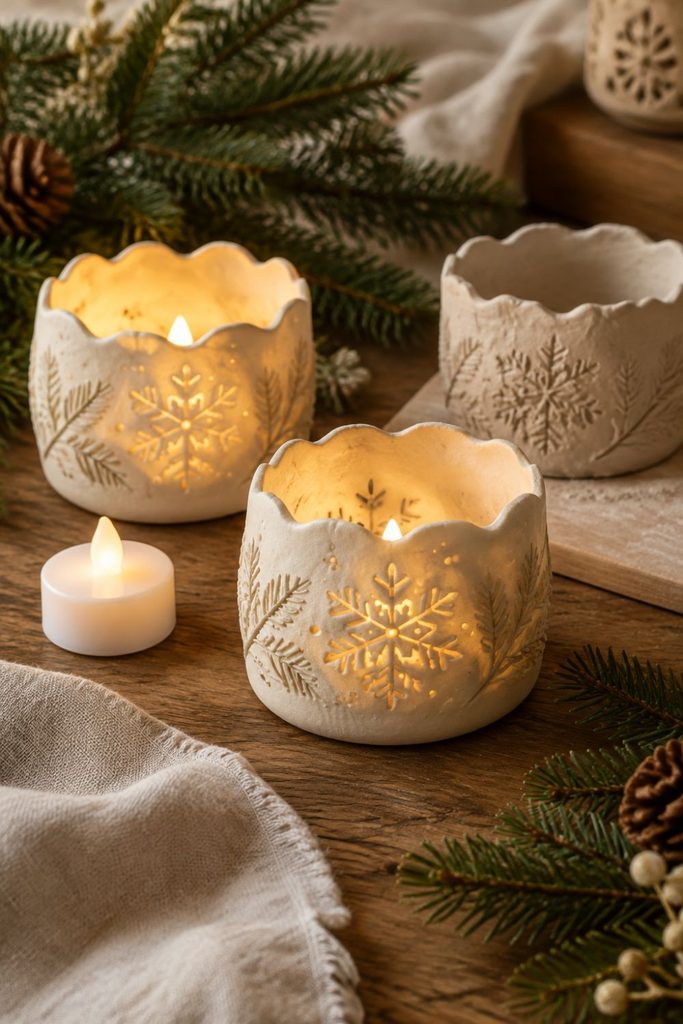
Small clay candle holders can bring a handmade touch to a Christmas table or mantel. Snowflakes, pine branches, and simple dots look pretty pressed into the surface. Since candles involve heat and flame, these holders need more care than the other projects, and the clay must be suitable for the intended use.
Materials needed
- Air dry clay for a decorative holder, or clay specifically rated by its maker for candle use
- Rolling pin
- Blunt modeling tool
- Clean pine sprig or snowflake stamp for texture
- Suitable paint, if allowed by the clay maker
- Battery operated tea light for a safer display
- Protective work surface
Step by step method
- Roll the clay into an even sheet and cut a broad circle for the base. Shape a low wall around the edge if you want a shallow dish.
- Press a snowflake stamp, clean pine sprig, or blunt tool gently into the surface to create a pattern. Keep the base thick enough to remain stable.
- If making a holder for a battery operated tea light, shape a shallow central recess that fits the light without forcing it in.
- Smooth the edges and check that the base sits flat on the table. Do not make a holder for a real flame from ordinary air dry clay unless the manufacturer explicitly rates it for that purpose.
- Allow the piece to dry completely according to the package directions. Do not rush the drying process, as damp clay may crack or warp.
- Add paint only if it is compatible with the clay and intended display. Keep paint away from any area that could contact heat unless the materials are rated for it.
- Place a battery operated tea light in the recess and display the holder on a stable surface, away from fabric, paper, and places where it could be knocked over.
For a family activity, children can decorate the outside while an adult shapes the base and checks stability. Battery operated lights give a warm holiday look without an open flame.
Tips for Making Christmas Clay Time Easier With Kids
Choose a project that suits your children’s ages and patience. Young children may enjoy pressing fingerprints, making round snowmen, or stamping patterns, while older kids can work on miniature houses and figures with more parts. It helps to prepare the clay and cover the table before everyone sits down.
Allow enough drying time before painting or attaching decorations. Thick pieces may need longer than thin ones, and different clay brands have different instructions. Keep paints, glue, beads, scissors, and small parts under adult supervision. Store unused clay as directed on the package so it stays workable for another day.
You can also make a family decorating box with ribbon, paint, stamps, and a few cutters. Reusing the same supplies for several projects keeps costs down and makes it easier to start another activity when the mood strikes.