
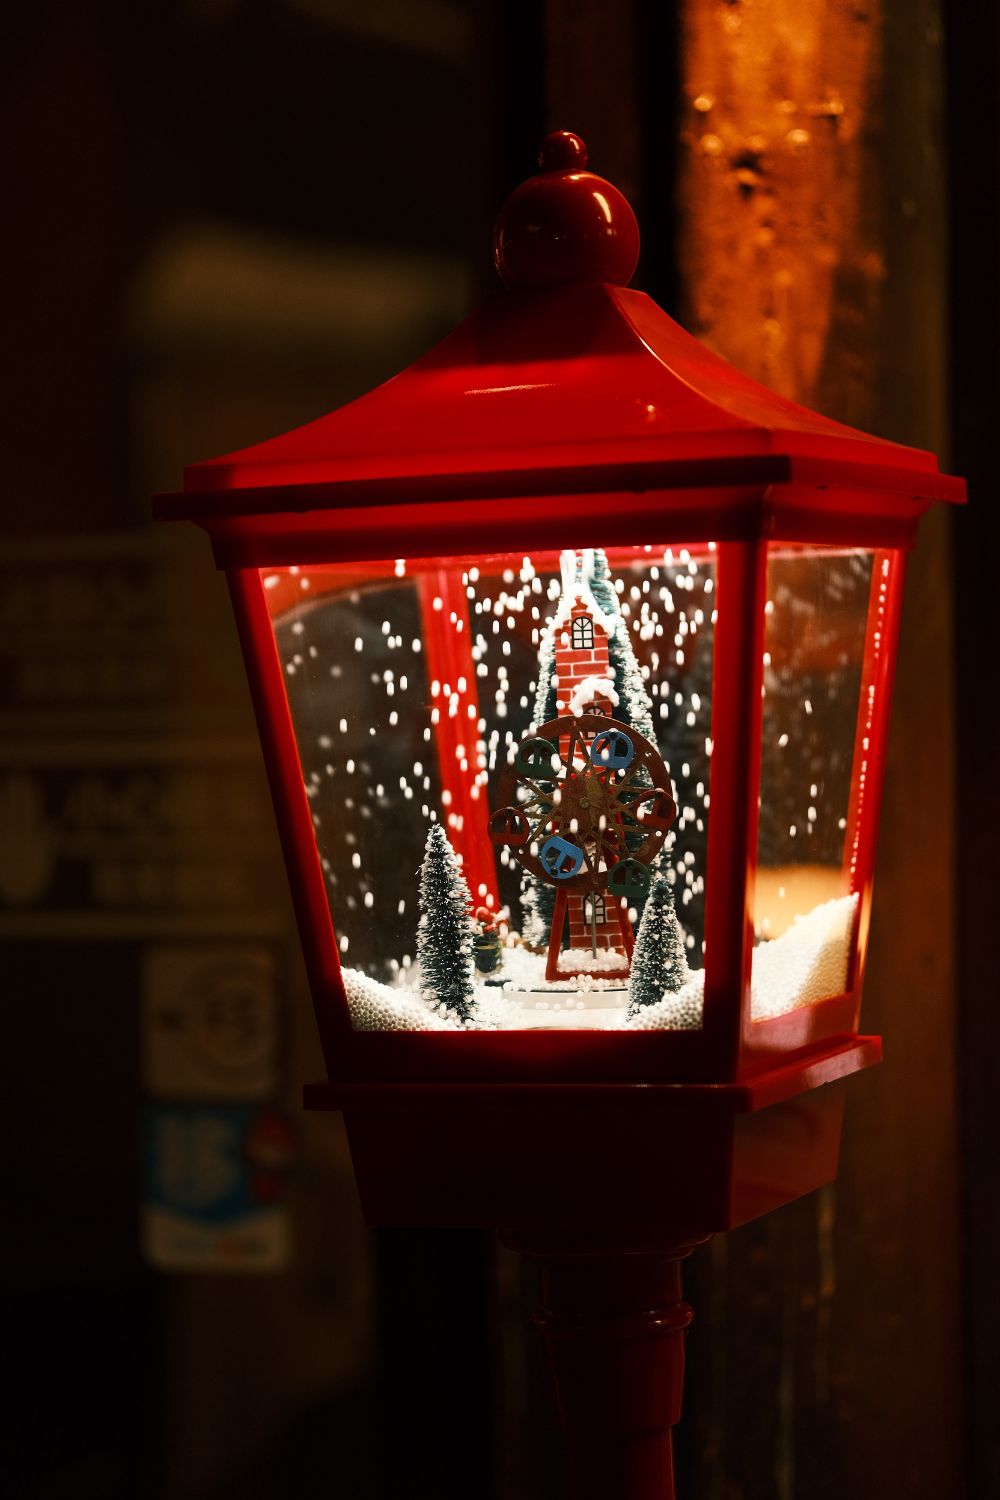
Christmas is the perfect time to make your home feel warm, cheerful, and full of holiday spirit. Twinkling lights, festive greenery, pretty ribbons, and glowing lanterns can turn even a simple corner into a cozy Christmas display. The best part? You don’t need expensive decorations to achieve a beautiful result. With a few affordable supplies and some creativity, you can make stunning Christmas lanterns at home that reflect your personal style.
DIY Christmas lanterns are lovely for decorating fireplaces, dining tables, windowsills, entryways, staircases, and front porches. You can choose traditional red and green decorations, soft white winter themes, elegant gold accents, or playful designs inspired by gingerbread houses and tiny Christmas villages. Reusing mason jars, tin cans, wine bottles, and old lanterns can also help you save money while giving forgotten household items a festive new look.
In this guide, you’ll find the materials needed for homemade Christmas lanterns, 21 detailed decorating ideas with easy instructions, and practical ways to display your finished pieces around the house. Whether you love rustic farmhouse décor or elegant holiday decorations, there is an idea here to suit your home and budget. Gather your supplies, put on your favorite Christmas music, and get ready to make decorations your family will enjoy throughout the holiday season.
What Materials and Budget Friendly Supplies Do You Need to Create Beautiful DIY Christmas Lanterns at Home?
You don’t need a large budget or a professional craft room to make beautiful Christmas lanterns. Start with items you already have, then purchase a few inexpensive supplies to complete your favorite designs. Your materials will depend on whether you are decorating glass jars, metal lanterns, wooden frames, bottles, or recycled cans.
Basic Supplies for Christmas Lanterns
Lantern bases: Mason jars, clear glass cylinders, old metal lanterns, wooden frames, empty tin cans, glass globes, and clean wine bottles can all serve as starting points.
Lighting: Battery operated LED tea lights, warm white fairy lights, small LED candles, and battery powered string lights create a lovely glow. Choose lights that fit inside your container and follow the manufacturer’s instructions.
Christmas greenery: Artificial pine branches, cedar sprigs, eucalyptus leaves, faux holly, moss, and small wreath pieces add a festive touch. Artificial greenery is convenient because it can be stored and reused next year.
Decorative accessories: Miniature Christmas trees, tiny houses, small deer figurines, toy trucks, gold bells, miniature gifts, wooden stars, snowflake ornaments, and Christmas baubles help give every lantern its own look.
Finishing materials: Ribbon, jute twine, burlap, lace, cotton stems, faux snow, Epsom salt, acrylic paint, craft glue, clear adhesive, and decorative beads are useful for many projects.
Budget Friendly Tools to Keep Nearby
A pair of scissors, a ruler, a pencil, a paintbrush, craft glue, wire cutters for suitable decorative wire, and a small glue gun can handle most projects. Use a hole punch for paper designs and a paint pen for small details. If you use hot glue, work carefully and keep it away from children.
You can save money by collecting jars, boxes, ribbon scraps, pinecones, and leftover wrapping paper before buying new supplies. Discount stores and seasonal clearance shelves are useful places to find ornaments and artificial greenery. Choose a few colors that work together, such as red and white, gold and ivory, or blue and silver. This makes it easier to decorate several lanterns without purchasing a different set of supplies for every project.
Safety Supplies and Preparation
Use battery operated lights near paper, dried fruit, artificial snow, fabric, and greenery. Never place a real flame beside flammable decorations or leave a burning candle unattended. For outdoor displays, use lights and decorations rated for the conditions they will face. Wash and dry jars and bottles before decorating, and protect your work surface with old newspaper or a washable mat.
Before starting, sort your supplies into small groups according to each design. This saves time, reduces waste, and makes your decorating session more enjoyable. You can also prepare a small box for leftover decorations to use in future Christmas projects.
How Can You Make 21 Different Christmas Lanterns Decorated DIY Using Easy, Step by Step Instructions and Creative Decorating Techniques?
Each idea below has its own style, from snowy mason jars to elegant pearl lanterns and colorful gingerbread designs. Choose a project that suits your available materials and the room you want to decorate. Most can be made with affordable supplies, and you can adjust the colors or accessories to match your Christmas décor.
1. Epsom Salt Mason Jar Christmas Lanterns with Tiny Red Cardinal Ornaments and Snowy Pine Sprigs
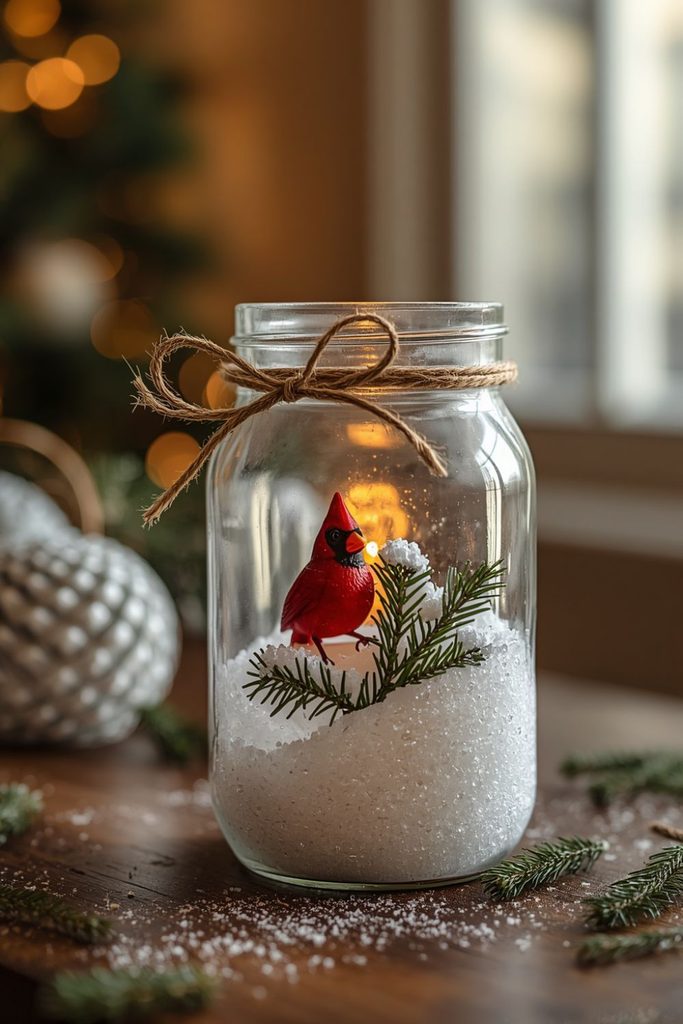
Materials: A clean mason jar, white craft glue, Epsom salt, a small artificial red cardinal, faux pine sprigs, ribbon, and an LED tea light.
Steps: Apply a thin coat of glue to the outside of the jar, leaving a small clear section if you want the light to shine through. Roll the jar gently in Epsom salt until it has a snowy finish. Allow it to dry completely, then attach a tiny red cardinal and a few pine sprigs near the rim with craft glue. Tie a simple ribbon around the neck and place an LED tea light inside.
The white texture and red bird give this lantern a cheerful winter look. Arrange two or three jars of different sizes on a mantel or windowsill for a coordinated display.
- Related post Christmas Cards Handmade: Elegant and Affordable Designs for a Beautiful Holiday Season
2. Vintage Black Metal Christmas Lanterns with Burgundy Velvet Bows, Red Winterberries, and Cascading Cedar Branches
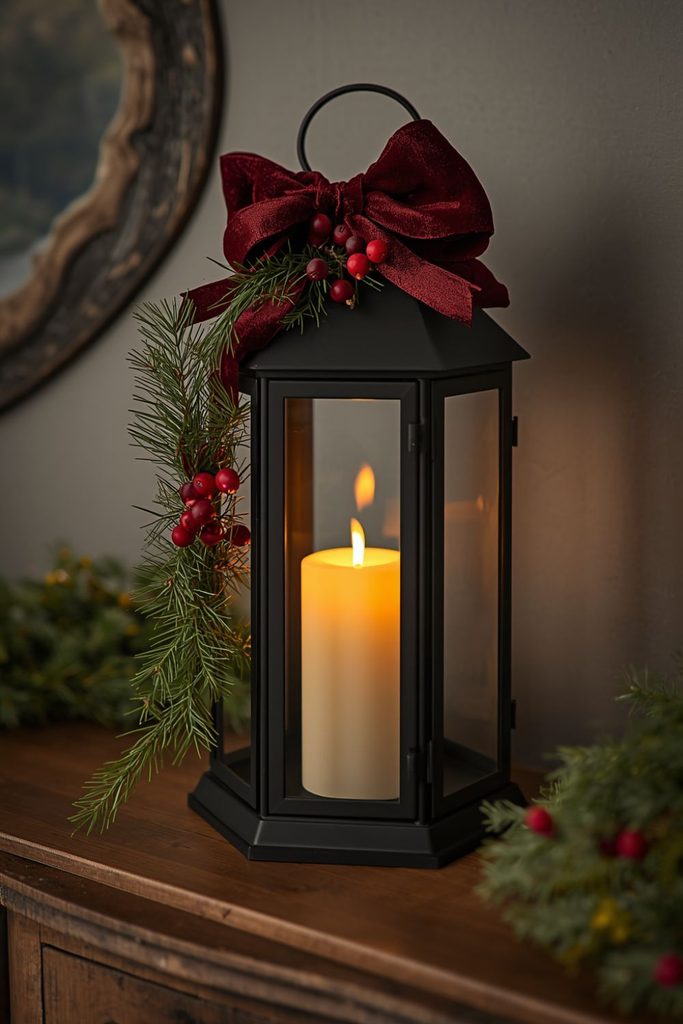
Materials: An old black metal lantern, burgundy velvet ribbon, artificial winterberries, cedar garland, floral wire, and an LED candle.
Steps: Clean the lantern and dry it thoroughly. Place an LED candle inside, then attach a large burgundy bow to the top or handle using floral wire. Tuck winterberry stems behind the bow and arrange cedar branches so they cascade down one side. Adjust the greenery to leave the lantern’s glass panels visible.
The dark metal and rich red accents create a classic Christmas look that works well in traditional living rooms. Use the lantern as a standalone decoration beside a fireplace or on a console table.
3. Miniature Christmas Village Lanterns with Light Up Putz Houses, Bottlebrush Trees, and a Snowy Cobblestone Path
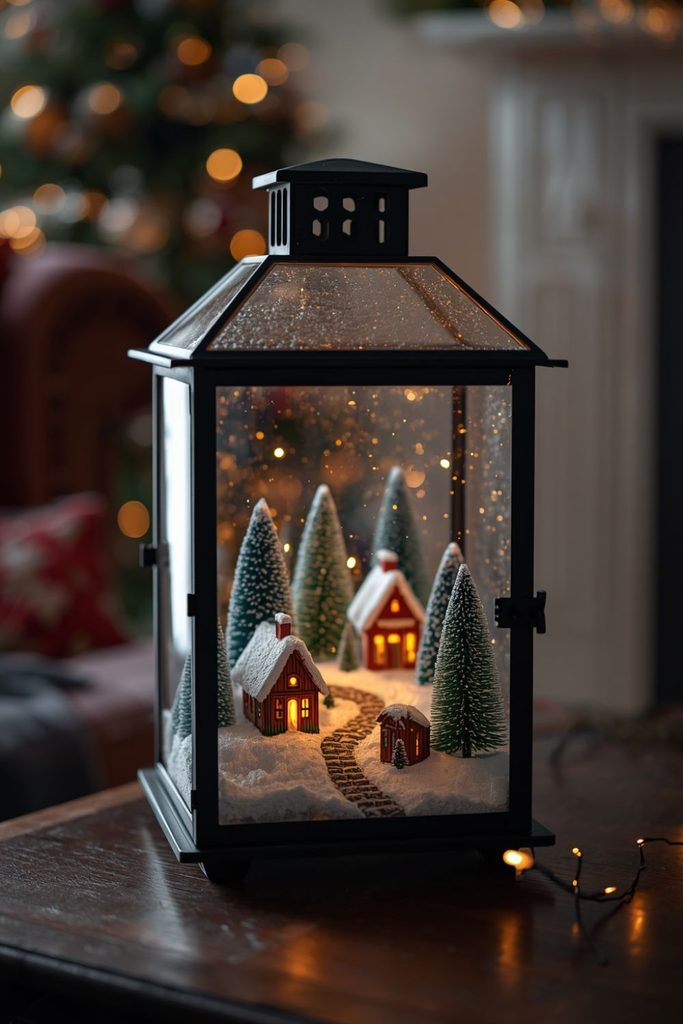
Materials: A large lantern with removable glass panels, miniature cardboard or resin houses, bottlebrush trees, faux snow, small pebbles, and battery powered fairy lights.
Steps: Create a base inside the lantern using a piece of sturdy cardboard or foam board cut to size. Cover it with faux snow and arrange the tiny houses along the back. Add bottlebrush trees on either side, then form a narrow path using small pebbles. Place fairy lights behind the houses to illuminate the scene without hiding the details.
Choose houses in matching colors for a tidy little village. This design looks lovely on a side table, where guests can see the tiny windows, snowy path, and glowing trees.
4. Cinnamon Stick Wrapped Christmas Lanterns with Burlap Handles, Star Anise, and Hanging Wooden Stars
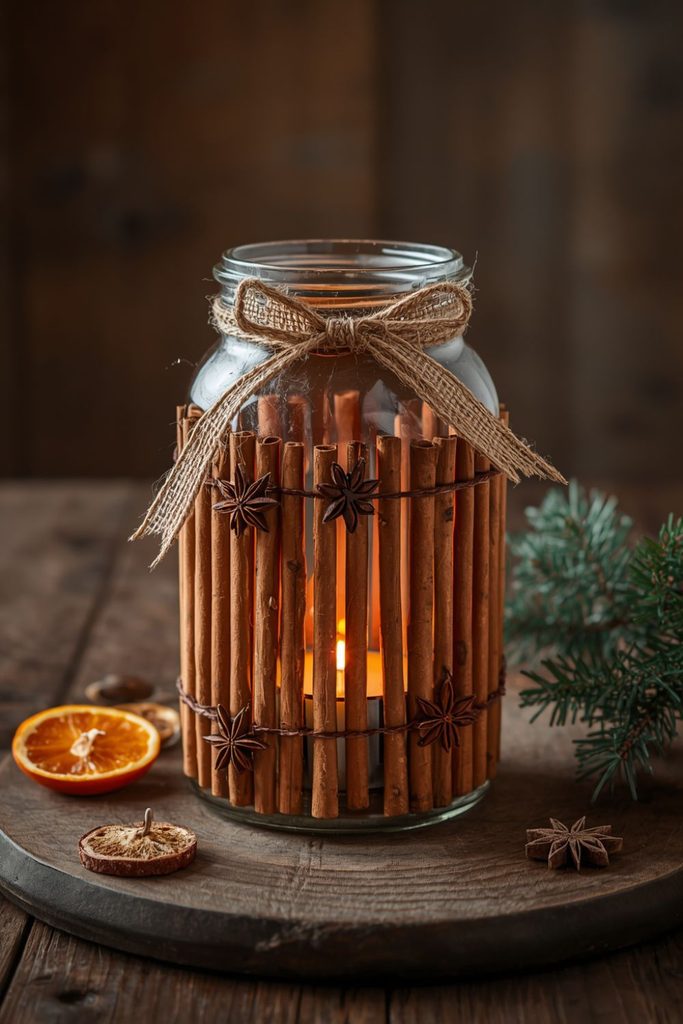
Materials: A glass cylinder or sturdy jar, cinnamon sticks, jute twine, burlap ribbon, star anise, small wooden stars, and an LED candle.
Steps: Arrange cinnamon sticks vertically around the outside of the jar and secure them with twine. Add a burlap bow near the top, then attach a small wooden star with another length of twine. Glue a few star anise pieces onto the bow for extra detail. Place an LED candle inside and check that the decorations do not block the light.
The warm brown shades give this lantern a natural farmhouse appearance. Use artificial cinnamon scented décor if you want the look without relying on the scent of real spices. Keep all dried materials away from open flames.
5. Champagne Gold Christmas Lanterns with Metallic Baubles, Ivory Roses, and Elegant Eucalyptus Garlands
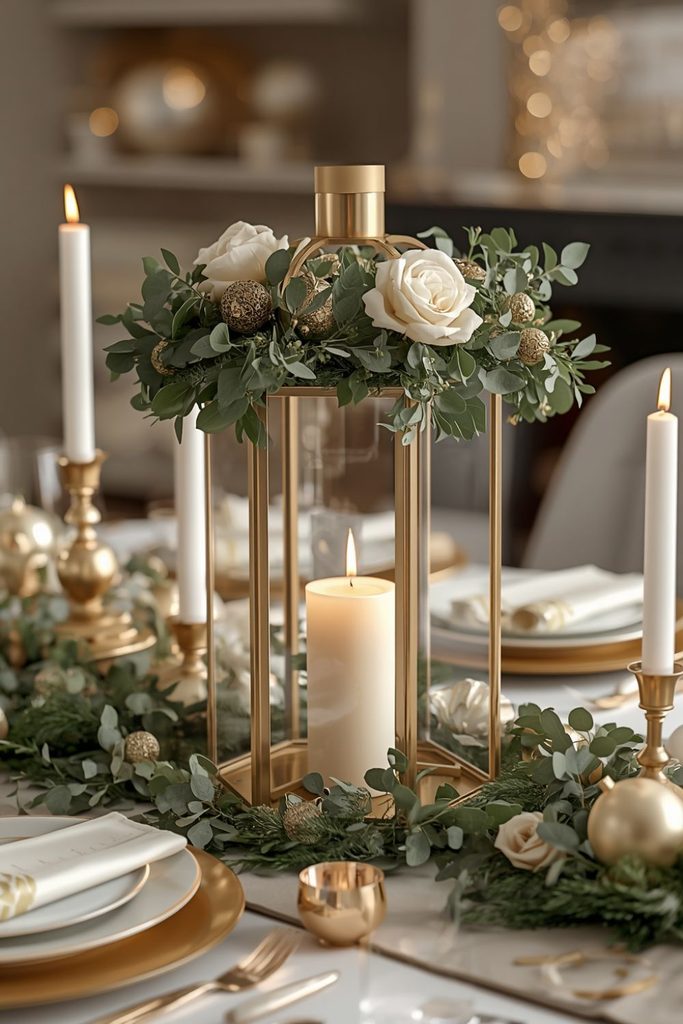
Materials: A gold or neutral lantern, champagne colored baubles, artificial ivory roses, faux eucalyptus, gold ribbon, floral wire, and a warm LED candle.
Steps: Put the LED candle inside the lantern first. Attach a short eucalyptus garland around the top, using floral wire to hold it in place. Add two or three ivory roses and arrange the metallic baubles between the leaves. Finish with a narrow gold ribbon bow, keeping the lantern’s main opening clear.
This design is ideal for a formal dining room or an elegant holiday table. Combine it with ivory napkins, gold place settings, and a simple evergreen runner for a coordinated Christmas display.
6. Gingerbread Cottage Christmas Lanterns with Cookie Shaped Cardboard Houses, Faux Icing Details, and Candy Colored Lights
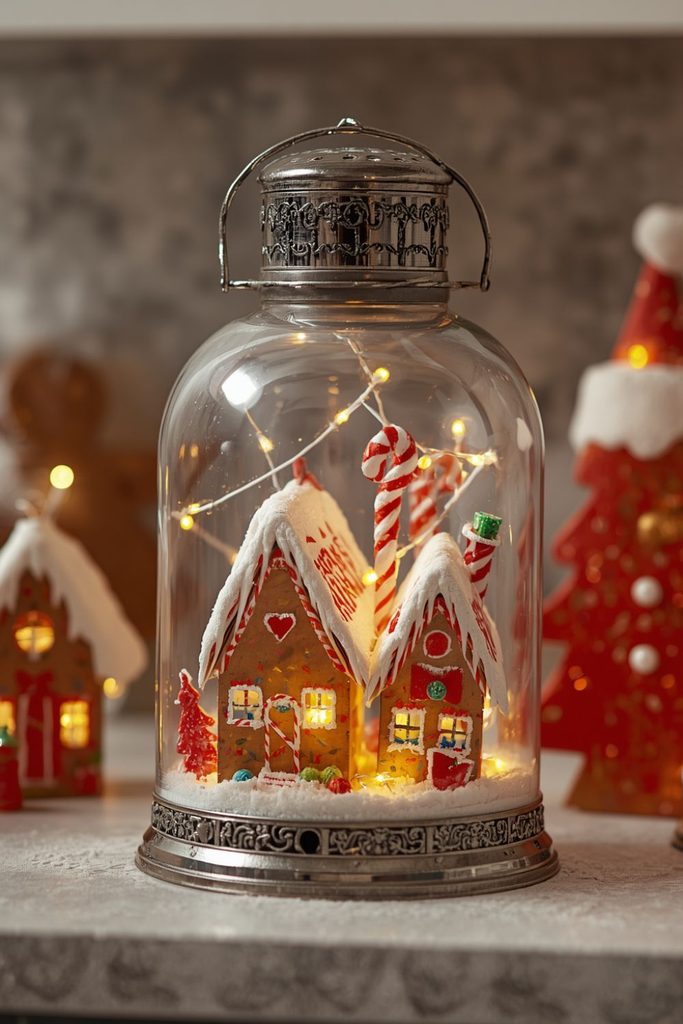
Materials: A lantern, brown cardstock, white paint pens, small cardboard houses, colorful battery powered fairy lights, paper candy shapes, and glue.
Steps: Cut or assemble small cottage shapes from brown cardstock. Draw windows, doors, roof tiles, and icing patterns with a white paint pen. Add paper candy canes and gumdrop shapes to the cottage walls, then let all painted pieces dry. Arrange the cottages inside the lantern with colorful lights behind them.
This playful design looks like a tiny gingerbread village without needing real cookies or food. It is a fun project to make with older children under adult supervision. Use paper decorations rather than edible sweets to keep the display tidy.
7. Scandinavian Wooden Star Lanterns with White Paper Panels, Natural Beads, and Minimalist Evergreen Sprigs

Materials: A wooden lantern frame, white translucent paper, wooden star cutouts, natural wooden beads, evergreen sprigs, and an LED candle.
Steps: Cut translucent paper panels to fit the inside of the lantern and secure them with suitable adhesive. Attach wooden stars to the outer frame, then thread natural beads onto twine to create a simple hanging decoration. Add one small evergreen sprig near the handle and place an LED candle inside.
Keep the design uncluttered by using only a few ornaments. The pale colors and natural textures work well with neutral furniture, light wood, and simple holiday decorations.
8. Vintage Red Pickup Truck Christmas Lanterns with a Miniature Snowy Truck Bed, Wrapped Gifts, and Tiny Bottlebrush Trees
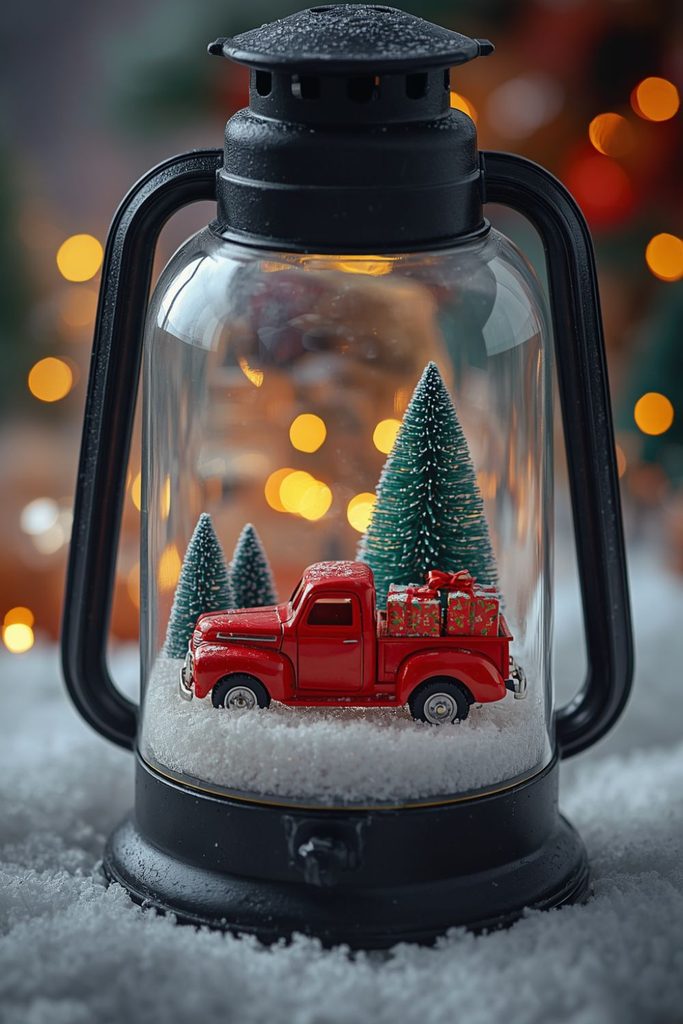
Materials: A large lantern, a miniature red pickup truck, faux snow, tiny wrapped gifts, bottlebrush trees, and warm fairy lights.
Steps: Spread a thin layer of faux snow over the lantern’s base. Position the truck so its front faces the glass, then fill the truck bed with tiny gifts and a small tree. Place two more bottlebrush trees beside the vehicle and arrange fairy lights at the back. Secure the pieces with removable adhesive if you want to change the scene later.
The bright red truck becomes the main feature, making this lantern perfect for a family room or shelf. Choose a truck that fits through the lantern opening before buying your decorations.
9. Hanging Glass Globe Christmas Lanterns with Suspended Miniature Gold Bells, Pearl Beads, and Warm Fairy Lights
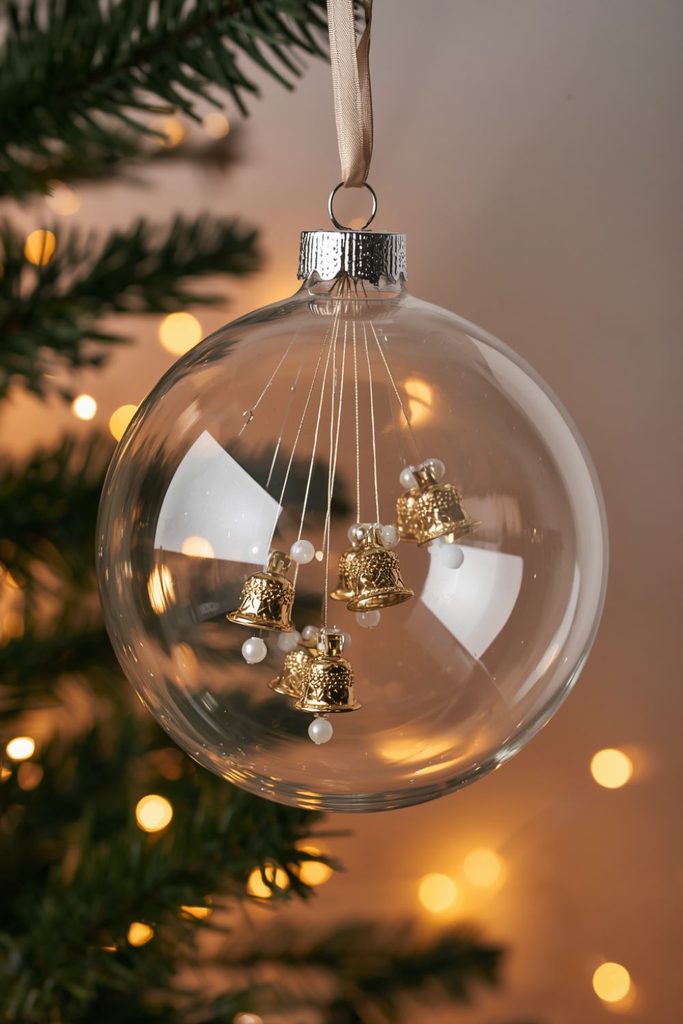
Materials: A glass globe with a secure hanging fixture, fine decorative thread, lightweight gold bells, pearl beads, battery powered micro fairy lights, and ribbon.
Steps: Attach small bells and pearl beads to short lengths of decorative thread. Suspend them at different heights inside the globe, making sure they do not crowd the center. Add micro fairy lights around the inner edge and close the globe securely. Tie a ribbon around the hanging fixture if desired.
Hang the globe only from a support rated for its weight, away from doorways and busy walking areas. Its delicate golden details work well near a window or in a quiet corner where the light can shine through the glass.
10. Recycled Tin Can Christmas Lanterns with Intricate Punched Snowflake Patterns and Flickering LED Tea Lights
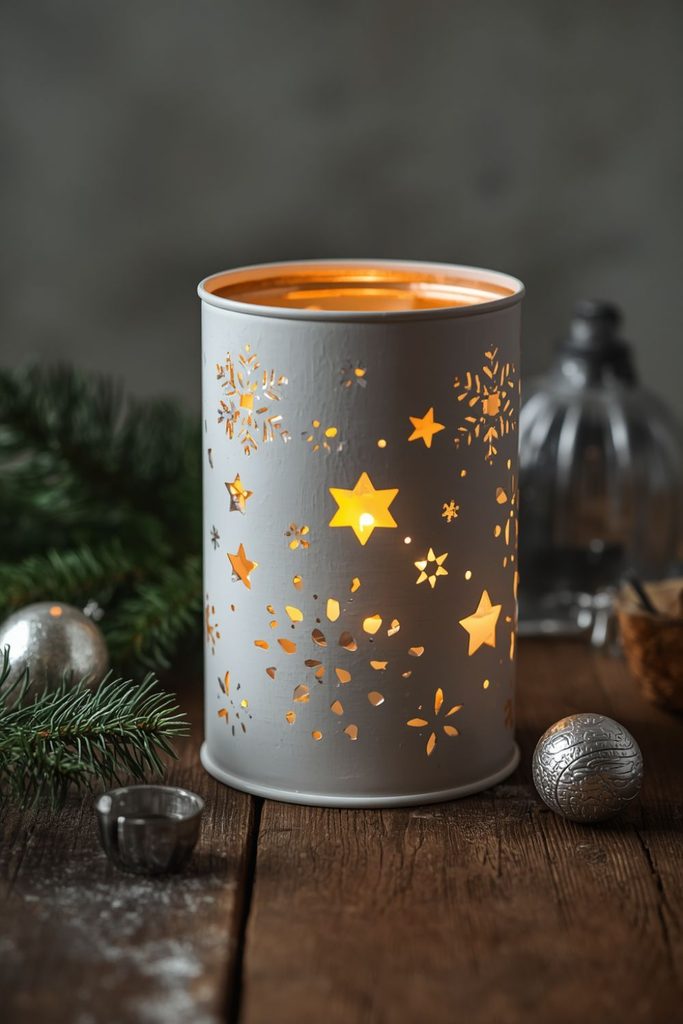
Materials: A clean, empty tin can, a marker, a nail or suitable metal punch, a hammer, paint, and an LED tea light.
Steps: Remove the label and wash the can. Draw snowflake shapes on the outside, then have an adult carefully punch holes along the marked lines using appropriate tools and a stable work surface. Sand or cover sharp edges, paint the can in white, silver, or deep blue, and allow it to dry. Place an LED tea light inside to shine through the holes.
For easier shaping, some makers partially fill the can with water and freeze it before punching the pattern. Handle the frozen can carefully and never hold it in your hand while hammering. This project is best for adults because cut metal can be sharp.
11. Enchanted Woodland Christmas Lanterns with Miniature Mushrooms, Faux Moss, Tiny Toadstools, and Forest Animals
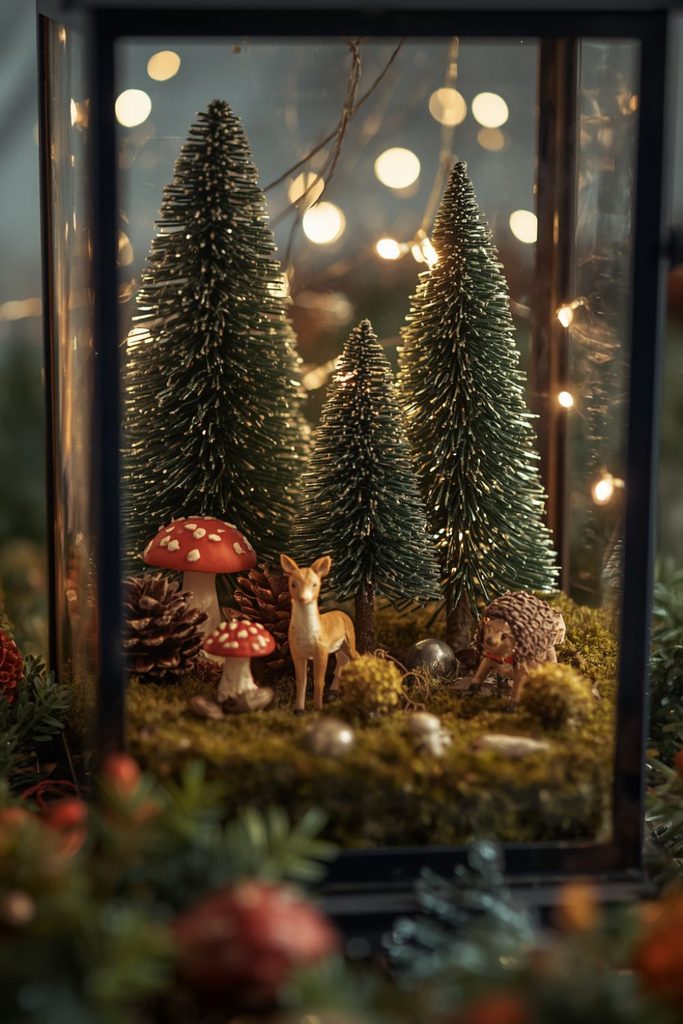
Materials: A large lantern, faux moss, miniature mushrooms, tiny deer or hedgehog figurines, small pinecones, miniature trees, and battery powered fairy lights.
Steps: Cover the base with a thin layer of faux moss. Arrange a few miniature trees at the back, then place the forest animals near the front. Add mushrooms and pinecones around the scene, leaving enough open space for every figure to remain visible. Place fairy lights behind the trees for a soft woodland glow.
Choose earthy shades of green, brown, cream, and muted red. This lantern looks especially pretty on a bookshelf or side table surrounded by natural wood accessories.
12. Arctic Blue Christmas Lanterns with Iridescent Glass Gems, Silver Icicles, and Translucent Snowflake Embellishments
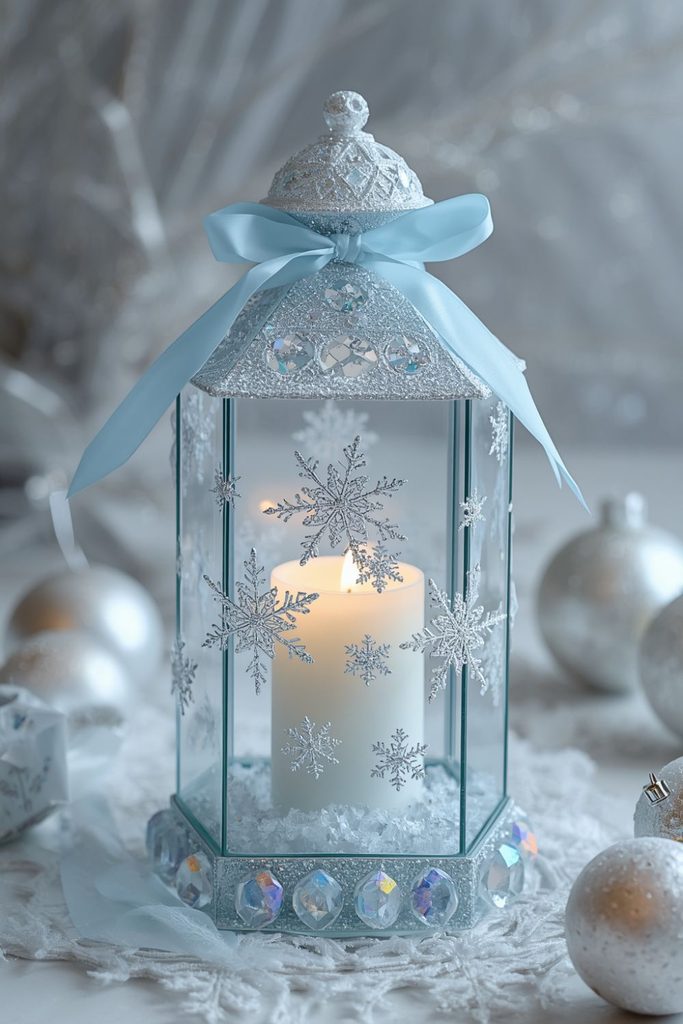
Materials: A clear lantern, blue ribbon, iridescent decorative gems, silver icicle ornaments, translucent snowflake stickers, and a cool white LED candle.
Steps: Attach snowflake stickers to the glass panels, leaving plenty of clear space between them. Arrange iridescent gems around the base and hang a few lightweight silver icicles from the upper frame. Tie a blue ribbon around the handle and place a cool white LED candle inside.
Keep the accessories light so the glass remains the main feature. This icy design pairs beautifully with silver ornaments, white table linens, and blue winter decorations.
13. Floating Cranberry and Rosemary Christmas Lantern Centerpieces with Clear Glass Cylinders and Waterproof LED Lights
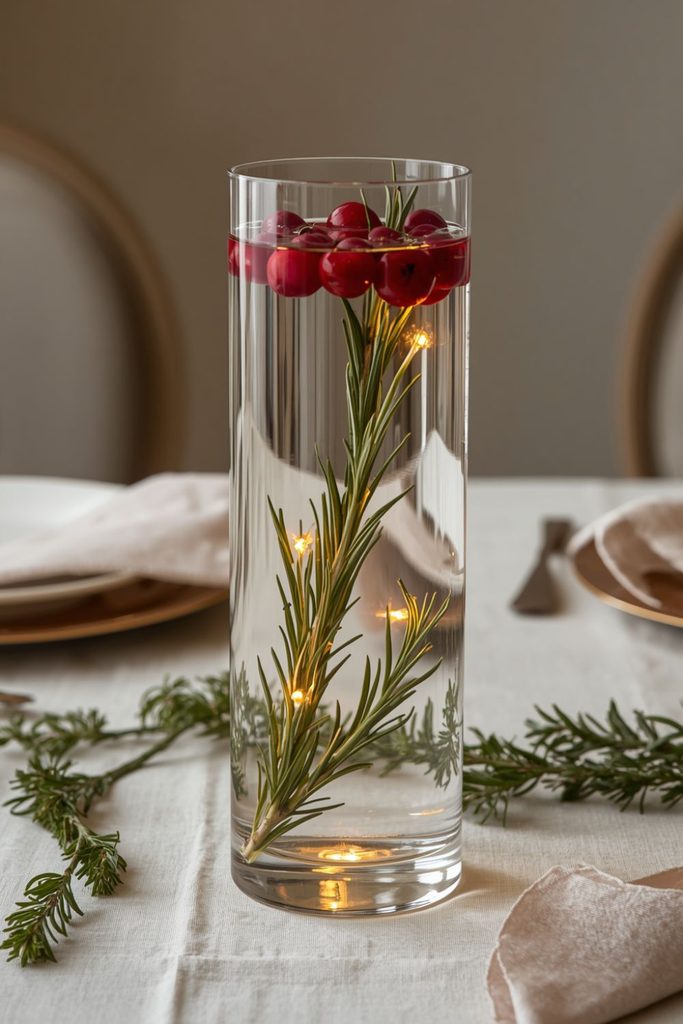
Materials: A clear glass cylinder, fresh cranberries, rosemary sprigs, clean water, and waterproof LED lights designed for submersion.
Steps: Wash the cranberries and rosemary, then place them inside the glass cylinder. Add clean water, leaving enough space at the top to prevent spills. Arrange the rosemary around the sides and distribute the cranberries throughout the container. Add waterproof LED lights according to their instructions.
Use this as a dining table centerpiece and prepare it shortly before guests arrive. Do not put ordinary fairy lights or non waterproof candles in water. Keep the container on a stable, water resistant surface, away from electrical outlets.
14. Frosted Farmhouse Windowpane Lanterns with Cotton Stems, White Berry Garlands, and Distressed White Paint
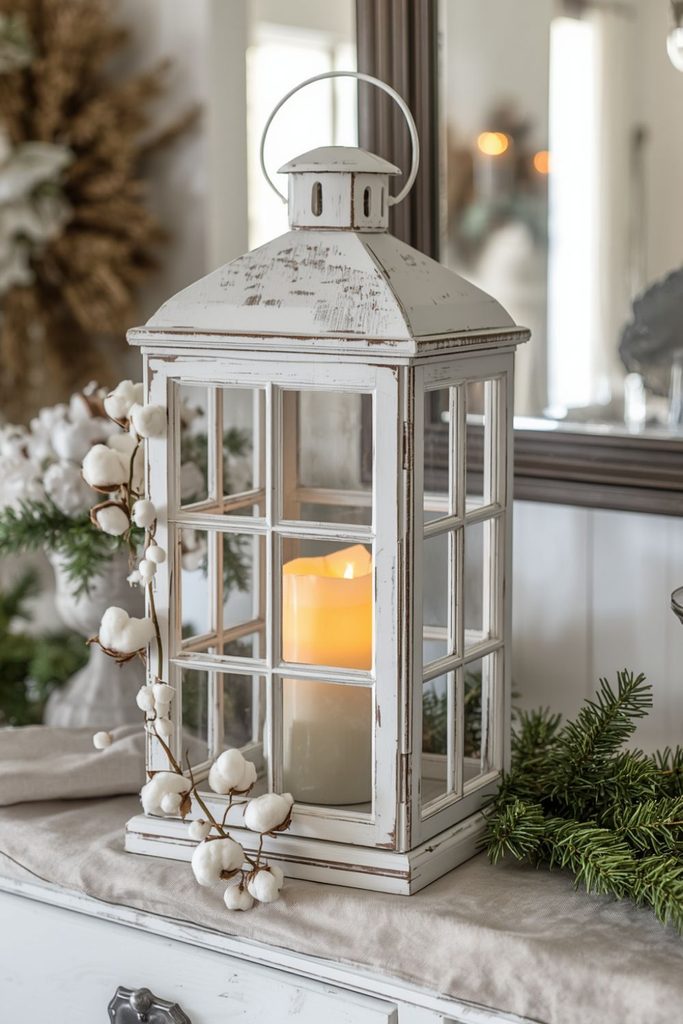
Materials: An old windowpane style lantern, white acrylic paint, a brush, cotton stems, artificial white berry garlands, and an LED candle.
Steps: Clean the lantern and apply a light coat of white paint to the frame. For a distressed finish, gently rub selected edges with fine sandpaper after the paint has dried. Attach cotton stems and white berry garlands to one side of the frame, then place an LED candle inside.
Avoid painting moving hinges or areas that must remain clear for safe opening. The soft white finish creates a farmhouse look that works beautifully on a mantel, entryway table, or open shelf.
15. Nutcracker Soldier Christmas Lanterns with Miniature Toy Guards, Black and Gold Details, and Royal Blue Velvet Ribbon
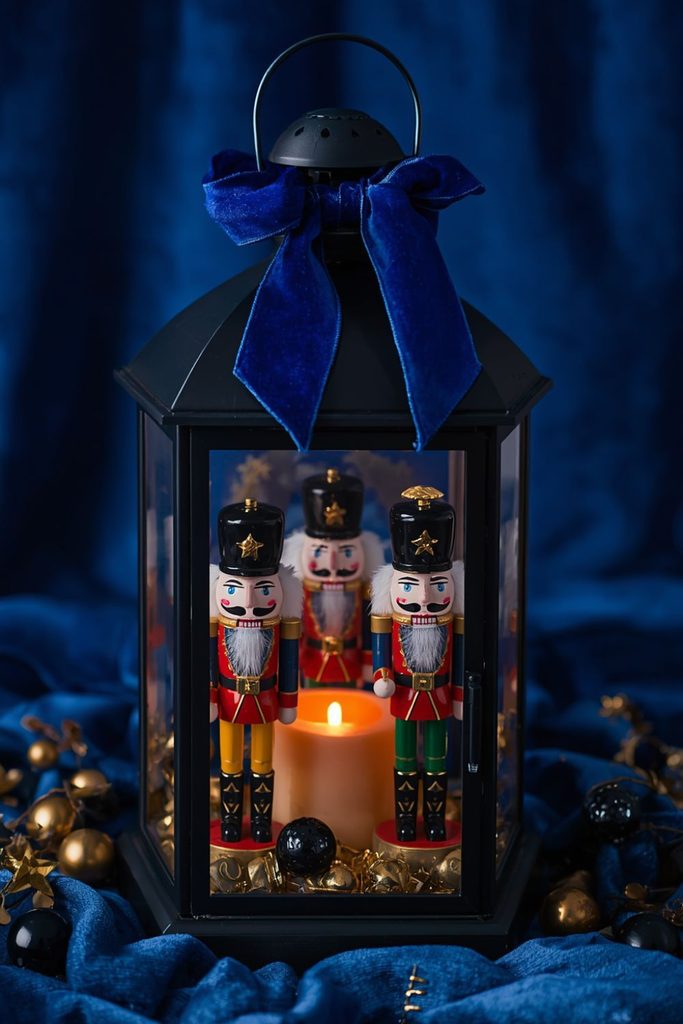
Materials: A lantern, miniature nutcracker figures, black and gold ornaments, royal blue velvet ribbon, a small gold star, and a warm LED candle.
Steps: Place the candle inside the lantern and arrange the nutcracker figures on the base. Add a few small gold ornaments around their feet, keeping their faces and uniforms visible. Tie royal blue velvet ribbon around the handle and attach a small gold star near the bow.
Use two or three figures at most so the lantern does not become overcrowded. This regal theme works well on a console table or near a Christmas tree decorated with blue and gold ornaments.
16. Peppermint Swirl Christmas Lanterns with Red and White Spiral Patterns, Striped Ribbon Handles, and Candy Shaped Ornaments
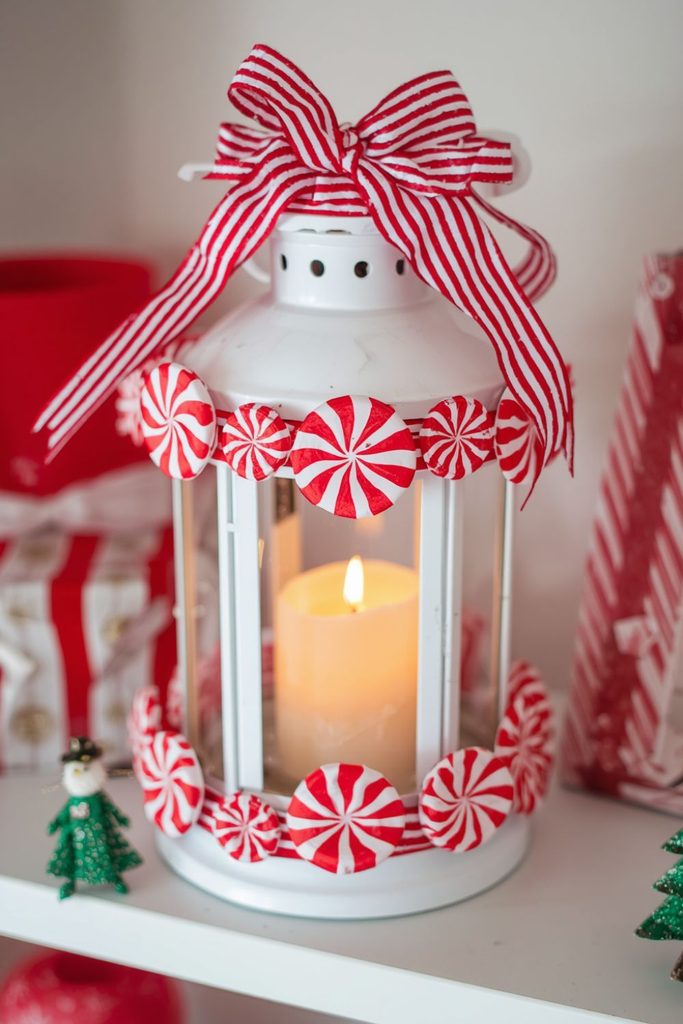
Materials: A white or clear lantern, red and white ribbon, paper peppermint shapes, candy cane ornaments, removable adhesive, and an LED candle.
Steps: Wrap red and white ribbon around the lantern handle in a spiral pattern. Attach paper peppermint circles to the outer frame or glass using removable adhesive, leaving open areas for the light. Add small candy cane ornaments to the top and place a white LED candle inside.
Choose paper or lightweight plastic decorations rather than real candy, which may attract insects. The bold stripes look cheerful in a playroom, kitchen, or family gathering area.
17. Upcycled Wine Bottle Christmas Lanterns with Illuminated Evergreen Silhouettes and Cutout Star Patterns
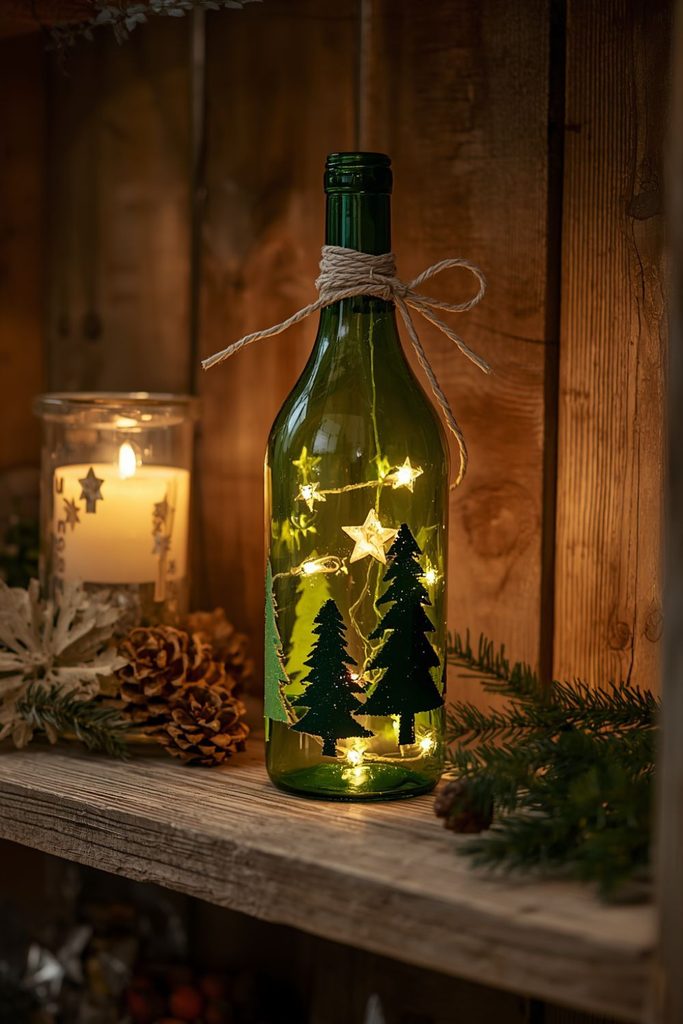
Materials: A clean wine bottle, evergreen silhouette stickers or paper templates, suitable glass paint, battery powered bottle lights, and ribbon.
Steps: Remove the label, wash the bottle, and dry it fully. Apply evergreen silhouette stickers or paint simple tree shapes on the glass. Add small star motifs around the design, then allow the paint to dry according to the manufacturer’s directions. Insert a purpose made battery powered bottle light and decorate the neck with ribbon.
Use an intact bottle rather than cutting the glass, since cutting creates sharp edges and requires specialist tools. Stand the finished bottle on a stable shelf, away from the edge.
18. Dried Orange Slice Christmas Lanterns with Pressed Botanical Details, Brass Bells, and Natural Jute Hangers
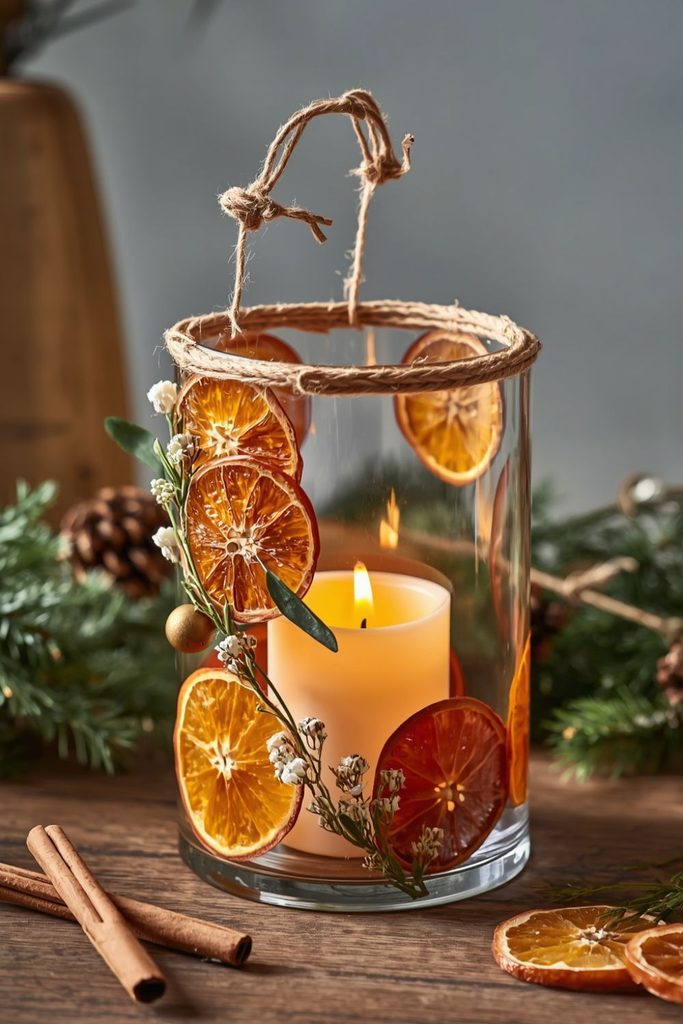
Materials: A glass lantern, dried orange slices, pressed artificial botanical decorations, small brass bells, jute twine, and an LED candle.
Steps: Tie dried orange slices to short lengths of jute twine and attach them to the outer frame. Add a few lightweight botanical decorations and small brass bells. Keep the glass panels clear enough for the light to pass through, then place an LED candle inside.
The orange slices create a warm, natural color that pairs well with pine branches and wooden ornaments. Use fully dried fruit, and replace any pieces that show moisture or mold. Keep all dried materials away from open flames.
19. Romantic Pearl and Lace Christmas Lanterns with Ivory Lace Overlays, Champagne Satin Bows, and Warm Candlelight
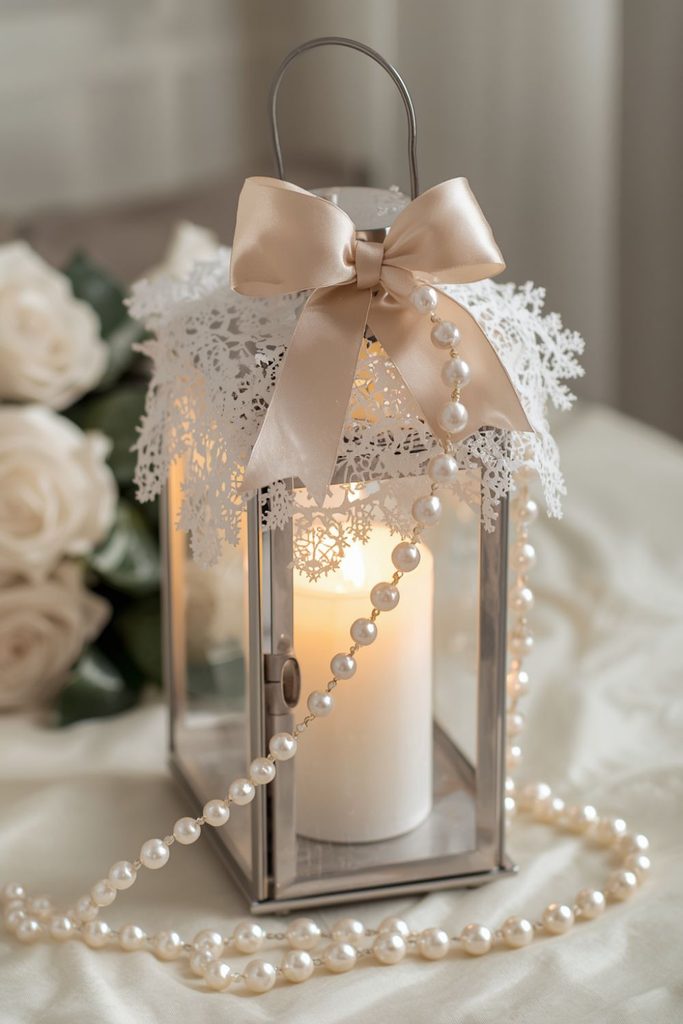
Materials: A lantern, ivory lace, pearl beads, champagne satin ribbon, removable adhesive, and a warm LED candle.
Steps: Measure the lace against the lantern’s panels and trim it to fit. Attach small pieces of lace to the outer frame or glass edges, keeping the center clear. Add pearl strands around the handle and tie a champagne satin bow at the top. Finish with a warm LED candle for a soft glow.
This elegant design suits a bedroom, dining table, or romantic Christmas display. Keep lace, ribbon, and pearls away from any real flame, and use an LED light for a safer arrangement.
20. Nativity Scene Christmas Lanterns with Handmade Clay Figurines, Straw Bedding, and a Rustic Bethlehem Star
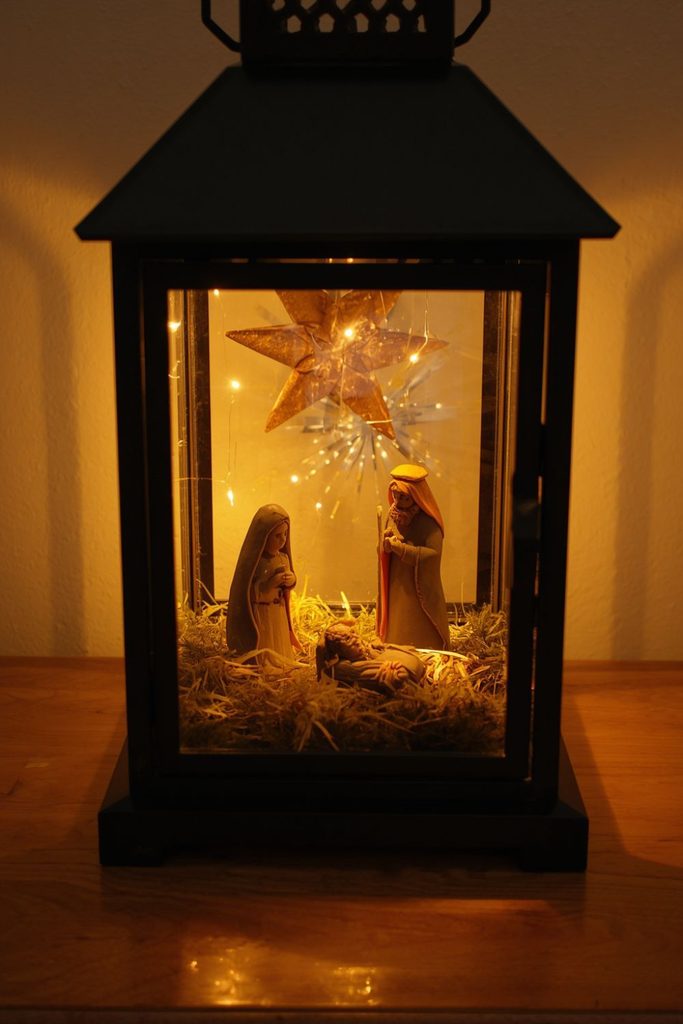
Materials: A large lantern, small clay Nativity figures, clean decorative straw or paper raffia, a wooden or cardboard star, faux moss, and a warm LED light.
Steps: Arrange a thin layer of straw or paper raffia on the base. Position the Nativity figures in the center and add a little faux moss around the edges. Attach the Bethlehem star near the top of the scene, ensuring it remains visible through the glass. Place a warm LED light behind the figures.
Keep the layout simple so the figures remain the focus. This meaningful display is well suited to a mantel, sideboard, or family prayer corner during Christmas.
21. Snow Dusted Outdoor Porch Lanterns with Oversized Plaid Bows, Frost Resistant Greenery, and Weather Resistant LED Candles
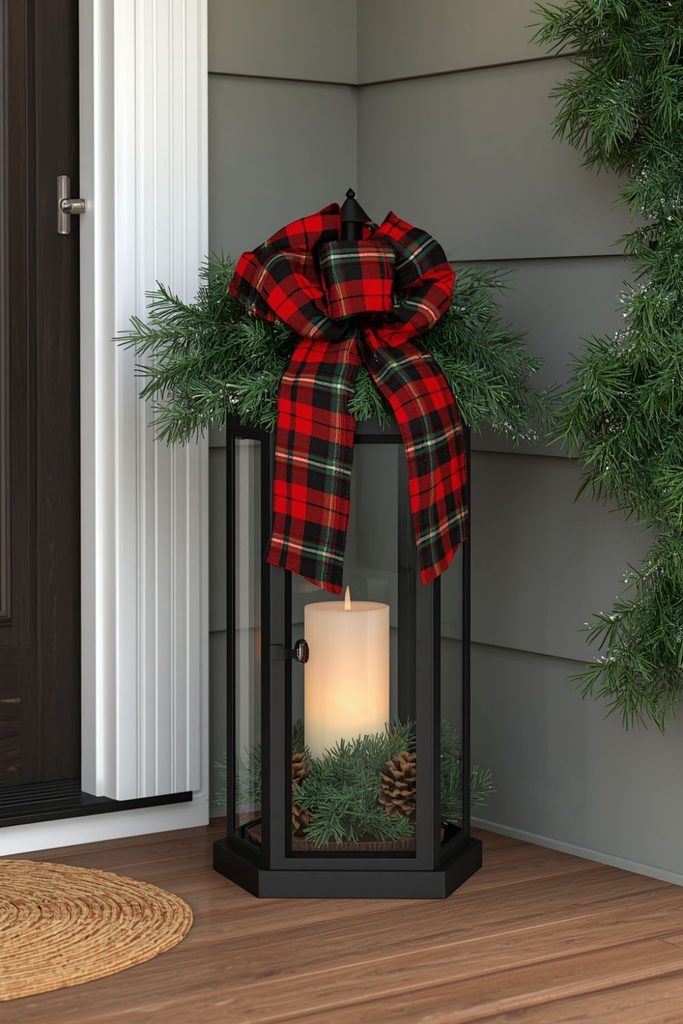
Materials: A sturdy outdoor lantern, a large plaid bow, artificial outdoor rated greenery, pinecones, suitable faux snow, and weather resistant LED candles.
Steps: Check that the lantern is suitable for outdoor use. Place the LED candle inside and attach the plaid bow to the handle. Arrange the greenery around the top and sides, then tuck in a few pinecones. Add faux snow only if it is rated for the intended use and will not damage the finish.
Set the lantern on a stable, sheltered porch surface. Secure lightweight decorations against wind, and bring the lantern indoors during severe weather unless it is rated to remain outside.
How Can You Arrange and Display DIY Christmas Lanterns in Different Areas of Your Home to Create a Magical, Festive Atmosphere?
After making your lanterns, choose display spots where their colors and lighting complement your existing decorations. A little planning helps each piece stand out without making the room feel crowded.
Style Your Living Room and Fireplace
Arrange three lanterns of different heights on the mantel, or place one large lantern beside the fireplace. Pair them with evergreen garlands, stockings, and a few ornaments. Keep decorations away from heat sources.
Create a Welcoming Entryway
Place a lantern on a console table with a small wreath and a bowl of seasonal ornaments. For a covered porch, use weather rated lighting and secure decorations against wind.
Dress Up Your Dining Table
Use the cranberry and rosemary centerpiece or a gold lantern as the focal point. Keep the arrangement low enough for guests to see each other across the table.
Add Warmth to Bedrooms and Shelves
Choose soft white, pearl, or Scandinavian designs for quieter spaces. Use battery powered lights, stable surfaces, and uncluttered arrangements to create a gentle evening glow.
Coordinate Colors Throughout the Home
Repeat two or three colors across different rooms, such as burgundy and gold or white and natural wood. Store fragile lanterns carefully after Christmas so they are ready to use next year.