
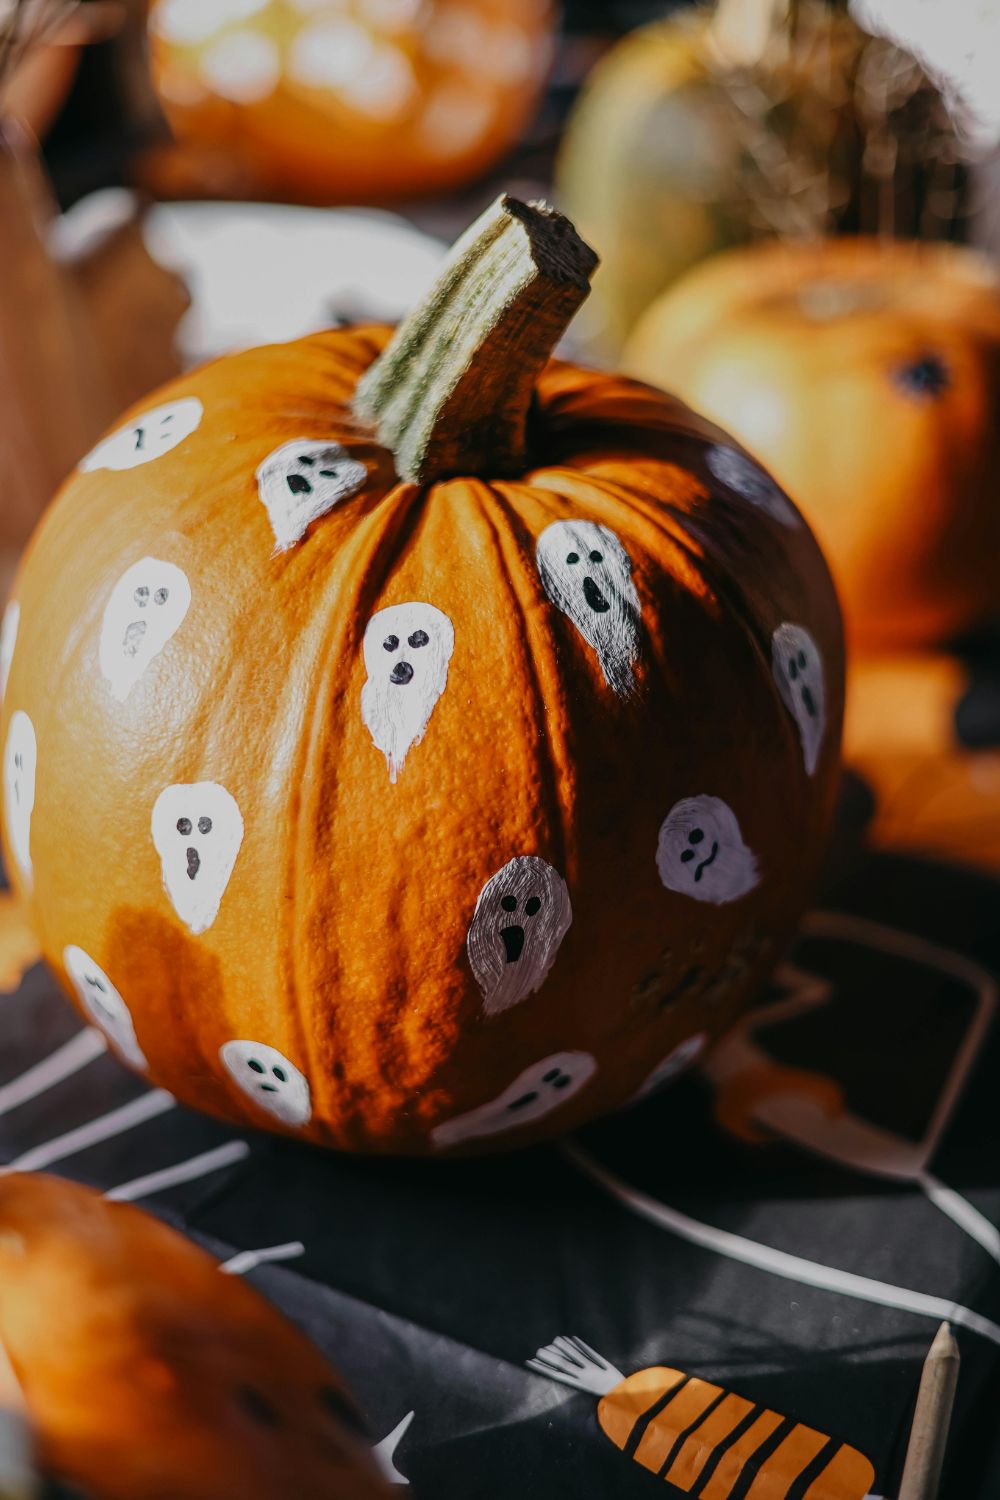
Mini pumpkin painting is a simple and fun fall activity for families with young children. With a few paints and small pumpkins, kids can create colorful designs like ghosts, rainbows, animals, fruits, and funny faces without needing advanced art skills. These mini pumpkin painting ideas are easy, budget friendly, and perfect for a relaxed family craft day at home.
1. Rainbow Stripe Mini Pumpkins
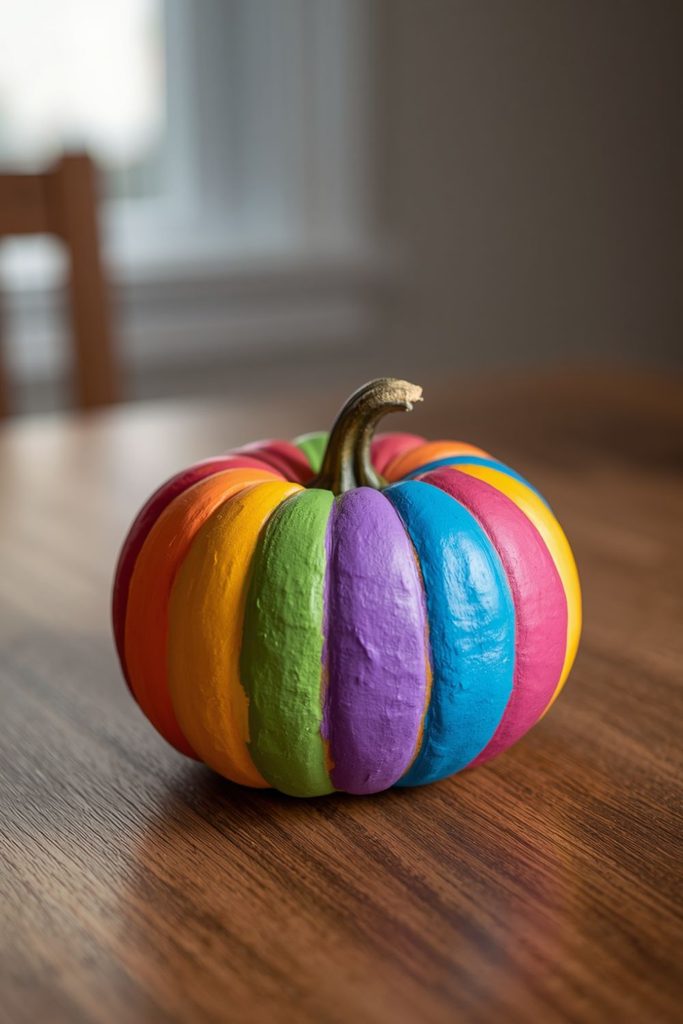
Rainbow stripes are one of the easiest mini pumpkin painting ideas for young children because the design only needs simple lines and bright colors. Kids can choose their favorite shades and create a cheerful pumpkin that looks great on a table, shelf, or windowsill.
This idea also works well for siblings because each child can choose a different color order. Parents can help younger children make wider stripes while older kids can try thinner lines or curved patterns.
Material Needed
- Mini pumpkin
- Red, orange, yellow, green, blue, and purple acrylic paint
- Small paintbrushes
- Water cup
- Paper towel
- Newspaper or a washable table covering
Step by Step Method
- Wipe the pumpkin with a dry paper towel to remove dirt.
- Let the child choose the order of the rainbow colors.
- Paint the first stripe around the widest part of the pumpkin.
- Add the next colors above or below it.
- Keep the stripes fairly wide so they are easy for small hands to paint.
- Allow the first layer to dry before adding another coat if needed.
- Add tiny white dots around the stripes for extra decoration.
- Let the pumpkin dry completely before displaying it.
2. Friendly Ghost Mini Pumpkins

Friendly ghost pumpkins bring a soft Halloween theme to these mini pumpkin painting ideas without making the activity too spooky for younger children. A white pumpkin with a sweet expression can be made with only a few basic shapes.
Kids can choose whether their ghost has a happy smile, surprised mouth, or sleepy expression. This gives children a chance to create different faces while practicing simple painting skills.
Material Needed
- Mini pumpkin
- White acrylic paint
- Black acrylic paint
- Small round brush
- Fine detail brush
- Water cup
- Paper towel
Step by Step Method
- Paint the entire pumpkin white.
- Allow the first coat to dry.
- Add a second white coat if the pumpkin surface still shows through.
- Paint two large black oval eyes.
- Add a small black mouth below the eyes.
- Give the ghost a smile by adding small curved lines at the sides.
- Add tiny pink cheeks if desired.
- Let the pumpkin dry before placing it with other Halloween decorations.
3. Bumblebee Mini Pumpkins

A bumblebee pumpkin is a cheerful choice for kids who enjoy animals and bright colors. Yellow and black stripes are easy for children to paint, while small wings can be added with white paint.
This idea gives young painters a simple pattern to follow without requiring perfect lines. Parents can also turn the activity into a little nature themed afternoon by talking about bees, flowers, and gardens while the pumpkins dry.
Material Needed
- Mini pumpkin
- Yellow acrylic paint
- Black acrylic paint
- White acrylic paint
- Small paintbrush
- Fine detail brush
- Water cup
- Paper towel
Step by Step Method
- Paint the pumpkin yellow from top to bottom.
- Let it dry before adding the black sections.
- Paint two or three black stripes around the pumpkin.
- Add two small white wings on the sides.
- Paint two tiny black eyes near the top.
- Add short black antennae with a thin brush.
- Paint a small smile if your child wants the bee to look friendly.
- Allow the pumpkin to dry fully before displaying it.
- Related post The Ultimate Guide to Halloween Games for Kids: Creative Ideas for an Unforgettable Halloween Party
4. Watermelon Mini Pumpkins

Watermelon pumpkins bring a fun summer fruit design into fall decorating. The round shape of a mini pumpkin works nicely for a watermelon inspired pattern, and children can paint the colors using large, easy sections.
This is one of the mini pumpkin painting ideas that lets kids practice working with three main colors. The black seeds are also fun to add because they can be painted as little dots or teardrop shapes.
Material Needed
- Mini pumpkin
- Green paint
- Pink or red paint
- Black paint
- Small brushes
- Water cup
- Paper towel
- Pencil for light guidelines
Step by Step Method
- Paint the bottom section of the pumpkin green.
- Paint the middle section pink or red.
- Allow the paint to dry.
- Add a thin lighter green line between the sections if desired.
- Paint small black seeds across the pink or red area.
- Make the seeds different sizes for a playful look.
- Add another paint coat if any areas look uneven.
- Leave the pumpkin to dry completely.
5. Ladybug Mini Pumpkins
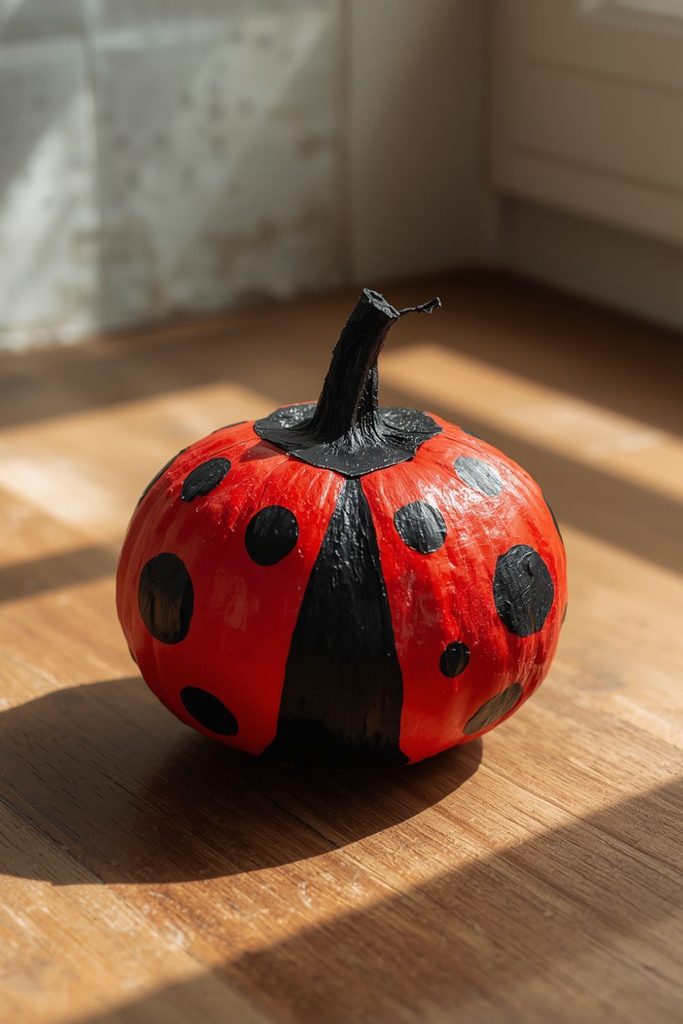
Ladybug pumpkins are a sweet option for children who enjoy tiny animals and bold colors. The red and black pattern is simple enough for preschoolers, while older children can add extra spots or little antennae.
The curved shape of the pumpkin makes the ladybug design look rounded and playful. It is also a nice choice for a group activity because children can make a whole collection of ladybugs in different sizes.
Material Needed
- Mini pumpkin
- Red acrylic paint
- Black acrylic paint
- White paint
- Small paintbrush
- Fine detail brush
- Water cup
- Paper towel
Step by Step Method
- Paint the pumpkin completely red.
- Let the first coat dry.
- Paint a black head near the top.
- Add a black line down the middle of the pumpkin.
- Paint several black dots on both sides.
- Add two white dots inside the eyes.
- Paint small black antennae above the head.
- Let the ladybug pumpkin dry before displaying it.
6. Monster Eye Mini Pumpkins

Monster eye pumpkins are perfect for kids who like silly Halloween decorations rather than scary ones. Children can use bright base colors and add one, two, three, or even five funny eyes.
Each pumpkin can have a different expression, which makes this idea especially fun for siblings. There is no need for perfectly shaped eyes, so younger children can paint freely and still get a cute result.
Material Needed
- Mini pumpkins
- Purple, green, orange, or blue paint
- White paint
- Black paint
- Small brushes
- Water cup
- Paper towel
Step by Step Method
- Let the child choose a base color.
- Paint the whole pumpkin in that shade.
- Allow it to dry.
- Paint several white circles for the eyes.
- Add black pupils inside each circle.
- Make the pupils point in different directions.
- Add a silly mouth using black paint.
- Add small spots, eyebrows, or teeth if desired.
- Leave the pumpkin to dry completely.
7. Panda Mini Pumpkins
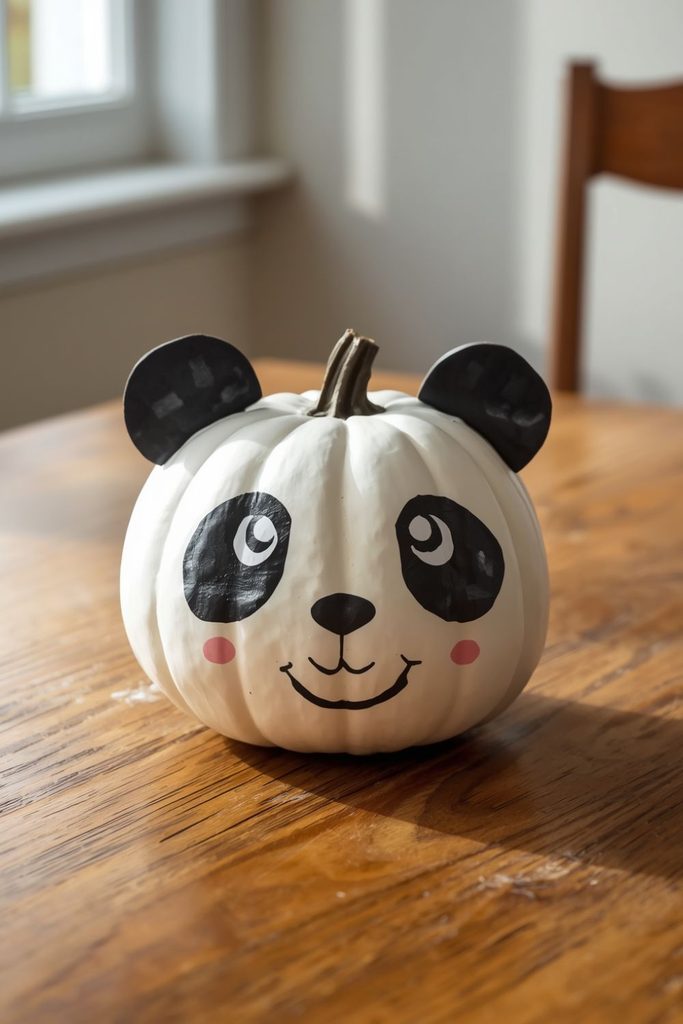
Panda pumpkins are a simple animal design that uses mostly black and white paint. Children can create the round black ears and eye patches with basic brush strokes.
This is one of the easiest mini pumpkin painting ideas for a child who prefers familiar animals. The design can stay simple for younger children, while older kids can add bamboo leaves, tiny paws, or a little smile.
Material Needed
- Mini pumpkin
- White acrylic paint
- Black acrylic paint
- Small round brush
- Fine detail brush
- Water cup
- Paper towel
Step by Step Method
- Paint the pumpkin white.
- Wait for the surface to dry.
- Add two black rounded ears near the top.
- Paint two black oval eye patches.
- Add small white or black eyes inside the patches.
- Paint a tiny black nose.
- Add a small curved smile.
- Paint little black paws on the lower front if desired.
- Allow the pumpkin to dry before handling it.
8. Ice Cream Cone Mini Pumpkins
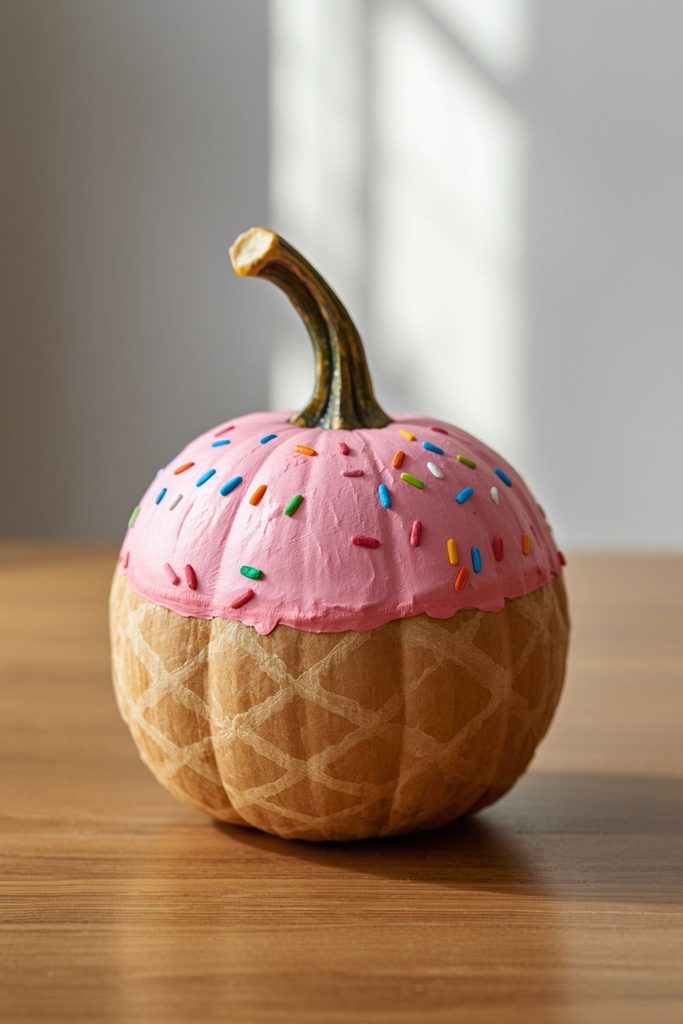
Ice cream cone pumpkins bring a sweet treat theme to fall decorating. The pumpkin can become a colorful scoop of ice cream, while the bottom section can be painted with a simple waffle cone pattern.
Kids can choose any ice cream flavor, from pink strawberry to brown chocolate or light blue cotton candy. Sprinkles make the finished pumpkin even more playful.
Material Needed
- Mini pumpkin
- Pink, blue, purple, or brown paint
- Tan paint
- White paint
- Small brushes
- Fine detail brush
- Water cup
- Paper towel
Step by Step Method
- Paint the lower section tan to represent the cone.
- Paint the upper section in the chosen ice cream color.
- Let the paint dry.
- Add thin diagonal lines across the cone section.
- Paint small white dots or lines for frosting.
- Add colorful sprinkle shapes across the top.
- Add a small red circle for a cherry if desired.
- Let the pumpkin dry fully.
9. Strawberry Mini Pumpkins
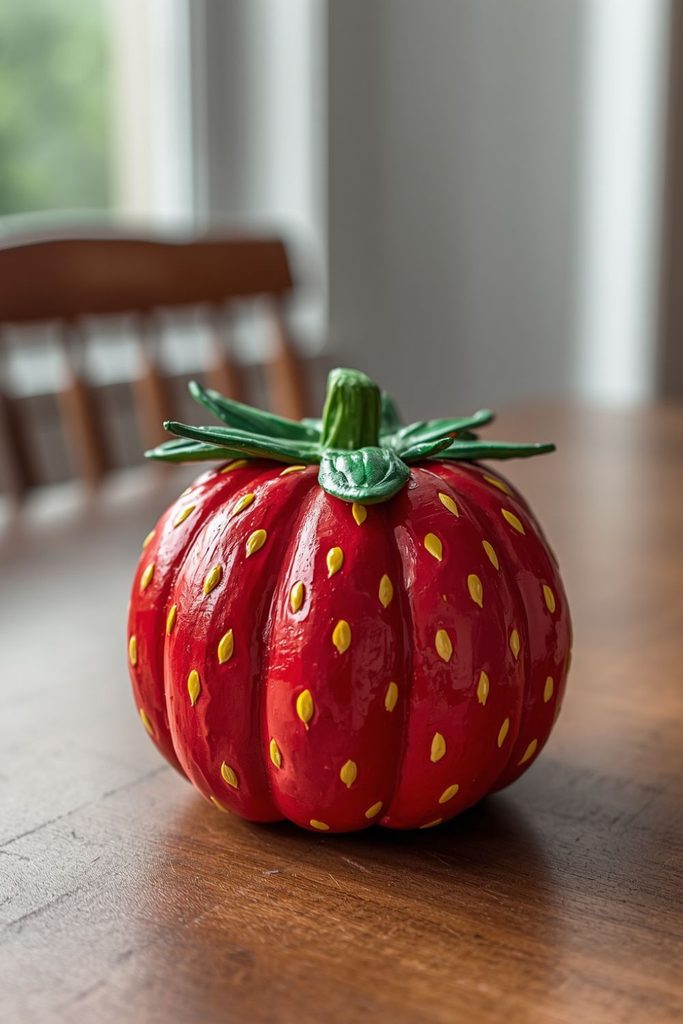
Strawberry pumpkins are bright, cute, and easy to recognize. A red or pink base with small seeds and green leaves gives children a simple design with only a few painting steps.
This idea is especially nice for younger children because the seeds do not need to be identical. Kids can make them large, small, round, or slightly uneven and still create an attractive strawberry pumpkin.
Material Needed
- Mini pumpkin
- Red or pink paint
- Green paint
- Black or yellow paint
- Small brushes
- Water cup
- Paper towel
Step by Step Method
- Paint the pumpkin red or pink.
- Allow it to dry.
- Paint small black or yellow seed shapes around the pumpkin.
- Add a green leafy shape near the stem.
- Paint several leaves pointing outward.
- Add another coat of red paint if needed.
- Use a thin brush to sharpen the leaf edges.
- Let the strawberry pumpkin dry before displaying it.
10. Galaxy Mini Pumpkins
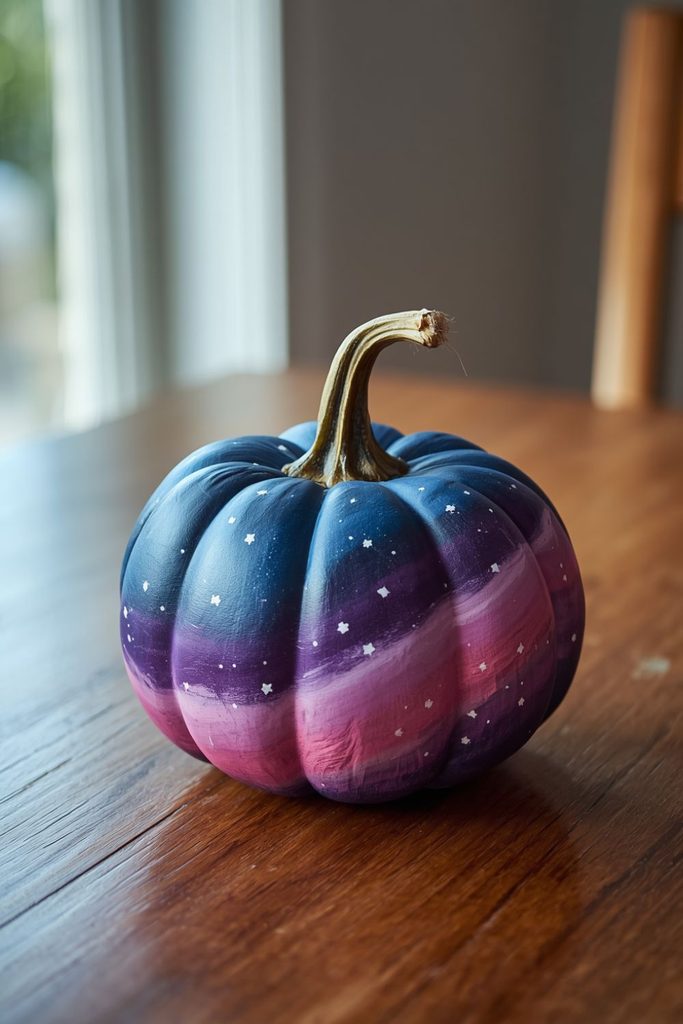
Galaxy pumpkins give older children an opportunity to experiment with blending colors. Deep blue, purple, pink, and white can be mixed together to create a starry night appearance.
Younger kids can use simple patches of color instead of trying to blend every shade. Older children may enjoy adding tiny stars, dots, and swirls once the base paint has dried.
Material Needed
- Mini pumpkin
- Dark blue paint
- Purple paint
- Pink paint
- White paint
- Small sponge
- Small paintbrush
- Water cup
- Paper towel
Step by Step Method
- Paint the pumpkin dark blue.
- Allow it to dry slightly.
- Dab purple and pink paint onto different areas with a sponge.
- Blend the colors gently while they are still wet.
- Let the pumpkin dry.
- Use a small brush to add white dots.
- Add a few tiny star shapes.
- Paint a thin white swirl across one section if desired.
- Allow the pumpkin to dry completely.
11. Candy Corn Mini Pumpkins

Candy corn pumpkins are a natural choice for Halloween because their colors are instantly recognizable. The design only needs three painted sections, making it suitable for young children who are learning to control a brush.
Parents can lightly mark the sections before painting so children know where each color belongs. Kids can also make the stripes wider or narrower based on their preference.
Material Needed
- Mini pumpkin
- White paint
- Orange paint
- Yellow paint
- Small paintbrush
- Pencil
- Water cup
- Paper towel
Step by Step Method
- Lightly mark two curved lines around the pumpkin.
- Paint the top section white.
- Paint the middle section orange.
- Paint the bottom section yellow.
- Let each section dry before touching the neighboring color.
- Add a second coat if necessary.
- Clean up the edges with a small brush.
- Allow the pumpkin to dry completely.
12. Sunflower Mini Pumpkins

Sunflower pumpkins add a warm fall feeling while giving children a chance to paint petals. The design can be as simple as a yellow flower placed on the front of the pumpkin.
Kids can choose different shades of yellow and orange for the petals. Brown dots in the center create the sunflower middle and are easy enough for little children to add with a cotton swab.
Material Needed
- Mini pumpkin
- Yellow paint
- Orange paint
- Brown paint
- Green paint
- Small brushes
- Cotton swab
- Water cup
Step by Step Method
- Paint a large yellow circle or flower shape on the pumpkin.
- Add several yellow petals around the center.
- Use orange paint to add a second row of petals.
- Let the flower dry.
- Dab brown paint in the center with a cotton swab.
- Add small green leaves near the bottom.
- Add another layer of yellow where needed.
- Leave the pumpkin to dry before displaying it.
13. Dinosaur Mini Pumpkins

Dinosaur pumpkins are a great choice for children who love prehistoric animals. A green pumpkin with darker spots and simple spikes can become a friendly dinosaur without requiring complicated drawing skills.
Parents can let each child choose a dinosaur type or invent a funny dinosaur of their own. The design works especially well with green, blue, orange, and purple paint.
Material Needed
- Mini pumpkin
- Green paint
- Dark green paint
- White paint
- Black paint
- Orange or yellow paint
- Small brushes
- Water cup
Step by Step Method
- Paint the pumpkin green.
- Allow it to dry.
- Add darker green spots around the surface.
- Paint two white eyes near the top.
- Add black pupils.
- Paint a small mouth.
- Add triangular spikes along the top or sides.
- Use orange or yellow paint for tiny claws.
- Let the dinosaur pumpkin dry fully.
14. Cupcake Mini Pumpkins

Cupcake pumpkins turn a small pumpkin into a sweet looking dessert. The lower portion becomes the cupcake wrapper while the upper section is painted like frosting.
Children can choose pink, blue, purple, or brown frosting and then add tiny sprinkles in different colors. This design is easy to customize and works well for a family painting afternoon.
Material Needed
- Mini pumpkin
- Tan paint
- Pink, purple, blue, or brown paint
- White paint
- Several bright paint colors
- Small brushes
- Water cup
- Paper towel
Step by Step Method
- Paint the lower section tan.
- Add diagonal lines to create a wrapper pattern.
- Paint the upper section with the chosen frosting color.
- Let the pumpkin dry.
- Add white frosting lines or dots.
- Paint colorful sprinkles across the top.
- Add a small red circle as a cherry.
- Allow the pumpkin to dry completely.
15. Rainbow Cloud Mini Pumpkins
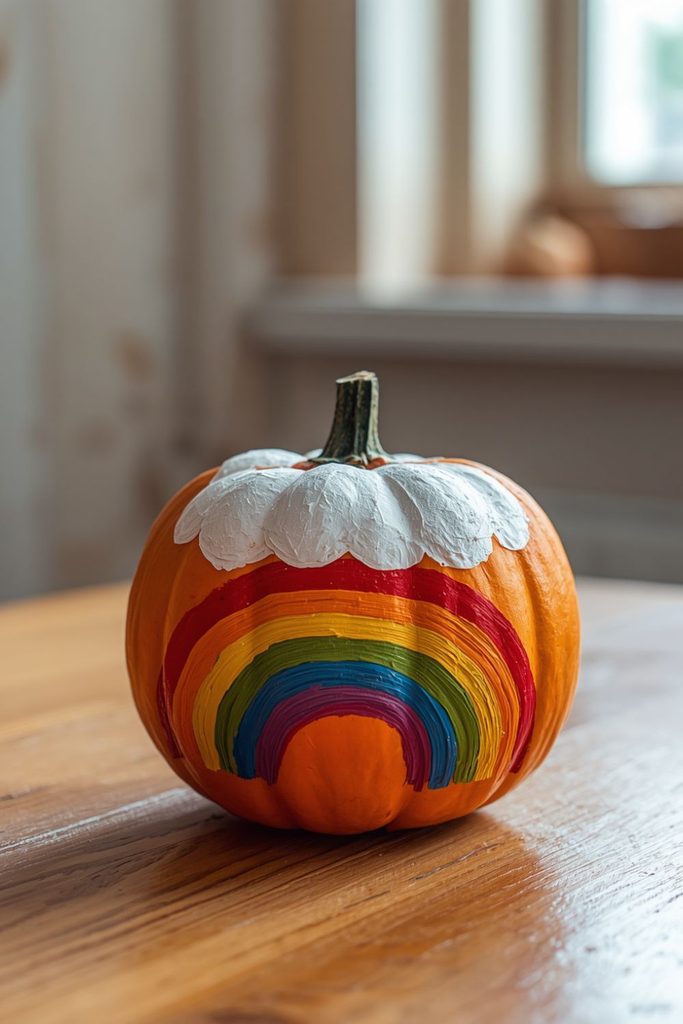
Rainbow cloud pumpkins create a cheerful scene using soft white clouds and colorful arcs. Children can paint the cloud with simple rounded shapes rather than trying to make a perfect outline.
This is one of the mini pumpkin painting ideas that can be adapted for different ages. Younger children can use large rainbow stripes, while older kids can add tiny stars, raindrops, or a second cloud.
Material Needed
- Mini pumpkin
- White paint
- Red paint
- Orange paint
- Yellow paint
- Green paint
- Blue paint
- Purple paint
- Small brushes
- Water cup
Step by Step Method
- Paint a fluffy white cloud on one side of the pumpkin.
- Let the cloud dry.
- Paint a red curved line beneath it.
- Add orange, yellow, green, blue, and purple lines below the first curve.
- Keep the arcs close together.
- Add tiny white dots around the cloud.
- Paint small blue raindrops if desired.
- Let the finished pumpkin dry completely.
16. Penguin Mini Pumpkins

Penguin pumpkins are cute winter inspired designs that can also become part of a fall display. The black body and white belly are simple shapes, while orange paint adds the beak and feet.
Children can give each penguin a different expression. A small scarf painted around the middle can also turn the pumpkin into a cheerful character.
Material Needed
- Mini pumpkin
- Black paint
- White paint
- Orange paint
- Red, blue, or green paint
- Small brushes
- Water cup
- Paper towel
Step by Step Method
- Paint the pumpkin black.
- Let it dry completely.
- Paint a white oval on the front for the belly.
- Add two white eyes.
- Paint black pupils.
- Add a small orange beak.
- Paint two orange feet near the bottom.
- Add a colorful scarf around the middle.
- Allow the pumpkin to dry before displaying it.
17. Boo Bat Mini Pumpkins

Boo bat pumpkins combine a simple black Halloween design with a friendly face. Children can paint the pumpkin black and add large eyes, a small mouth, and colorful bat wings.
The design can be kept cute rather than scary, making it suitable for younger children. Older kids can add stars, tiny fangs, or a painted moon behind their bat.
Material Needed
- Mini pumpkin
- Black paint
- White paint
- Purple paint
- Pink paint
- Small brushes
- Fine detail brush
- Water cup
Step by Step Method
- Paint the pumpkin black.
- Let it dry before adding details.
- Paint two large white eyes.
- Add black pupils.
- Paint a small purple or pink mouth.
- Add two simple bat wings on the sides.
- Paint tiny white stars around the wings.
- Add small fangs if desired.
- Let the pumpkin dry fully.
18. Flower Petal Mini Pumpkins
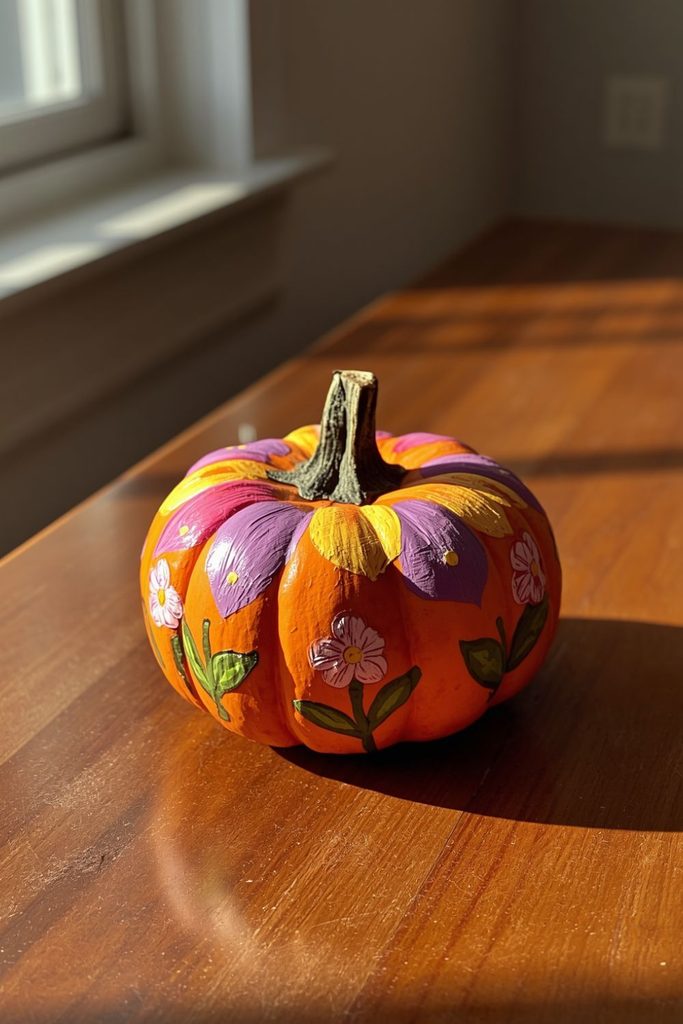
Flower petal pumpkins give children a chance to make a large colorful flower across the front of a mini pumpkin. The petals can be painted with one color or several shades for a cheerful effect.
This design is easy to adjust for different ages. Younger children can use large rounded petals, while older children can add smaller petals, leaves, dots, and extra flower details.
Material Needed
- Mini pumpkin
- Pink paint
- Yellow paint
- Purple paint
- Orange paint
- Green paint
- Small brushes
- Water cup
- Paper towel
Step by Step Method
- Paint a yellow circle in the center of the pumpkin.
- Add large petals around the center.
- Use two or more colors for the petals.
- Allow the petals to dry.
- Add smaller dots inside the yellow center.
- Paint green leaves below the flower.
- Add small decorative dots around the flower if desired.
- Leave the pumpkin to dry completely.
19. Funny Face Mini Pumpkins

Funny face pumpkins are ideal for children who want to invent their own characters. Instead of following one fixed design, kids can give each pumpkin a different combination of eyes, eyebrows, noses, and mouths.
This idea is especially useful for a family activity because every person can create a funny face based on their own personality. The pumpkins can then be placed together as a silly little group.
Material Needed
- Mini pumpkins
- White paint
- Black paint
- Pink paint
- Blue paint
- Yellow paint
- Small brushes
- Fine detail brush
- Water cup
Step by Step Method
- Choose a base color for the pumpkin.
- Paint the whole surface.
- Let it dry.
- Paint two eyes in different sizes.
- Add eyebrows at different angles.
- Paint a large smile, tiny mouth, or surprised expression.
- Add pink cheeks or a colorful nose.
- Give the character hair using short painted lines.
- Let the pumpkin dry before placing it on display.
20. Ombre Mini Pumpkins

Ombre pumpkins let children experiment with different shades of one color. The color can begin light at the top and become darker toward the bottom, creating a smooth painted effect.
For younger children, parents can prepare three shades of the same color and let the child paint one section at a time. Older children can try mixing white paint into the base color to create their own lighter shades.
Material Needed
- Mini pumpkin
- One main paint color
- White paint
- Small paintbrushes
- Water cup
- Paper towel
- Small mixing palette
Step by Step Method
- Choose a main color such as blue, pink, purple, or orange.
- Mix the color with white paint to create a light shade.
- Paint the top portion with the lightest shade.
- Add a medium shade below it.
- Use the original darker color near the bottom.
- Blend the edges gently while the paint is still wet.
- Add another coat after drying if needed.
- Leave the pumpkin untouched until completely dry.
21. Family Character Mini Pumpkins
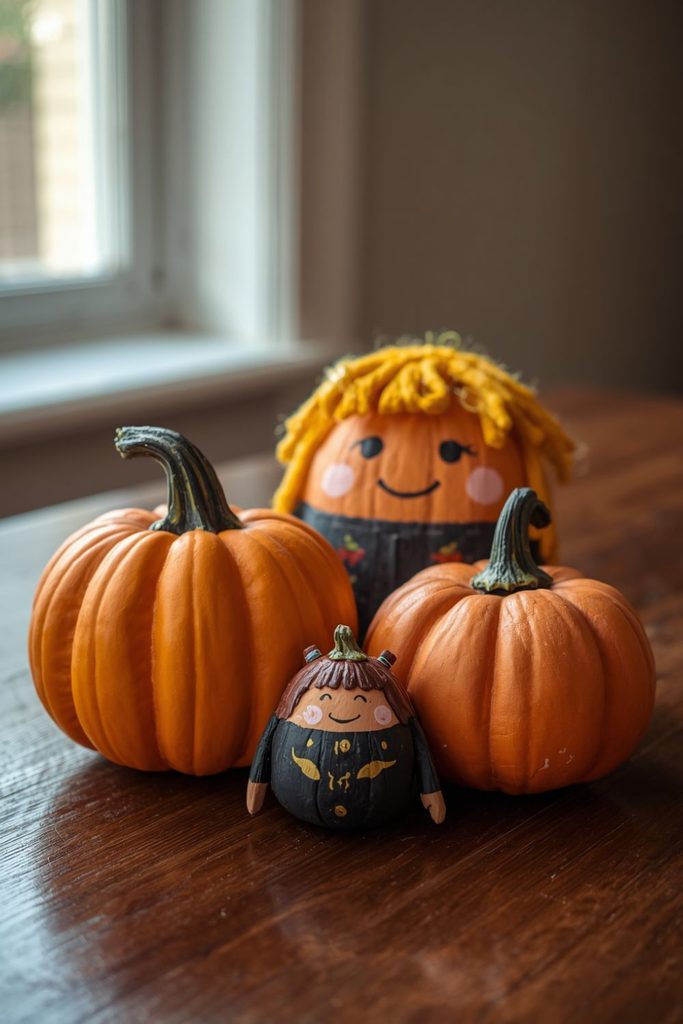
Family character pumpkins turn a simple painting afternoon into a group activity where every person gets their own pumpkin. Each family member can paint a character based on their favorite colors, hairstyles, expressions, clothing, or funny features.
This idea works especially well at the end of a family painting session because everyone can place their pumpkins together as one display. Younger children can use simple faces and colors, while older children can add more details.
Material Needed
- One mini pumpkin for each family member
- Paint in several colors
- Small brushes
- Fine detail brushes
- Water cups
- Paper towels
- Paint palette
- Markers for optional details
Step by Step Method
- Give each family member one mini pumpkin.
- Decide on a character idea for each pumpkin.
- Paint the main color or clothing area first.
- Allow the base layer to dry.
- Add eyes, hair, clothing, and facial expressions.
- Give each character a different color scheme.
- Add small details such as glasses, bows, hats, or buttons.
- Write each person’s name on the bottom once the paint has dried.
- Arrange all the pumpkins together for a family display.