

Christmas is a time for sharing love, celebrating family traditions, and sending warm wishes to the people who matter most. A handwritten greeting can make someone feel remembered, even when you cannot celebrate together. Handmade Christmas cards bring a personal touch to this tradition, allowing you to share your creativity without spending a fortune. With simple paper, leftover ribbons, watercolor paints, and a few decorative details, you can create beautiful cards that look elegant and feel meaningful.
For women who enjoy creative hobbies, personalized gifts, and festive decorations, making Christmas cards at home is a lovely way to prepare for the holidays. You can choose classic red and green, soft cream and gold, or modern navy and silver. Each card can reflect your personal style and the person receiving it.
The best part is that beautiful Christmas cards do not need expensive supplies or professional artistic skills. Small details, thoughtful messages, and careful color choices can make even a simple design feel special. From recycled paper designs to delicate watercolor illustrations, the ideas below will help you create affordable handmade Christmas cards that your loved ones will want to keep.
What Affordable Materials Can You Use to Create Elegant Handmade Christmas Cards?
Creating elegant Christmas cards at home begins with choosing materials that are affordable, easy to find, and simple to use. You may already have many useful supplies in your drawers, craft boxes, or wrapping paper collection. Instead of buying a new set of materials for every design, combine a few basic items in creative ways.
Cardstock and Kraft Paper
Cardstock provides a sturdy base for handmade cards. White, cream, forest green, and burgundy cardstock are useful choices for Christmas designs. Kraft paper is another affordable option, especially for rustic cards decorated with gold details, twine, or simple botanical shapes.
You can purchase plain cardstock in packs to reduce the cost per card. Cut each sheet carefully to create several card bases, depending on the size you prefer.
Recycled Wrapping Paper and Paper Scraps
Leftover wrapping paper can become a beautiful decorative feature. Cut it into triangles for Christmas trees, small circles for ornaments, or narrow strips for borders. Old greeting cards can also be reused by cutting out attractive illustrations and attaching them to new cardstock.
This approach helps reduce waste while giving every design a different appearance.
Watercolor Paints and Colored Pencils
A small watercolor set is enough to paint poinsettias, snowflakes, evergreen branches, and winter villages. Colored pencils work well for fine details, especially if you prefer a controlled, simple drawing style.
You do not need advanced painting skills. Basic shapes and a limited color palette can produce lovely results.
Ribbons, Twine, and Lace
Small pieces of ribbon can add a soft, festive finish to a plain card. Red velvet ribbon suits traditional Christmas designs, while thin gold ribbon works beautifully with cream or white paper. Twine and leftover lace are useful for rustic or vintage styles.
Use narrow strips and small bows rather than covering the whole card, so your supplies last longer.
Gold Pens, Glue, and Decorative Details
A metallic gold pen can create stars, borders, lettering, and delicate snowflakes without the expense of foil printing. White gel pens are useful for adding snow to dark cardstock, while small pearl beads can decorate Christmas ornaments or flower centers.
A good glue stick, scissors, ruler, and pencil are enough for many designs. Buy extra decorations only when a project requires them.
Money saving tip: Choose three or four main colors and reuse the same materials across several cards. Buying fewer supplies in coordinated colors makes the finished collection look polished and keeps spending under control.
Which Designs, Colors, and Embellishments Make Handmade Christmas Cards Look Elegant and Festive?
An elegant Christmas card often looks beautiful because its colors and decorations work well together. You do not need to fill every empty space with glitter, stickers, or ribbon. A simple illustration, a neat greeting, and one carefully placed decoration can make a stronger impression than a crowded design.
Classic Colors for a Timeless Christmas Look
Red and green remain popular because they are associated with traditional Christmas decorations. Pair deep green cardstock with cream lettering, or use burgundy paper with small gold stars for a refined appearance.
For a softer style, choose ivory, champagne, blush pink, and muted sage green. These shades suit floral cards and delicate paper designs. Navy blue paired with silver creates a winter evening effect, while black cardstock and white lettering offer a modern look.
Try to use two or three main colors on each card. This keeps the design coordinated and makes it easier to use leftover supplies.
Minimalist Designs with Beautiful Details
Minimalist cards are ideal for anyone who prefers a clean, elegant appearance. A single evergreen branch on white cardstock, a gold star in the center of a cream card, or a small paper Christmas tree can be enough.
Leave some empty space around the main decoration. This gives the design room to breathe and makes the greeting easier to read.
Watercolor Illustrations for a Handmade Finish
Watercolor paintings bring a gentle, artistic quality to Christmas cards. Poinsettias, holly leaves, snowy rooftops, and pine branches are lovely subjects. Use soft washes of color and allow the paper to show through in some areas.
If painting directly on the card feels difficult, paint on separate watercolor paper, let it dry, then cut out the illustration and attach it to the card base.
Ribbons, Pearls, and Metallic Accents
Decorative details can make a simple card look more refined. A small red ribbon bow adds texture, while tiny pearl beads can create the appearance of snow or decorate a paper ornament. Gold and silver pens add a festive shimmer without requiring expensive materials.
Choose one main embellishment for each card. Too many decorations can make the paper bulky and increase postage costs.
Paper Cutting and Layered Designs
Layered paper shapes create depth without requiring paint or complicated tools. Cut evergreen trees from forest green paper, add a cream border, and mount them on a white card. You can also use recycled wrapping paper to create geometric Christmas trees.
For a more traditional style, layer paper poinsettia petals and finish the center with a small gold circle.
Design tip: Before gluing anything in place, arrange all the pieces on the card and check the balance of color, space, and decoration. A few thoughtful adjustments can make an inexpensive design look much more polished.
How Can You Personalize Handmade Christmas Cards to Create Meaningful and Memorable Holiday Greetings?
Personalization gives handmade Christmas cards a special meaning. Instead of sending the same greeting to everyone, add details that reflect your relationship with each recipient. Even a small change, such as using someone’s name or mentioning a favorite Christmas memory, can make the card feel more thoughtful.
Add Names and Handwritten Greetings
Write the recipient’s name on the front or inside the card using a gold pen, brush lettering, or neat handwritten script. You can add a short greeting such as “Wishing you a Christmas filled with love” or “May your home be warm and your holidays be joyful.”
If calligraphy is difficult, practice on scrap paper first. Clear handwriting is just as lovely as decorative lettering.
Include Shared Memories
A personal message can mention a family gathering, a favorite holiday recipe, or a happy moment from the past year. For a close friend, write a few lines about something you appreciate about them. For a relative, mention a tradition you hope to share again.
These details help turn a greeting card into a keepsake rather than a seasonal message that is quickly forgotten.
Match the Design to the Recipient
Think about the person’s interests before choosing the card style. Someone who loves gardening may enjoy a watercolor poinsettia or botanical holly design. A friend who prefers modern decor might appreciate a navy card with silver stars. For a family member who enjoys traditional celebrations, a red and green design with a paper wreath may be ideal.
Add Family Names, Dates, or Small Photographs
A card featuring the family surname can make a lovely holiday greeting for relatives and close friends. You could also include a small printed photograph from the year, a child’s drawing, or a short note about a family milestone.
Keep photographs small enough to fit neatly inside the card, and use paper that will not make it too bulky.
Make the Message as Special as the Design
The message inside should suit the relationship. For a partner, write something affectionate. For a colleague, keep the greeting warm and professional. For a friend who lives far away, include a reminder that you are thinking of them.
Personalization tip: Prepare a few basic card designs in advance, then add names and handwritten messages as you decide who will receive each card. This saves time while keeping every greeting personal.
- Related post Christmas Wrapping Ideas for Kids’ Gifts: Fun, Colorful, and Easy Designs Parents Can Make
21 Specific Handmade Christmas Card Ideas for Inspiration
The following ideas combine affordable materials with elegant details. Each design offers a different way to share holiday wishes, from simple paper projects to more decorative keepsakes.
1. Kraft Paper Christmas Cards with Gold Foil Snowflakes
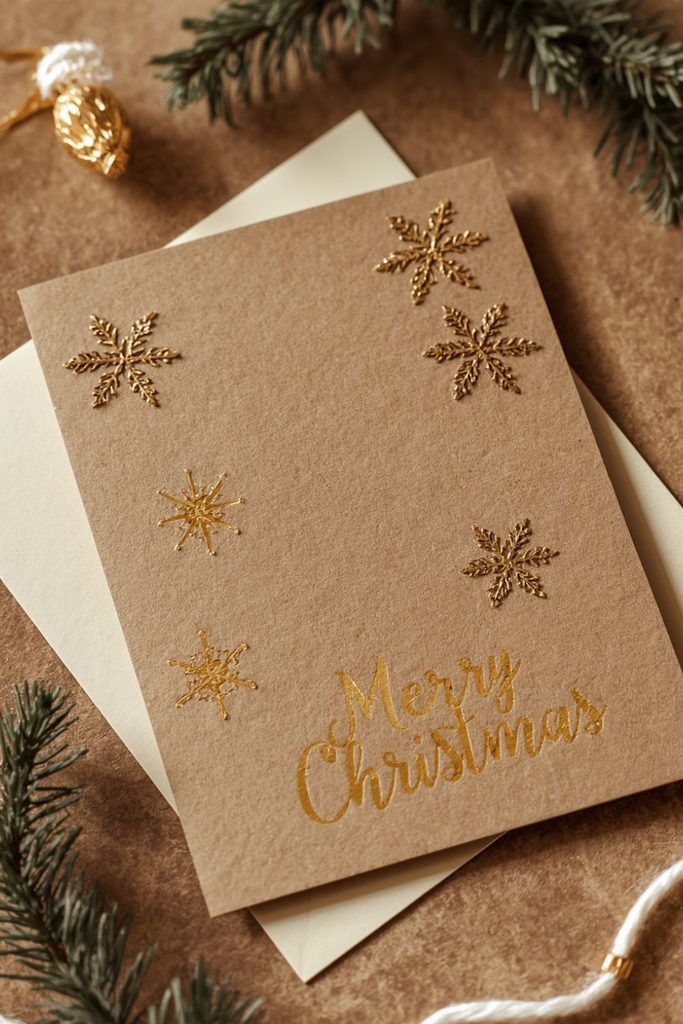
Use kraft cardstock as the base and decorate it with gold snowflakes made from metallic paper or a gold paint pen. Add a small greeting in cream or gold lettering. The warm brown background creates a lovely contrast with the metallic details.
You can make several cards from one sheet of cardstock and use the same snowflake pattern across the collection. This design is ideal for anyone who loves a rustic style with a polished finish.
2. Watercolor Poinsettia Cards with Handwritten Gold Greetings
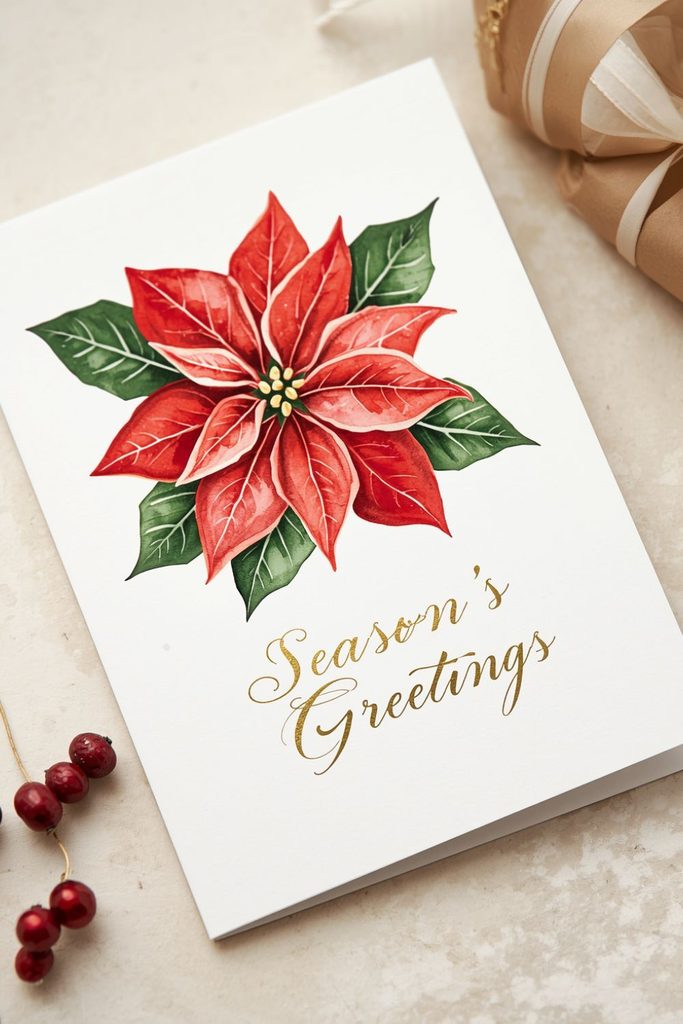
Paint a red poinsettia with green leaves on white watercolor paper. Add a few gold details around the flower and write “Merry Christmas” beneath the illustration. Let the paint dry completely before attaching the artwork to a folded card.
For a softer appearance, use blush pink or pale cream instead of bright red. This design works beautifully for family members, friends, and anyone who appreciates floral artwork.
3. Minimalist White Christmas Cards with Embossed Evergreen Branches
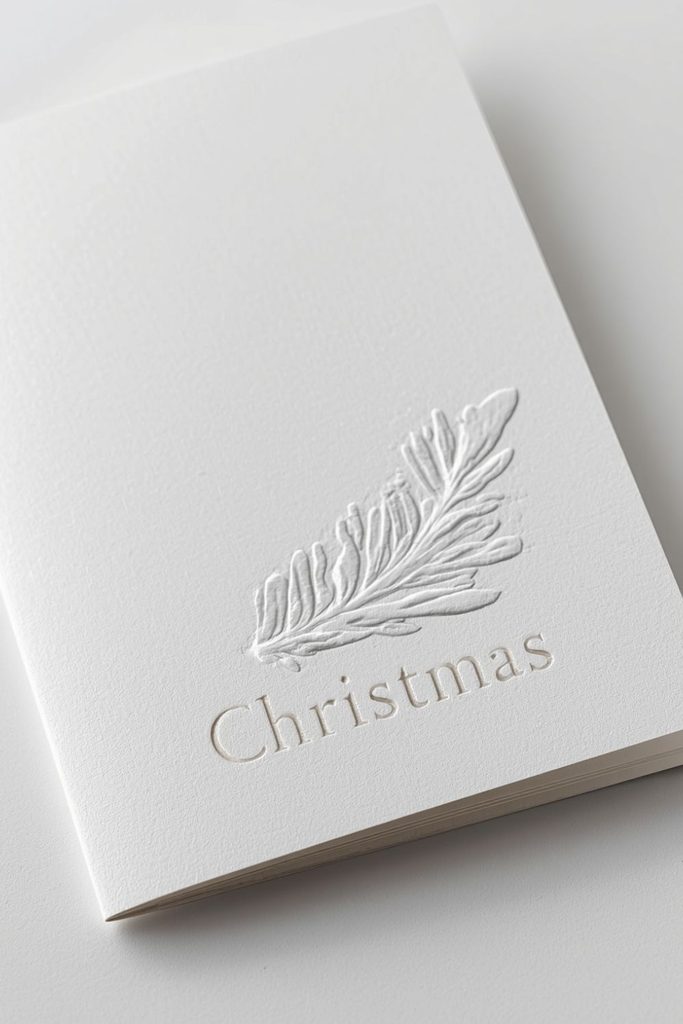
Start with thick white cardstock and create a single evergreen branch using an embossing folder or a simple hand-drawn outline. If you do not have embossing tools, draw the branch with a pale gray or muted green pen.
Keep the greeting small and leave most of the card blank. The result looks clean, graceful, and easy to reproduce. This is a good option when you need several cards without spending much on supplies.
4. Handmade Christmas Cards Featuring Red Velvet Ribbon Bows

Attach a narrow strip of red velvet ribbon across a cream or forest green card. Tie a small bow and place it near the top or center. Add a simple gold greeting to complete the design.
Ribbon remnants from gift wrapping or sewing projects can be used for this idea. Keep the bow small enough that the card closes neatly and fits inside its envelope without being crushed.
5. Pressed Dried Flower Christmas Cards with Natural Kraft Envelopes
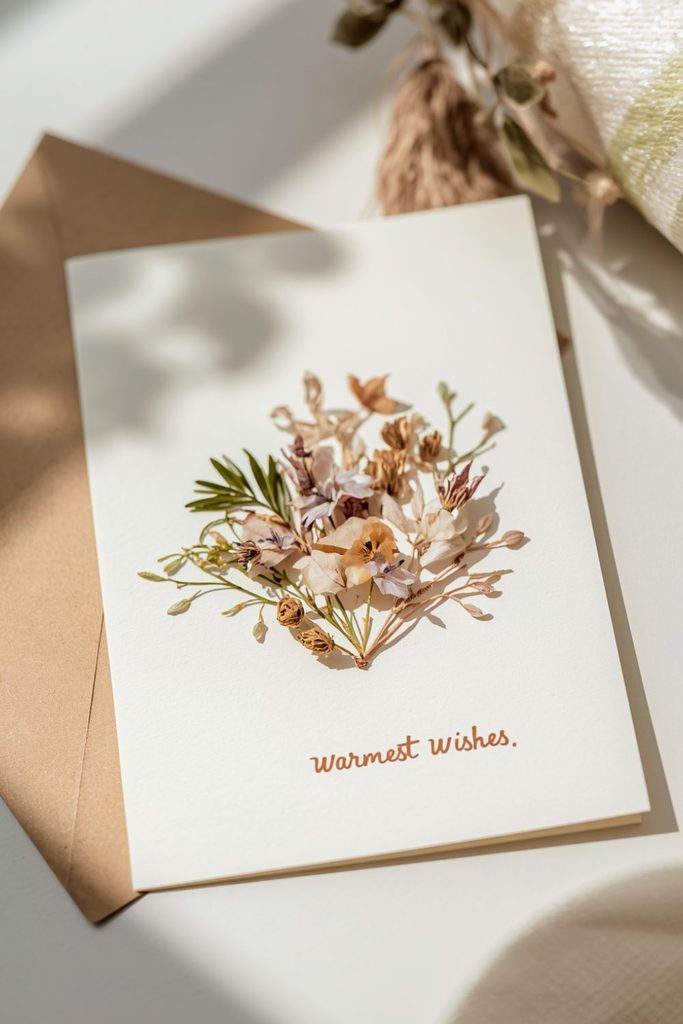
Arrange pressed flowers and delicate leaves on ivory cardstock. Add a tiny handwritten greeting and place the card inside a kraft paper envelope. Small dried flowers can create a gentle, natural look that feels different from traditional Christmas imagery.
Choose flat, fully dried flowers so they attach neatly. Use a thin layer of glue and avoid adding too many pieces, as thick decorations can make the card difficult to mail.
6. Layered Paper Cut Christmas Tree Cards in Forest Green and Cream
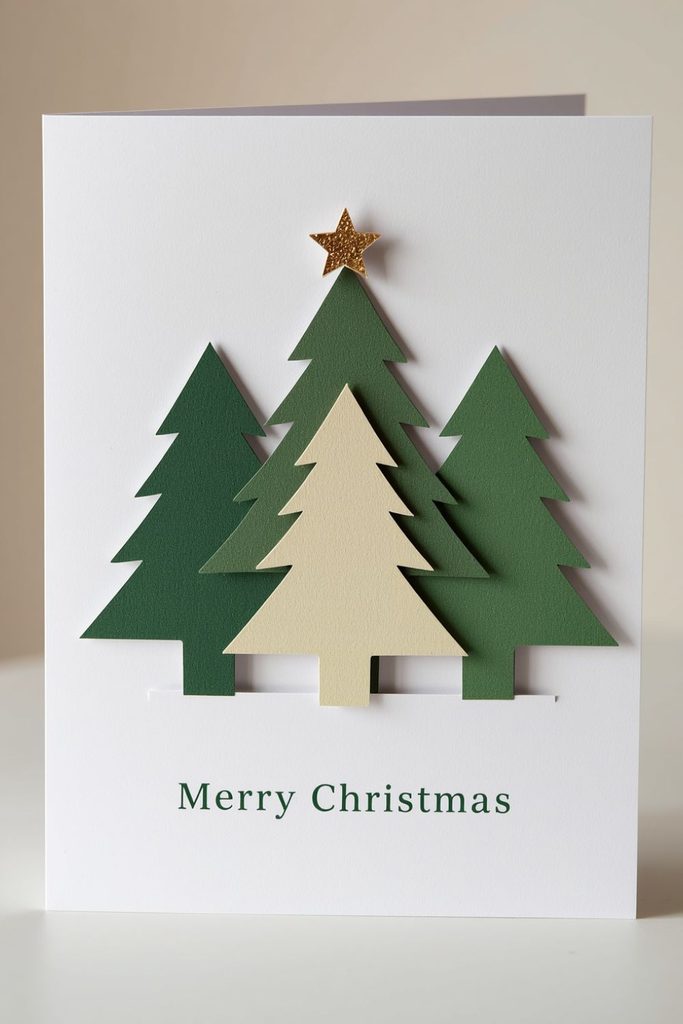
Cut three or four Christmas tree shapes in gradually smaller sizes. Layer them using forest green, sage, and cream paper, then attach them to a white card base.
A small gold star at the top completes the design. Recycled paper scraps are suitable for the layers, making this an affordable project. You can vary the tree shapes and colors to create a small collection of cards that look coordinated without being identical.
7. Handmade Christmas Cards with Cinnamon Stick and Twine Embellishments

Use kraft cardstock as the background and attach a tiny cinnamon stick with a short piece of natural twine. Add a paper evergreen sprig or a simple red bow beside it.
This design has a rustic appearance and a subtle seasonal scent. Keep the cinnamon stick short and securely attached, since thicker decorations may require extra postage. If mailing is not practical, these cards make attractive additions to holiday gifts.
8. Navy Blue Christmas Cards with Hand Painted Silver Stars

Choose navy cardstock and draw small silver stars using a metallic pen. Add a few tiny white dots to suggest falling snow, then write a short greeting in silver or white.
You can arrange the stars in a scattered pattern or form a single large star in the center. The dark background makes the metallic details stand out, giving the card a festive evening sky appearance without requiring expensive embellishments.
9. Vintage Christmas Cards Featuring Repurposed Sheet Music and Lace

Cut a small section from old sheet music or a printed music page and attach it to cream cardstock. Add a narrow strip of lace along one edge and finish with a muted red paper flower.
This design suits people who love vintage decorations and traditional holiday music. If you do not have old sheet music, print a decorative musical pattern on ordinary paper. Use only a few pieces so the card stays neat rather than crowded.
10. Handmade Christmas Cards with Mini Wreaths Made from Green Paper Scraps

Cut thin strips or tiny leaf shapes from different shades of green paper. Arrange them in a circle to form a miniature wreath on white or kraft cardstock. Add three small red paper berries and a short ribbon at the top.
The wreath can be attached with glue or raised slightly with small foam pads. This design uses very little material, making it a useful option for turning leftover paper into festive cards.
11. Elegant Christmas Cards Decorated with Pearl Beads and White Snowflakes

Begin with pale blue or white cardstock and add a white snowflake cutout near the center. Place a few small pearl beads around it to resemble frozen droplets or falling snow.
Use a restrained layout and a short silver greeting. Check that the beads are attached securely, especially if the cards will be handled or mailed. For a flatter and cheaper version, substitute white paper dots or a pearl effect pen.
12. Watercolor Winter Village Cards with Warm Yellow Window Lights
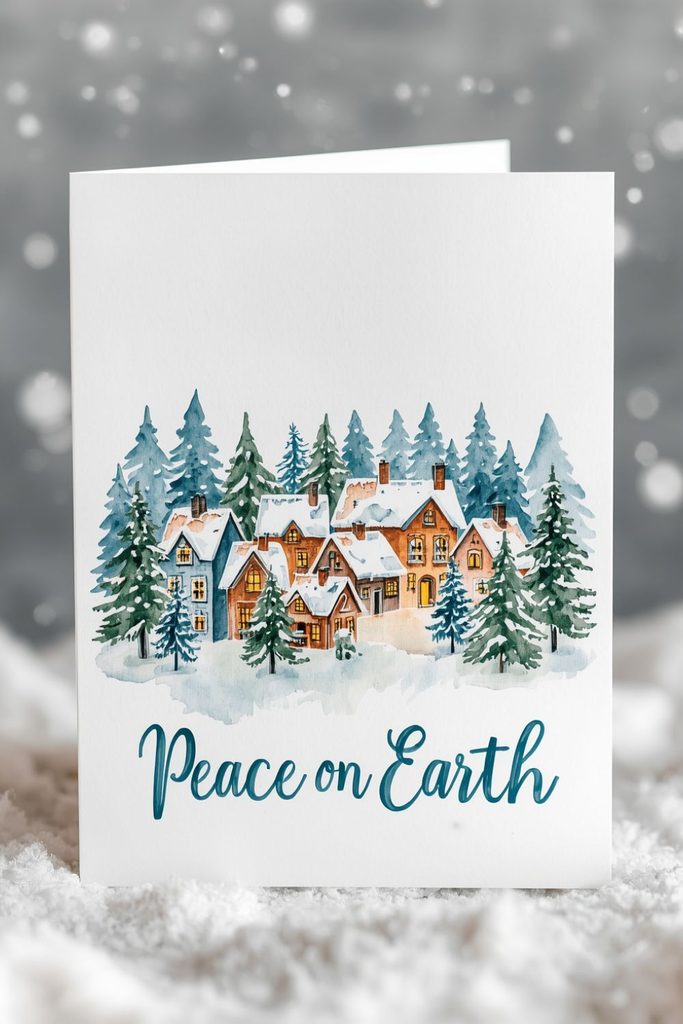
Paint a row of small houses with snow-covered roofs and dark blue or gray walls. Use warm yellow paint in the windows to suggest lights glowing on a cold winter evening. Add white dots for falling snow and a short holiday greeting below the scene.
The illustration can be simple, with just three houses and a few trees. This card is especially suitable for friends and relatives who enjoy cozy winter scenes and peaceful holiday decorations.
13. Handmade Christmas Cards Featuring Personalized Family Names in Calligraphy

Choose a cream or dark green card base and write the recipient’s family name in decorative lettering. Add a small wreath, gold stars, or a simple evergreen branch around the name.
For a family card, you might include the names of everyone in the household inside the greeting. Practice the lettering on scrap paper before writing on the final card. Even ordinary handwriting can look attractive when spaced carefully and paired with a clean design.
14. Rustic Christmas Cards with Stamped Reindeer Silhouettes and Red Ink

Use a reindeer stamp on cream or kraft cardstock, then add a small red dot for the nose or a red border around the image. If you do not have a stamp, cut a simple reindeer silhouette from paper and trace around it.
A short greeting in dark brown or red completes the card. This design is easy to repeat and suits traditional Christmas themes without needing a large collection of supplies.
15. Embroidered Christmas Cards with Simple Gold Thread Stars

Draw a few small stars on sturdy cardstock and carefully pierce tiny holes along their outlines using a needle. Stitch through the holes with gold embroidery thread to create a delicate star pattern.
Work on a protective surface and keep the holes far enough apart that the paper does not tear. Finish with a short handwritten greeting. This design takes more time than a paper cutout, but the stitched details give each card a lovely handmade finish.
16. Handmade Christmas Cards with Layered Paper Poinsettias and Metallic Centers
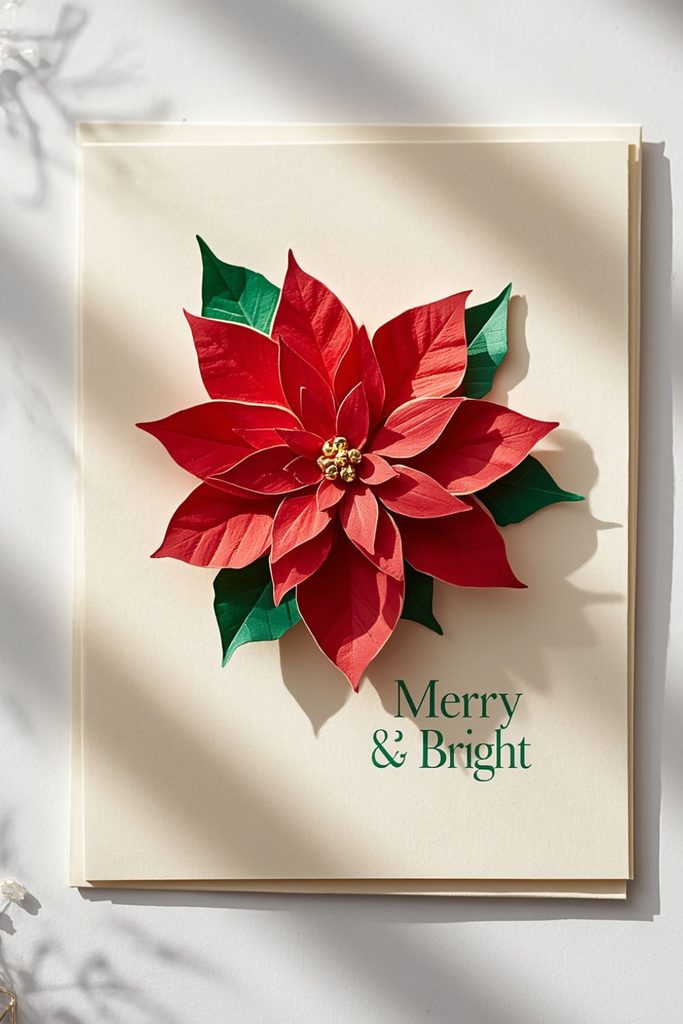
Cut several poinsettia petals from red paper and arrange them in overlapping layers. Add green leaves underneath and place a small gold circle or metallic bead in the center.
Attach the flower to white or cream cardstock and leave room for a greeting. You can use recycled paper or old gift wrap for the petals. A single large flower makes a strong focal point, so there is no need to decorate the entire card.
17. Festive Shaker Christmas Cards Filled with Red, Green, and Gold Confetti
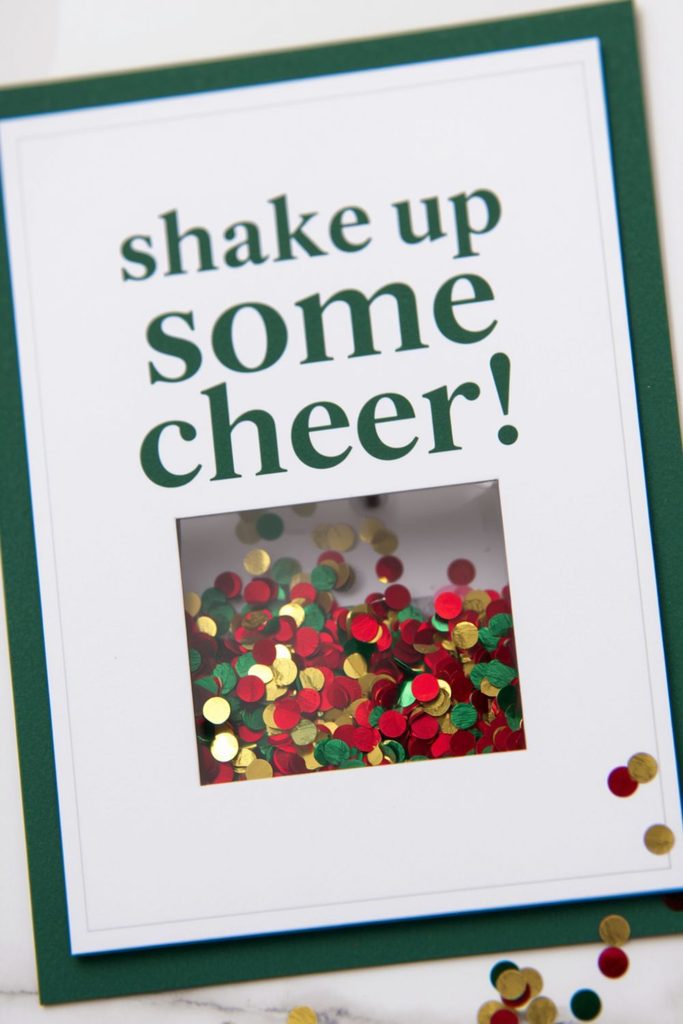
Create a small window on the front of a folded card and cover it with clear acetate. Attach a foam border behind the window, add a small amount of red, green, and gold confetti, then seal it with another layer of cardstock.
The confetti moves when the card is shaken, creating a playful effect. Keep the window compact and use only a little filling to prevent it from becoming bulky. This idea is especially fun for children, close friends, and family members who enjoy interactive greetings.
18. Handmade Christmas Cards Featuring Botanical Holly Leaves and Red Berry Details

Draw or cut several holly leaves from green paper and arrange them in one corner of an ivory card. Add small red circles for berries and use a fine pen to draw the leaf veins.
A handwritten greeting beneath the botanical arrangement keeps the design simple. If you prefer painting, use watercolors for the leaves and berries. This style suits recipients who enjoy natural decorations and traditional Christmas plants.
19. Geometric Christmas Tree Cards with Recycled Wrapping Paper Triangles
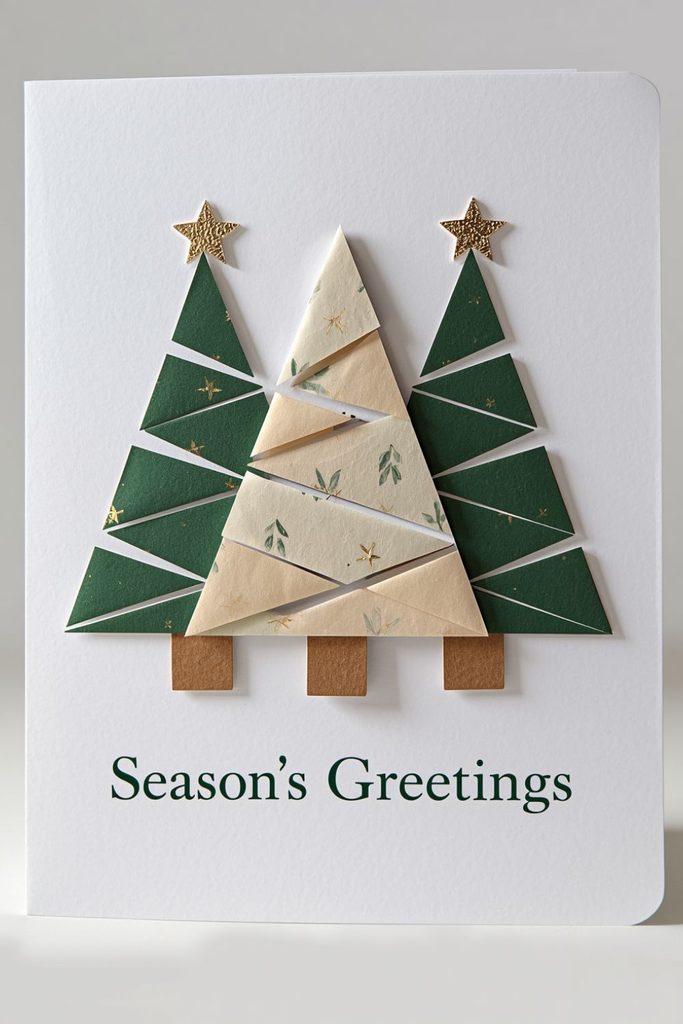
Cut triangles from leftover wrapping paper in complementary colors and arrange them into a Christmas tree shape. Attach a small brown rectangle at the bottom for the trunk and add a tiny gold star above it.
Choose patterns that work together, such as green stripes, gold dots, and cream paper. Because the design uses small scraps, it is affordable and helps reduce waste. No painting skills are needed, making it an easy project for beginners.
20. Elegant Black Christmas Cards with White Hand Lettered Holiday Messages

Use matte black cardstock and write a short holiday message with a white gel pen or paint marker. Add a small white star, snowflake, or evergreen outline in one corner.
The contrast between black and white creates a modern, refined look. You can add a tiny gold accent if you want extra shine, but the design works well without it. Use a white or cream envelope to complete the presentation.
21. Handmade Christmas Cards with Fold Out Paper Ornaments and Personalized Messages
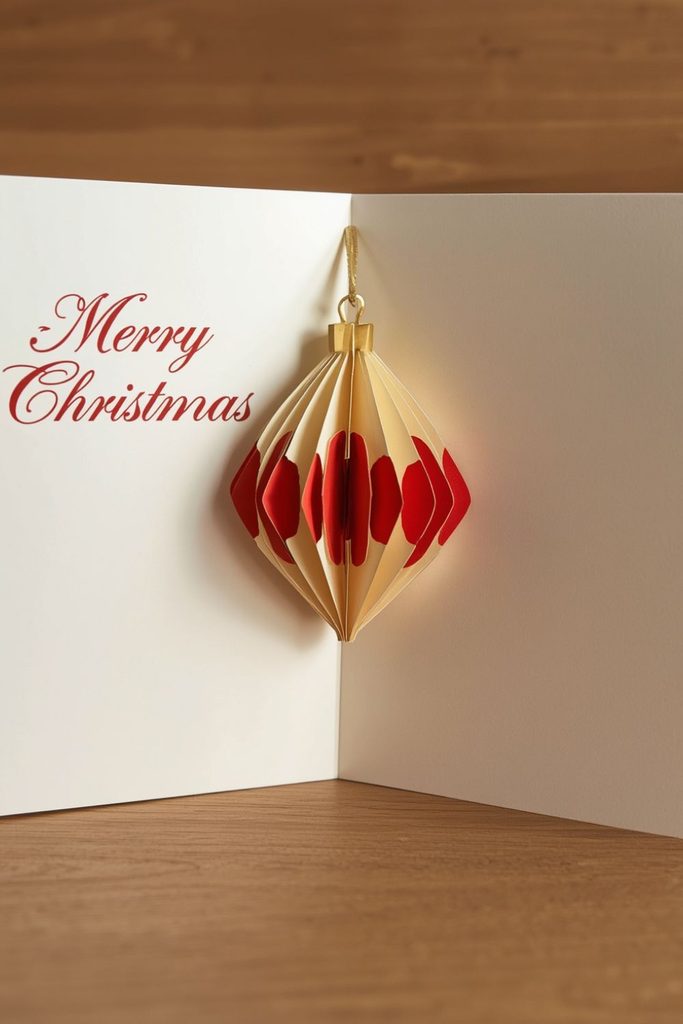
Create a small paper ornament that folds outward when the recipient opens the card. Cut several matching shapes, fold them in half, and attach their folded edges together to form a three dimensional ornament.
Glue the finished ornament inside the card so it opens gently with the paper. Add the recipient’s name and a personal message below it. This design takes a little more time, but it gives the greeting a memorable surprise.
How to Make Your Handmade Christmas Cards Look Beautiful on a Budget
A beautiful card collection does not require a large shopping list. Plan your designs before buying supplies and choose materials that can be used for several projects. For example, one pack of cream cardstock can serve as the base for watercolor flowers, paper wreaths, and gold lettering.
Make a small sample before producing several copies. This helps you check the color balance, card size, and amount of glue or decoration required. It also prevents wasted paper if a design needs adjusting.
Use leftover wrapping paper, ribbon ends, old cards, and paper scraps whenever possible. Keep your workspace organized so small materials do not get lost. A little planning makes the process easier and helps each card look neat and consistent.
Tips for Writing Heartfelt Messages Inside Christmas Cards
The words inside a handmade card can be just as meaningful as the design on the front. A short, sincere message is often more memorable than a long greeting copied from a card collection.
For family, mention a shared tradition or wish for more happy moments together. For friends, write about how much their friendship means to you. For colleagues, choose a warm message that remains professional.
You can also include a personal wish for the coming year, such as good health, peaceful days, or time with loved ones. If you are sending many cards, prepare a few message ideas in advance but add one personal sentence to each greeting.
Write slowly with a pen that suits the paper, and allow the ink to dry before closing the card. A clear message, written with care, gives the recipient another reason to keep it.
How to Package and Present Handmade Christmas Cards Beautifully
Presentation can make handmade Christmas cards feel like small gifts. Choose envelopes that complement the card colors, such as kraft envelopes for rustic designs or cream envelopes for watercolor illustrations. A small gold star or a handwritten name on the envelope adds a thoughtful finishing touch.
If you are giving cards in person, tie a small group together with twine or a ribbon. You can also place each card inside a simple paper sleeve to protect raised decorations.
For cards sold at local markets or given as gifts, include a matching envelope and keep the packaging neat. Avoid oversized decorations that may become damaged during transport. Beautiful presentation does not need expensive packaging; careful details are often enough.