
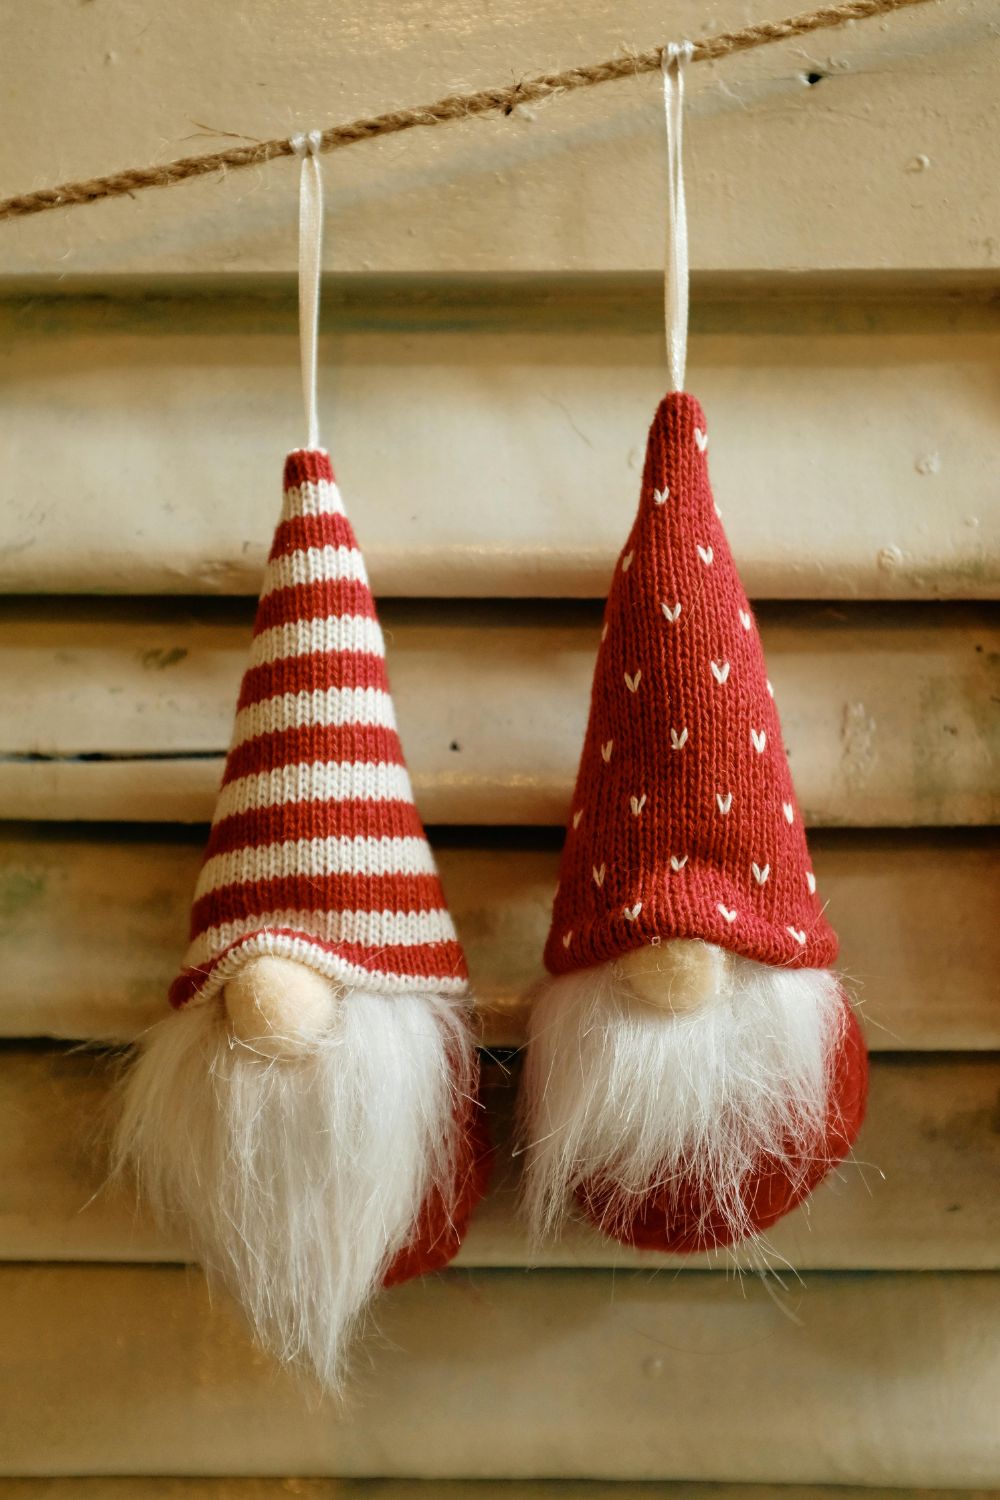
Christmas gnomes are a fun way to add handmade charm to shelves, mantels, tables, tree displays, and gift packages. With basic fabric, felt, yarn, stuffing, and a few decorative supplies, beginners can create adorable gnomes without complicated equipment or advanced skills.
This guide features 21 different Christmas gnome designs, so you can choose a style that fits your holiday decorating plans. Some are simple enough for a first project, while others include playful details such as tiny skis, village houses, candy decorations, or miniature presents. Read through the ideas and pick the design that matches your available supplies and the look you want.
Classic Scandinavian Christmas Gnome
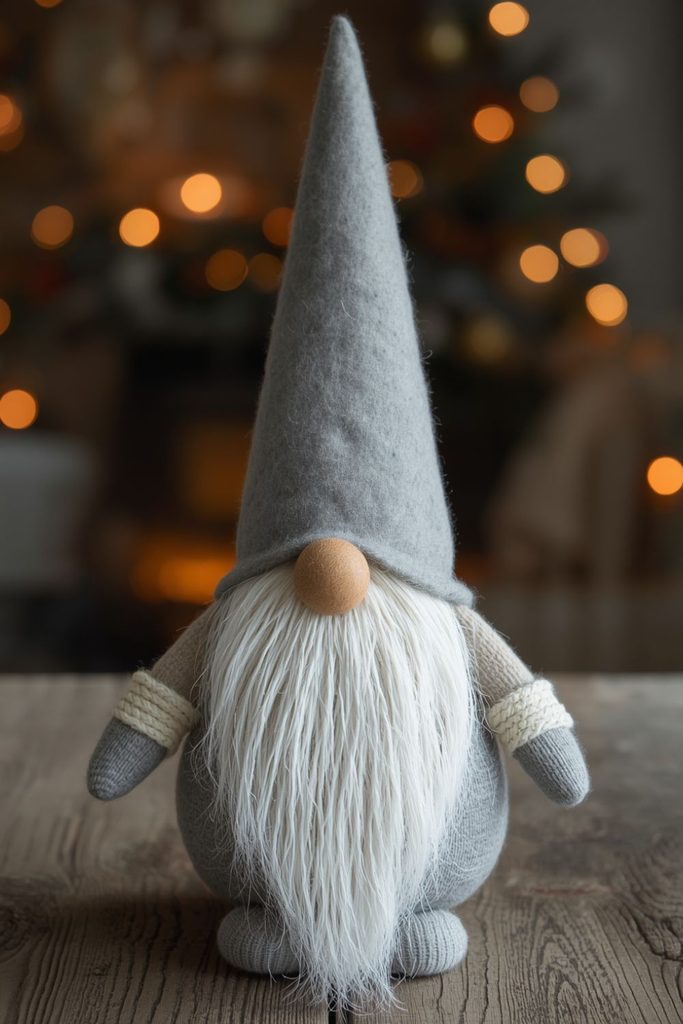
A Scandinavian Christmas gnome has a simple, cozy appearance with a tall hat, soft body, large nose, and long beard. Neutral colors make this design easy to blend with other Christmas decorations.
For a beginner project, use soft gray, cream, beige, or muted red fabrics and keep the decoration simple.
Materials Needed
- Gray or cream felt
- Fabric for the body
- Polyester stuffing
- White yarn
- Wooden or fabric covered nose
- Scissors
- Hot glue
- Needle and thread
- Small pom pom
Step by Step Method
- Cut a rounded body shape from your chosen fabric and sew or glue the edges, leaving the bottom open.
- Fill the body with stuffing until it feels firm but still soft.
- Close the bottom securely so the filling stays inside.
- Cut a tall triangle from felt for the hat.
- Roll the triangle into a cone and secure the side seam.
- Make a beard from several strands of white yarn and trim the bottom into a soft point.
- Attach the beard near the upper front of the body.
- Place the nose above the beard and secure it firmly.
- Add the hat so it sits slightly over the nose.
- Finish the hat with a small pom pom for a neat Scandinavian look.
Santa Claus Christmas Gnome

A Santa gnome combines the familiar red and white colors of Santa Claus with the simple shape of a gnome. It works well beside presents, on a mantel, or as part of a Christmas table display.
Keep the body rounded and use fluffy white trim to make the red hat and outfit stand out.
Materials Needed
- Red felt
- Red fabric
- White faux fur
- Polyester stuffing
- White yarn
- Small wooden nose
- Black felt
- Scissors
- Hot glue
- Needle and thread
Step by Step Method
- Create a rounded body using red fabric.
- Fill it evenly with polyester stuffing.
- Close the bottom with glue or small stitches.
- Cut a long red triangle for the Santa hat.
- Join the two long edges to form a cone.
- Add white faux fur around the bottom edge of the hat.
- Make a beard from white yarn or faux fur.
- Attach the beard to the front of the body.
- Add a round nose above the beard.
- Cut a narrow black strip and attach it around the lower body as a Santa belt.
- Add a small white square of felt for the belt buckle.
- Finish the hat with a white pom pom.
Christmas Tree Gnome
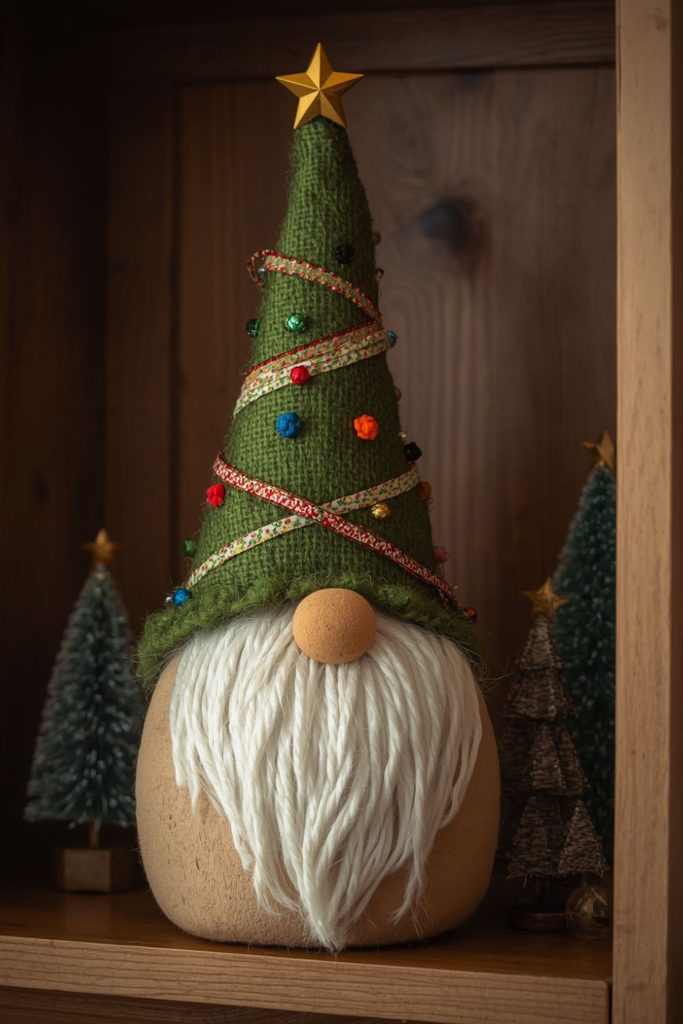
The Christmas tree gnome uses the hat as the main feature. Instead of a plain pointed hat, the cone is decorated to look like a tiny evergreen tree.
Small ornaments, ribbon, and a star make this design especially nice for a shelf or side table.
Materials Needed
- Green felt
- Brown or beige fabric
- Stuffing
- Small buttons
- Mini ribbon
- Tiny star decoration
- Yarn
- Wooden nose
- Hot glue
- Scissors
Step by Step Method
- Make a rounded body from beige or brown fabric.
- Fill the body with stuffing and close the opening.
- Cut a large green triangle for the tree style hat.
- Fold it into a cone and secure the back edge.
- Attach tiny buttons around the hat to represent ornaments.
- Wrap a thin piece of ribbon around the cone.
- Place a small star at the very top.
- Prepare a short beard using cream or white yarn.
- Glue the beard onto the body.
- Attach the nose above the beard.
- Place the decorated hat over the upper body.
- Check that the hat remains centered before the glue fully sets.
Snowman Christmas Gnome

This design combines a snowman body with a gnome beard and pointed hat. The result is a soft winter figure that can be placed with snow themed decorations.
White fabric creates the snowman shape, while black buttons and a colorful scarf provide contrast.
Materials Needed
- White fleece or felt
- Stuffing
- Black buttons
- Orange felt
- Yarn
- Blue or red fabric
- White felt
- Glue
- Scissors
- Needle and thread
Step by Step Method
- Cut a rounded body from white fabric.
- Sew or glue the sides and leave a small opening.
- Fill the body with stuffing.
- Close the opening neatly.
- Attach two or three black buttons down the front.
- Cut a small orange triangle for the carrot style nose.
- Glue the nose above the beard area.
- Create a white yarn beard and attach it below the nose.
- Cut a narrow strip of colored fabric for the scarf.
- Wrap the scarf around the neck area.
- Make a pointed hat from blue, red, or white felt.
- Add a small pom pom to the hat.
- Arrange the scarf and beard so the facial area remains easy to see.
Reindeer Christmas Gnome
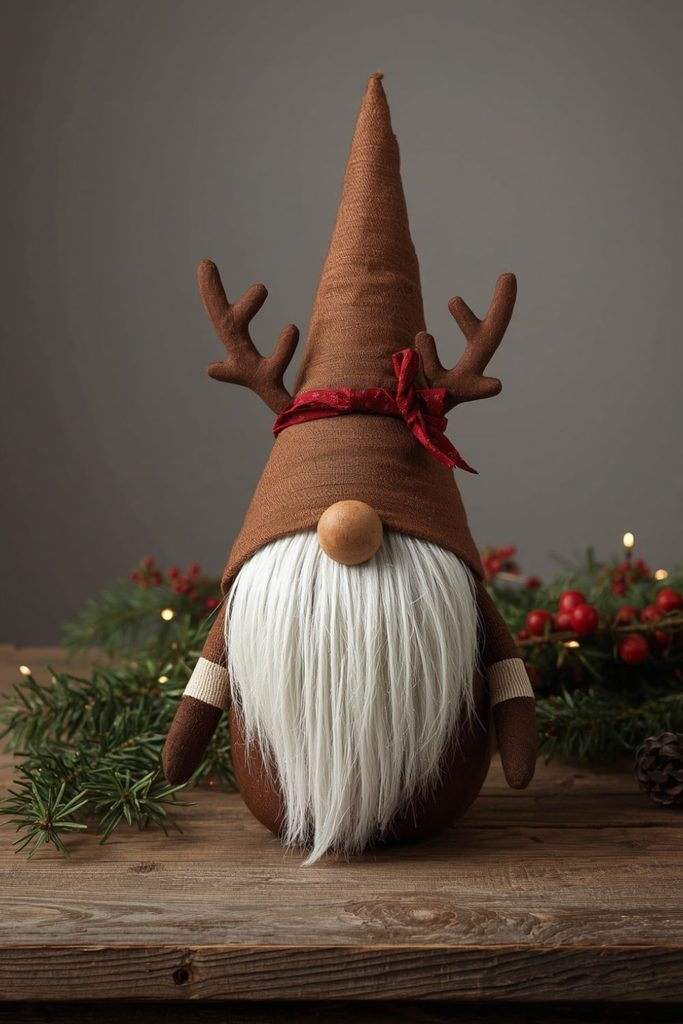
A reindeer gnome brings woodland Christmas details into a traditional gnome shape. Small antlers are the main feature, while brown fabric and a red nose give the figure a cheerful holiday appearance.
This design works especially well beside pine branches, wooden ornaments, or rustic decorations.
Materials Needed
- Brown fabric
- Beige felt
- Brown felt
- White yarn
- Small red pom pom
- Thin craft wire
- Stuffing
- Scissors
- Glue
- Needle and thread
Step by Step Method
- Sew or glue a rounded brown body.
- Fill it with stuffing and close the opening.
- Cut two antler shapes from brown felt.
- For stronger antlers, place thin wire between two felt pieces.
- Join the antler pieces together.
- Make a beard from white yarn.
- Attach the beard to the front of the body.
- Place the red pom pom above the beard.
- Make a brown pointed hat.
- Add a small cream band around the lower hat edge.
- Attach the antlers behind the hat.
- Check that both antlers sit at an even height.
- Add a small scarf if you want a warmer winter appearance.
Christmas Elf Gnome

An elf gnome is brighter and more playful than a traditional gnome. Use green, red, and striped fabrics to give it a cheerful holiday appearance.
A long curved hat and pointed shoe details can make the figure look like a tiny Christmas helper.
Materials Needed
- Green felt
- Red felt
- Striped fabric
- Stuffing
- Yarn
- Wooden nose
- Small bells
- Scissors
- Glue
- Needle and thread
Step by Step Method
- Create a small rounded body from green fabric.
- Fill it with stuffing.
- Close the lower opening.
- Cut a long curved triangle for the hat.
- Roll and secure the hat into shape.
- Add a red felt band near the bottom.
- Attach a small bell to the hat tip.
- Make a yarn beard and place it on the body.
- Add a round nose above the beard.
- Cut two small pointed shoe shapes from red felt.
- Attach the shoes near the bottom of the body.
- Finish with a narrow striped scarf around the neck.
Gingerbread Christmas Gnome

A gingerbread gnome is inspired by traditional holiday cookies. Brown fabric forms the body, while white trim can imitate icing around the hat and clothing.
Tiny candy colored buttons make the design cheerful without requiring complicated work.
Materials Needed
- Brown felt
- Beige fabric
- White yarn
- White felt
- Red buttons
- Green buttons
- Stuffing
- Scissors
- Glue
- Needle and thread
Step by Step Method
- Cut a rounded body from brown fabric.
- Fill it with stuffing.
- Secure the bottom opening.
- Cut a brown pointed hat.
- Add a white felt strip around the hat edge.
- Create a white yarn beard.
- Attach the beard to the front.
- Add a small beige or wooden nose.
- Glue red and green buttons onto the body.
- Cut thin white felt strips to resemble icing.
- Add the strips around the hat and body.
- Keep the decorations evenly spaced for a cookie inspired appearance.
Peppermint Candy Gnome

A peppermint gnome uses red, white, and soft green details to create a candy shop inspired Christmas figure. The design is especially suitable for kitchens, dessert tables, and colorful holiday displays.
A striped hat and round peppermint pieces give this gnome its main visual style.
Materials Needed
- Red felt
- White felt
- Green fabric
- Stuffing
- White yarn
- Red ribbon
- Small round buttons
- Wooden nose
- Glue
- Scissors
Step by Step Method
- Form a rounded green or white body.
- Fill it with stuffing and close it.
- Cut a tall triangle from red felt.
- Add diagonal white strips across the hat.
- Roll the triangle into a cone.
- Create a beard from white yarn.
- Attach the beard to the body.
- Place the nose above the beard.
- Cut small circles from red and white felt.
- Layer the circles to resemble peppermint candies.
- Attach the candy pieces to the hat or body.
- Finish with a red ribbon around the lower body.
Woodland Snow Gnome
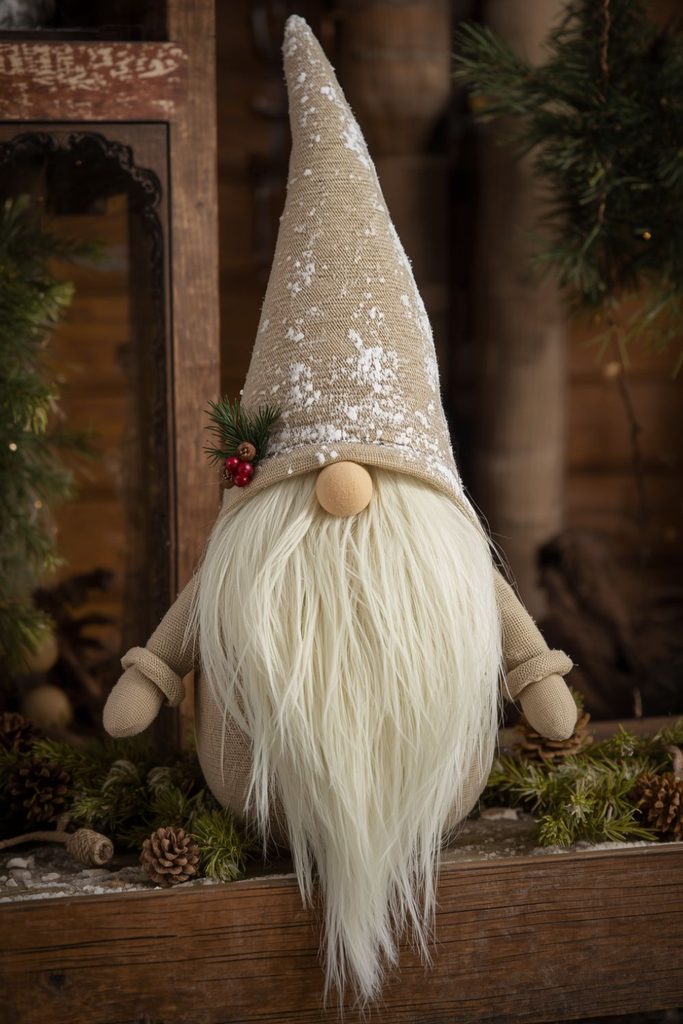
The woodland snow gnome combines soft winter colors with natural looking decorations. Pinecones, faux snow, berries, and evergreen pieces give it a forest holiday feel.
This design looks especially nice on wooden trays, shelves, and mantels with other natural decorations.
Materials Needed
- Brown or beige fabric
- Cream felt
- White yarn
- Small pinecones
- Faux snow
- Artificial evergreen pieces
- Red berries
- Stuffing
- Glue
- Scissors
Step by Step Method
- Make a rounded beige or brown body.
- Fill it with stuffing.
- Close the bottom.
- Create a cream pointed hat.
- Make a thick white yarn beard.
- Attach the beard and a small wooden nose.
- Add a small pinecone near the side of the hat.
- Glue a few artificial evergreen pieces around the base.
- Add two or three red berries.
- Apply a small amount of faux snow to the hat and greenery.
- Let all glued parts dry before moving the gnome.
- Keep the decorations light so the figure does not become too heavy.
Christmas Caroler Gnome

A Christmas caroler gnome brings a traditional singing theme to holiday décor. A tiny songbook, scarf, and winter hat can make the figure look as though it has just arrived for a Christmas performance.
This design works nicely as part of a group display with several small figures.
Materials Needed
- Gray or red fabric
- Felt
- White yarn
- Cardstock
- Tiny ribbon
- Wooden nose
- Stuffing
- Glue
- Scissors
- Black marker
Step by Step Method
- Make a rounded body from gray or red fabric.
- Fill it with stuffing and close the base.
- Create a white yarn beard.
- Attach the beard and nose.
- Make a winter hat from felt.
- Add a contrasting hat band.
- Cut a tiny rectangle from cardstock for the songbook.
- Fold the cardstock in half.
- Draw a few tiny music notes on the inside.
- Glue the songbook to the front of the gnome.
- Add a narrow scarf around the neck.
- Place the figure beside small lanterns or other holiday singers.
Christmas Baker Gnome
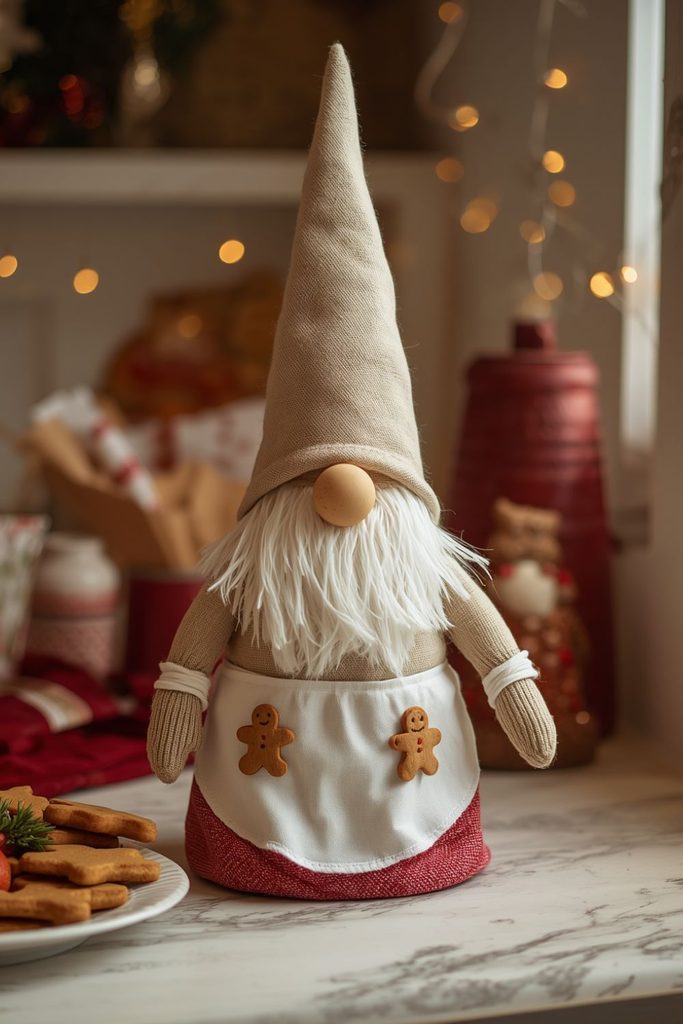
The Christmas baker gnome is perfect for kitchens or dining areas. Its chef hat, apron, and tiny cookie details give it a clear baking theme.
The project can be kept simple by using felt pieces instead of sewing every small accessory.
Materials Needed
- Beige fabric
- White felt
- Red felt
- Brown felt
- Yarn
- Stuffing
- Small buttons
- Cardstock
- Glue
- Scissors
Step by Step Method
- Create the body from beige fabric.
- Fill it with stuffing and close it securely.
- Make a white yarn beard.
- Attach the beard and wooden nose.
- Cut a white chef hat from felt.
- Add a red strip around the hat.
- Cut a small apron from white or cream felt.
- Glue the apron onto the front.
- Cut tiny brown circles for cookie decorations.
- Attach a few cookies near the apron.
- Add two small buttons as apron details.
- Place the baker gnome near a cookie jar or holiday kitchen display.
Christmas Morning Gnome

The Christmas morning gnome has a relaxed home style. Pajamas, a small mug, and a wrapped present create the feeling of an early holiday morning.
Soft fabrics and simple colors work well for this cozy design.
Materials Needed
- Flannel fabric
- White felt
- Yarn
- Tiny paper cup
- Small gift box
- Ribbon
- Stuffing
- Wooden nose
- Glue
- Scissors
Step by Step Method
- Make the body from soft flannel fabric.
- Fill it with stuffing.
- Close the lower opening.
- Create a white or cream beard from yarn.
- Attach the beard and nose.
- Make a floppy sleeping hat from matching flannel.
- Add a small pom pom to the hat.
- Wrap a tiny box with paper and ribbon.
- Attach the present to the side of the gnome.
- Add a miniature paper cup as a morning drink.
- Secure the accessories with small amounts of glue.
- Place the finished gnome beside wrapped presents or a Christmas tree.
Christmas Angel Gnome
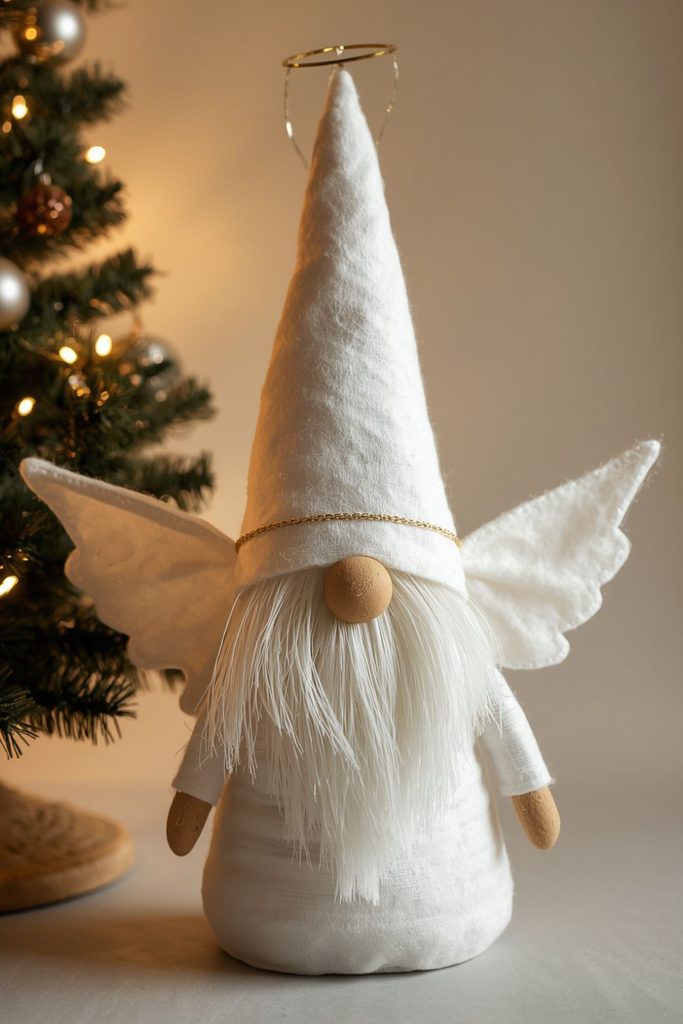
An angel gnome combines a pointed hat with simple wings and soft white colors. Gold ribbon can add a little shine without making the project difficult.
The finished figure works well on a mantel, shelf, or beside a Christmas tree.
Materials Needed
- White fabric
- White felt
- Gold ribbon
- White yarn
- Cardstock
- Stuffing
- Wooden nose
- Glue
- Scissors
- Small gold decoration
Step by Step Method
- Make a rounded white body.
- Fill it with stuffing and close the bottom.
- Create a soft white beard.
- Attach the beard and nose.
- Cut a pointed white hat.
- Add a narrow gold ribbon around the hat.
- Draw two matching wing shapes on cardstock.
- Cover the wings with white felt.
- Attach the wings to the back of the gnome.
- Add a small gold circle above the hat as a halo detail.
- Check that the wings are balanced.
- Place the angel on a stable flat surface.
Christmas Gift Gnome

The gift gnome makes a cheerful decoration for areas filled with wrapped presents. Its hat and body can use colors that match your existing gift wrap.
A miniature present held against the body gives the figure a clear holiday theme.
Materials Needed
- Red or green fabric
- Felt
- Yarn
- Small gift box
- Wrapping paper
- Ribbon
- Stuffing
- Wooden nose
- Glue
- Scissors
Step by Step Method
- Make a rounded body from your chosen fabric.
- Fill the body with stuffing.
- Close the bottom.
- Attach a yarn beard.
- Add the nose above the beard.
- Make a pointed felt hat.
- Wrap a tiny box with colorful paper.
- Add a small ribbon bow to the box.
- Glue the present against the front of the gnome.
- Add a matching ribbon around the hat.
- Keep the box light so it does not pull the gnome forward.
- Set the finished gnome beside larger Christmas presents.
Winter Ski Gnome

The winter ski gnome adds an outdoor snow theme to Christmas décor. Small skis and a knitted style hat give it a playful appearance.
This design can be made with simple wooden sticks if miniature skis are not available.
Materials Needed
- Blue or red felt
- Gray fabric
- White yarn
- Two wooden craft sticks
- Thin wire
- Stuffing
- Wooden nose
- Glue
- Scissors
- Small buttons
Step by Step Method
- Make a rounded body from gray fabric.
- Fill it with stuffing.
- Close the bottom.
- Add a white yarn beard.
- Attach the nose above the beard.
- Make a warm pointed hat from blue or red felt.
- Cut two craft sticks into matching ski shapes.
- Round the front ends with scissors if needed.
- Add thin wire pieces as miniature ski poles.
- Glue the skis beneath the gnome.
- Position the poles along the sides.
- Add two small buttons as coat details.
- Allow the glue to dry before standing the figure upright.
Christmas Village Gnome
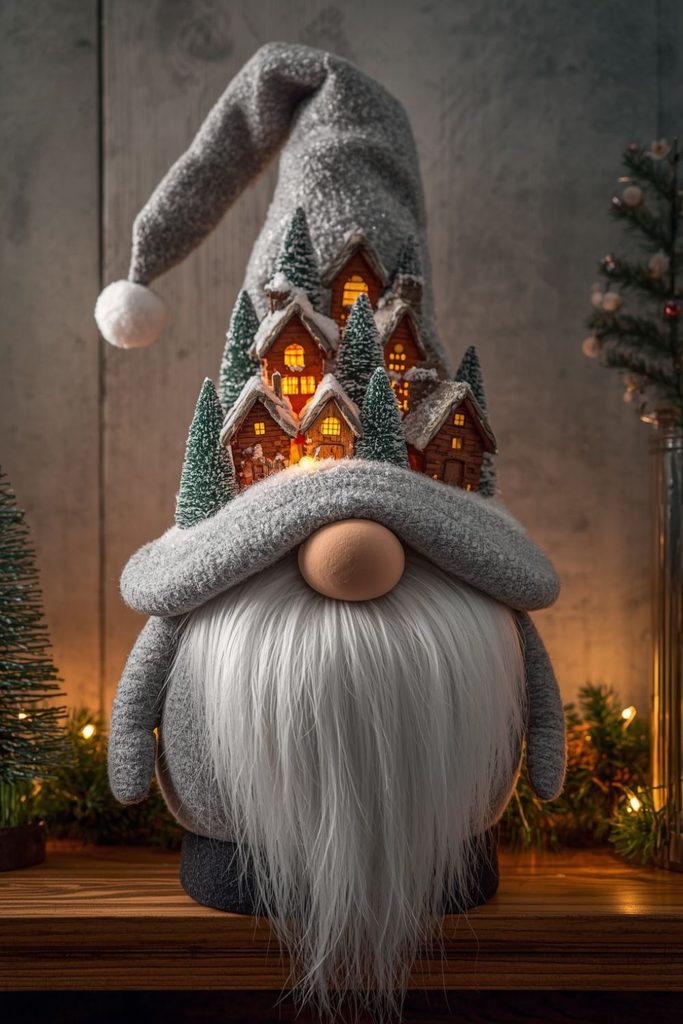
The Christmas village gnome turns the hat into a tiny snowy village. Small houses, trees, and snow details can be arranged on the wide hat surface.
It creates a miniature display in one figure, making it a fun project for a mantel or shelf.
Materials Needed
- Gray felt
- White felt
- Brown felt
- Miniature house pieces
- Tiny bottle brush trees
- Faux snow
- Stuffing
- Yarn
- Wooden nose
- Glue
- Scissors
Step by Step Method
- Make a rounded gray body.
- Fill it with stuffing and close the bottom.
- Create a wide pointed gray hat.
- Attach the hat securely to the body.
- Cut tiny house shapes from brown and white felt.
- Add small yellow paper windows.
- Place miniature trees around the lower hat.
- Add a little faux snow around the houses.
- Create a white yarn beard.
- Attach the beard and wooden nose.
- Add a small snowy edge around the hat opening.
- Keep the village pieces lightweight so the hat remains upright.
Snow Globe Hat Gnome

The snow globe hat gnome uses a clear dome or small transparent container as the main feature. A tiny winter scene inside the dome makes the hat look like a miniature snow globe.
Use lightweight decorations so the gnome stays balanced.
Materials Needed
- Beige fabric
- White felt
- Clear plastic dome
- Tiny tree
- Tiny snowman decoration
- Faux snow
- Yarn
- Stuffing
- Wooden nose
- Glue
- Scissors
Step by Step Method
- Make a small rounded body from beige fabric.
- Fill it with stuffing.
- Close the base.
- Make a white yarn beard.
- Attach the beard and nose.
- Prepare a small circular base for the clear dome.
- Glue a tiny tree inside the dome.
- Add a miniature snowman or small house.
- Sprinkle a little faux snow inside.
- Secure the clear dome over the miniature scene.
- Attach the dome above the gnome body as its hat.
- Check that the dome sits straight before the glue dries.
Christmas Wreath Hat Gnome

The wreath hat gnome replaces the usual pointed hat with a festive greenery wreath. This makes the design stand out from traditional gnomes while still keeping the familiar beard and nose.
Artificial greenery is a practical choice because it stays neat throughout the holiday season.
Materials Needed
- Beige fabric
- White yarn
- Small artificial greenery
- Mini berries
- Ribbon
- Wire wreath frame
- Stuffing
- Wooden nose
- Glue
- Scissors
Step by Step Method
- Make a rounded beige body.
- Fill it with stuffing.
- Close the lower opening.
- Create a full white yarn beard.
- Attach the beard and wooden nose.
- Prepare a small wreath frame.
- Wrap artificial greenery around the frame.
- Add tiny red berries between the greenery.
- Tie a small ribbon bow at the bottom.
- Attach the wreath above the gnome face.
- Check that the wreath does not cover the nose.
- Add a small fabric scarf if desired.
Christmas Stocking Hat Gnome

The stocking hat gnome uses a long Christmas stocking as its main head covering. The stocking can hang to one side, giving the figure a relaxed holiday appearance.
Choose a small lightweight stocking so the gnome does not lean over.
Materials Needed
- Small Christmas stocking
- Beige fabric
- White yarn
- Stuffing
- Wooden nose
- Ribbon
- Felt
- Glue
- Scissors
- Needle and thread
Step by Step Method
- Sew or glue a rounded beige body.
- Fill the body with stuffing.
- Close the bottom.
- Create a long white yarn beard.
- Attach the beard to the front.
- Add a round wooden nose.
- Choose a small Christmas stocking with a soft cuff.
- Place the stocking over the upper body.
- Bend the stocking gently to one side.
- Secure the top section with glue.
- Add a small ribbon around the stocking cuff.
- Leave the end loose so the stocking keeps its soft shape.
Mistletoe Gnome Couple

A gnome couple creates a small romantic Christmas display with two coordinating figures. One can wear a red hat while the other wears green, with a mistletoe decoration placed between them.
The figures can share similar body sizes while using different accessories.
Materials Needed
- Red fabric
- Green fabric
- Beige fabric
- White yarn
- Felt
- Small mistletoe sprig
- Stuffing
- Wooden noses
- Ribbon
- Glue
- Scissors
Step by Step Method
- Make two rounded bodies from beige fabric.
- Fill both bodies with stuffing.
- Close the lower openings.
- Make matching white yarn beards.
- Attach a wooden nose to each figure.
- Create a red pointed hat for one gnome.
- Create a green pointed hat for the other.
- Add small ribbons to both hats.
- Prepare a miniature mistletoe sprig.
- Attach the sprig between the two figures.
- Position the gnomes close together without letting them fall.
- Add small matching scarves to make the pair look coordinated.
Christmas Tree Farm Gnome

The Christmas tree farm gnome is inspired by rows of evergreen trees and rustic holiday markets. A plaid scarf, miniature trees, and a tiny wooden sign give this figure a warm country Christmas appearance.
It works particularly well beside larger tabletop trees or wooden holiday decorations.
Materials Needed
- Brown fabric
- Green felt
- Plaid fabric
- White yarn
- Small wooden sign
- Miniature evergreen trees
- Stuffing
- Wooden nose
- Glue
- Scissors
- Small ribbon
Step by Step Method
- Make a rounded brown body.
- Fill it with stuffing.
- Close the bottom securely.
- Add a long white yarn beard.
- Attach the beard and wooden nose.
- Make a green pointed hat.
- Add a small plaid band around the hat.
- Prepare two or three miniature evergreen trees.
- Attach the trees around the lower body.
- Write “Christmas Tree Farm” on a tiny wooden sign.
- Place the sign against the front or side of the gnome.
- Add a small ribbon at the base for an extra holiday detail.