
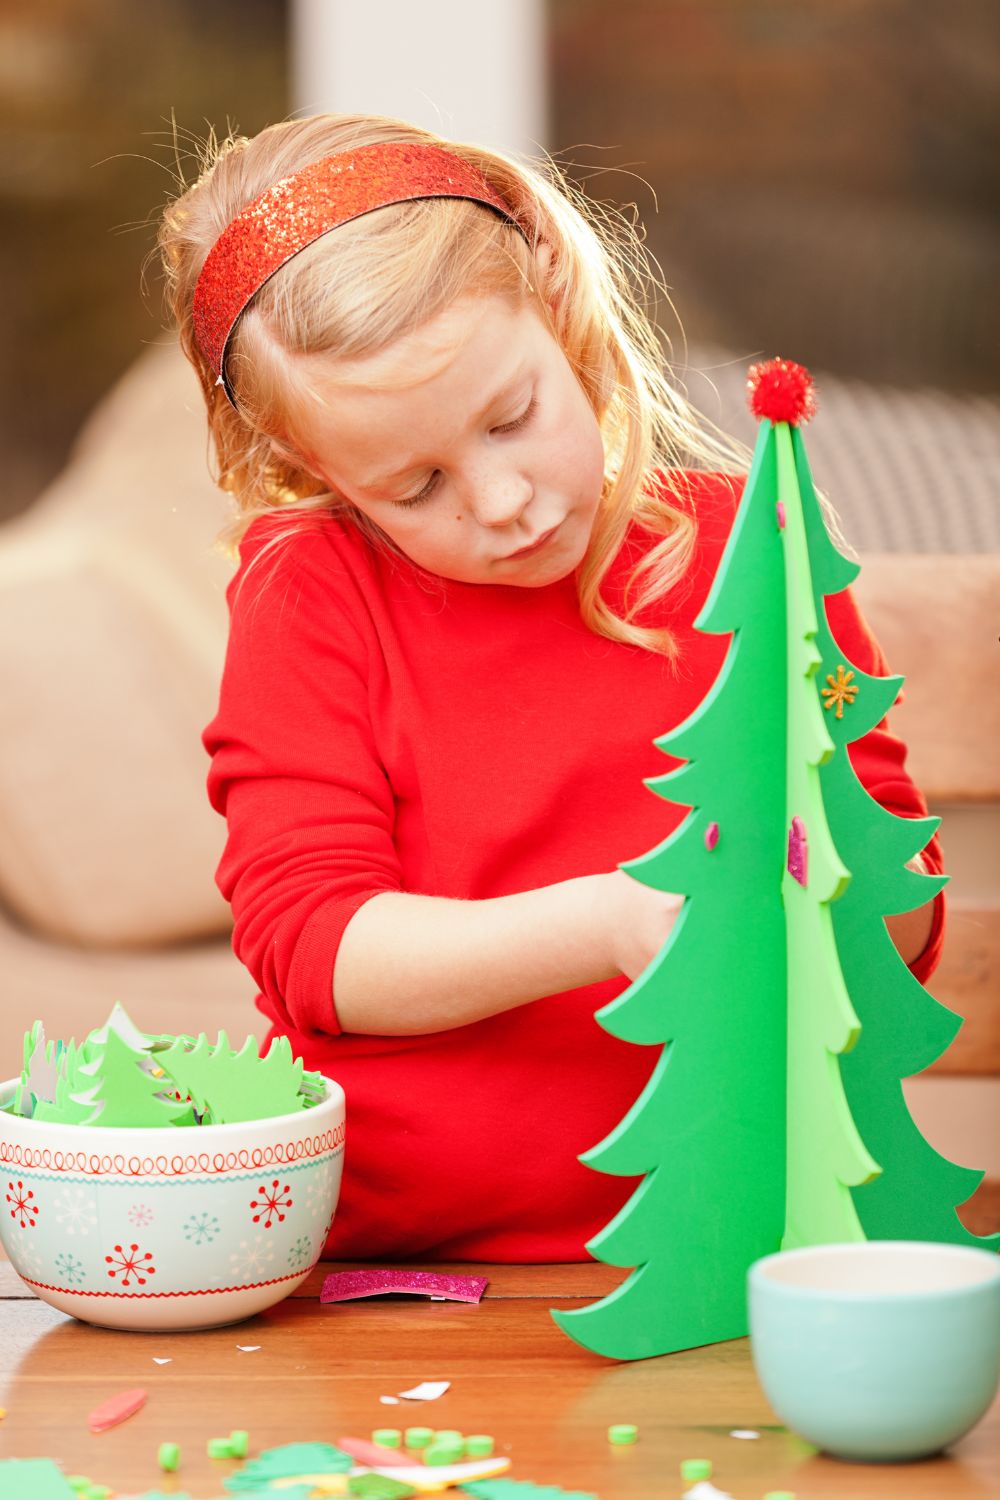
Making Christmas wood crafts is an easy way to create festive decorations without spending much on store bought pieces. With simple wood, basic tools, paint, and a few supplies, you can make Christmas trees, ornaments, signs, door hangers, and other decorations for your home.
What materials, tools, and types of wood do you need to make easy Christmas wood crafts safely?
Pine is a practical choice for many beginner projects. A board around 1/2 to 3/4 inch thick is sturdy enough for shelf sitters, signs, and small holders while still being reasonably easy to cut. Thin plywood, around 1/4 inch thick, works better for stars, snowflakes, bells, ornaments, and silhouettes because it is lighter.
MDF can also be used for indoor painted decorations when a very smooth surface is wanted. It should be kept dry, and cutting it creates fine dust, so wear suitable eye and respiratory protection and follow the product’s safety guidance.
For most projects, gather sandpaper, a pencil, ruler, measuring tape, hand saw or jigsaw, drill, wood glue, clamps, paintbrushes, acrylic paint, painter’s tape, stencils, ribbon, twine, and a clear finish. You may also need small screws, hooks, wooden discs, dowels, or unfinished wooden shapes.
A few safety habits are worth making routine. Wear safety glasses while cutting or drilling. Secure the board before sawing, keep your hands clear of the blade, and don’t hold a small piece directly in your hand while drilling it. Sand in a well ventilated area and use suitable respiratory protection for wood dust.
For reclaimed boards, remove every nail and staple you can find before cutting. Check for rot, splitting, mold, or unknown coatings. If you don’t know where a piece of reclaimed wood came from, using fresh unfinished lumber is a safer option.
What are the easiest Christmas wood craft projects to make, and how do you create them step by step?
Flat decorations are usually the easiest place to begin. Stars, bells, snowflakes, reindeer, and gingerbread figures can all be cut from a single sheet of thin plywood. If cutting shapes isn’t practical, unfinished wooden blanks can save time and let you focus on painting.
For signs and shelf sitters, a simple board with a painted message may be all you need. The trick is to spend more time on preparation than you might expect. A few minutes of sanding can make paint look much cleaner, especially around the edges.
Before making a cut, draw the shape on paper first. This lets you adjust the proportions before marking the wood. If you are making several matching pieces, create one cardboard template and trace it repeatedly rather than drawing each shape freehand.
Paint in light coats. Heavy coats tend to collect around corners and can leave brush marks. Give each layer enough time to dry before adding lettering or details. When using stencils, keep the brush nearly dry and dab rather than pushing a large amount of paint across the letters.
The projects below are arranged as individual ideas rather than one large build. Several can be finished in an afternoon, while the more involved pieces are better spread over a weekend.
- Related post Side Hustle Season: Christmas Crafts for Adults You Can Sell (and Actually Profit From)
How can you personalize, finish, and display your Christmas wood crafts to create festive DIY decor?
Personalization doesn’t have to mean elaborate lettering. A surname, first initial, Christmas year, or short greeting can change the feel of an ordinary wooden decoration. You can also personalize pieces through color. A family that uses red and gold every year might want those shades repeated across several handmade decorations.
For a rustic appearance, stain the wood and paint only the main details. If you prefer a cleaner look, paint the entire surface and add a crisp border. A satin clear coat gives painted pieces a subtle sheen, while a matte finish keeps them quieter.
Think about the final location before choosing dimensions. A 12 inch tree may look right on a deep mantel but too large on a narrow shelf. A 24 inch porch sign can be easy to see from the driveway, while a small ornament should usually stay around 3 to 5 inches.
The project ideas below include practical starting sizes, approximate times, and small tips where they can save you trouble.
Top 21 Christmas Wood Crafts Ideas
1. DIY Wooden Christmas Tree Shelf Sitter
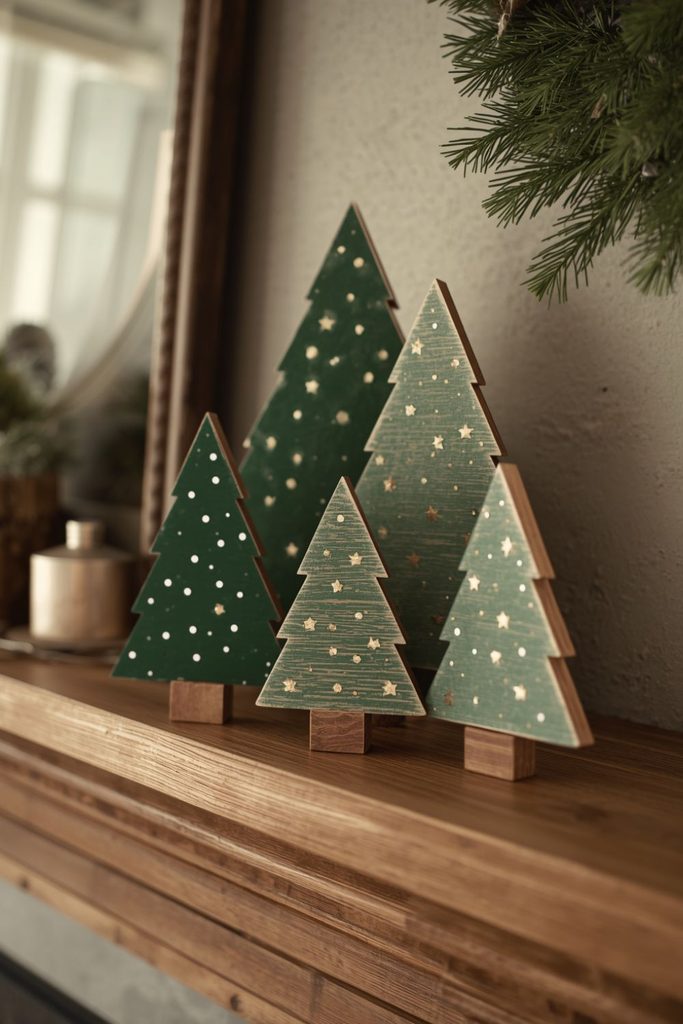
Good starting size: 10 to 14 inches tall
Time: About 1 to 2 hours, plus drying
Difficulty: Easy
A simple triangular tree is one of the best ways to use a leftover piece of pine. You can make one tree or cut three at 8, 11, and 14 inches for a small group on a mantel.
Materials needed
- 1/2 to 3/4 inch pine board
- Pencil and ruler
- Jigsaw or hand saw
- Medium and fine sandpaper
- Green, brown, and white paint
- Small paintbrush
- Clear sealer
Draw a triangle with a short rectangular trunk at the bottom. Cut the outline, then spend a few minutes smoothing the edges. If the board has a visible knot, consider placing that area toward the back rather than trying to hide it with several layers of paint.
Paint the trunk brown and the tree green. Once dry, add white dots for snow or small gold stars for ornaments. A thin white line around the outside can make the shape stand out against a dark shelf.
Common mistake: Making the base too narrow. If the tree keeps tipping over, attach a wider wooden foot underneath.
2. Wooden Snowman Door Hanger

Good starting size: 14 to 20 inches tall
Time: 2 to 3 hours, plus drying
Difficulty: Easy
A snowman is forgiving because the design does not depend on perfectly straight lines. A round wooden disc works, or you can join two or three circular pieces to create a fuller snowman.
Materials needed
- Round wooden board or 1/4 inch plywood
- White, black, orange, and red paint
- Sandpaper
- Drill
- Ribbon
- Exterior rated sealer if used outdoors
Paint the surface white and allow it to dry. Add two black eyes, a row of buttons, and a smiling mouth. A carrot shaped orange nose brings the face together quickly.
Paint a scarf across the lower section and add a black hat or red Santa hat. Drill the hanging hole before painting if you want to avoid chipping the finished surface.
Practical tip: If the door receives direct rain, place the hanger under a covered section or use materials and finishes rated for outdoor exposure. Even sealed wood benefits from some shelter.
3. Scrap Wood Christmas Star Ornament

Good starting size: 3 to 5 inches wide
Time: 30 to 60 minutes, plus drying
Difficulty: Easy
This is a useful project for small pieces of thin plywood that are too good to throw away but too small for larger decorations.
Materials needed
- Thin scrap wood
- Star template
- Jigsaw or coping saw
- Fine sandpaper
- Paint or stain
- Small drill bit
- Ribbon or twine
Trace the star and cut around it. Sand each point carefully because sharp corners can remain rough even when the larger surfaces feel smooth.
Stain the entire piece and paint only the points, or use two contrasting colors. Drill the hanging hole about 1/4 inch from the top edge. Add ribbon and hang it on the tree.
Practical tip: Make the hole before applying the final finish. It is easier to clean up sawdust around an unfinished hole.
4. Wooden Santa Boot Decoration

Good starting size: 10 to 16 inches tall
Time: 1 to 2 hours, plus drying
Difficulty: Easy
A Santa boot is a good alternative to the usual tree and snowflake shapes. Make one for a shelf or two matching boots for a fireplace display.
Materials needed
- 1/4 inch plywood
- Boot template
- Jigsaw
- Sandpaper
- Red, white, black, and gold paint
- Clear sealer
Trace the boot onto the plywood and cut slowly around the curves. Sand the cut edge before painting the boot red.
Add a white cuff at the top, a black sole, and a small gold buckle. You can write a name on the cuff or add tiny snowflakes along the boot.
Common mistake: Making the buckle too large. Keep small details proportional to the boot so the painted shape doesn’t look crowded.
5. Personalized Family Name Christmas Plaque

Good starting size: 12 by 18 inches
Time: 2 to 3 hours, plus drying
Difficulty: Easy
A name plaque can become one of those decorations you bring out every December. Start with a rectangular board and let the lettering do most of the work.
Materials needed
- Pine board
- Sandpaper
- Paint or wood stain
- Letter stencil
- Painter’s tape
- Small sponge or stencil brush
- Clear sealer
- Hanging hardware
Sand the board and apply the background color. Once it has dried, measure the center before placing the stencil. This extra step helps keep the name from drifting too high or low.
Secure the stencil and apply a small amount of paint. Remove it carefully, then add a few stars or trees around the lettering.
Practical tip: Test the stencil on cardboard first. It gives you a chance to check spacing and paint coverage before working on the finished board.
6. Wooden Reindeer Silhouette
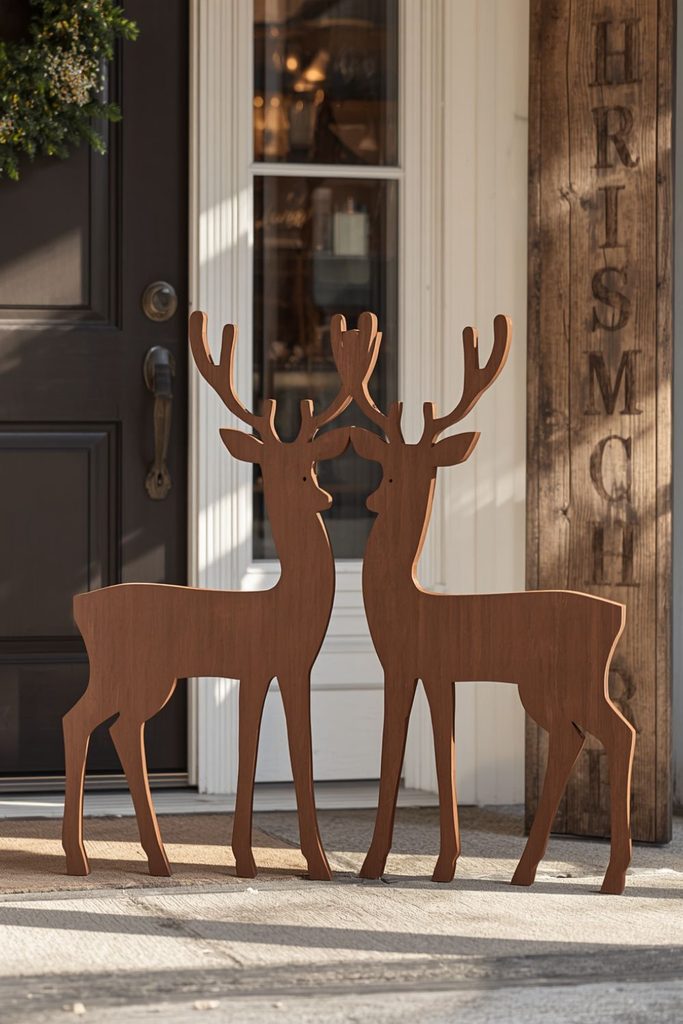
Good starting size: 12 to 18 inches tall
Time: 2 to 3 hours, plus drying
Difficulty: Moderate
The antlers are the only part that really calls for patience. A template with thicker antler branches is much easier to cut than a highly detailed silhouette.
Materials needed
- 1/4 inch plywood
- Reindeer template
- Jigsaw
- Fine sandpaper
- Brown, black, red, and white paint
- Clear exterior sealer if needed
Trace the outline and cut slowly around the antlers and legs. Don’t force the jigsaw around tight corners. Several gentle cuts are safer and usually produce a cleaner result.
Paint the body brown and add a small red nose. For a porch display, make two reindeer in slightly different sizes and place them near a larger sign.
Practical tip: If a narrow antler breaks, don’t throw the whole piece away. Simplify that section and sand it into a slightly different shape.
7. Mini Wooden Christmas Village Houses

Good starting size: 3 to 7 inches tall
Time: 2 to 4 hours for several houses
Difficulty: Easy to Moderate
This project is excellent for leftover blocks because the houses do not need to be identical. In fact, different heights make the little village look more natural.
Materials needed
- Small wood blocks
- Thin scrap wood for roofs
- Sandpaper
- Wood glue
- Acrylic paint
- Fine paintbrushes
- Clear sealer
Cut blocks to several heights and create simple pitched roofs from thin wood. Sand before assembly, especially around the roof pieces.
Paint the houses in cream, green, red, or muted blue. Add tiny doors and windows, then paint a thin white line along the roof to suggest snow.
Practical tip: Don’t paint tiny windows with a thick brush. The end of a toothpick or a very fine brush can give you better control.
8. DIY Wooden Christmas Tree Garland
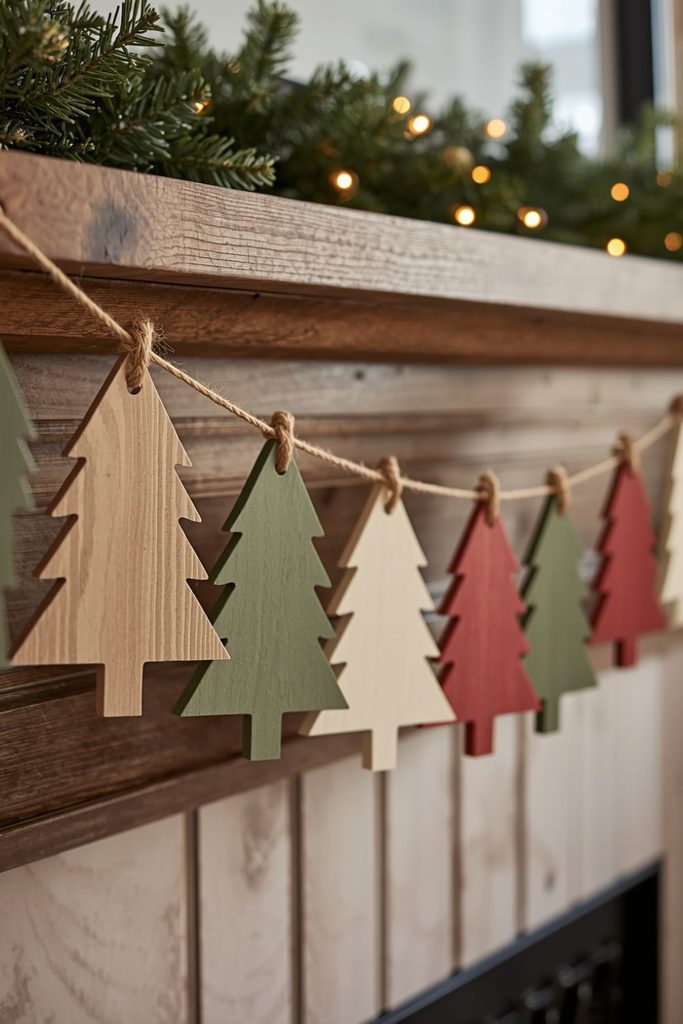
Good starting size: 3 to 4 inches per tree
Time: 1 to 2 hours
Difficulty: Easy
A wooden garland is a good choice if you want to decorate a long mantel without filling it with large objects. Make eight to twelve small trees for a typical shelf.
Materials needed
- Thin plywood
- Tree template
- Saw
- Sandpaper
- Paint
- Drill
- Twine
Trace the tree shape several times, cut the pieces, and sand them. Paint them in alternating colors rather than making every tree identical.
Drill one small hole near the top of each tree and thread them onto twine. Leave roughly 2 to 3 inches between pieces.
Practical tip: Lay the finished trees on the floor before hanging the garland. You can adjust the spacing much more easily this way.
9. Wooden Gingerbread Man Decorations
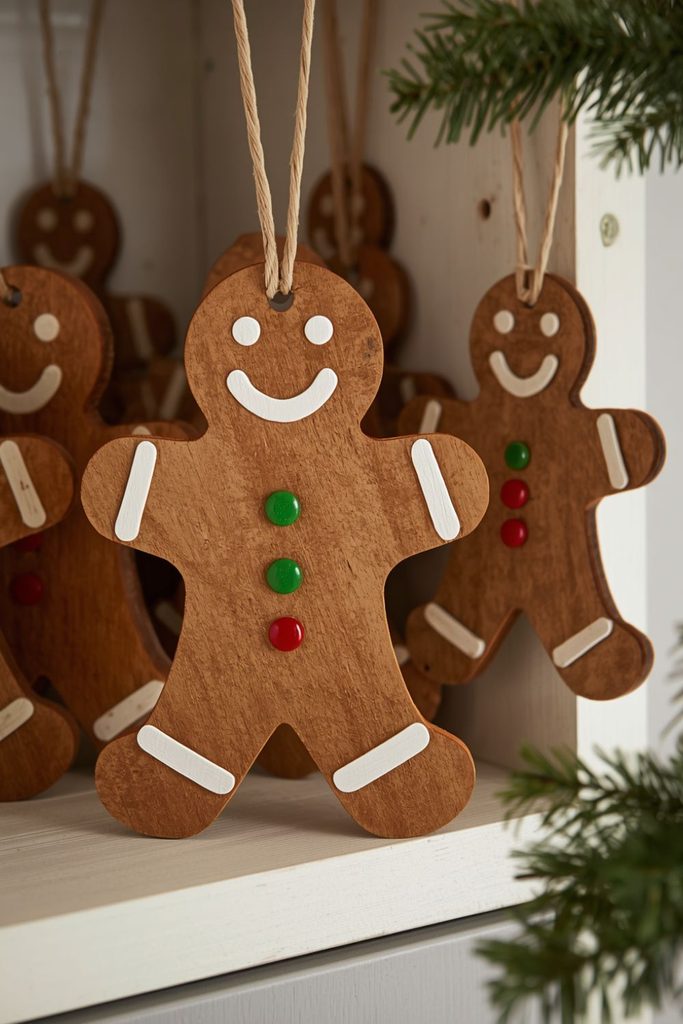
Good starting size: 5 to 8 inches tall
Time: 1 to 2 hours
Difficulty: Easy
These little figures can be used on a Christmas tree, kitchen shelf, or dining table. The painted icing provides most of the detail.
Materials needed
- Thin plywood
- Gingerbread template
- Jigsaw
- Sandpaper
- Brown, white, red, and green paint
- Ribbon
- Clear sealer
Cut the figure and smooth the edges. Paint the body brown and wait until the surface is fully dry before adding the icing.
Use white paint for the outline around the arms and legs, then add colored buttons and a small smile. A tiny hole and ribbon turn it into an ornament.
Practical tip: Don’t try to make every icing line perfectly even. Slight variations suit the handmade appearance.
10. Rustic Wooden Nativity Stable

Good starting size: 12 inches wide by 8 inches high
Time: 3 to 5 hours
Difficulty: Moderate
This project requires more measuring than the flat decorations, but the structure can remain very simple. The stable should provide a backdrop rather than compete with the figures.
Materials needed
- Small pine boards
- Saw
- Sandpaper
- Wood glue
- Small nails
- Brown stain or paint
- Nativity figures
- Decorative straw
Cut a back panel, two side pieces, and two roof boards. Sand everything before putting the pieces together.
Glue the walls and roof, then reinforce the joints with small nails if suitable for your materials. Once dry, stain the wood brown or leave it mostly natural.
Common mistake: Making the roof too small. Let the roof extend slightly beyond the side walls so the structure looks more like a stable and less like a small box.
11. Wooden Advent Calendar With Drawers
Good starting size: 18 by 24 inches
Time: A weekend project
Difficulty: Moderate to Advanced
An advent calendar can become a family decoration that gets used year after year. Building 24 separate drawers from raw wood is possible, but it adds a lot of work, so beginners may prefer a premade wooden compartment box.
Materials needed
- Wooden cabinet or box
- 24 small compartments or drawers
- Sandpaper
- Paint
- Number stencils
- Small handles
- Wood glue
- Clear sealer
Sand the box and paint the frame before adding the numbers. Number the compartments from 1 to 24 and use a consistent style so the front doesn’t become too busy.
Add small handles if the compartments are drawers. Fill each space with a note, family activity, small treat, or another age appropriate surprise.
Practical tip: Leave enough room inside each compartment for what you actually plan to put in it. A beautiful calendar isn’t very useful if the drawers are too shallow.
12. DIY Wooden Stocking Holder
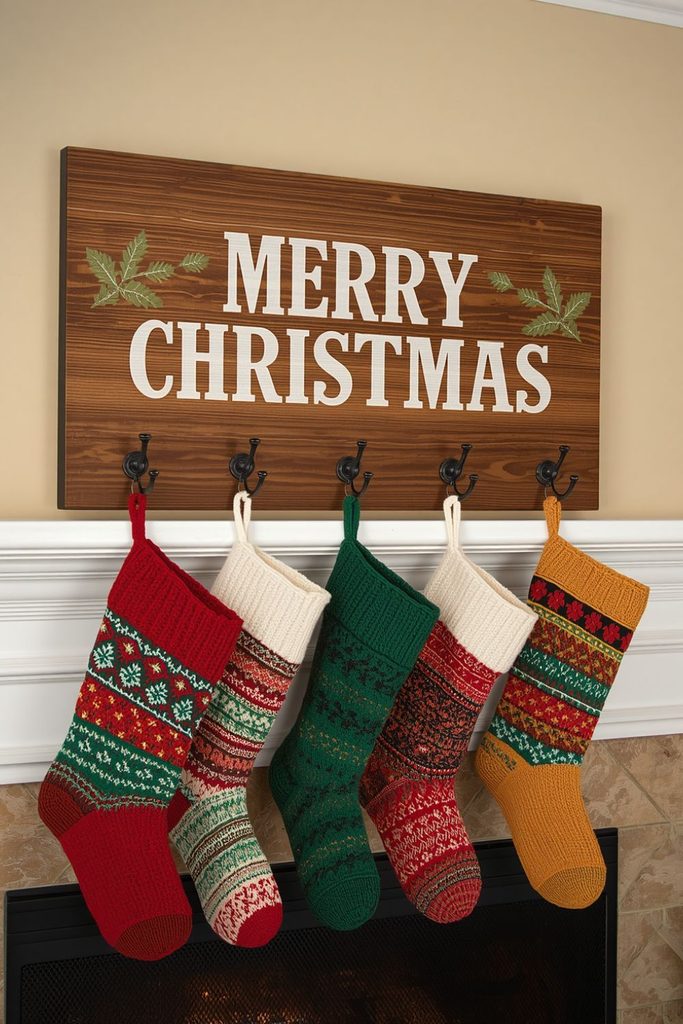
Good starting size: 6 by 24 inches for several stockings
Time: 2 to 3 hours
Difficulty: Easy to Moderate
A stocking holder is one of the more useful decorations in the list because it has a job beyond looking festive.
Materials needed
- Pine board
- Sandpaper
- Paint or stain
- Three to five hooks
- Drill
- Screws
- Letter stencil
- Clear sealer
Sand and finish the board before attaching the hooks. Mark their positions with a ruler so each stocking hangs evenly.
Drill pilot holes and secure the hooks with screws. Paint a family name, “Merry Christmas,” or individual names above the hooks.
Safety note: Don’t rely on decorative adhesive hooks if the holder will carry heavy stockings. Mount the board securely and choose hardware suitable for the wall.
13. Wooden Snowflake Window Decorations
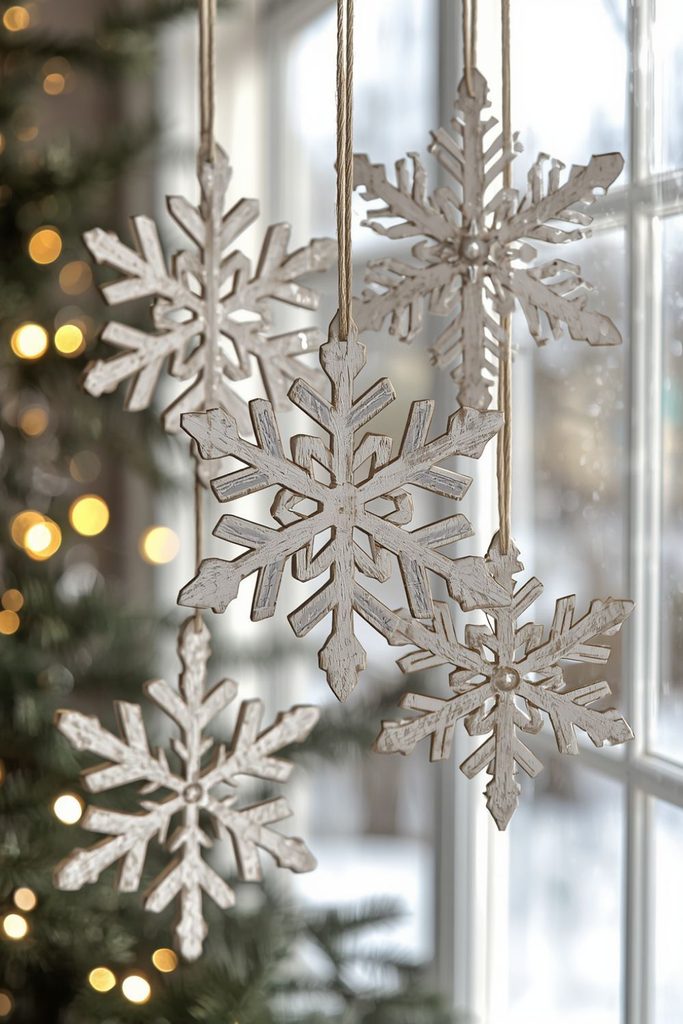
Good starting size: 4 to 8 inches wide
Time: 1 to 2 hours for several
Difficulty: Moderate
Thin snowflakes look especially pretty near a window because daylight can show the shape from both sides.
Materials needed
- 1/4 inch plywood
- Snowflake templates
- Jigsaw
- Fine sandpaper
- White or silver paint
- Drill
- Ribbon
Choose a design with broad branches. Very narrow snowflake sections are more likely to snap during cutting.
Cut Never put a real candle inside a wooden lantern. Keep the finished decoration away from heaters and other hot surfaces even and sand the pieces, then paint them white, silver, or pale blue. Drill the hanging holes and use ribbon in different lengths to create a staggered arrangement.
Practical tip: Hang three to five snowflakes at different heights instead of putting them all on one horizontal line.
14. Wooden Christmas Bell Decorations

Good starting size: 5 to 7 inches tall
Time: 1 to 2 hours
Difficulty: Easy
A bell shape works nicely as a tree ornament or part of a mantel display. It is also simple enough to make several at once.
Materials needed
- Thin plywood
- Bell template
- Saw
- Sandpaper
- Red, gold, silver, or green paint
- Ribbon
- Clear sealer
Trace and cut the bell, then smooth the edges. Paint the main shape and allow it to dry before adding a contrasting rim.
A small painted clapper at the bottom gives the bell more definition. Add a ribbon bow near the top and a hanging hole if needed.
Practical tip: Make the bell slightly wider at the bottom than at the top. It gives the silhouette a more recognizable shape.
15. DIY Wooden Candle Lantern

Good starting size: 6 by 6 by 10 inches
Time: 3 to 4 hours
Difficulty: Moderate
This lantern can be used indoors or on a sheltered porch, but a battery operated candle should be used rather than a real flame.
Materials needed
- Thin wooden strips
- Wooden base
- Wood glue
- Sandpaper
- Paint or stain
- Battery operated candle
- Clear sealer
Cut four vertical strips to the same length. Sand them, then arrange them around the base so the candle will remain easy to place and remove.
Glue the strips in position and add a simple top frame. Stain the wood for a rustic appearance or paint it white and add small Christmas details.
Safety note: Never put a real candle inside a wooden lantern. Keep the finished decoration away from heaters and other hot surfaces even when using an LED candle.
16. Wooden Christmas Card Holder
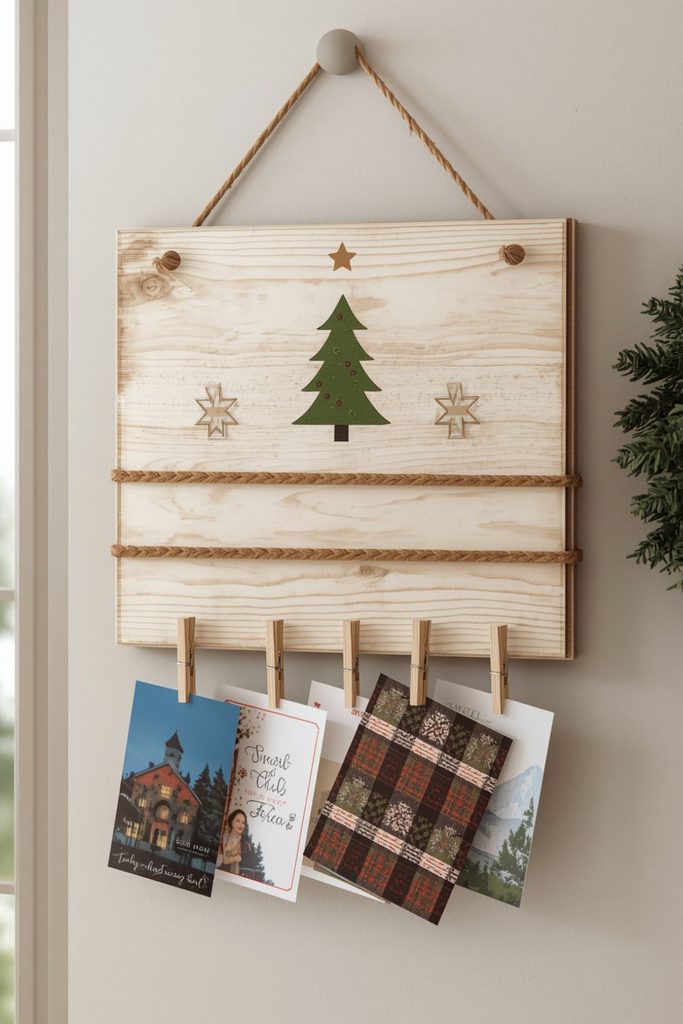
Good starting size: 8 by 20 inches
Time: 1 to 2 hours
Difficulty: Easy
A card holder gives Christmas cards a dedicated spot while making them part of the decoration.
Materials needed
- Wooden board
- Sandpaper
- Paint or stain
- Twine or thin wire
- Small wooden pegs
- Adhesive or screws
- Paint for lettering
Paint the board and add a simple tree, star, or Christmas greeting. Attach one or two lines of twine across the front.
Space the pegs evenly and secure them to the twine. Once everything is firmly attached, hang the board and use the pegs for cards throughout December.
Practical tip: Leave enough space between the lines of twine so larger cards don’t overlap too much.
17. Rustic Wooden Wreath Frame

Good starting size: 16 by 16 inches
Time: 3 hours, plus glue drying
Difficulty: Moderate
Instead of covering a wooden frame completely with greenery, leave much of the wood exposed. This keeps the project lighter and lets the natural material become part of the decoration.
Materials needed
- Thin wooden strips
- Saw
- Sandpaper
- Wood glue
- Clamps
- Artificial greenery
- Ribbon
- Hanging wire
Cut four matching strips and arrange them into a square. Glue the corners and clamp them until the adhesive has cured.
Attach greenery across one corner or along one side. Add a ribbon and hanging wire. A lightly stained frame works well with dark green foliage.
Common mistake: Adding too much greenery. Covering the entire frame can hide the wood and make the piece heavier than necessary.
18. Wooden Christmas Gift Box Décor
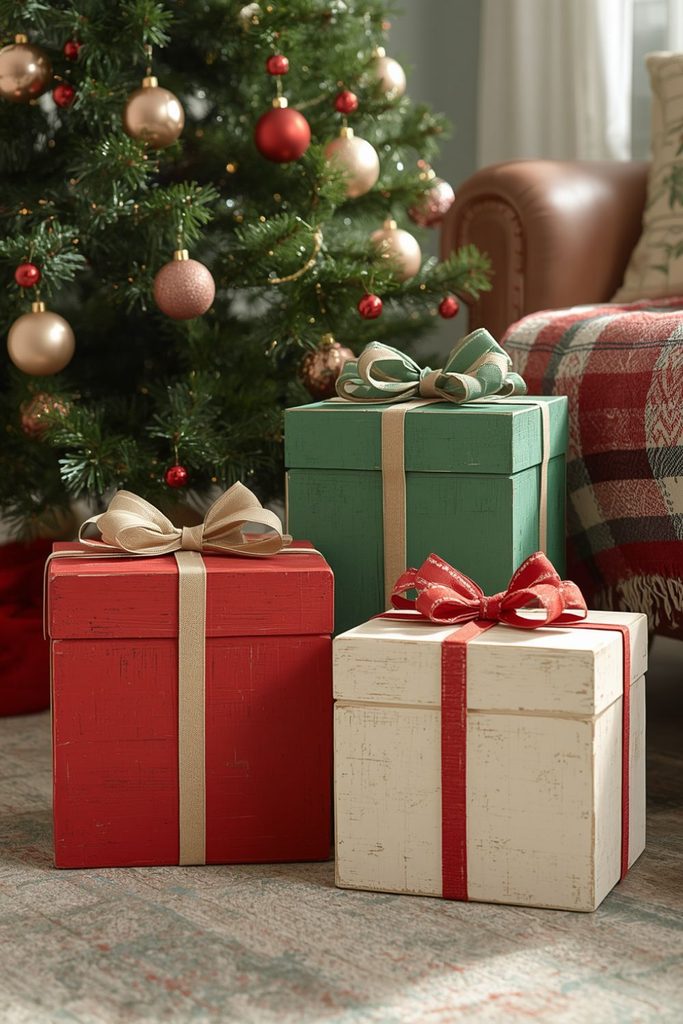
Good starting size: 4, 6, and 8 inch blocks
Time: 1 to 2 hours
Difficulty: Easy
Wooden gift boxes are useful for filling empty space beneath the tree or on a porch. They can be stacked in different sizes to create height.
Materials needed
- Wooden blocks or small boxes
- Sandpaper
- Red, green, white, and gold paint
- Ribbon
- Wood glue
- Clear sealer
Paint each block a different base color. After it dries, paint two narrow lines crossing at the center to mimic ribbon.
Add a bow to the top of each piece. Stack them from largest to smallest, and glue them together if you want a permanent display.
Practical tip: Use a ruler for the painted ribbon lines. Freehand lines can wander noticeably across a large box.
19. DIY Wooden Holly and Berry Wall Art
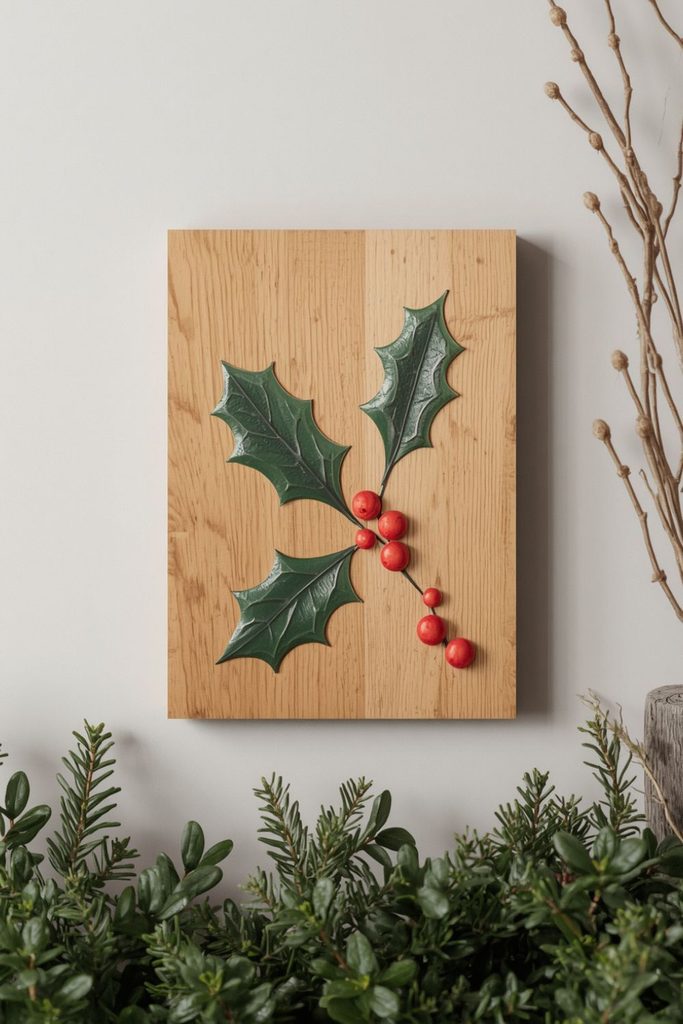
Good starting size: 10 by 14 inches
Time: 1 to 2 hours
Difficulty: Easy
This project is a good option if you want Christmas wall décor without cutting a complicated silhouette.
Materials needed
- Flat wooden board
- Holly leaf template
- Green and red paint
- Small round wooden pieces
- Sandpaper
- Wood glue
- Clear sealer
Sand the board and lightly sketch three or four holly leaves. Paint them green, then add red berries using small wooden discs or painted circles.
A thin border around the board helps contain the design. Once the paint has dried, seal the surface and add hanging hardware.
Practical tip: Leave some open space around the holly instead of filling the entire board. It gives the design room to breathe.
20. Wooden Christmas Train Decoration

Good starting size: 12 to 18 inches long add lots of decorations to make a wooden piece look finished. One of the easiest techniques is to combine a painted center with a stained or natural only a small amount of paint onto the brush, wipe most of it away on a paper towel, then lightly is light distressing. After the paint has dried, gently sand selected corners so a little of the wood or your layout before painting the actual board. A pencil guide can be erased after the paint dries, and removable stencils make repeated
Time: 3 to 4 hours
Difficulty: Moderate
A wooden train can be made from ordinary blocks, so you don’t need to cut a detailed locomotive shape. The wheels and paint do most of the visual work.
Materials needed
- Small wooden blocks
- Wooden discs
- Thin dowels
- Sandpaper
- Wood glue
- Red, green, black, and white paint
- Clear sealer
Choose one larger block for the engine and several smaller blocks for the cars. Sand them before painting.
Attach wooden discs as wheels and use dowels for small details. Paint windows, doors, lights, and trim after the main colors have dried.
Practical tip: Don’t permanently glue every car together if children will be using the train. Separate cars are easier to rearrange and store.
21. DIY Wooden North Pole Direction Sign
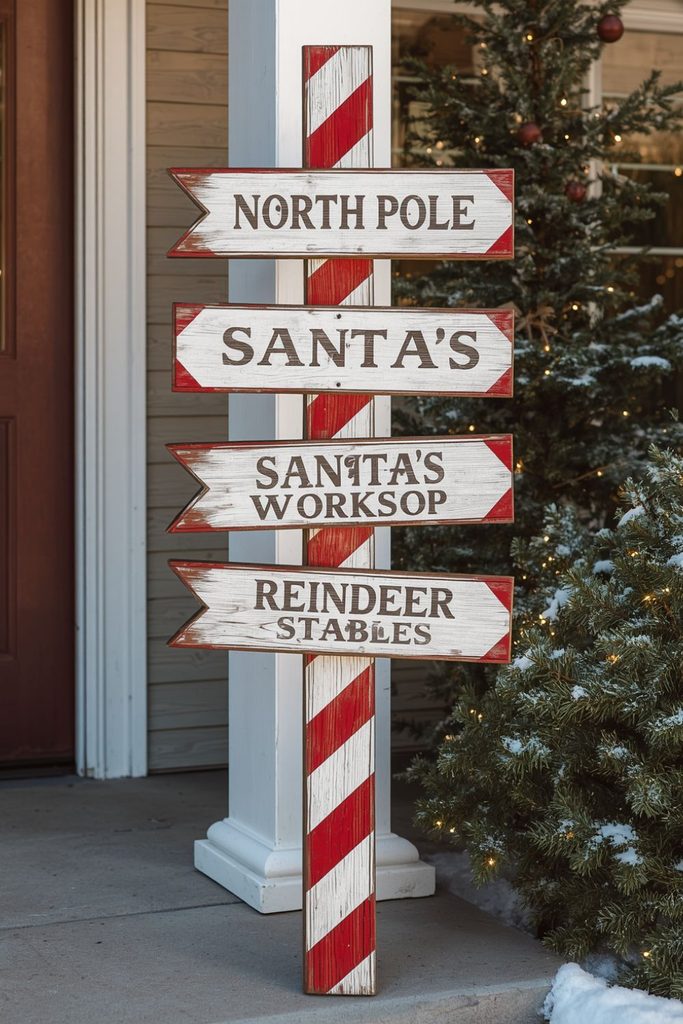
Good starting size: 18 to 30 inches tall
Time: 2 to 4 hours
Difficulty: Moderate
A North Pole sign is a fun choice for a porch or garden, especially if you have several Christmas decorations around the entrance.
Materials needed
- Wooden boards
- Saw
- Sandpaper
- Red and white paint
- Pencil and ruler
- Letter stencil
- Wood glue
- Exterior rated sealer for outdoor use
Cut the boards into arrow shapes and sand the edges. Paint each arrow white, then add red stripes around the border or across the board.
Letter the signs with phrases such as “North Pole,” “Santa’s Workshop,” and “Reindeer Stables.” Attach them to a central post or board.
For a smaller indoor version, skip the long post and mount several arrows onto a single rectangular board. This takes up less space and is easier to display on a shelf.
How to Give Simple Wood Projects a More Handmade Appearance
You don’t need to add lots of decorations to make a wooden piece look finished. One of the easiest techniques is to combine a painted center with a stained or natural edge. The contrast gives even a plain sign more definition.
Dry brushing can also add texture. Dip only a small amount of paint onto the brush, wipe most of it away on a paper towel, then lightly brush across the wood. This works particularly well for snowy edges on trees, houses, signs, and gift boxes.
Another option is light distressing. After the paint has dried, gently sand selected corners so a little of the wood or darker base coat shows through. Keep the sanding irregular rather than removing paint from every edge.
For lettering, test your layout before painting the actual board. A pencil guide can be erased after the paint dries, and removable stencils make repeated letters easier to position.
How to Choose the Right Finish for Christmas Wood recoating times.
Seal exposed edges and drilled holes because those areas can display usually looks more balanced when the pieces vary in height. Place larger signs or shelf sitters behind smaller houses, ornaments, the pieces together. If your tree uses red, white, and green, repeat surface plenty of time to cure before packing it away. Paint may feel dry to the touch while still being soft enough to stick damp garages or sheds for unfinished wood because moisture can cause swelling, warping, or mildew Decorations
A finish should match where the decoration will be used. Indoor signs and ornaments generally need less protection than pieces that will sit on a porch.
For indoor decorations, a clear water based sealer is a convenient option for many painted surfaces. Matte finishes work well for rustic pieces, while satin gives a little more sheen.
Outdoor decorations need products rated for exterior use. Follow the instructions on the paint and sealer, particularly the recommended drying and recoating times. Seal exposed edges and drilled holes because those areas can allow moisture into the wood.
Don’t assume that one coat makes a decoration weatherproof. Outdoor pieces can still develop cracks, faded paint, or swelling after repeated exposure to rain and temperature changes. Store them somewhere dry after the holiday season.
How to Display Different Wooden Christmas Decorations Together
A display usually looks more balanced when the pieces vary in height. Place larger signs or shelf sitters behind smaller houses, ornaments, or trees. This prevents everything from appearing to sit on one straight line.
Color can tie the pieces together. If your tree uses red, white, and green, repeat those shades in the shelf decorations. You don’t need every project to contain all three colors.
Use the purpose of each piece to decide its location. Snowflakes work naturally near windows, stocking holders belong near the fireplace, card holders work well in entryways, and larger North Pole signs can mark a porch or garden area.
Don’t feel pressured to display every project at once. Rotating decorations throughout December can make the collection feel fresh and gives smaller pieces a chance to be noticed.
How to Store Handmade Christmas Wood Decorations
Give every painted and sealed surface plenty of time to cure before packing it away. Paint may feel dry to the touch while still being soft enough to stick to another decoration.
Wrap thin ornaments individually in tissue paper or soft cloth. Put heavier shelf sitters at the bottom of the storage box so they don’t crush smaller pieces.
Keep the storage container somewhere dry. Avoid damp garages or sheds for unfinished wood because moisture can cause swelling, warping, or mildew.
Before the next Christmas season, inspect outdoor pieces for peeling paint, loose screws, cracked wood, or damaged hanging hardware. Small repairs are much easier before the decoration goes back outside.
A Simple Way to Plan Your Christmas Wood Projects
If you’re making several decorations, don’t start by buying every material on the list. Look through your existing scrap wood first and sort pieces by size and thickness. You may already have enough different purposes. One door decoration, one personalized sign, a few ornaments, a tabletop piece, and a larger Cut all the flat shapes together, sand them in one session, and paint similar colors at the same time. Just keep the pieces labeled if several shapes look basic cutting and sanding, while a sign gives you practice with paint and lettering. Those simple skills can then be used style. You can work with new pine boards, plywood, wooden blanks, or leftover scraps and turn them into trees, ornaments, signs, edges, use thin coats of paint, and give glue and finishes enough time to set. Those simple habits will make the finished pieces knowing you made it yourself. Change the colors, add names, leave some wood grain visible, or material for several ornaments, signs, and shelf decorations.
Then choose projects with different purposes. One door decoration, one personalized sign, a few ornaments, a tabletop piece, and a larger porch decoration can create a complete handmade display without producing 21 separate items.
Batching similar work can also save time. Cut all the flat shapes together, sand them in one session, and paint similar colors at the same time. Just keep the pieces labeled if several shapes look alike.
Most projects become easier once the first one is finished. The star ornament teaches basic cutting and sanding, while a sign gives you practice with paint and lettering. Those simple skills can then be used on the larger projects.