
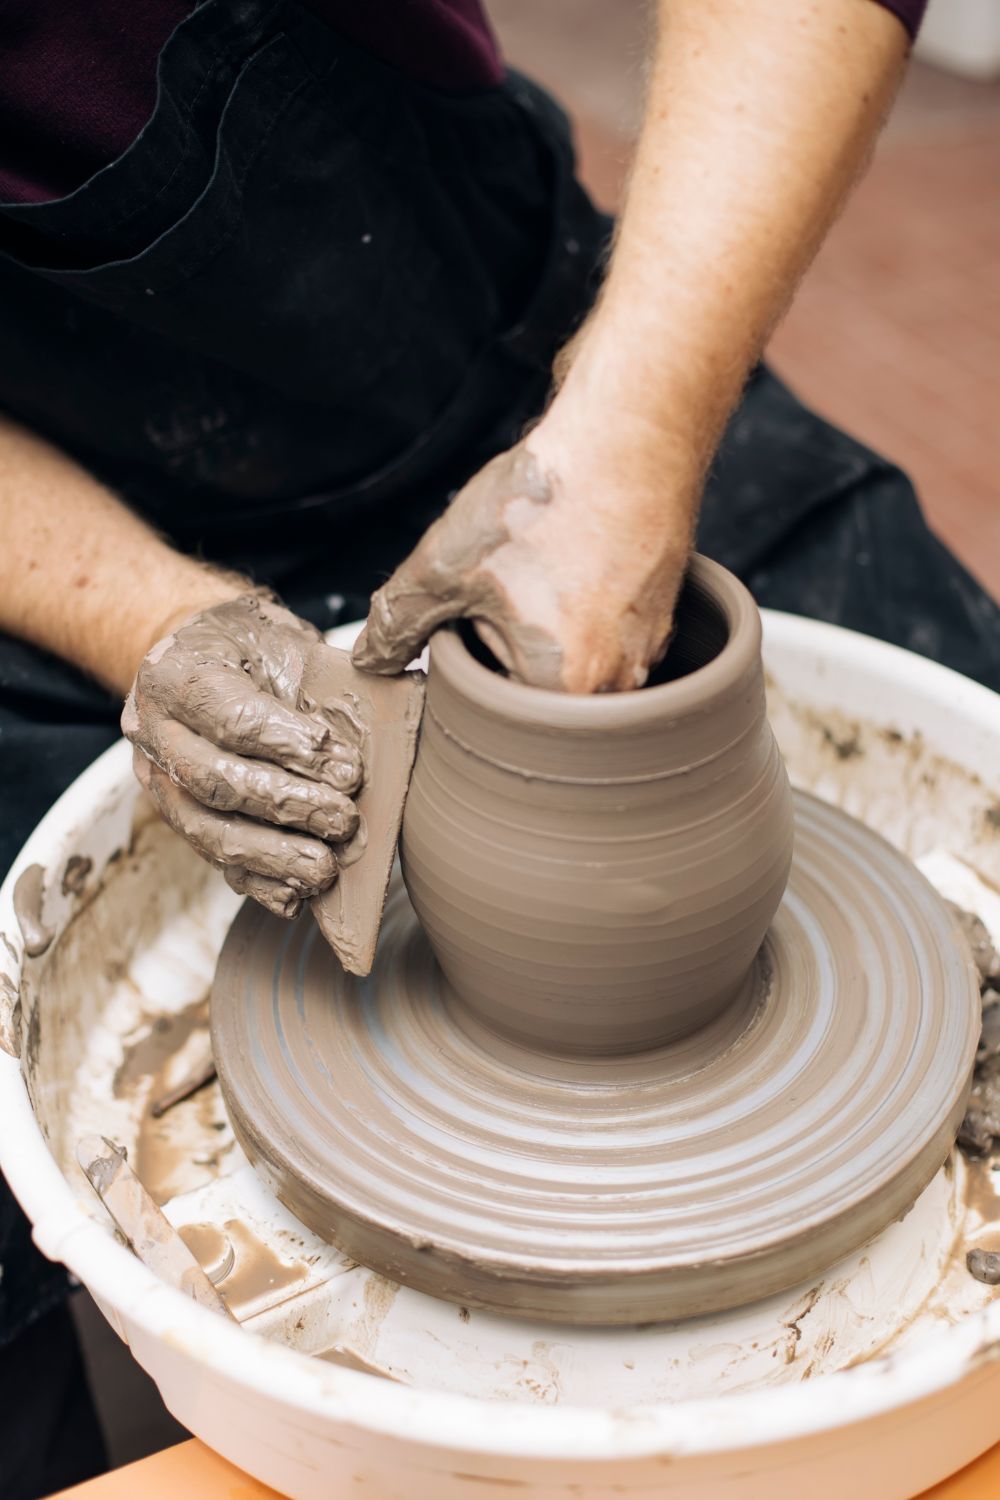
Thanksgiving tables are often remembered for more than the food. The colors, candlelight, handmade details, and little touches around each place setting can make guests feel comfortable before dinner even begins. Pottery is especially lovely for this kind of table because clay pieces have a natural texture that works beautifully with autumn colors. A hand painted plate, a softly glazed bowl, or a small ceramic pumpkin can make the table feel personal without making it look overly decorated.
For women who enjoy DIY home décor and seasonal decorating, Thanksgiving pottery offers plenty of ways to bring creativity to the dining table. You can work with warm terracotta, creamy ivory, sage green, burnt orange, brown, and muted gold. Even simple pottery pieces can look special when their shapes and finishes are chosen carefully. The ideas below focus on useful pieces that can be made, painted, or styled for Thanksgiving. Some work as tableware, while others add candles, flowers, food, or personal details. The result is a cozy table that feels handmade, welcoming, and ready for family gatherings.
What Thanksgiving pottery ideas are best for creating a warm and cozy table?
The best Thanksgiving pottery ideas are pieces that add both beauty and purpose to the table. Dinner plates, chargers, serving bowls, mugs, gravy boats, and platters are useful during the meal, while candle holders, pumpkin decorations, and vases help create the mood. Choosing pieces in related colors makes the table feel connected without making every item look exactly alike.
Warm shades work especially well for Thanksgiving. Terracotta, cinnamon, burnt orange, cream, brown, muted sage, and soft rust can create a comfortable autumn feeling. Matte and lightly speckled finishes are also attractive because they give pottery a natural handmade appearance. You do not need every piece to have a complicated design. A few hand painted leaves or a pressed botanical pattern can be enough.
Shape also matters. Rounded bowls, pumpkin forms, leaf impressions, and softly curved serving pieces can make a table feel relaxed. Place a decorative piece beside something practical, such as a ceramic pumpkin next to a dinner plate or a small vase between two serving dishes. This keeps the table useful while still giving guests plenty to look at.
The strongest Thanksgiving pottery ideas also work with food and flowers already being served. A ceramic platter can hold the turkey, an acorn bowl can hold nuts, and a small vase can hold dried wheat. That connection between decoration and function makes the table feel natural rather than crowded.
How can you make or customize Thanksgiving pottery pieces for your table?
You can make Thanksgiving pottery pieces from clay if you have access to a kiln, or customize ready made bisque pottery if you want a simpler home project. For many people, painting and decorating bisque pieces is the easiest place to begin. It gives you freedom to choose colors and patterns without needing to shape the pottery yourself.
For hand built pieces, air dry clay can work for decorative items that will not hold food or liquids. Food safe plates, bowls, mugs, and serving dishes need suitable clay, glaze, and firing. Always follow the directions from the clay and glaze manufacturer, particularly for pieces that will touch food.
Start with a small color palette. Cream and terracotta can form the base, while burnt orange, brown, sage, or muted gold can be used for accents. Leaf stamps, rubber stamps made for pottery, texture tools, and real dried leaves can create attractive surface patterns. A pressed leaf design is especially fitting for Thanksgiving because it gives a natural seasonal look without requiring advanced painting skills.
Personal touches can make the pieces feel more connected to your gathering. You might add a guest’s initial to a place card holder, paint a tiny pumpkin on a mug, or add a simple leaf border around a plate. Keep the designs spaced out so the pottery still looks clean. A little imperfection can actually make handmade pottery feel warmer, and small variations between pieces can add character.
How can you arrange and style Thanksgiving pottery to create a beautiful Thanksgiving tablescape?
Start by deciding where people will sit and how much room each guest needs. Place the dinner plates first, then add chargers, napkins, glasses, and smaller pottery pieces. This prevents decorative items from taking up space needed for eating. A table should look inviting, but guests should still be able to reach the food and talk comfortably.
Use height carefully. Low bowls and pumpkins work well near the center because they do not block conversation. Taller vases can be placed toward the ends of the table or used with short dried arrangements. Candle holders can fill small gaps between serving dishes and centerpieces. Repeating one or two colors throughout the table will help the pottery look connected.
Texture can make the arrangement feel especially cozy. Pair smooth cream pottery with speckled brown pieces, woven napkins, wood serving boards, linen table runners, and dried leaves. You do not need every item to match. The goal is to create a relaxed mix where pottery remains the visual focus.
A simple arrangement might begin with a neutral runner, followed by a low ceramic bowl filled with mini pumpkins and wheat. Add cream vases with rust colored flowers, then place pottery candle holders around them. Individual pumpkin place card holders can sit beside each plate. This gives guests several small details to notice without filling every inch of the table.
- Related post Step-by-Step Thanksgiving Centerpieces DIY Projects That Add Warmth to Your Holiday Table
Top 10 Thanksgiving Pottery Ideas
1. Hand Painted Pumpkin Dinner Plates with Terracotta and Cream Tones
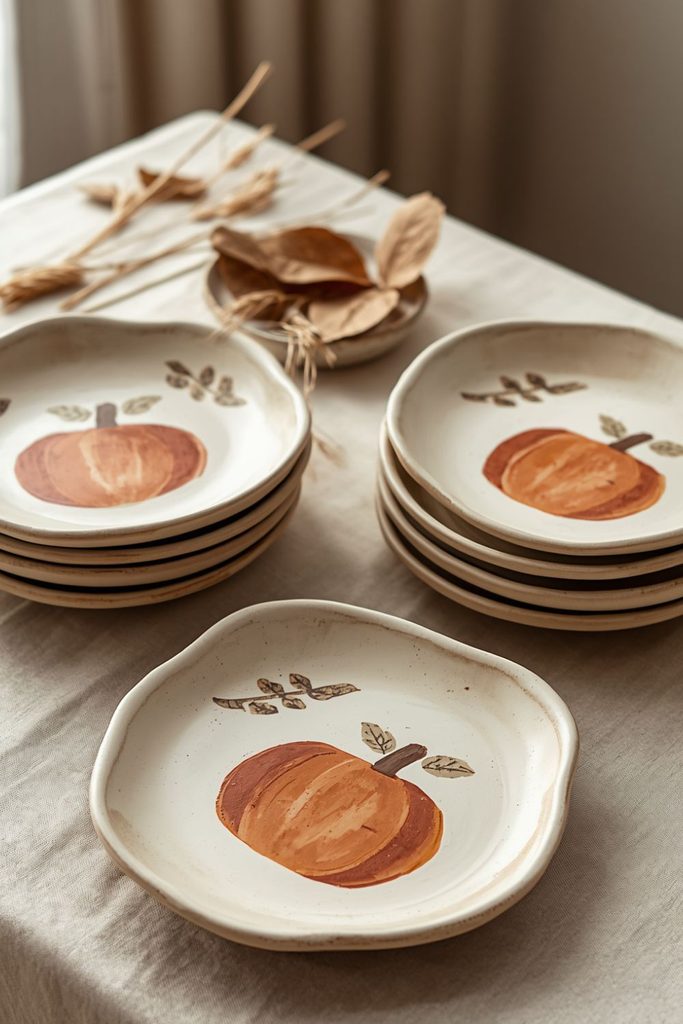
Hand painted pumpkin dinner plates can become the main visual feature of a Thanksgiving place setting. Terracotta and cream create a soft autumn combination that feels warm without becoming too bright. You can paint small pumpkins around the rim, place one larger pumpkin near the center, or use tiny pumpkin shapes as a repeating border. A cream plate with terracotta details works especially well with linen napkins in rust, brown, or muted green.
For a more handmade appearance, keep the brushwork slightly loose instead of trying to make every pumpkin identical. Add thin brown stems and a few curved leaves around the pumpkins. If you prefer a cleaner look, use a simple pumpkin outline rather than filling the shapes completely. This allows the natural ceramic surface to remain visible.
These plates are especially useful because they can work as both everyday fall dinnerware and Thanksgiving table pieces. If you are decorating food safe pottery, use products approved for dinnerware and follow the firing instructions carefully.
Materials needed
- Plain ceramic or bisque dinner plates
- Food safe ceramic paints or underglazes
- Fine and medium paint brushes
- Pencil or ceramic marking pencil
- Pumpkin stencil, if desired
- Clear food safe glaze
- Clean sponge and water
- Kiln access if required by the product
Step by step method
- Wash the plates and let them dry completely.
- Lightly sketch small pumpkin shapes around the rim.
- Paint the pumpkins in terracotta, leaving small cream areas visible.
- Add brown stems and a few simple leaves.
- Allow the paint to dry according to the product directions.
- Add a suitable clear glaze if the pottery system requires one.
- Fire the plates according to the clay or glaze manufacturer’s instructions.
- Let the plates cool fully before washing and using them.
2. Leaf Impressed Clay Chargers with Burnt Orange and Deep Brown Glazes

Leaf impressed chargers give a Thanksgiving table a natural texture while sitting underneath the dinner plates. They are not intended to hold food directly, so they can focus more on decoration and visual texture. Choose leaves with clear veins, such as maple, oak, or similar sturdy varieties. Pressing the leaf into soft clay creates a pattern that looks organic and detailed once glaze settles into the grooves.
Burnt orange and deep brown make a strong pair for these chargers. You can use burnt orange across most of the surface and brush brown into the leaf impressions. Wiping the raised areas before firing can leave the darker glaze concentrated inside the pattern. This gives the leaves more definition.
Keep the charger shape simple. A softly uneven edge can add a handmade appearance, while a smooth round edge gives a more polished result. Place a cream or ivory dinner plate on top so the leaf pattern remains visible around the outer edge.
Materials needed
- Pottery clay suitable for slab work
- Rolling pin or slab roller
- Large autumn leaves
- Round template or plate
- Clay knife
- Sponge
- Burnt orange glaze
- Deep brown glaze
- Kiln
- Work surface covered with canvas or another suitable material
Step by step method
- Roll the clay into an even slab.
- Place a clean leaf vein side down on the clay.
- Roll gently over the leaf to press its shape into the surface.
- Remove the leaf carefully.
- Cut a round charger shape around the impression.
- Smooth the outer edge with a damp sponge.
- Let the clay dry slowly until it reaches the proper stage for firing.
- Bisque fire the charger according to the clay instructions.
- Apply burnt orange glaze over the surface.
- Add deep brown glaze around and inside the leaf impressions.
- Fire again according to the glaze instructions.
- Let the charger cool before placing it under a dinner plate.
3. Mini Ceramic Pumpkin Place Card Holders for Individual Guests
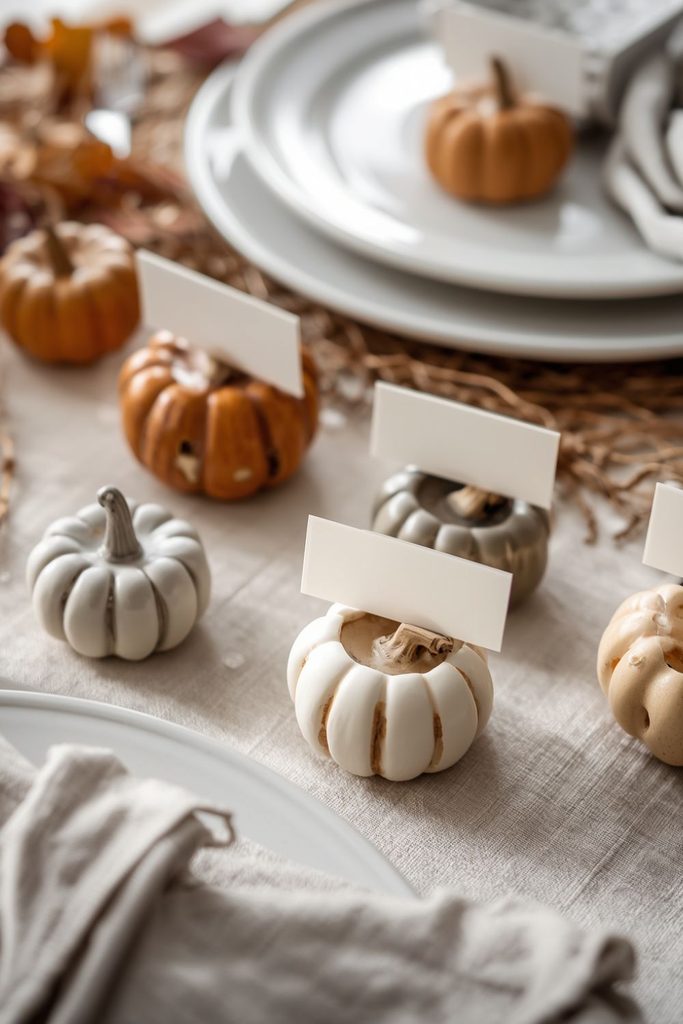
Mini ceramic pumpkins can make each guest’s place setting feel personal. Rather than using a large centerpiece pumpkin, make several small versions that sit beside individual plates. Each pumpkin can hold a small name card, making it both decorative and useful.
Choose a soft palette so the pumpkins do not compete with the dinnerware. Cream, muted orange, sage, and warm brown all work well. You can make the pumpkins slightly different in size and shape, which gives them a handmade appearance. Small carved lines can define the pumpkin sections, while a short brown stem finishes the shape.
A narrow slot can be added to the top while the clay is still workable. This allows a folded card to stand securely. If you prefer, a tiny metal or ceramic holder can be attached after firing. Add each guest’s name by hand on cream cardstock for a softer look.
Materials needed
- Pottery clay
- Small pumpkin mold or hand building tools
- Clay knife
- Texture tool
- Small wooden stick
- Orange, cream, sage, or brown glaze
- Small name cards
- Fine brush
- Kiln
Step by step method
- Divide the clay into small equal portions.
- Shape each portion into a rounded pumpkin.
- Press shallow vertical lines around each pumpkin.
- Add a small stem at the top.
- Cut a narrow card slot into the upper surface.
- Smooth rough edges with a damp fingertip or sponge.
- Let the pieces dry fully.
- Bisque fire them according to the clay instructions.
- Apply the chosen glaze colors.
- Fire the pumpkins again.
- Write each guest’s name on a small card.
- Place one card into each ceramic pumpkin.
4. Rustic Speckled Pottery Candle Holders Filled with Warm Amber Candles

Speckled pottery candle holders can bring soft light to the Thanksgiving table. Their small size makes them easy to place between plates, bowls, and serving dishes. A rustic cream or warm beige clay body with brown speckles looks especially attractive beside terracotta plates and dried leaves.
Choose candle holders with enough weight to remain stable on the table. A wide base is useful, particularly when guests are moving serving dishes around. Amber colored candles add a gentle glow that works beautifully with autumn pottery. You can use small candles rather than tall ones so guests can still see one another across the table.
The pottery itself does not need a complicated design. A lightly textured exterior, small carved lines, or a simple leaf stamp can give it character. If you make the holders from clay, check that the finished piece is suitable for candle use and keep the flame away from dried foliage, napkins, and other flammable materials.
Materials needed
- Suitable pottery clay
- Pottery wheel or hand building tools
- Texture tool or leaf stamp
- Speckled or brown glaze
- Small amber candles
- Kiln
- Sandpaper or smoothing tool for the base
- Heat safe surface for use
Step by step method
- Shape a small clay cup with a wide stable base.
- Create an opening large enough for the chosen candle.
- Add a subtle leaf texture or carved line pattern.
- Smooth the rim carefully.
- Dry the holder completely.
- Bisque fire according to the clay instructions.
- Apply a rustic speckled glaze.
- Fire the holder again.
- Check the base for rough spots and smooth them if needed.
- Place a suitable amber candle inside.
- Position the holder away from napkins and dried foliage.
- Light the candle only while the table is attended.
5. Acorn Shaped Ceramic Bowls for Cranberries, Nuts, and Small Table Snacks

Acorn shaped bowls add a playful autumn detail without looking childish. Their rounded form is ideal for small portions of cranberries, roasted nuts, olives, wrapped chocolates, or other table snacks. Use several bowls at different points around the table so guests can reach them easily.
A warm cream bowl with a brown acorn cap is a simple color combination. You can also use a soft speckled glaze for the lower section and a darker brown glaze for the upper portion. A shallow carved texture on the cap can imitate the rough surface of an acorn.
Keep the inside smooth and food safe. Since these bowls will hold food, use suitable clay and glaze products and follow the firing instructions carefully. The bowls can also be used after Thanksgiving for small snacks, sauces, or jewelry, making them useful beyond one holiday.
Materials needed
- Food safe pottery clay
- Acorn template or hand building tools
- Clay knife
- Small texture tool
- Cream or beige glaze
- Brown glaze
- Clear food safe glaze if required
- Kiln
- Small sponge
Step by step method
- Form a rounded bowl shape from clay.
- Flatten the bottom slightly so it sits securely.
- Shape a separate cap section for the acorn.
- Add small textured marks to the cap.
- Attach the cap securely to the upper portion of the bowl.
- Smooth the inside and rim.
- Let the bowl dry completely.
- Bisque fire it according to the clay instructions.
- Glaze the bowl in cream or beige.
- Add brown glaze to the acorn cap.
- Apply a suitable clear food safe glaze if needed.
- Fire again and allow the bowl to cool before use.
6. Hand Stamped Pottery Mugs Featuring Autumn Leaves and Thanksgiving Motifs

Hand stamped mugs can bring Thanksgiving details to the drinkware without requiring advanced painting skills. Begin with plain ceramic mugs or make your own if you have pottery equipment. Simple leaf stamps, acorns, pumpkins, or tiny turkey shapes can create a repeating design around the outside.
A cream mug with brown leaf stamps is a classic choice. For something warmer, try a soft terracotta mug with darker brown impressions. Keep the stamp pattern concentrated around the lower half or near the handle so the design does not feel too busy.
These mugs can be used for coffee, cider, tea, or hot chocolate after dinner. Add a small handwritten name tag to the handle if you are hosting a larger gathering. For food safe use, make sure the glaze and decorating materials are suitable for mugs and follow their firing requirements.
Materials needed
- Plain ceramic mugs or suitable pottery clay
- Leaf or pumpkin pottery stamps
- Food safe underglaze
- Fine brush
- Sponge
- Clear food safe glaze
- Kiln if required
- Pencil for planning the pattern
Step by step method
- Clean the mug surface thoroughly.
- Lightly plan where the stamped pattern will go.
- Apply a small amount of underglaze to the pottery stamp.
- Press the stamp gently onto the mug.
- Repeat the pattern around the selected area.
- Add small hand painted stems or dots if desired.
- Wipe away unwanted marks with a damp sponge.
- Let the decoration dry.
- Apply clear food safe glaze if required.
- Fire the mug according to the product directions.
- Let it cool completely.
- Pair each mug with a warm drink during the Thanksgiving meal.
7. Low Ceramic Dough Bowls Filled with Mini Pumpkins, Dried Leaves, and Wheat

A low ceramic dough bowl can become a relaxed centerpiece without blocking conversation across the table. The shallow shape gives you plenty of room for small seasonal decorations while keeping the arrangement close to the table surface.
Choose a bowl in matte cream, warm beige, or earthy brown. Fill it loosely with mini pumpkins, dried leaves, wheat stems, and a few pinecones. The arrangement should look gathered rather than tightly packed. Leave some of the pottery visible because its shape and finish are part of the decoration.
The bowl can be made by hand from a slab or purchased as a ready made pottery piece. If you make one, focus on a broad base and low sides so it stays stable. Avoid placing lit candles inside the dried arrangement. If you want candlelight, place ceramic candle holders outside the bowl.
Materials needed
- Low ceramic dough bowl
- Mini pumpkins
- Dried autumn leaves
- Dried wheat stems
- Small pinecones
- Decorative moss if desired
- Matte cream or brown pottery glaze if making the bowl
- Pottery clay and tools if hand building
Step by step method
- Choose a low, stable ceramic bowl.
- Place a few mini pumpkins inside the bowl first.
- Add dried wheat between the pumpkins.
- Tuck dried leaves around the edges.
- Add a small number of pinecones for texture.
- Adjust the pieces so the bowl remains visible.
- Remove any overly tall stems that block conversation.
- Place the finished bowl in the center of the table.
- Add matching pottery candle holders around the outside if desired.
- Check that all dried materials are kept well away from flames.
8. Matte Cream Pottery Vases Arranged with Dried Wheat and Rust Colored Florals
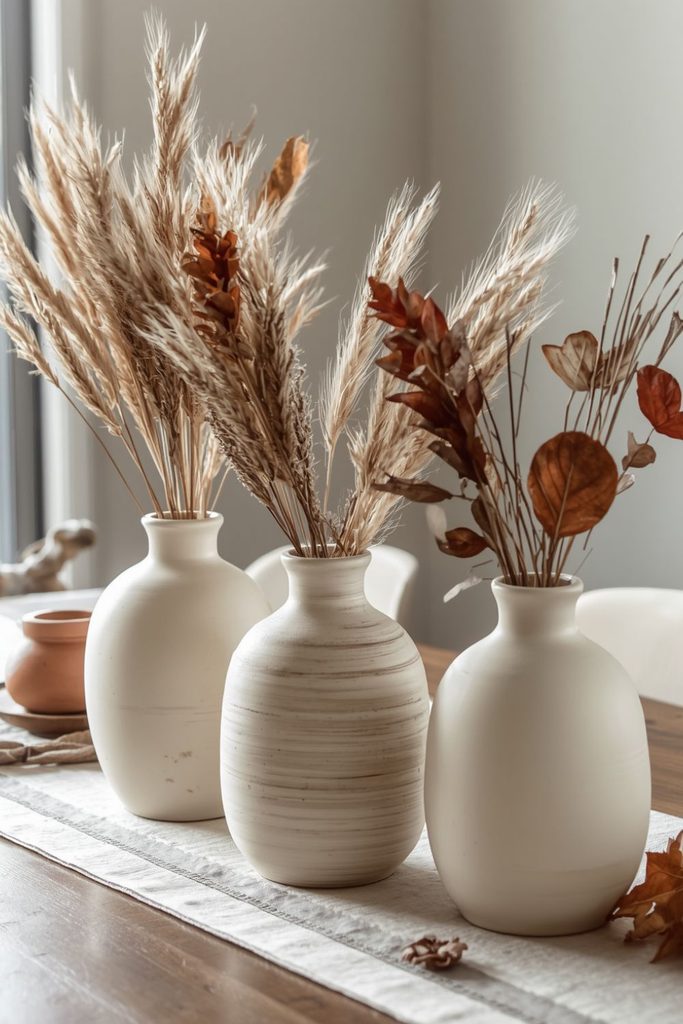
Matte cream pottery vases can give a Thanksgiving table a soft neutral base. Their simple color allows rust colored flowers, dried wheat, and autumn foliage to stand out. Instead of using one large vase, try three smaller vases with slightly different heights. This creates a more relaxed arrangement and leaves room for conversation.
Use dried flowers in rust, muted orange, tan, and brown. Wheat adds height and a gentle golden tone, while small dried leaves can fill spaces between the stems. Keep the arrangements loose instead of making them perfectly symmetrical.
The vases can be plain, lightly speckled, or decorated with a narrow brown line around the rim. Matte surfaces pair nicely with linen napkins and wooden serving boards. If you make the vases yourself, give the base enough width to support taller dried stems.
Materials needed
- Matte cream pottery vases
- Dried wheat
- Rust colored dried flowers
- Dried autumn leaves
- Small pruning scissors
- Brown or sage ribbon if desired
- Pottery clay and cream glaze if making the vases
- Water if using fresh flowers instead of dried flowers
Step by step method
- Select two or three vases with different heights.
- Place the tallest vase slightly off center.
- Add wheat stems first to establish height.
- Add rust colored flowers around the wheat.
- Fill empty spaces with dried leaves.
- Trim stems so the arrangement remains low enough for conversation.
- Repeat the process with the smaller vases.
- Place the vases along the center of the table.
- Leave enough space between them for serving dishes.
- Add matching pottery pieces around the arrangement for a connected look.
9. Handcrafted Turkey Inspired Serving Platters for the Thanksgiving Main Course

A turkey inspired serving platter can become a memorable piece for the main course. The design does not need to show a detailed turkey illustration. A simple feather shaped border, warm brown glaze, or subtle tail inspired edge can give the platter a Thanksgiving feel while keeping it practical.
A wide oval platter works well for turkey, roasted vegetables, bread, or other main dishes. Use warm cream as the base and add brown, terracotta, or muted orange details. If you prefer a modern look, paint only a few feather shapes near one end of the platter and leave most of the surface plain.
Because this piece will hold food, choose food safe clay and glaze. The platter should also be wide enough to carry comfortably when full. Add small handles if the design allows them, but keep them low enough that they do not interfere with serving.
Materials needed
- Food safe pottery clay
- Oval platter template
- Rolling pin or slab roller
- Clay knife
- Feather texture tool
- Cream, brown, terracotta, or orange glaze
- Food safe clear glaze if required
- Kiln
- Large sponge
Step by step method
- Roll the clay into an even slab.
- Cut an oval platter shape.
- Add shallow feather impressions around one end or along the rim.
- Shape and smooth the edges.
- Add small handles if desired.
- Let the platter dry slowly.
- Bisque fire according to the clay instructions.
- Apply the cream base glaze.
- Add brown and terracotta feather details.
- Apply food safe clear glaze if required.
- Fire the platter according to the glaze instructions.
- Let it cool fully before placing food on it.
10. Two Tone Ceramic Gravy Boats and Serving Bowls in Sage Green and Warm Ivory

Two tone gravy boats and serving bowls can add color to a Thanksgiving table without becoming too decorative. Sage green and warm ivory are especially useful because they balance stronger autumn colors such as orange, brown, and rust. A sage green exterior with an ivory interior gives the pieces a soft contrast.
Use the gravy boat for traditional gravy, mushroom sauce, or another table sauce. Matching serving bowls can hold mashed potatoes, roasted vegetables, cranberry sauce, or side dishes. Keeping the shapes simple lets the color combination do most of the visual work.
A narrow painted line between the two colors can give the pieces a clean finish. You could also use a dipping glaze technique where the two colors overlap slightly. If the pieces are intended for food, use approved food safe glaze and firing methods.
Materials needed
- Food safe pottery clay
- Gravy boat and bowl forms
- Sage green glaze
- Warm ivory glaze
- Fine brush
- Sponge
- Food safe clear glaze if needed
- Kiln
- Clay shaping tools
Step by step method
- Form the gravy boat and serving bowls from suitable clay.
- Shape the rims smoothly.
- Add a comfortable handle to the gravy boat.
- Let the pieces dry completely.
- Bisque fire according to the clay instructions.
- Apply warm ivory glaze to the inside surfaces.
- Apply sage green glaze to the outside surfaces.
- Clean the dividing line with a damp sponge.
- Add a thin accent line if desired.
- Apply a food safe clear glaze if required.
- Fire the pieces according to the glaze directions.
- Let them cool before adding Thanksgiving side dishes.
A warm Thanksgiving table does not need dozens of decorations to feel special. A thoughtful mix of pottery plates, textured chargers, little pumpkins, candle holders, serving dishes, and soft floral arrangements can create plenty of visual interest while leaving enough room for food and conversation.
The best results come from repeating a few colors and finishes rather than matching every piece. Terracotta, cream, sage, brown, rust, and muted orange can appear in different forms throughout the table. With handmade details placed around useful dinnerware, your Thanksgiving table can feel personal, comfortable, and ready for a memorable family meal.