If you’ve ever wanted your valentines door decorations classroom project to feel meaningful instead of just cute, you’re in the right place. So many teachers love dressing up their doors for February, but the real magic happens when those decorations spark kindness, friendship and warm feelings between students. When the whole class feels involved and proud of what they created together, the door becomes a daily reminder that kindness matters. It also becomes something parents admire, other teachers talk about, and kids point at with smiles that make all the cutting and gluing worth it.
This guide goes far beyond simple construction paper hearts taped to the door. Here, you’ll find a full step-by-step approach for choosing themes, gathering simple materials, and building valentines door decorations classroom displays that students carry with them through February and beyond. Each idea is fully hand-made and fits perfectly with the way elementary students learn, share, talk, cooperate and celebrate each other’s strengths. All the projects are real, buildable, and doable in a busy classroom. They’re also designed to help your students show kindness in ways that feel natural, honest, and fun. And that energy spills into the rest of your day, too.
Let’s start with how to choose the best theme, then move into the materials, then the building steps, and then the hands-on projects. Everything flows into simple processes that teachers can use even with a crowded February calendar.
How can elementary teachers choose Valentine’s door decoration themes that naturally promote kindness and friendship among students?
Choosing a theme for valentines door decorations classroom projects might seem like an easy first step, but the theme shapes the entire project. For teachers who want to highlight kindness and friendship, the goal is to pick a theme that helps students connect their feelings with the visuals they see every day.
Themes that work well usually echo what students already understand about caring for others. Children know what compliments are, what helping feels like, how teamwork changes the day and how friendship grows. Themes that reinforce those ideas make the decorations feel real, not forced.
A good place to start is by asking students simple questions like “What makes someone a good friend?” or “What is something kind you saw this week?”
Their answers help you decide which direction fits your group. If they talk a lot about helping others, maybe a kindness tree theme makes sense. If they talk about cheering people up, a floating balloon theme works great. If they mention how everyone brings something special to the class, a puzzle or quilt theme will fit well.
Teachers can also choose themes that allow personal expression. When students help shape valentines door decorations classroom ideas, they feel ownership instead of just following steps. That sense of ownership boosts pride, which builds more kindness naturally. Finally, a strong theme also helps you keep the door organized, instead of letting it become a random mix of hearts and tape. The more intentional the theme is, the more meaningful the project becomes for your students.
What simple, affordable materials do teachers need to create meaningful Valentines door decorations classroom projects?
The best valentines door decorations classroom projects do not depend on expensive supplies. In fact, the more common the materials are, the easier it is for the whole class to build something together.
Most projects use simple paper, scissors, glue, colors, and a few small additions that are easy for teachers to find. Construction paper remains the most flexible material for any February decoration because students can fold it, tear it, roll it, or color it in any style they want. With just a stack of red, pink, purple and white sheets, you can create flowers, hearts, envelopes, feathers, puzzle pieces, tickets, stars, lanterns and dozens of other pieces.
Tissue paper also plays a big role because it adds softness and volume without adding weight to the door. It’s perfect for flowers, heart mosaics and layered backgrounds. Cardboard scraps or cereal boxes help reinforce sturdier parts like puzzle pieces or frames. Yarn is wonderful for threading, connecting shapes or creating outlines. Students also love using it because it feels different from regular paper crafts.
Markers, crayons and colored pencils help personalize each item. Even if every student is making the same shape, their drawings and handwriting make the final valentines door decorations classroom display feel alive. A few teachers also add small stickers, glitter glue or foil pieces, but these are optional. Nothing in these projects requires special tools. The whole goal is to keep things simple so that the meaning behind the projects, not the supplies, drives the final look.
What step-by-step process can teachers follow to design and assemble Valentines door decorations classroom displays that students will love?
Start by choosing the theme and sketching a quick layout on scrap paper. The sketch doesn’t need perfect lines; it just helps you picture where the main pieces go. Having this map stops the door from looking crowded later.
Next, prepare the background. Many teachers use long sheets of butcher paper, either solid colors or blended colors. You can tape together two sheets if the door is large. Once the background is in place, mark light pencil guides so you know where big pieces belong. This also helps students know where their work will be displayed.
Then move into student creation. Give clear instructions and model one complete piece yourself so students understand the shapes. Encourage them to personalize their pieces with drawings, kind words, names or friendship quotes. This part usually brings the most excitement.
Once the pieces are done, sort them by size and attach the largest ones first. This prevents small pieces from being hidden later. Use strong tape or sticky tack on the back so pieces stay secure but do not damage the door. Then line the pieces up in a way that feels balanced. When everything is placed, add a title that matches your theme. It can be playful, heartfelt or simple. The final step is stepping back with the class and letting them admire everything they created together.
How can teachers involve students in creating Valentines door decorations classroom elements that encourage teamwork and positive relationships?
The heart of any valentines door decorations classroom project is student involvement. Kids feel more connected when they don’t just make their own piece but also help support the work of others. One of the strongest ways to build teamwork is to introduce shared tasks. For example, instead of having students work alone, pair them up to cut shapes, blend colors or brainstorm kindness messages. Small partnerships introduce patience and meaningful conversation.
Group stations also work well. Create two or three tables with different tasks: drawing, cutting, brainstorming messages, or assembling bigger pieces. Students rotate through stations, supporting each other instead of staying isolated at one desk. This setup helps them talk more and notice each other’s strengths.
You can use this chance to highlight simple social skills like taking turns, offering help or giving a compliment. Even a quick prompt like “Try saying something encouraging to your partner” helps students grow more confident with their words.
Reflection moments add even more value. After students complete a piece, ask them, “Whose work can you appreciate today?” or “Who helped you?” Students start to recognize the kindness happening around them. When their finished pieces go on the valentines door decorations classroom display, they see evidence of teamwork in every corner.
What are effective ways to showcase and celebrate the finished Valentines door decorations classroom designs to reinforce a culture of kindness?
After everyone finishes their valentines door decorations classroom pieces, the celebration brings everything full circle. The recognition doesn’t need to be fancy; it just needs to feel genuine. A simple reveal moment can make students feel like their work matters. Many teachers cover the final door with a large sheet and then remove it in front of the class to applause. Students love that moment.
Another helpful idea is a hallway walk. Invite another class or a few teachers to stop by and take a look. When students see others appreciating their work, they stand a little taller. You can also let students act as “guides,” explaining the meaning behind their pieces, which boosts confidence. Some teachers record short classroom videos showing each child sharing one kind message from the display, then send the video to families.
Daily rituals also help keep the door meaningful. You can choose one student each morning to stand by the door and read one message from the display. You can also ask students to silently pick one message or shape from the door that inspires something kind they can do during the day.
The more intentional the celebration feels, the more students internalize the idea that their valentines door decorations classroom project wasn’t just art but something that brought their class closer.
Create a “Chain of Kindness” Using Handmade Paper Links Where Each Link Lists a Kind Act the Student Has Shown
The “Chain of Kindness” is a simple yet powerful valentines door decorations classroom project that visually shows how small acts of kindness connect everyone in the class. Students get to celebrate their good deeds while seeing the bigger picture of the class community. Over time, the chain grows longer and becomes a colorful reminder of how kindness multiplies.
Step-by-Step Method:
- Prepare Materials: Gather construction paper in a variety of colors, scissors, glue or tape, and markers. Cut the paper into uniform strips about 1–2 inches wide and 6–8 inches long.
- Explain the Purpose: Briefly discuss the idea of kindness with the students. Ask them to think of one thing they have done recently to help, support, or encourage a classmate.
- Write the Acts: Have each student write their kind act clearly on a paper strip. Encourage them to add doodles, small drawings, or decorative patterns to personalize their links.
- Form the Links: Show students how to curl their paper strip into a loop and secure it with tape or glue. The first link can be attached directly to the door.
- Connect the Chain: Attach each subsequent link to the previous one, creating a continuous chain that represents the growing acts of kindness.
- Display on the Door: Hang the chain across the door frame, letting it drape or loop in a fun, visible pattern. Over time, add more links as students continue to practice kindness.
- Celebrate: Take a moment as a class to admire the chain. Highlight how each link represents a meaningful action and how the class grows stronger together.
This project not only decorates the classroom door beautifully but also reinforces positive behaviors and teamwork, making students proud to see their contributions displayed in a tangible, colorful chain.
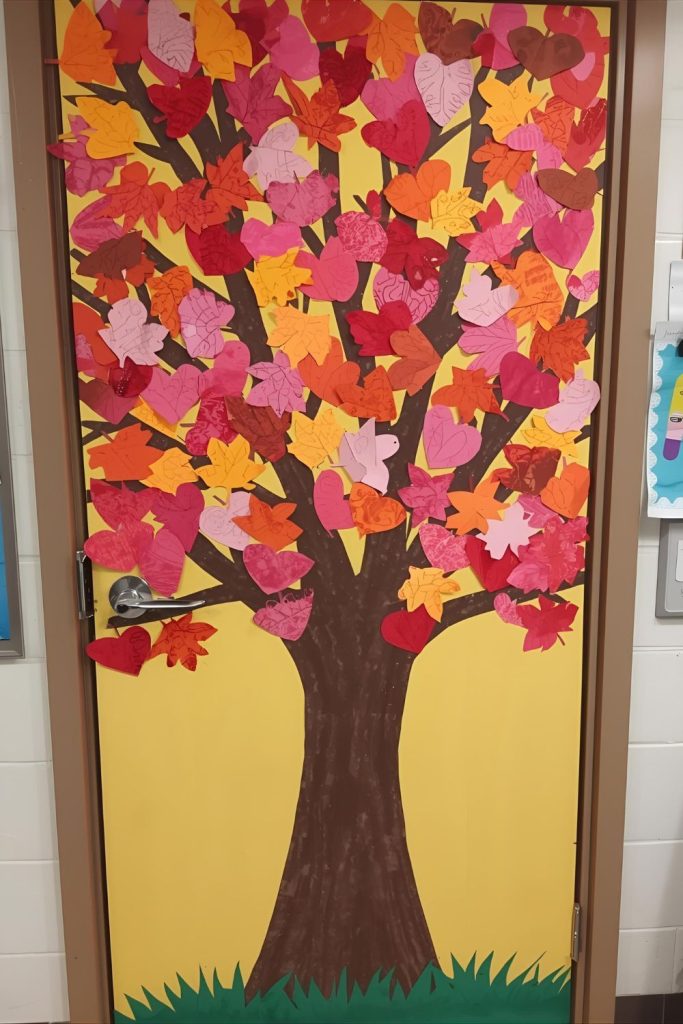
Design a Hand-Painted “Kindness Tree” with Branches Filled with Student-Made Leaves Listing Friendly Things They’ve Done for Others
The “Kindness Tree” is a beautiful valentines door decorations classroom project that transforms your door into a living symbol of friendship and thoughtful actions. Each student contributes a leaf representing something kind they’ve done, helping the tree grow lush with positivity. This project encourages reflection on personal actions while creating a colorful, interactive display.
Step-by-Step Method:
- Prepare the Background: Cover the classroom door with a large sheet of butcher paper or craft paper. Use brown paint or markers to draw the trunk and branches of a tree. Make the branches thick enough so leaves can be attached easily.
- Create Leaves: Cut leaf shapes from construction paper in green, red, pink, or yellow. Ensure there are enough leaves for each student, plus extras for multiple contributions over time.
- Discuss Kindness: Gather the class and talk briefly about what “kind acts” mean. Give examples such as helping a classmate, sharing supplies, giving a compliment, or including someone in play.
- Write and Decorate Leaves: Each student writes one or more kind acts they have done on their leaf. Encourage them to decorate the leaves with doodles, small designs, or their name to personalize it.
- Attach Leaves to the Tree: Using tape, sticky tack, or glue, students attach their leaves to the branches. Arrange them so the tree looks full and colorful, with some leaves overlapping to create depth.
- Add New Leaves Over Time: Allow students to add new leaves whenever they perform another kind act. This turns the tree into a living, growing display of generosity and friendship.
- Celebrate: Invite students to admire the completed tree. Discuss how each small act contributes to the class community, reinforcing a positive, collaborative environment.
This project is not only visually striking but also teaches students that even small gestures matter, turning valentines door decorations classroom into a meaningful symbol of kindness and teamwork.
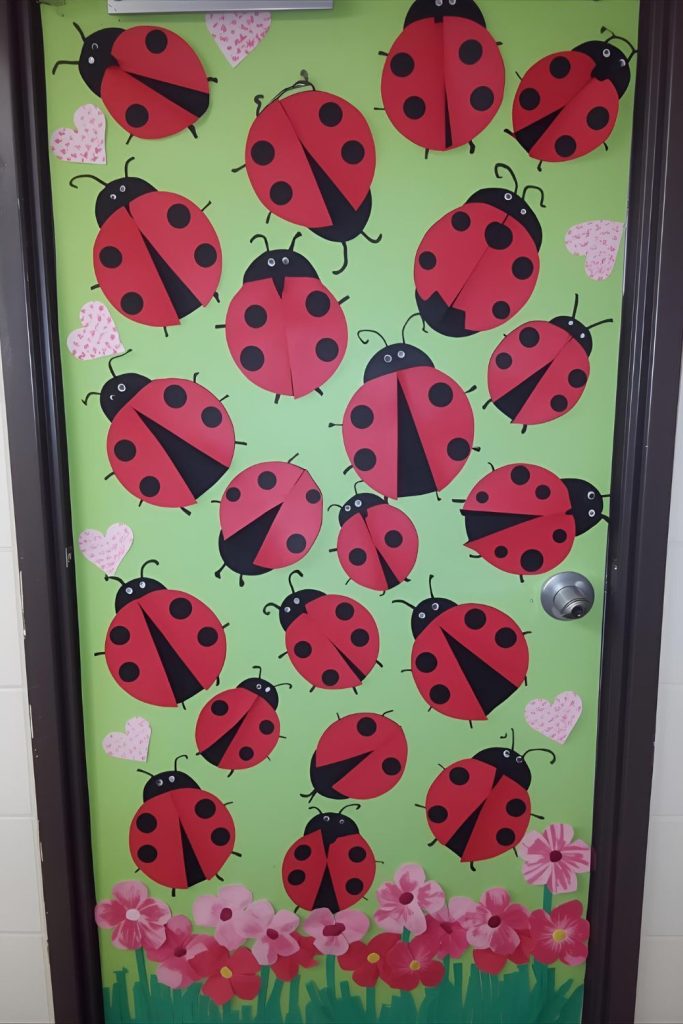
Craft a “Love Bug Squad” Door Where Students Fold and Color Paper Ladybugs That Open to Reveal a Compliment for a Classmate
The “Love Bug Squad” transforms your classroom door into a playful display celebrating friendship and positive interactions. Each student creates a paper ladybug carrying a hidden compliment for a classmate. This project encourages creativity while promoting kindness and peer recognition, turning valentines door decorations classroom into an interactive and memorable experience.
Step-by-Step Method:
- Prepare Materials: Gather red and black construction paper, scissors, glue, markers, and small stickers.
- Fold Ladybugs: Show students how to fold red paper in half to create the ladybug’s body.
- Decorate Ladybugs: Students draw black spots on the ladybugs and add details like eyes or antennae.
- Write Compliments: Inside the folded ladybug, each student writes a short, positive message or compliment for a classmate.
- Assemble: Glue the folded ladybugs onto the door in clusters or in a “squad” formation. Ensure each bug’s hidden message is secure but accessible.
- Display and Rotate: Rotate the bugs periodically so students receive different compliments over the month.
- Celebrate: Highlight the positive messages during class announcements or reading time to reinforce kindness.
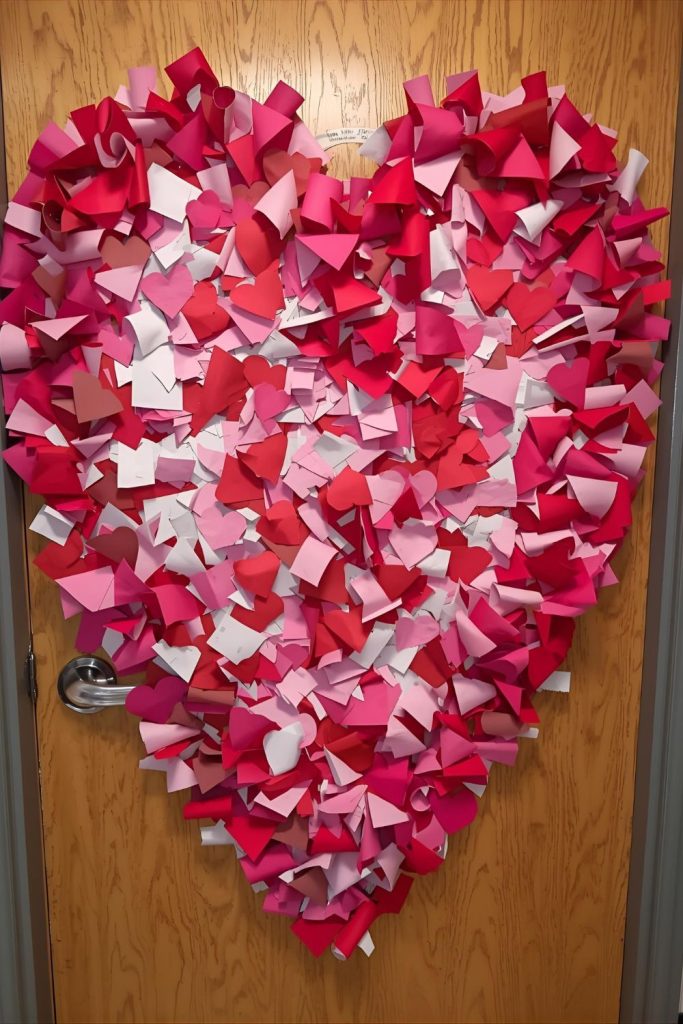
Create a “Heart-Shaped Mosaic” Door Using Torn Paper Scraps Arranged by Students into a Large Collaborative Artwork Symbolizing Teamwork
A “Heart-Shaped Mosaic” combines creativity and collaboration to produce a stunning valentines door decorations classroom project. Students tear colorful paper into small pieces and use them to fill a giant heart on the door. The process encourages teamwork, fine motor skills, and appreciation for collective effort, all while creating a striking visual display.
Step-by-Step Method:
- Prepare the Heart Template: Draw or trace a large heart outline on butcher paper to cover the door.
- Tear Paper Scraps: Provide students with construction paper in red, pink, white, and complementary colors. Encourage them to tear pieces into small shapes.
- Assign Sections: Divide the heart into sections so multiple students can work simultaneously without overlapping too much.
- Apply Glue: Students spread glue on their section of the heart.
- Attach Paper Pieces: Have students carefully place torn paper scraps on the glued area, overlapping pieces to create texture and color depth.
- Fill the Entire Heart: Continue until the heart is completely filled with colorful pieces, creating a mosaic effect.
- Display: Step back and admire the collaborative artwork, reinforcing the importance of working together to create something meaningful.
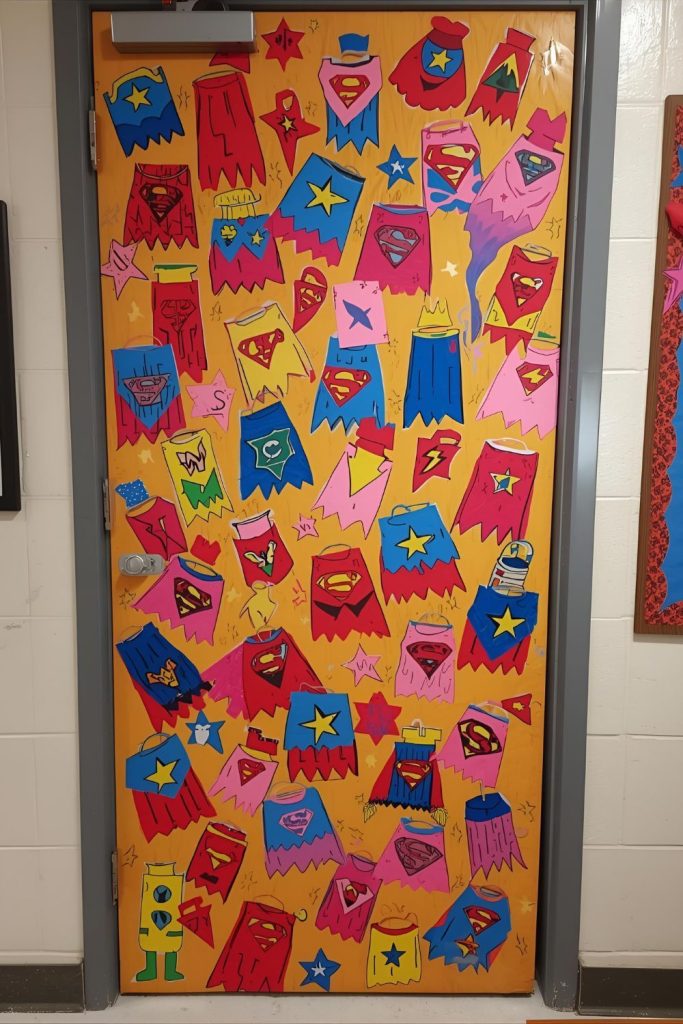
Build a “Classroom Superheroes of Kindness” Display with Hand-Drawn Superhero Capes for Each Student Showing Their Kindness Superpower
The “Classroom Superheroes of Kindness” display turns your valentines door decorations classroom into a fun, empowering project. Each student becomes a superhero with a unique “kindness superpower,” highlighting the positive impact everyone can have. This project encourages self-reflection, celebrates individual strengths, and makes kindness exciting and tangible.
Step-by-Step Method:
- Draw Capes: Provide each student with paper to design and draw a superhero cape.
- Name the Superpower: Ask students to think of one kind action they excel at, like helping friends, sharing, or encouraging others. Write the “superpower” on the cape.
- Decorate: Students can add symbols, colors, or glitter to make their capes visually striking.
- Cut Out and Laminate (Optional): For durability, cut out the capes and laminate them or attach them to thicker paper.
- Assemble Display: Arrange the capes on the classroom door in a flying formation or circle.
- Explain the Concept: Discuss how everyone has a special power to make the classroom a better place.
- Update Over Time: Add new superheroes as students perform additional acts of kindness, keeping the display dynamic.
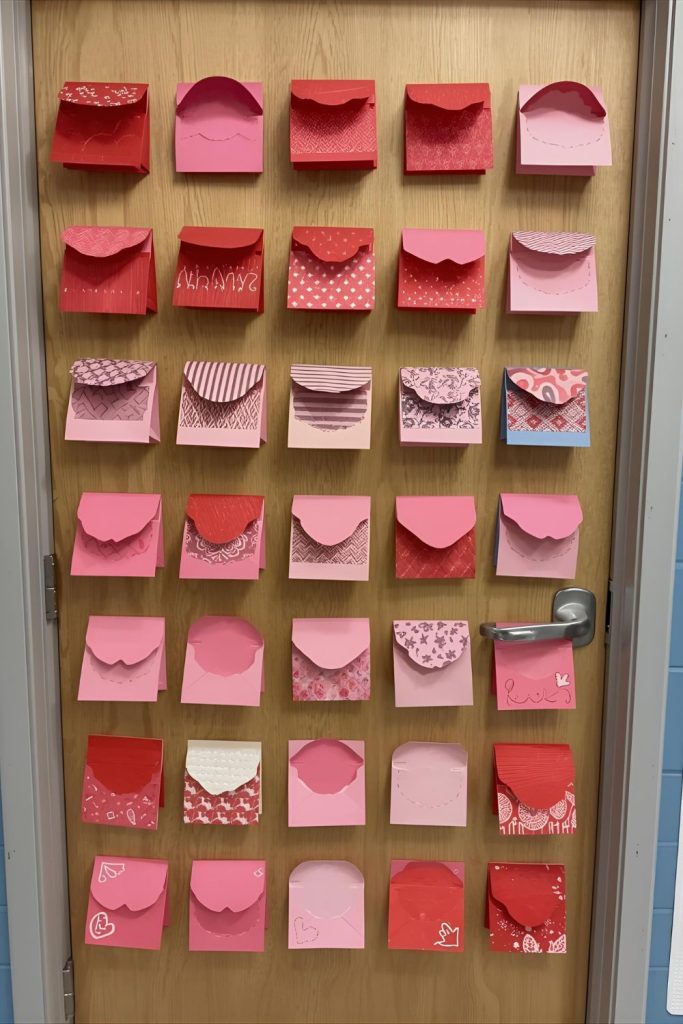
Make a “Friendship Mailbox Station” Where Students Handcraft Mini Postcards Expressing Appreciation for Classmates
The “Friendship Mailbox Station” is a hands-on valentines door decorations classroom project that encourages students to actively express gratitude and appreciation for their peers. Each student creates small postcards or notes that can be “mailed” to classmates, promoting thoughtful reflection, communication, and kindness in a fun, interactive way.
Step-by-Step Method:
- Prepare Materials: Collect cardstock, markers, colored pencils, stickers, and small envelopes or paper folded to make postcards.
- Decorate the Mailboxes: Designate a section of the door or a small table near the door for individual student “mailboxes.” These can be paper envelopes or small cardboard containers.
- Create Postcards: Students design mini cards for classmates, including a kind message or compliment. Encourage illustrations to make the messages personal.
- Write Messages: Each postcard should contain a positive message, a compliment, or an encouraging note for another student.
- Deliver Cards: Students place their postcards in the appropriate mailbox on the door.
- Check the Mail: At the end of the day or week, allow students to open their mailbox and read the kind messages from classmates.
- Rotate or Refill: Keep the mailbox active by encouraging ongoing messages, so the display grows throughout the Valentine’s celebration period.
This project strengthens friendships, encourages positive communication, and transforms the classroom door into a meaningful, interactive feature that celebrates kindness and community.
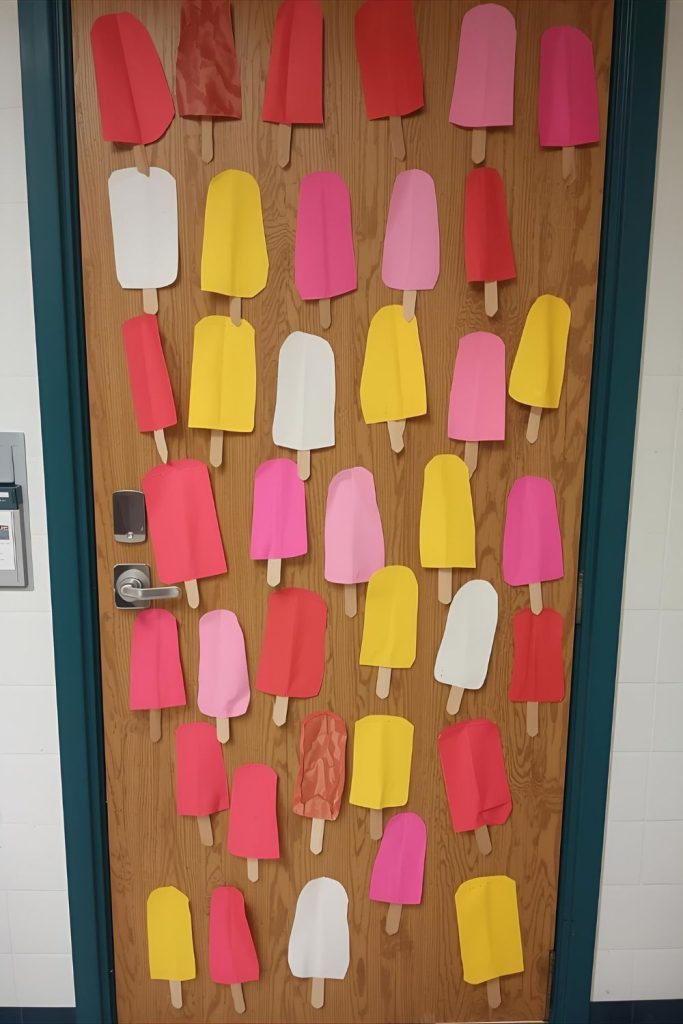
Construct a “Kindness Popsicle Wall” with Hand-Cut Popsicle Shapes Listing Sweet Things Students Have Done for Someone Else
The “Kindness Popsicle Wall” is a creative, visual way to show students’ positive actions in the classroom. By using colorful, hand-cut popsicle shapes, students can list specific acts of kindness they have performed, turning the classroom door into an uplifting, playful display that inspires everyone to continue spreading kindness.
Step-by-Step Method:
- Prepare Materials: Gather colored cardstock or construction paper, scissors, glue, markers, and popsicle stick cutouts.
- Cut Popsicle Shapes: Students cut out popsicle shapes in various colors. Each shape should be large enough to write on.
- Decorate Popsicles: Encourage students to add designs, doodles, or small illustrations to personalize their popsicle.
- Write Acts of Kindness: Each student writes a kind act they have done on their popsicle.
- Attach Popsicle Sticks: Glue or tape small paper sticks to the bottom of each popsicle to complete the look.
- Arrange on Door: Stick the popsicles onto the door in a visually appealing arrangement. The wall can grow as students add more popsicles over time.
- Celebrate Efforts: Allow students to share their kind acts with the class, reinforcing a culture of positivity and recognition.
Hand-Craft a “Friendship Quilt” Door Using Individually Decorated Felt or Paper Squares Stitched or Glued Together to Form One Big Quilt
A “Friendship Quilt” turns valentines door decorations classroom into a collaborative, tactile project that celebrates community and friendship. Each student decorates a small square representing themselves, then all squares are combined to create one large quilt. This hands-on project encourages creativity, individuality, and a sense of belonging.
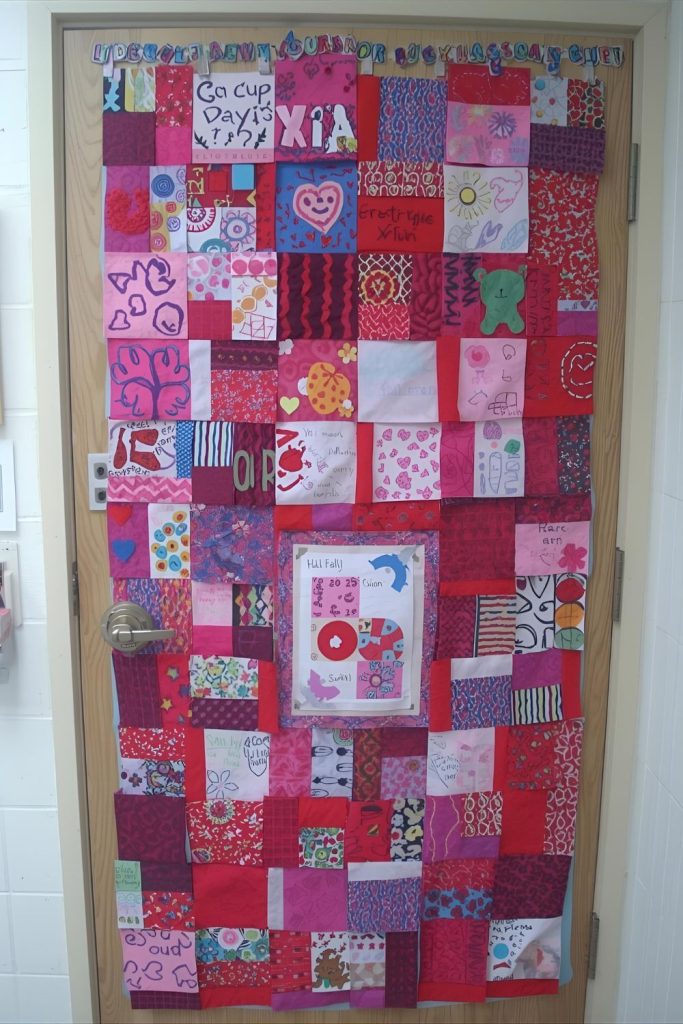
Step-by-Step Method:
- Prepare Squares: Cut felt or construction paper into uniform squares, one per student.
- Decorate Individual Squares: Students decorate their square with drawings, patterns, or words that represent friendship, kindness, or themselves.
- Write Messages: Encourage students to write a positive message or kind thought on their square.
- Connect Squares: Attach squares together using glue, tape, or yarn stitching to form a large quilt that will cover the classroom door.
- Assemble on Door: Secure the quilt to the door using tape or poster tack. Make sure all edges are visible and neatly arranged.
- Add Finishing Touches: Optional decorations like heart stickers, ribbon borders, or glitter can enhance the quilt’s appearance.
- Reflect: Celebrate the collective effort and discuss how each student contributes to the overall classroom community.
Create a “Strings of Support” Display Where Students Tie Yarn Between Hand-Cut Hearts to Show Connections to Classmates They’ve Helped
The “Strings of Support” project visually illustrates the connections between students in the classroom. Using hand-cut hearts and yarn, students link hearts to classmates they have supported or helped. This valentines door decorations classroom activity encourages empathy, reflection, and a strong sense of community.

Step-by-Step Method:
- Prepare Materials: Gather colored cardstock, scissors, markers, and yarn or string.
- Cut Hearts: Each student cuts out at least one heart to represent themselves.
- Label Hearts: Students write their names and optionally a kind trait or action on their heart.
- Discuss Support: Talk about how we can support classmates through small acts of kindness.
- Attach Hearts: Tape or glue hearts to the door at various points.
- Connect Hearts with Yarn: Students tie yarn from their heart to the hearts of classmates they have helped or worked with positively.
- Admire the Web: Display the network of connections, showing the classroom’s teamwork and support.
Design a “Compliment Constellation” Door Using Student-Decorated Stars Connected to Form Constellations of Friendship
The “Compliment Constellation” project turns your valentines door decorations classroom into a glowing universe of kindness. Each student creates a star with a compliment for a peer, then links the stars to form constellations. This project promotes positivity, creativity, and recognition of others in a visually engaging way.
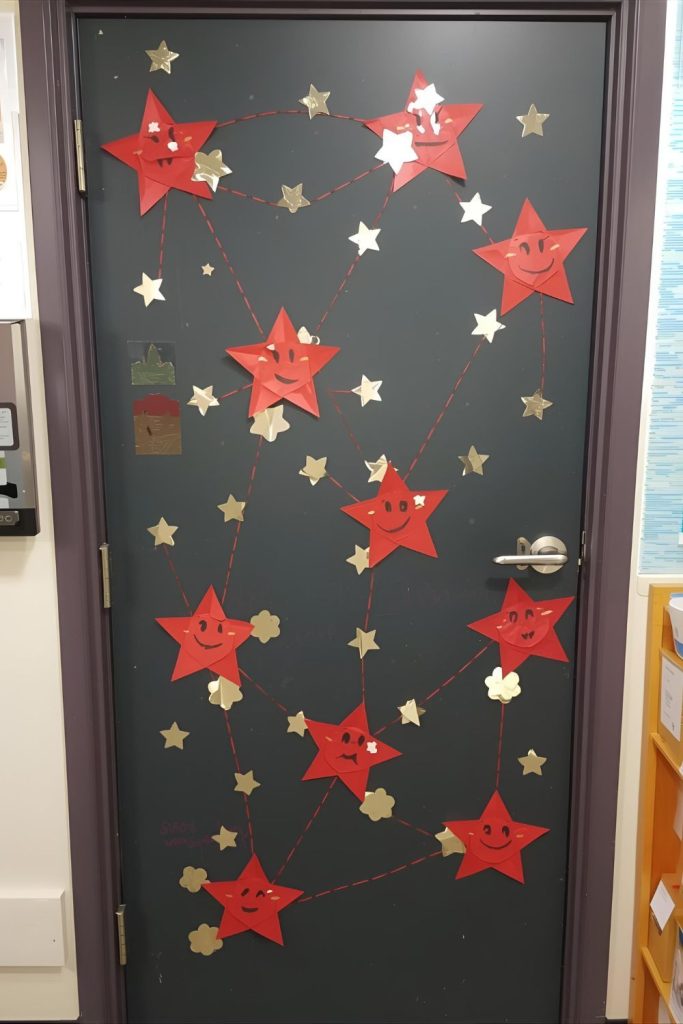
Step-by-Step Method:
- Prepare Stars: Cut stars from construction paper in various sizes. Provide metallic or glitter paper for extra effect.
- Decorate Stars: Students decorate their stars with drawings, colors, or patterns.
- Write Compliments: On each star, students write a kind message or compliment for a classmate.
- Plan Constellations: Arrange the stars on the door to create connected patterns like constellations.
- Attach Stars: Use tape or sticky tack to secure the stars on the door.
- Connect with Lines: Draw lines between stars to form constellations representing connections of friendship.
- Reflect and Celebrate: Discuss the “constellations” with the class, highlighting the interconnectedness and kindness within the classroom community.
Craft a “Kindness Ticket Booth” with Handmade Valentine Tickets Students Write to Reward Peers for Kind Actions
The “Kindness Ticket Booth” transforms valentines door decorations classroom into a playful, interactive celebration of good deeds. Students create paper tickets to reward classmates for thoughtful actions. This project not only encourages creativity but also reinforces positive behavior, recognition, and a sense of community.
Step-by-Step Method:
- Prepare Materials: Gather colored cardstock, scissors, markers, stickers, and tape.
- Create Tickets: Cut paper into ticket shapes. Students can decorate their tickets with borders, patterns, or small illustrations.
- Explain the System: Explain that each ticket represents recognition for a kind action performed by a peer.
- Write Rewards: Students write the recipient’s name and a description of the kind act on the ticket.
- Assemble the Booth: Tape a small “ticket booth” area to the door using construction paper or a small box.
- Distribute Tickets: Students place tickets in the booth for peers to collect.
- Celebrate and Display: Regularly check the tickets with the class, celebrating the kind actions and reinforcing positive behavior patterns.
Create a “Friendship Fortune Cookies” Door Where Students Make Paper Fortune Cookies Containing Positive Affirmations for Peers
The “Friendship Fortune Cookies” project is a fun and creative way to spread positivity in the classroom. Each student makes a paper fortune cookie containing a kind message or compliment for a classmate. This valentines door decorations classroom activity encourages thoughtful reflection, sharing, and playful interaction.

Step-by-Step Method:
- Prepare Materials: Collect colored paper, scissors, markers, and tape.
- Cut Circles: Students cut circles of paper about 4–5 inches in diameter.
- Write Messages: Fold each circle in half and write a kind message or compliment on the inner surface.
- Fold into Cookies: Fold the circles to form paper fortune cookie shapes, securing the edges lightly with tape.
- Decorate Cookies: Encourage students to add designs, small hearts, or doodles to personalize their cookies.
- Attach to Door: Tape the cookies to the classroom door in a visually appealing arrangement.
- Share and Reflect: Students can exchange cookies during the week, reading the positive messages aloud to celebrate friendship.
Build a “Love Letters Library” Display with Stitched Mini Books Created by Students Describing Kind Moments in Class
The “Love Letters Library” allows students to document and share acts of kindness through handcrafted mini books. Each student contributes a small book describing a personal experience or recognition of a peer’s thoughtful behavior. This project adds depth and storytelling to valentines door decorations classroom, fostering reflection and empathy.
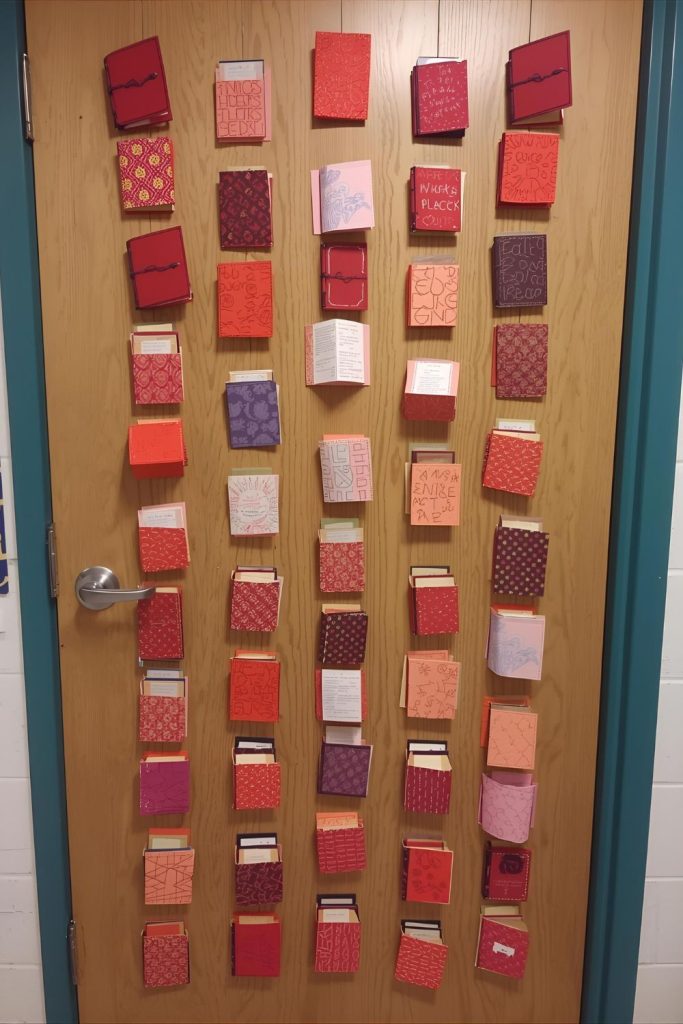
Step-by-Step Method:
- Prepare Materials: Gather small sheets of paper, thread or yarn, needles (plastic for safety), scissors, and markers.
- Fold Sheets: Fold 3–5 sheets per student into mini books.
- Stitch or Bind: Use simple yarn stitching or staple to hold the sheets together.
- Write Stories: Students write short stories or examples of kind acts in their books.
- Decorate Covers: Allow students to decorate their book covers with hearts, doodles, or symbols of kindness.
- Assemble Library: Arrange the mini books on the door or in a small display pocket, making a “library” of kindness.
- Share Stories: Invite students to read aloud from the library, celebrating the positive impact of their classmates.
Make a “Helpful Hands Wall” Where Students Trace, Cut, and Decorate Their Hands, Writing One Way They Help Others
The “Helpful Hands Wall” uses simple hand tracings to create a meaningful display of positive contributions. Each student traces and decorates their hand, writing a kind action they’ve performed. This valentines door decorations classroom project reinforces helpful behaviors, encourages reflection, and celebrates the ways each student contributes to the class community.
Step-by-Step Method:
- Prepare Materials: Collect colored construction paper, scissors, markers, and tape.
- Trace Hands: Students trace their hands on the paper.
- Cut Out Hands: Carefully cut out the hand shapes.
- Write Helpful Acts: On each hand, students write one way they have helped a classmate or teacher.
- Decorate Hands: Add doodles, stickers, or heart shapes to personalize.
- Arrange on Door: Attach the hands to the classroom door, layering or arranging them creatively.
- Reflect and Celebrate: Review the wall with the class, highlighting the collective impact of small, helpful actions.
Handcraft a “Heart Lantern Path” Using Hanging Paper Lanterns Students Decorate with Friendship Quotes
The “Heart Lantern Path” adds a warm, festive touch to valentines door decorations classroom. Students handcraft paper lanterns and write friendship quotes or compliments on them. When hung across the door, the lanterns create a cheerful, interactive path that celebrates friendship and kindness.

Step-by-Step Method:
- Prepare Materials: Gather colored paper, scissors, markers, glue, tape, and string or yarn.
- Cut Lanterns: Cut paper into rectangles and create slits to form lanterns.
- Write Quotes: Students write kind quotes or messages about friendship on the lantern panels.
- Assemble Lanterns: Roll paper into a cylindrical shape, secure with tape or glue.
- Add Handles: Attach string or paper handles to allow lanterns to hang.
- Hang Lanterns: Attach the lanterns above or around the classroom door, forming a decorative path.
- Celebrate: Invite students to admire and read the messages, reinforcing a culture of positivity.
Create a “Stitched Hearts Banner” Where Students Punch and Thread Yarn Around Paper Hearts, Each Labeled with a Classmate’s Name
The “Stitched Hearts Banner” is a hands-on valentines door decorations classroom project that combines creativity, fine motor skills, and friendship. Students create paper hearts, decorate them, and stitch around the edges with yarn. Each heart represents a classmate, celebrating connection, teamwork, and appreciation.
Step-by-Step Method:
- Prepare Materials: Gather cardstock, yarn, scissors, hole punchers, markers, and tape.
- Cut Hearts: Students cut out hearts from cardstock. Each heart should be large enough to write names and stitch around.
- Label Hearts: Students write the name of a classmate on each heart and optionally add a positive message or doodle.
- Punch Holes: Punch evenly spaced holes around the edge of the heart for stitching.
- Thread Yarn: Students thread yarn through the holes using a simple running stitch, creating a stitched border.
- Assemble Banner: Use yarn or string to connect all the stitched hearts into a banner.
- Display: Hang the banner on the classroom door, showcasing the class’s friendship connections.
Build a “Friendship Puzzle Tree” Where Students Design Small Wooden-Stick Frames with Photos and Friendship Messages
The “Friendship Puzzle Tree” transforms your classroom door into a collaborative and meaningful display. Students create small wooden-stick frames containing photos and messages about friendship. Together, the pieces form a “puzzle” tree, representing how each student contributes to the class community.
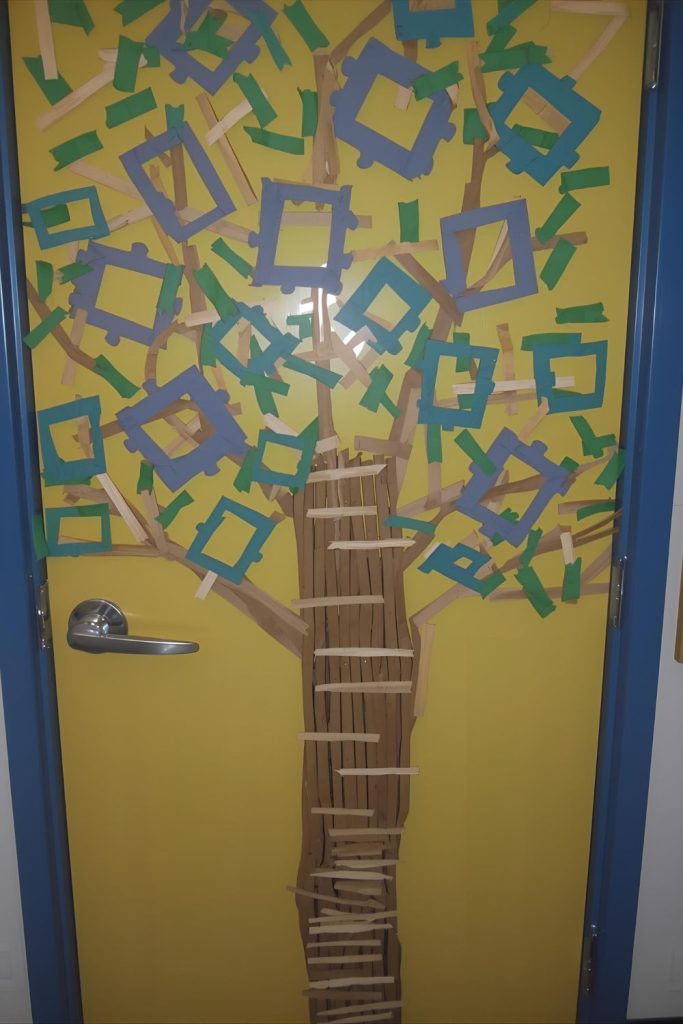
Step-by-Step Method:
- Prepare Materials: Gather craft sticks, glue, small photos, cardstock, scissors, and markers.
- Create Frames: Students glue craft sticks together to form square frames.
- Add Photos: Insert a photo of the student or a symbol representing friendship inside the frame.
- Write Messages: Students write a message about friendship or a kind act on cardstock and attach it to the frame.
- Decorate Frames: Encourage students to add small designs, hearts, or doodles.
- Assemble Puzzle Tree: Arrange the frames on the classroom door in the shape of a tree, connecting branches and leaves visually.
- Reflect: Discuss how each student’s contribution completes the tree, symbolizing unity and collaboration.
Design a “Kindness Candy Jar” Door Where Each Hand-Cut Candy Reveals a Specific Good Deed Done by a Student
The “Kindness Candy Jar” is a colorful, interactive valentines door decorations classroom project. Each student creates hand-cut candy shapes with notes about kind acts they’ve performed. When displayed on the door, the jar becomes a visual celebration of good deeds, encouraging continued positive behavior.
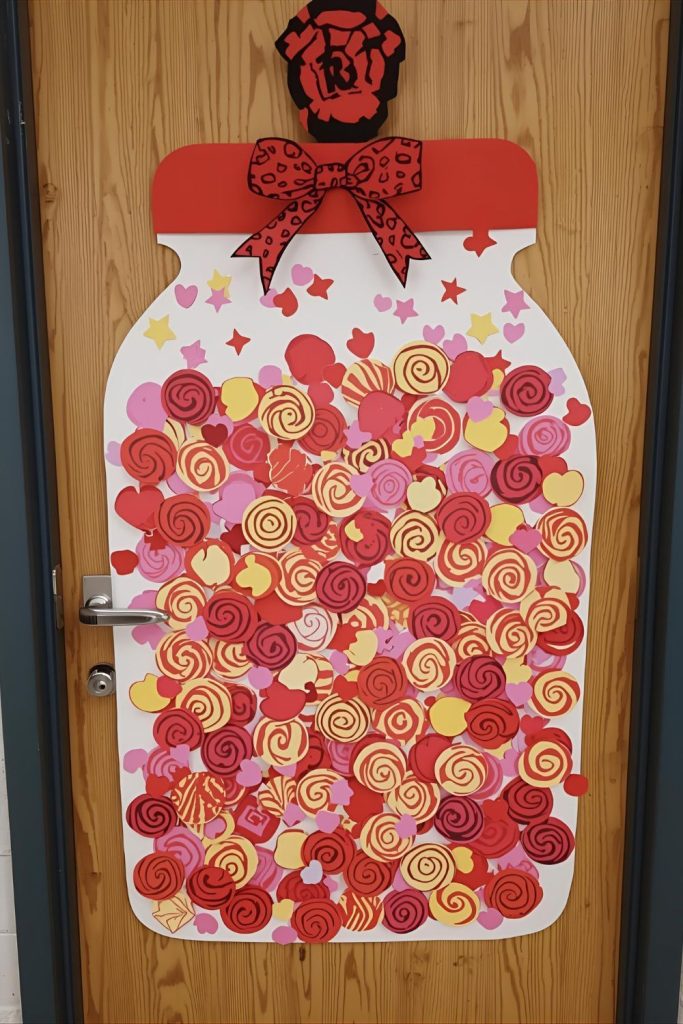
Step-by-Step Method:
- Prepare Materials: Collect construction paper, scissors, markers, tape, and a large paper or cardboard jar outline.
- Cut Candy Shapes: Students cut paper into small candy shapes, enough for multiple entries per student.
- Write Kind Acts: On each candy, students write a kind action they have done.
- Decorate Candies: Students add doodles, hearts, or patterns to make the candies visually appealing.
- Fill the Jar: Tape or glue the candies onto the paper jar on the classroom door.
- Arrange Creatively: Layer candies so the jar appears full and colorful.
- Celebrate Acts: Invite students to read and share their deeds, reinforcing kindness and community.
Craft a “Friendship Feather Wall” with Hand-Decorated Feathers Forming a Large Pair of Wings Symbolizing Support and Unity
The “Friendship Feather Wall” turns valentines door decorations classroom into a bold, symbolic display. Each student decorates a feather with kind messages or drawings, then the feathers are arranged to form large wings. This project promotes creativity, reflection, and a sense of collective support and unity among students.
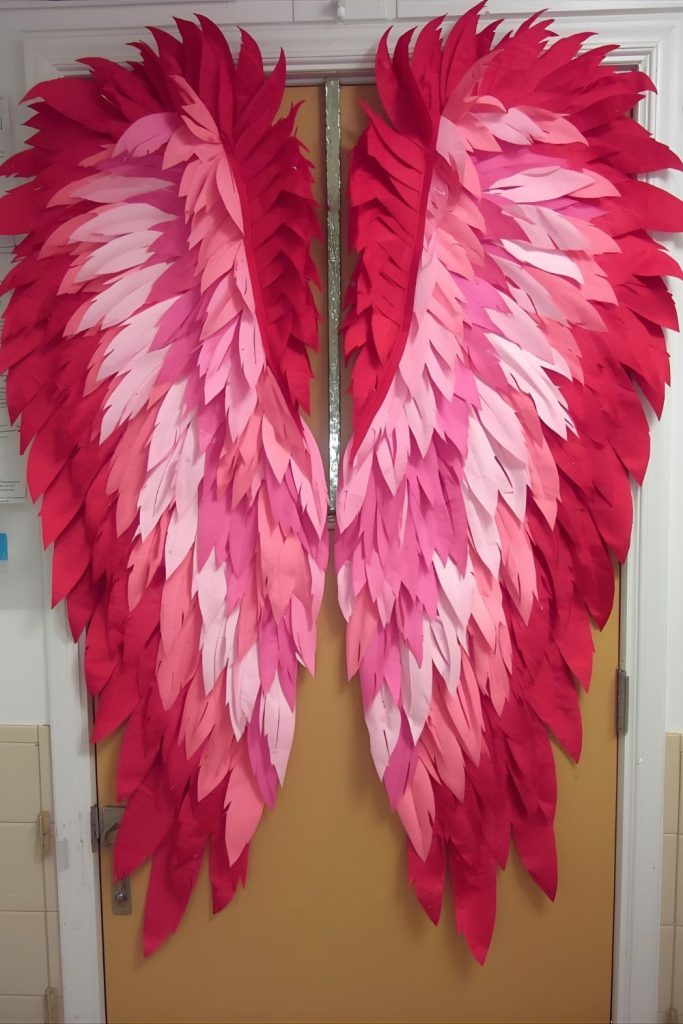
Step-by-Step Method:
- Prepare Materials: Gather cardstock or construction paper, scissors, markers, glue, and tape.
- Cut Feathers: Students cut feather shapes large enough to decorate and write messages.
- Decorate Feathers: Students write a kind message, compliment, or positive note and add designs or colors.
- Arrange Wings: Tape or glue the feathers on the door to form two large wings. Overlap feathers to create fullness and texture.
- Label Display: Optionally, add a banner above the wings with a message like “Our Friendship Soars.”
- Reflect: Discuss with the class how each feather represents a supportive action or quality, emphasizing unity.
- Celebrate: Step back as a class to admire the wings, highlighting how individual contributions create a beautiful, collective display.
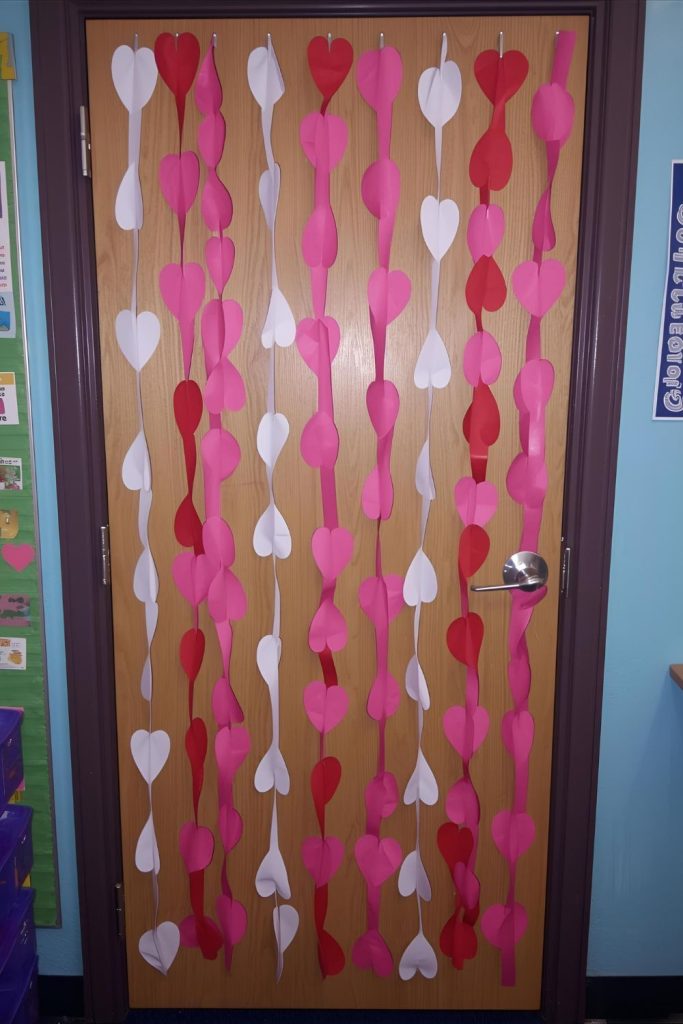
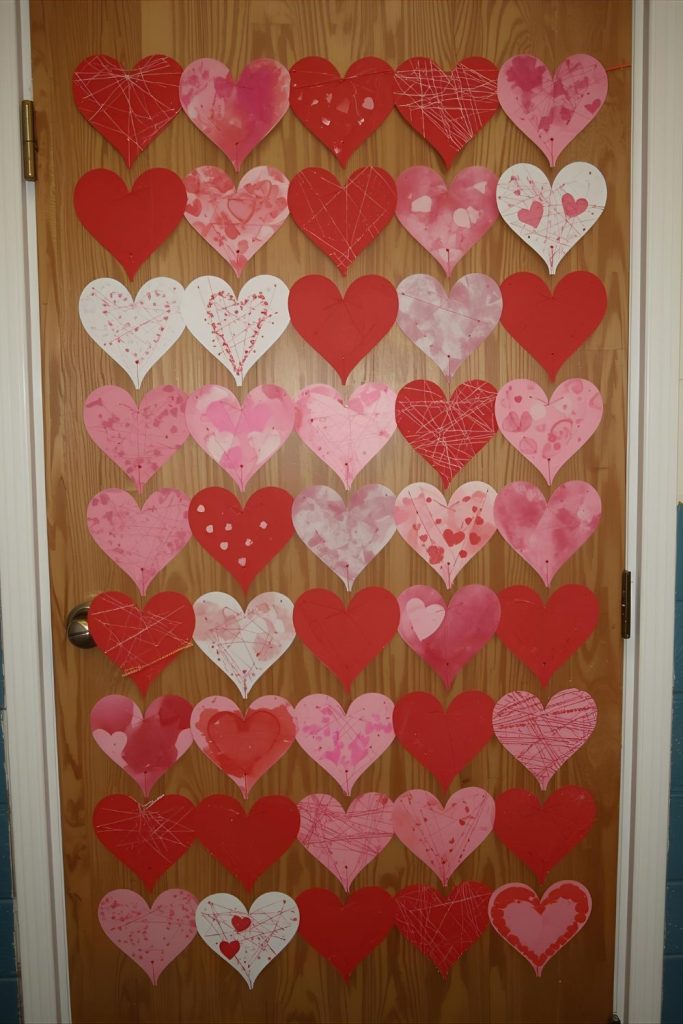
Create a “Love Notes Curtain” by Threading Student-Made Heart Notes onto String, Forming a Hanging Kindness Curtain Over the Door
The “Love Notes Curtain” is a whimsical and interactive valentines door decorations classroom project. Students make heart-shaped notes with kind messages, which are threaded onto strings and hung to form a curtain over the classroom door. This display promotes positivity, reflection, and collaboration.
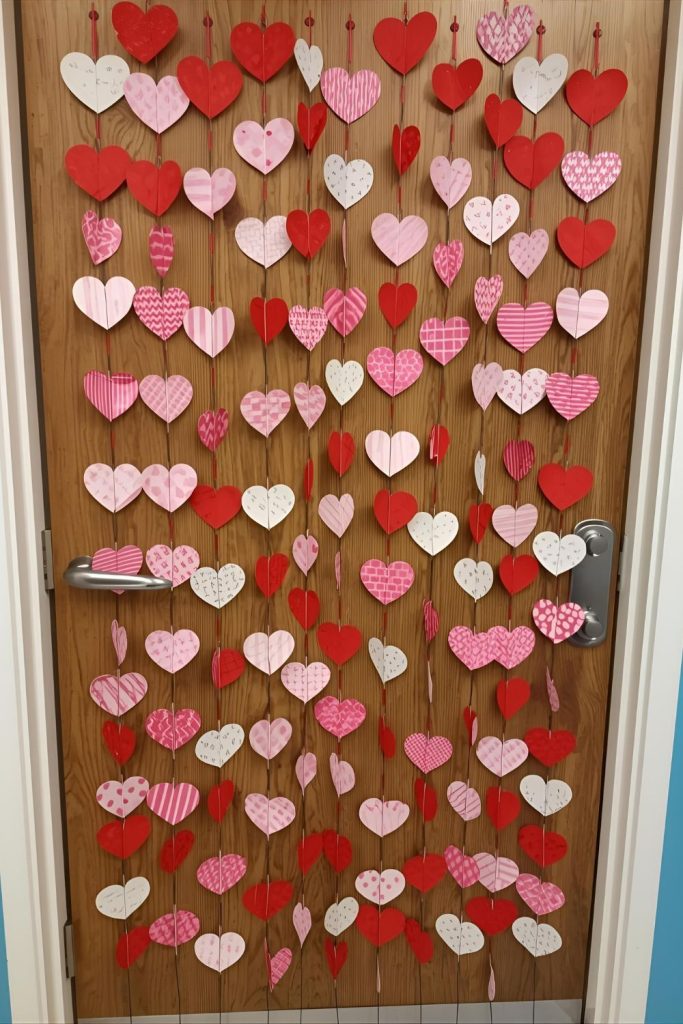
Step-by-Step Method:
- Prepare Materials: Gather colored paper, scissors, markers, string or yarn, and tape.
- Cut Heart Notes: Students cut multiple heart shapes from paper.
- Write Messages: Each student writes kind messages, compliments, or positive affirmations on their hearts.
- Decorate Hearts: Add doodles, patterns, or stickers to personalize each note.
- Thread onto Strings: Thread several hearts onto a string or yarn, spacing evenly.
- Hang Curtain: Attach strings above the classroom door, letting the hearts hang to form a curtain effect.
- Celebrate: Allow students to read each other’s notes, creating a festive, uplifting environment full of kindness.