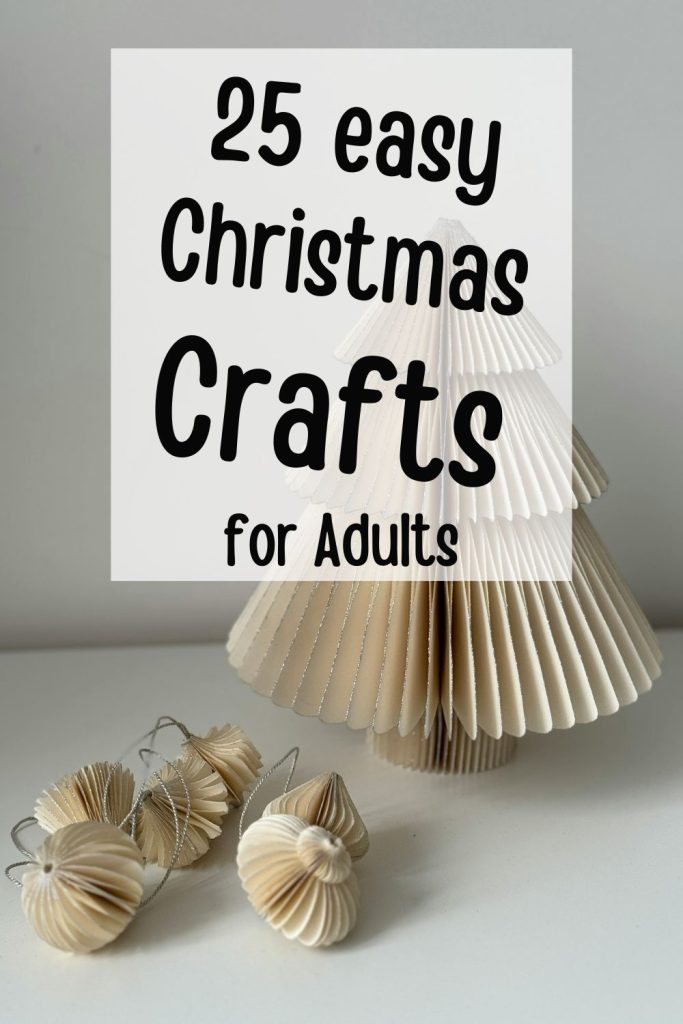
Christmas is sneaking up fast, and if you’ve ever thought about turning your love for making stuff into some extra cash, this is your moment. Selling Christmas crafts for adults isn’t just fun—it can actually pay off if you play your cards right. From cozy candles to snazzy ornaments, there’s a whole bunch of crafts that people are lining up for this year.
Let’s get this Christmas hustle rolling!
Top-Selling Christmas Crafts for Adults That Are Trending This Year
People want crafts that feel personal, useful, and a little fancy without being too over the top. Here are some crowd-pleasers:
- Hand-poured soy wax Christmas candles with seasonal essential oils: These babies smell like Christmas in a jar—think cinnamon, pine, and orange zest. I once made a batch for friends and sold out in two days at a local market. The secret? A clean, simple label and letting the scent do the talking.
- Laser-cut personalized wooden Christmas tree ornaments: You can easily grab a small laser cutter or even outsource these. Adding names or special dates makes people feel like they’re getting something just for them.
- Dried flower and eucalyptus holiday wreaths: Forget the grandma look. Modern wreaths with muted greens and soft blooms are big hits, especially with folks wanting a fresh but natural vibe.
- Clay Christmas stocking tags: Custom name tags with cute shapes—stars, trees, snowflakes. I’ve spent evenings crafting these while watching holiday movies, and they’re a sweet little add-on gift.
- Furoshiki-inspired reusable fabric gift wrap: These Japanese-style wraps come in festive prints and are eco-friendly. People love the idea of wrapping their presents in something pretty and reusable.
- Minimalist macramé holiday wall hangings: Neutral tones, clean lines—perfect for that cozy but modern feel everyone’s chasing right now.
How to Make Your Christmas Crafts for Adults Stand Out in a Crowded Market
First off, tell your story. Why do you love this craft? Did you learn it from your grandma? Or maybe you’ve been making candles for years as a way to unwind after a long day? Sharing your why connects with people better than any sales pitch.
Next, quality matters. Use good materials. A soy candle that burns clean and smells right will get repeat buyers. Handmade wreaths? Use fresh eucalyptus or dried flowers that don’t look like they’ve been sitting in a box for months.
Packaging is your secret weapon. No one says no to a craft wrapped with care. Add a little tag, a handwritten note, or festive ribbon. It shows you’re not just tossing things together.
Last but not least, be consistent. Post your work on Instagram or TikTok with behind-the-scenes shots. Show people your process—like mixing scents or shaping clay—so they feel part of the magic.
Where to Sell Your Christmas Crafts for Adults (Etsy, Markets, and More)
- Etsy: The classic go-to for handmade goodies. It’s packed, sure, but if you nail your photos and descriptions, you’ll find buyers. Pro tip: use clear, bright pics and keywords like Christmas crafts for adults so folks can find you.
- Local craft markets: Nothing beats meeting your customers face-to-face. Plus, you get immediate feedback. I remember selling macramé wall hangings and chatting with folks about how they’d use them—that connection is gold.
- Facebook Marketplace and Instagram Shops: Post your crafts with catchy captions, share stories, and watch orders come in.
- Pop-up shops and holiday fairs: If there’s a holiday fair near you, grab a booth. It’s a bit of upfront work but totally worth it if you want local fans.
- Gift shops and boutiques: Some small shops love carrying local handmade items. Drop off a sample and chat with the owners.
Pricing Strategies for Christmas Crafts for Adults That Actually Make a Profit
Start with your costs: materials, packaging, and even a slice of your time. For example, if a candle costs $5 in supplies and takes 1 hour to make, you want to factor in both.
A simple formula I use is:
Cost of materials + (Hourly wage × Time spent) + Profit margin = Price
For profit margin, think 30-50% markup on materials and labor.
Also, look at what others charge but don’t just copy. If your wreath has premium eucalyptus and hand-tied ribbons, you can charge more.
Offer bundles or add-ons—like a set of ornaments with a matching gift wrap—to increase your average sale.
Time-Saving Tips for Creating and Managing Christmas Crafts for Adults as a Side Hustle
- Batch your work: Make 5-10 candles at once instead of one-by-one.
- Prep ahead: Cut all your fabric before you start sewing those gift wraps.
- Use simple packaging: Avoid fancy boxes that eat your time; instead, go for eco bags with cute tags.
- Set a schedule: Dedicate certain evenings or weekends to crafting only.
- Automate sales channels: Use Etsy’s tools to manage orders and shipping labels.
- Keep a stockpile: Make extras early, so you’re not scrambling when orders hit.
1. Hand-poured Soy Wax Christmas Candles with Seasonal Essential Oils
What you need:
- Soy wax flakes
- Essential oils (cinnamon, pine, orange, clove, etc.)
- Candle wicks
- Glass jars or tins
- Double boiler or microwave-safe container
- Thermometer
- Stirring spoon
- Labels and ribbon (optional)
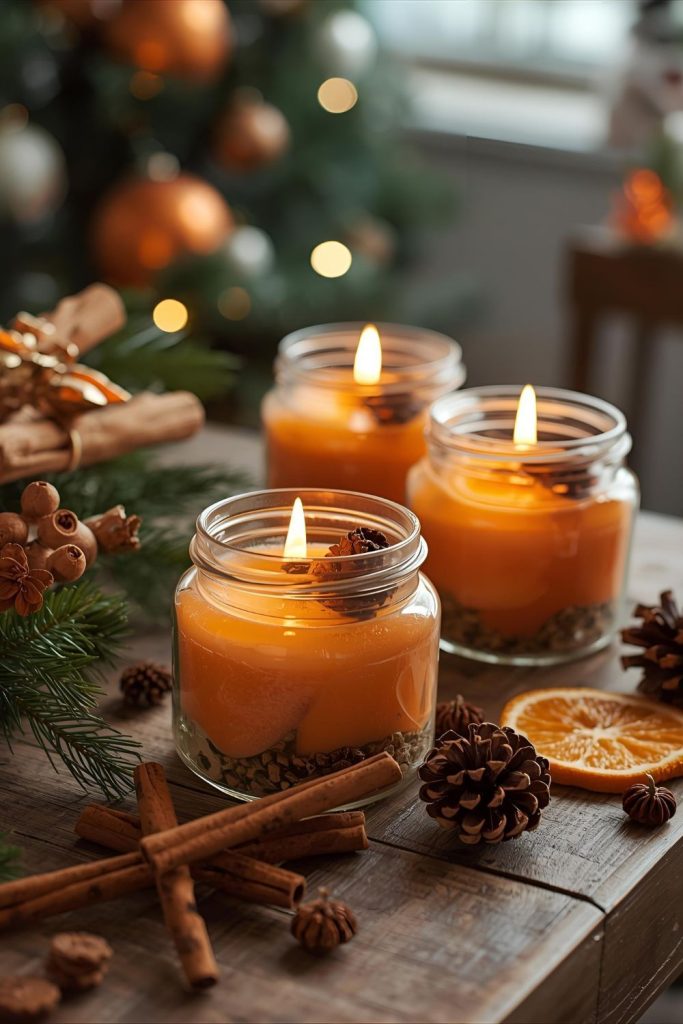
Steps:
- Prep your workspace: Lay down newspaper or parchment to catch spills. Attach wicks to the bottom center of each jar using wick stickers or a dab of hot glue.
- Melt the wax: Heat soy wax in a double boiler or microwave until fully melted, about 180°F (82°C). Use the thermometer to check.
- Add fragrance: Let wax cool to about 140°F (60°C) before stirring in essential oils—around 1 oz per pound of wax. Stir gently but thoroughly.
- Pour wax: Carefully pour wax into the jars, leaving about half an inch from the top. Hold wick centered if it moves.
- Set and trim wick: Let the candle cool and harden overnight. Trim wick to about ¼ inch before lighting.
- Decorate: Add labels with your scent name or festive design, maybe tie a ribbon around the jar neck.
2. Laser-cut Personalized Wooden Christmas Tree Ornaments
You’ll need:
- Thin plywood or birch sheets (1/8 inch thick)
- Laser cutter or laser cutting service
- Design software (Canva, Inkscape, or free online vector tools)
- Sandpaper
- Paint, stain, or wood burner (optional)
- Twine or ribbon for hanging
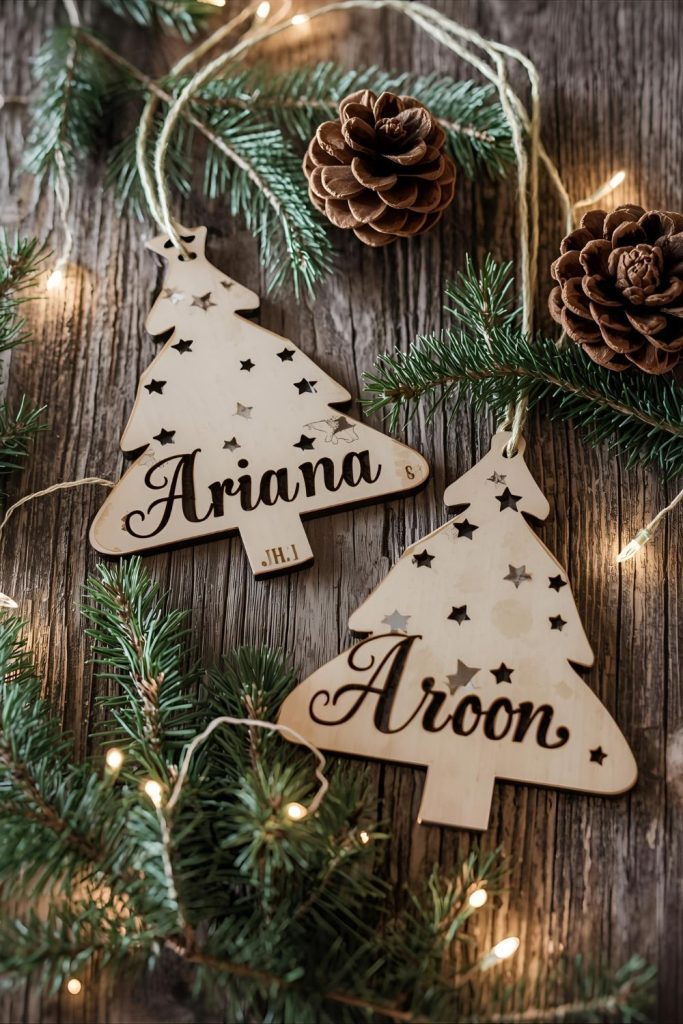
Steps:
- Design your ornament: Create or download simple Christmas shapes (trees, stars, snowflakes) and add names or dates as text. Export as a vector file (SVG or DXF).
- Cut & engrave: Use your laser cutter or send the file to a local maker or online service. They’ll cut and engrave your design on the wood.
- Smooth edges: Lightly sand the edges and surface to remove any burn marks or splinters.
- Add color or finish: Paint, stain, or lightly burn designs with a wood burner for extra flair (optional).
- Attach hanging string: Tie a loop of twine or ribbon through the hole at the top for hanging.
3. Dried Flower and Eucalyptus Holiday Wreaths with Modern Flair
Materials:
- Wire or foam wreath frame
- Floral wire
- Dried eucalyptus, lavender, baby’s breath, or other dried flowers
- Wire cutters or scissors
- Ribbon or small ornaments (optional)
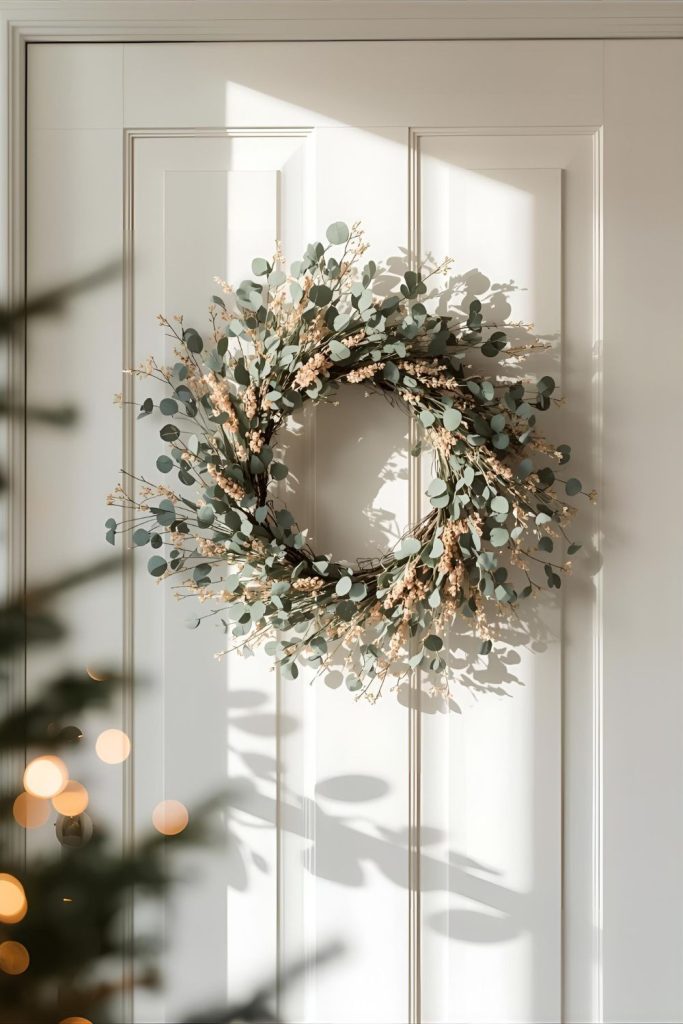
Steps:
- Prepare your frame: Decide on the wreath size and have your frame ready.
- Create small bunches: Cut 4-6 inch pieces of eucalyptus and flowers. Group a few stems into small bundles and secure with floral wire.
- Attach bunches: Start on one side of the frame and wire the bunches tightly to the frame, overlapping as you go to cover wire and gaps.
- Layer flowers: Alternate eucalyptus and other flowers to build texture and fullness.
- Finish off: Add a ribbon bow or tiny ornaments for a pop of holiday cheer. Hang and enjoy!
4. Clay Christmas Stocking Tags Customized with Names
You’ll need:
- Air-dry clay or polymer clay
- Rolling pin
- Alphabet stamps or a toothpick for writing names
- Cookie cutters (stars, trees, snowflakes)
- Straw or skewer for holes
- Paint and brushes (optional)
- Ribbon or twine for attaching
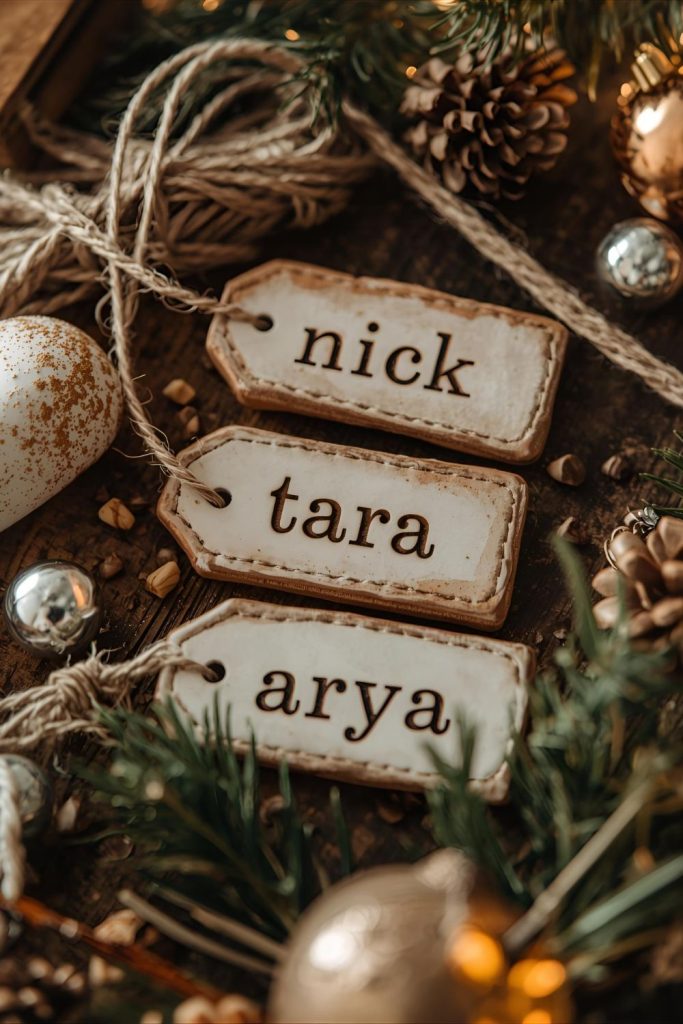
Steps:
- Roll out clay: On a clean surface, roll out the clay to about ¼ inch thick.
- Cut shapes: Use cookie cutters to cut your tags.
- Personalize: Stamp or write names on each tag with alphabet stamps or a toothpick.
- Make hanging hole: Use a straw or skewer to poke a hole at the top for stringing.
- Dry or bake: Let air-dry tags overnight or bake polymer clay as per instructions.
- Paint details: Add color or accents if you like.
- Attach ribbon: Thread ribbon or twine through the hole to tie onto stockings.
5. Furoshiki-Inspired Reusable Fabric Gift Wrap Sets in Festive Prints
Materials:
- Cotton or linen fabric squares (20” to 25” sizes)
- Festive print fabrics (Christmas colors, patterns)
- Sewing machine or needle and thread
- Scissors
- Iron
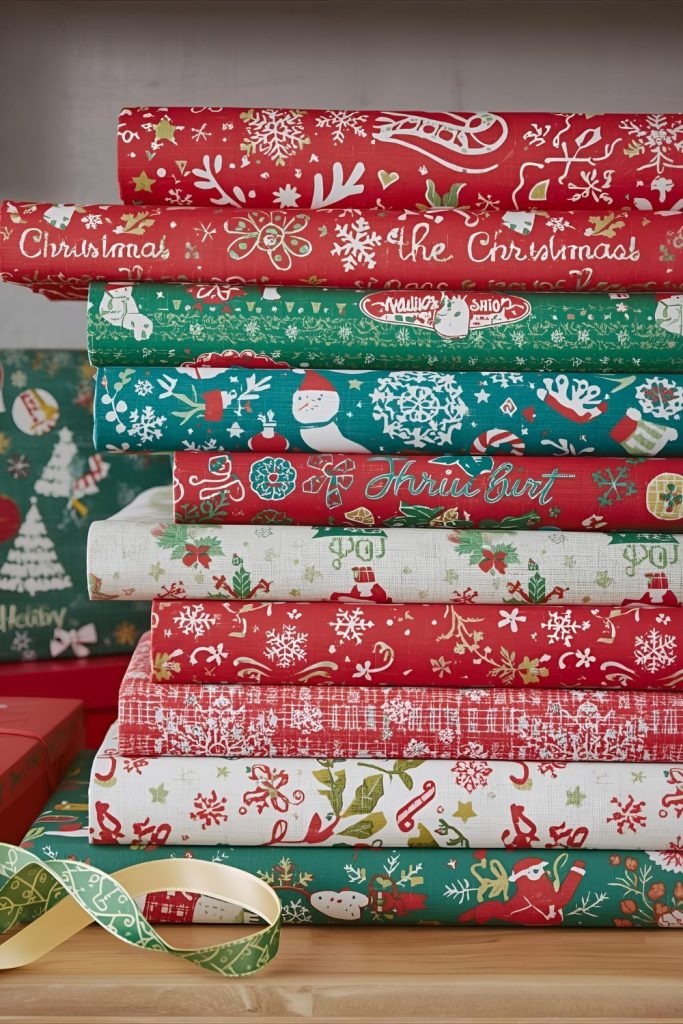
Steps:
- Cut fabric: Cut fabric into neat squares—common sizes are 20” or 25”.
- Finish edges: Sew a simple hem on all edges by folding about ¼ inch, then another ¼ inch, and sewing around the perimeter.
- Iron: Press fabric squares flat to remove wrinkles.
- Bundle sets: Pair a few coordinating prints together for sets.
- Add instructions card: Include a small card showing how to wrap gifts the furoshiki way (there are great simple wrapping techniques online).
6. Minimalist Macramé Holiday Wall Hangings Featuring Neutral Tones
Supplies:
- Macramé cord (cotton or jute)
- Wooden dowel or branch for hanging
- Scissors
- Measuring tape
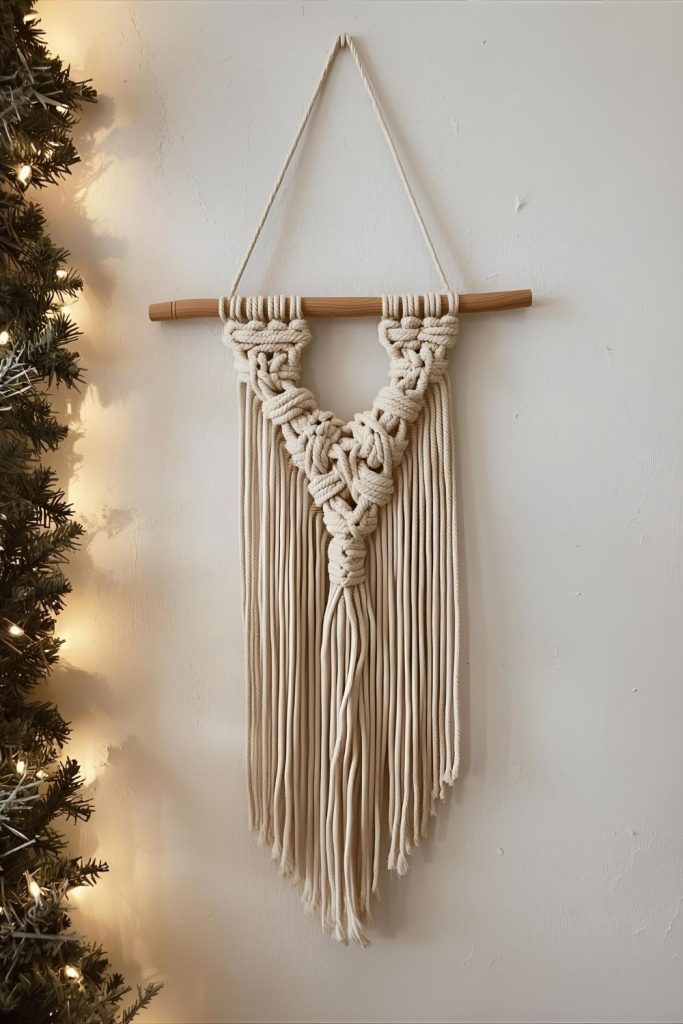
Steps:
- Cut cords: Measure and cut multiple cords about 3x the desired finished length.
- Attach cords: Fold cords in half and attach to dowel with a lark’s head knot.
- Create patterns: Use basic macramé knots—square knots, half hitch knots—to build simple geometric patterns.
- Trim and shape: Cut cord ends into a shape (like a triangle) or leave straight.
- Hang: Add a string for hanging, then display or sell.
7. Holiday-themed Bath Bombs with Natural Ingredients and Festive Scents
You’ll need:
- Baking soda (1 cup)
- Citric acid (1/2 cup)
- Cornstarch (1/2 cup)
- Epsom salts (1/2 cup)
- Coconut oil (2.5 tbsp)
- Essential oils (peppermint, pine, cinnamon)
- Food coloring (optional)
- Bath bomb molds or silicone molds
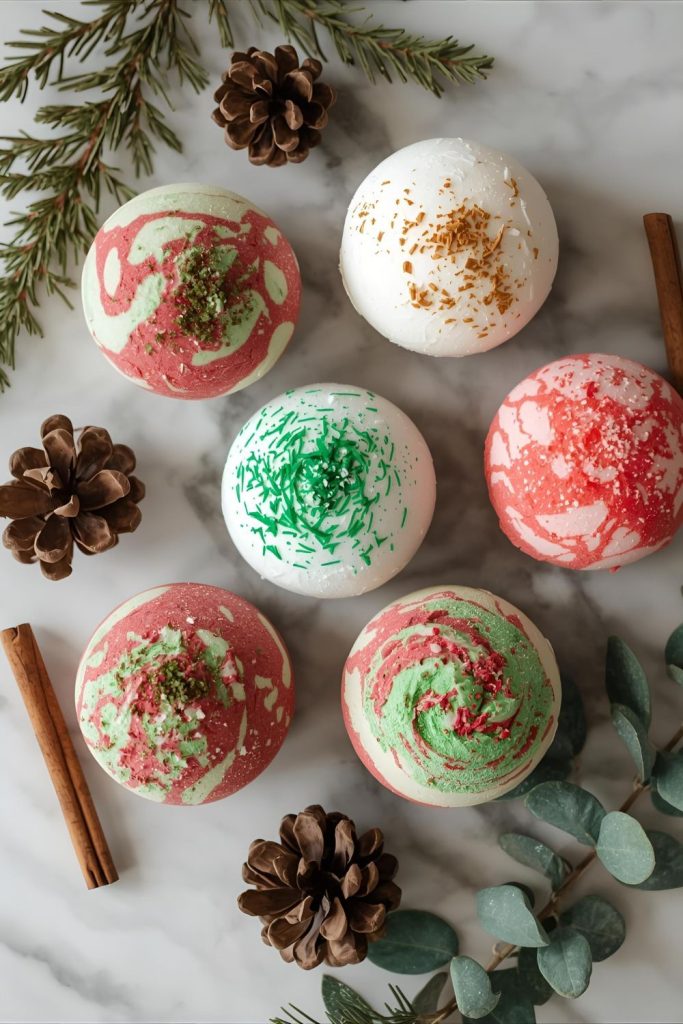
Steps:
- Mix dry ingredients: Combine baking soda, citric acid, cornstarch, and salts in a bowl.
- Mix wet ingredients: Melt coconut oil and mix with essential oils and food coloring.
- Combine: Slowly add wet mixture to dry while stirring continuously to avoid fizzing.
- Check consistency: Mixture should hold shape when squeezed, like damp sand.
- Fill molds: Pack mixture firmly into molds.
- Dry: Let bombs dry overnight before popping out.
- Package: Wrap in cellophane or place in cute boxes.
8. Layered Hot Cocoa Jars with Decorative Packaging and Recipe Cards
What you need:
- Mason jars
- Cocoa powder, sugar, mini marshmallows, chocolate chips, crushed candy canes, powdered milk
- Funnel and spoon
- Ribbon, tags, and recipe cards
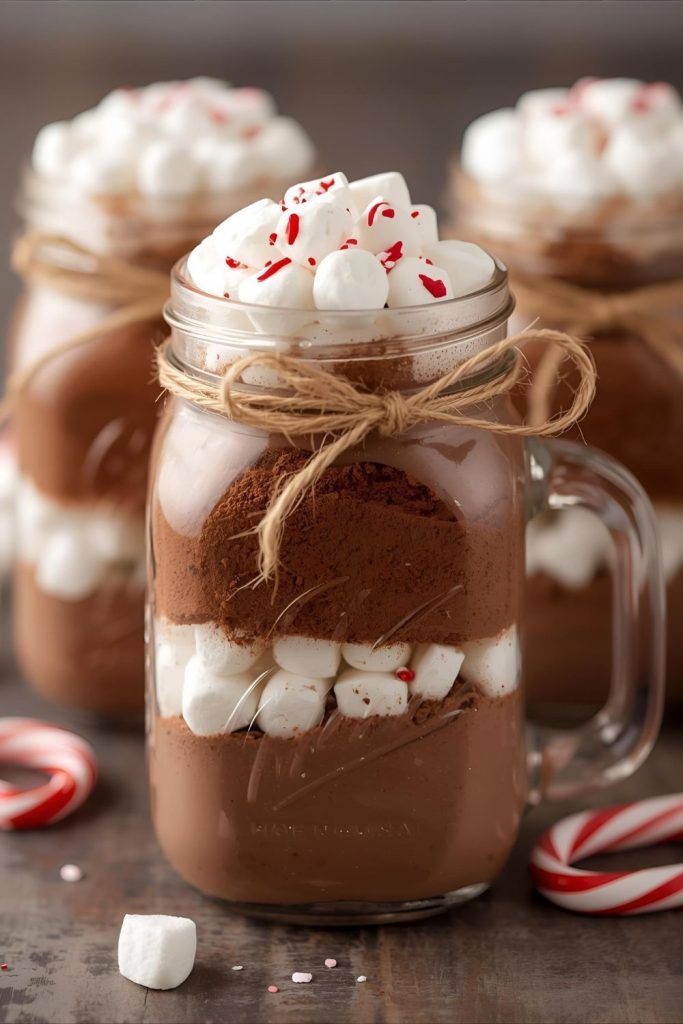
Steps:
- Layer ingredients: Use a funnel to layer cocoa powder, sugar, marshmallows, chocolate chips, crushed candy canes, and powdered milk in the jar.
- Seal jars: Screw on lids tightly.
- Decorate: Tie ribbons and attach recipe cards explaining how to mix with hot water or milk.
- Gift-ready: Perfect for markets or online sales.
9. Hand-painted Ceramic Mugs with Christmas Motifs and Gold Accents
Supplies:
- Plain ceramic mugs
- Ceramic paints or paint pens
- Paint brushes
- Painter’s tape (optional)
- Gold leaf or gold paint pen (optional)
- Oven (for curing)
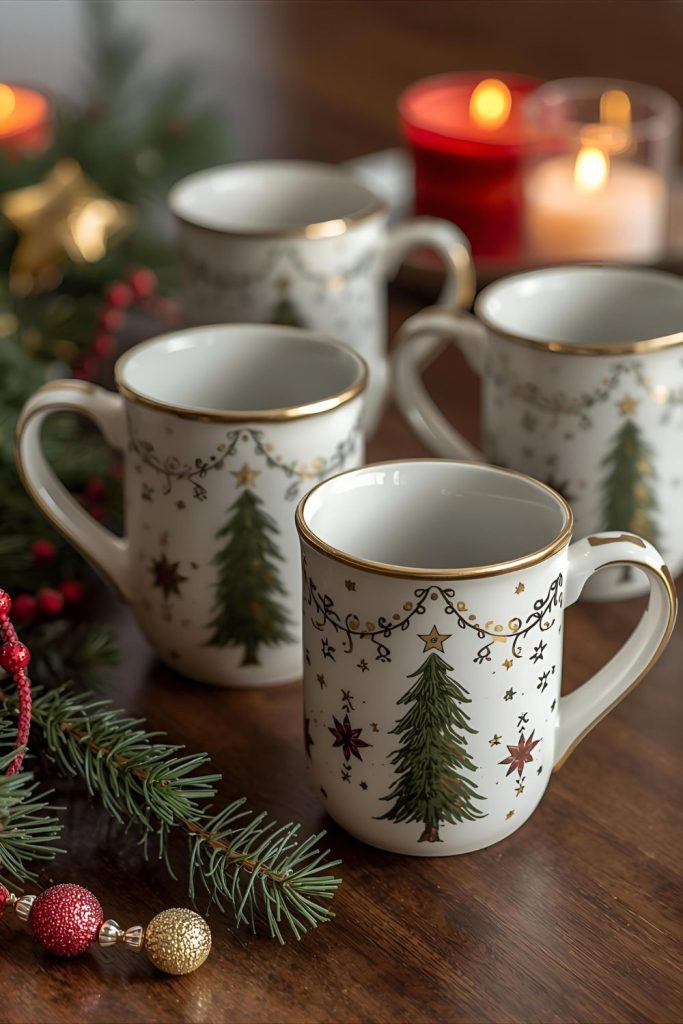
Steps:
- Clean mugs: Wash and dry mugs to remove dust and oils.
- Plan your design: Use painter’s tape to mark off areas if needed. Sketch simple Christmas motifs like trees, stars, or snowflakes.
- Paint: Use ceramic paints or pens to add designs. Let dry between layers.
- Add gold accents: Use gold paint or leaf for highlights.
- Cure: Bake mugs in the oven as per paint instructions (usually 350°F for 30 minutes) to set paint.
- Cool and package: Let cool before packaging for sale.
10. Fabric Advent Calendars with Pockets for Small Gifts or Notes
Materials:
- Fabric (neutral or festive prints)
- Small fabric scraps for pockets
- Sewing machine or needle and thread
- Numbers (fabric paint, iron-on numbers, or stitched)
- Ribbon or dowel for hanging
Steps:
- Cut base fabric: Cut a large rectangle (about 24”x36”).
- Cut pockets: Cut 24 small rectangles or squares for pockets.
- Attach pockets: Sew pockets onto base fabric in rows, leaving openings at the top.
- Add numbers: Decorate pockets with numbers 1-24 using paint or stitching.
- Add hanging: Sew a pocket or sleeve at the top to insert a dowel or attach ribbon loops for hanging.
- Fill: Add small treats or notes for daily surprises.
11. Beeswax Scented Wax Melts Shaped Like Snowflakes or Holly Leaves
You’ll need:
- Beeswax pellets
- Essential oils (pine, peppermint)
- Silicone molds (snowflakes, holly leaves)
- Double boiler
- Small container for storage
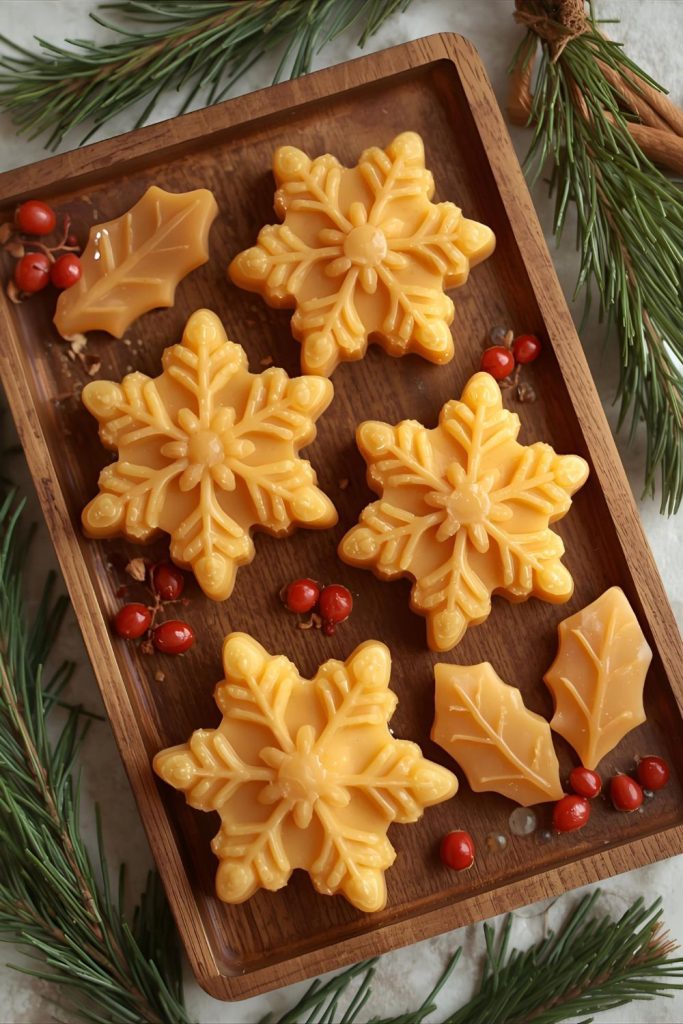
Steps:
- Melt beeswax: Heat beeswax pellets in a double boiler.
- Add scent: Once melted, add essential oils (about 10 drops per 1/4 cup wax).
- Pour into molds: Carefully pour wax into silicone molds.
- Cool: Let wax harden completely.
- Remove and package: Pop out wax melts and pack in small boxes or tins.
12. Calligraphy Holiday Greeting Cards Paired with Coordinating Envelopes
Materials:
- Blank cardstock or pre-cut cards
- Calligraphy pens or brush pens
- Ink or paint (metallics are nice for holidays)
- Envelopes
- Stamps and stickers (optional)
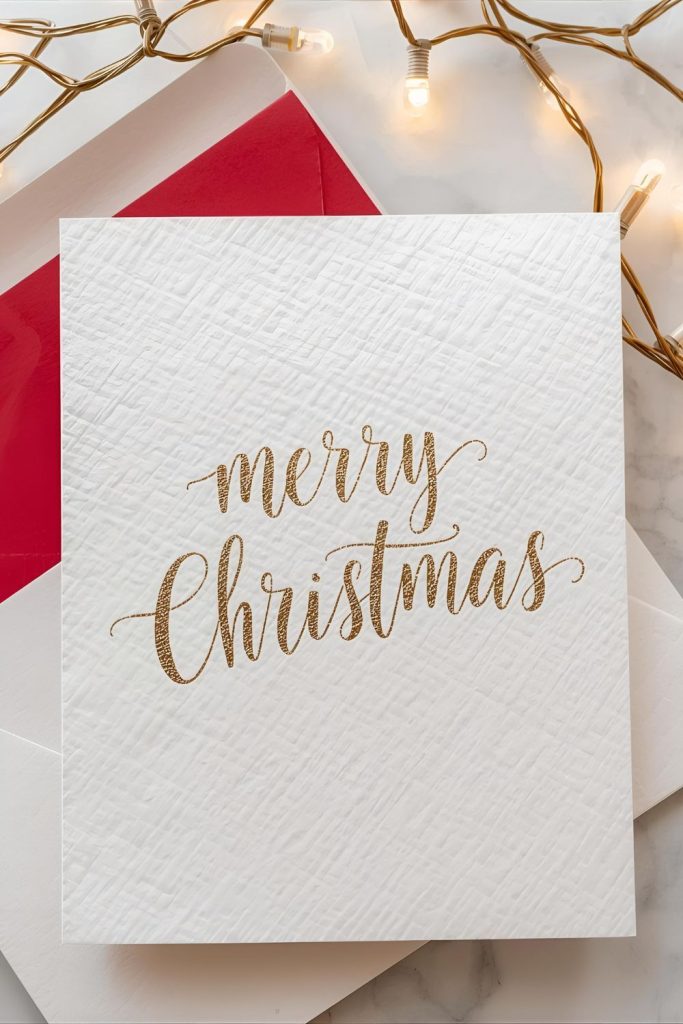
Steps:
- Plan your designs: Sketch holiday phrases like “Merry Christmas,” “Joy,” or “Happy Holidays.”
- Write with calligraphy: Use pens to carefully write your message on cards. Practice first on scrap paper.
- Add decorations: Draw small holly, stars, or snowflakes around text if desired.
- Pair with envelopes: Match cards with envelopes and add a seal or sticker for extra charm.
13. Knitted Cozy Cup Sleeves with Winter Patterns and Festive Colors
You’ll need:
- Yarn in winter colors
- Knitting needles or crochet hooks
- Scissors
- Buttons or ribbon (optional)

Steps:
- Choose pattern: Find a simple sleeve pattern or knit a rectangle that fits around a cup.
- Knit or crochet: Use basic stitches (garter or ribbing) for stretchy texture.
- Add details: Knit in festive patterns like snowflakes or stripes.
- Sew buttons: Add a button and loop closure or leave open-ended.
- Package: Pair with mugs or sell solo.
14. DIY Gingerbread House Kits with Pre-baked Pieces and Decorative Icing
Materials:
- Pre-baked gingerbread pieces (houses, roofs, walls)
- Royal icing mix or pre-made icing tubes
- Candy decorations (gumdrops, candy canes, sprinkles)
- Clear bags or boxes
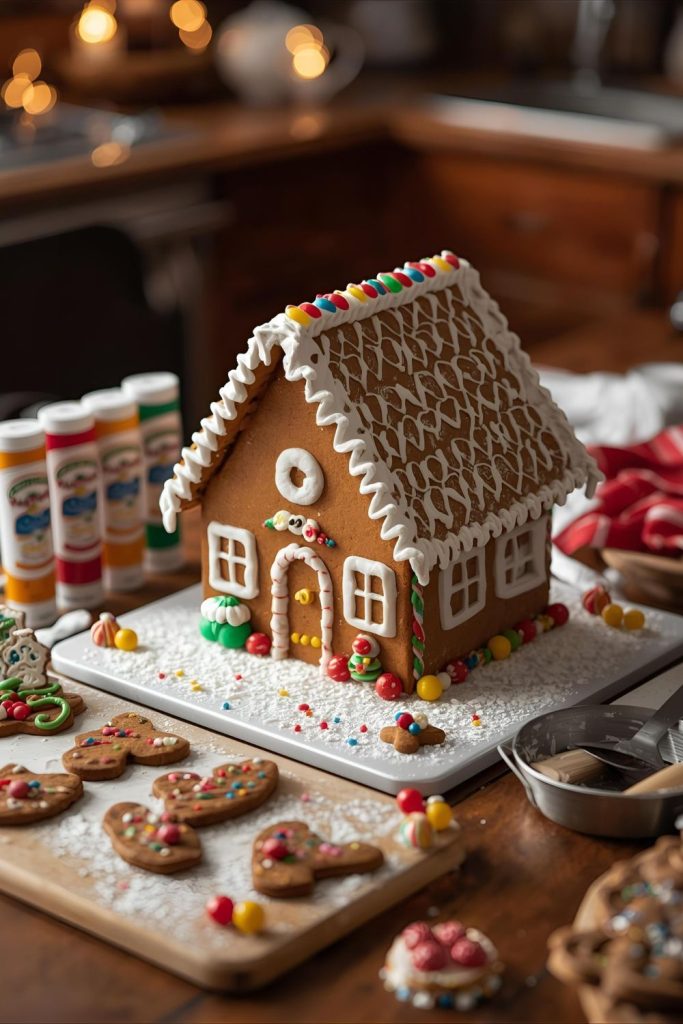
Steps:
- Bake gingerbread pieces: Make gingerbread dough, roll out, and cut shapes. Bake and cool.
- Prepare icing: Mix royal icing or fill piping bags with pre-made tubes.
- Assemble kits: Bundle all pieces, icing, and candies into clear bags or boxes.
- Include instructions: Add a simple step-by-step guide for assembling the house.
- Sell or gift: Perfect for kids and families to create together.
15. Engraved Wooden Charcuterie Boards with Christmas Sayings
You’ll need:
- Wooden cutting boards
- Wood burning tool or laser engraver
- Sandpaper
- Food-safe wood oil
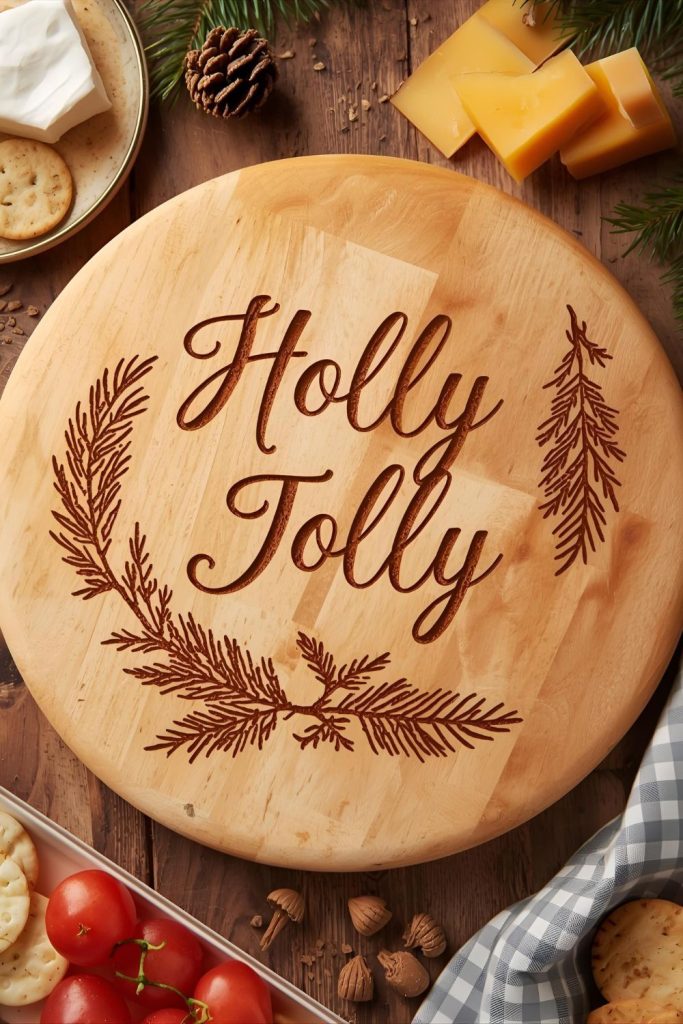
Steps:
- Sand boards: Smooth surfaces with sandpaper.
- Design engraving: Sketch or use software to create holiday sayings or designs.
- Engrave: Carefully burn or laser the design onto the wood.
- Oil boards: Apply food-safe oil to seal and protect.
- Package: Wrap in tissue or place in gift boxes.
16. Hand-stenciled Holiday Doormats with Witty or Warm Seasonal Messages
Materials:
- Plain coir doormats
- Stencils (letters or holiday shapes)
- Outdoor acrylic paint or spray paint
- Painter’s tape
- Brushes or sponges
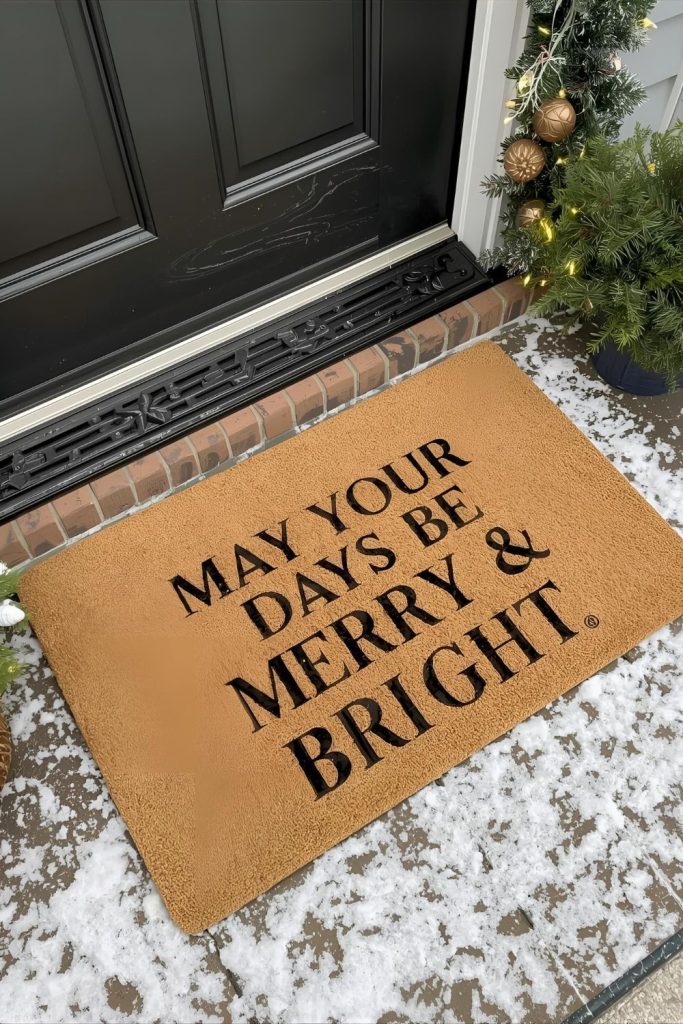
Steps:
- Clean mats: Shake out and brush mats clean.
- Position stencil: Tape stencil onto the mat firmly.
- Paint: Dab paint gently using sponge or brush; avoid drips.
- Dry: Let paint dry fully before removing stencil.
- Repeat: Add more designs if desired.
17. Lightweight Fabric or Wire Christmas Tree Toppers in Geometric Shapes
Materials:
- Wire or stiff fabric
- Wire cutters
- Hot glue or needle and thread
- Glitter, paint, or fabric embellishments

Steps:
- Shape wire: Bend wire into stars, triangles, or other geometric shapes.
- Cover with fabric: Cut fabric to cover shape, glue or sew in place.
- Decorate: Add glitter or paint details.
- Attach ribbon: Create a loop or clip for easy tree top mounting.
18. Digital Christmas Planner Printables, Including Budget and Gift Lists
Tools:
- Canva, Adobe Illustrator, or Microsoft Word
- Digital templates or your own designs
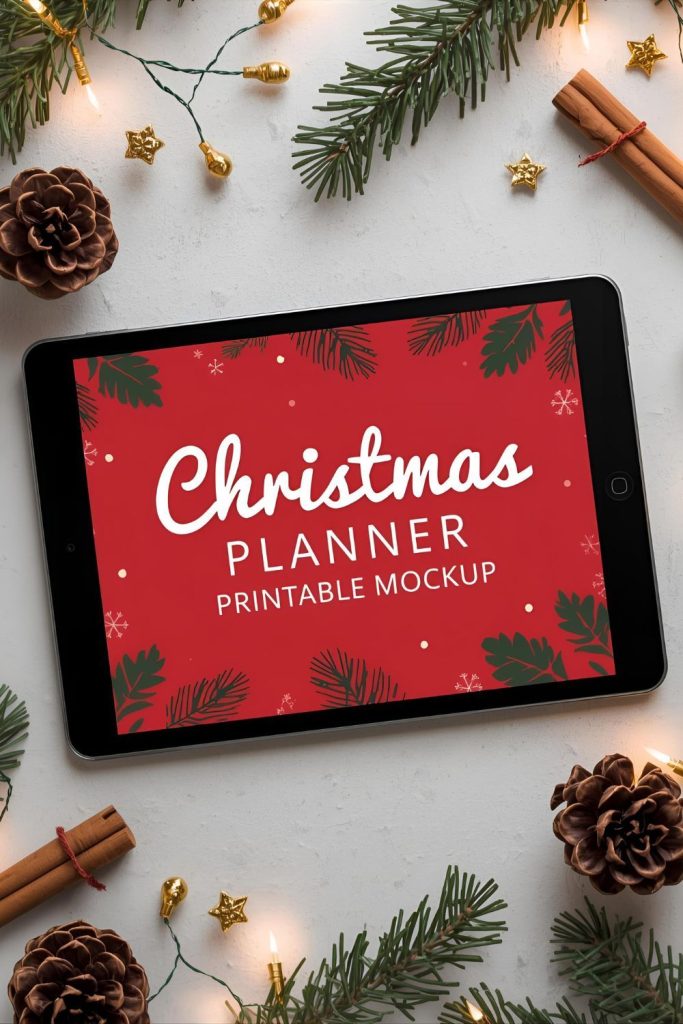
Steps:
- Design planner: Create pages for gift lists, budgets, calendars, meal planners, etc. Use festive colors and fonts.
- Export as PDFs: Save files in print-ready formats.
- Sell online: Upload to Etsy or your website. Buyers download and print at home.
19. Polymer Clay Trinket Dishes Shaped Like Christmas Trees or Stars
Supplies:
- Polymer clay in various colors
- Rolling pin
- Cookie cutters (tree, star)
- Oven
- Gloss glaze (optional)
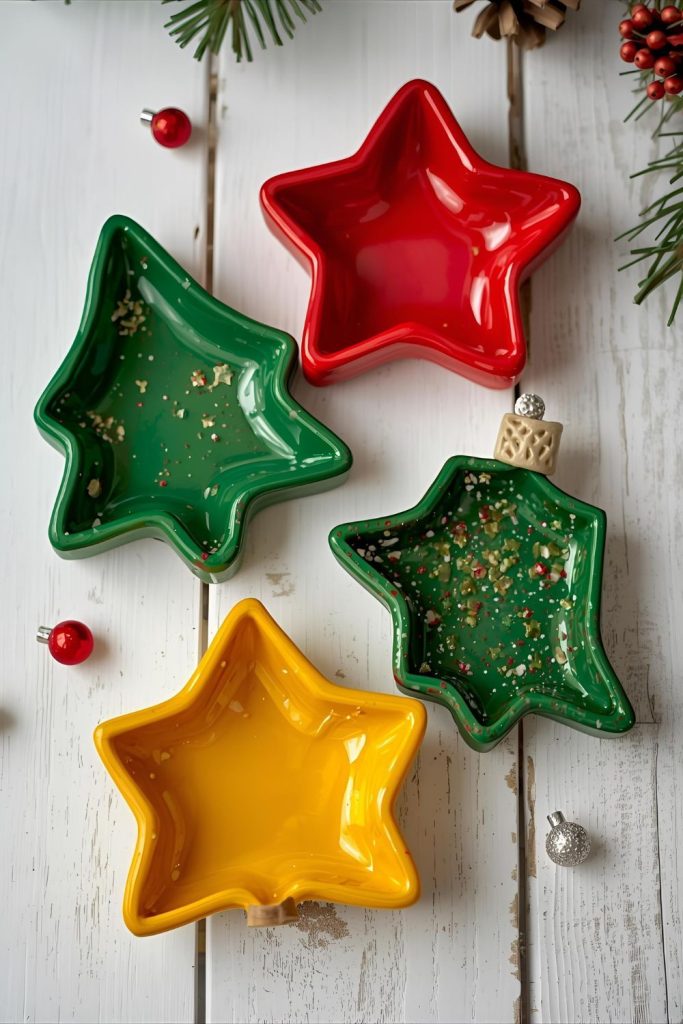
Steps:
- Roll out clay: Flatten clay to about ¼ inch thick.
- Cut shapes: Use cookie cutters to cut shapes.
- Form dish: Gently curve shapes over a small bowl to form a dish.
- Bake: Follow clay package instructions, usually 265°F for 15-30 mins.
- Glaze: Add gloss glaze after cooling for shine.
20. Felt Garlands with Modern Shapes Like Triangles, Stars, or Moons
Materials:
- Felt sheets in festive or neutral colors
- Scissors
- Needle and thread or glue
- String or ribbon
Steps:
- Cut shapes: Cut felt into triangles, stars, moons, or other shapes.
- Attach shapes: Sew or glue shapes along string or ribbon evenly spaced.
- Add details: Embroider or glue small accents if desired.
- Package: Roll gently and tie with a ribbon.
21. Etched Glass Ornaments Featuring Winter Scenes or Personalized Names
You’ll need:
- Clear glass ornaments (flat or round)
- Glass etching cream
- Vinyl stickers or stencils
- Gloves and safety gear
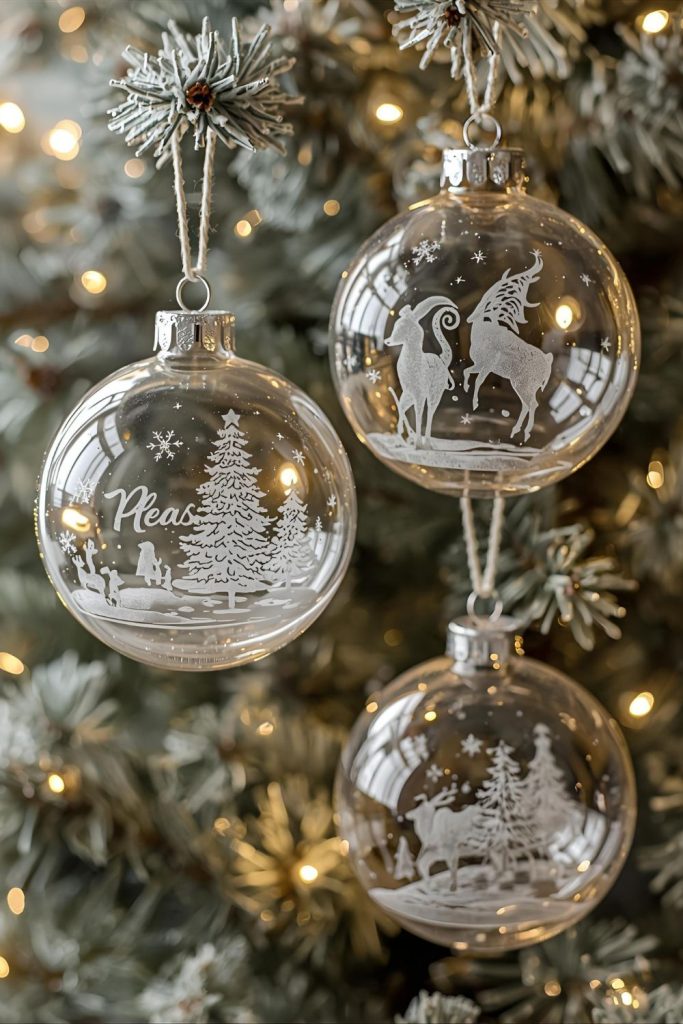
Steps:
- Clean ornaments: Wipe ornaments with rubbing alcohol.
- Apply stencil: Stick vinyl stickers or stencil design on glass.
- Apply cream: Using gloves, brush on etching cream and wait as per instructions (usually 5-10 mins).
- Rinse off: Wash off cream carefully, remove stencil.
- Dry and decorate: Add ribbons or glitter if you want.
22. Herbal Sachets Filled with Dried Lavender, Pine, and Cinnamon Sticks
Supplies:
- Small fabric bags or squares of fabric to sew into bags
- Dried lavender, pine needles, cinnamon sticks
- Needle and thread or sewing machine
- Ribbon for tying
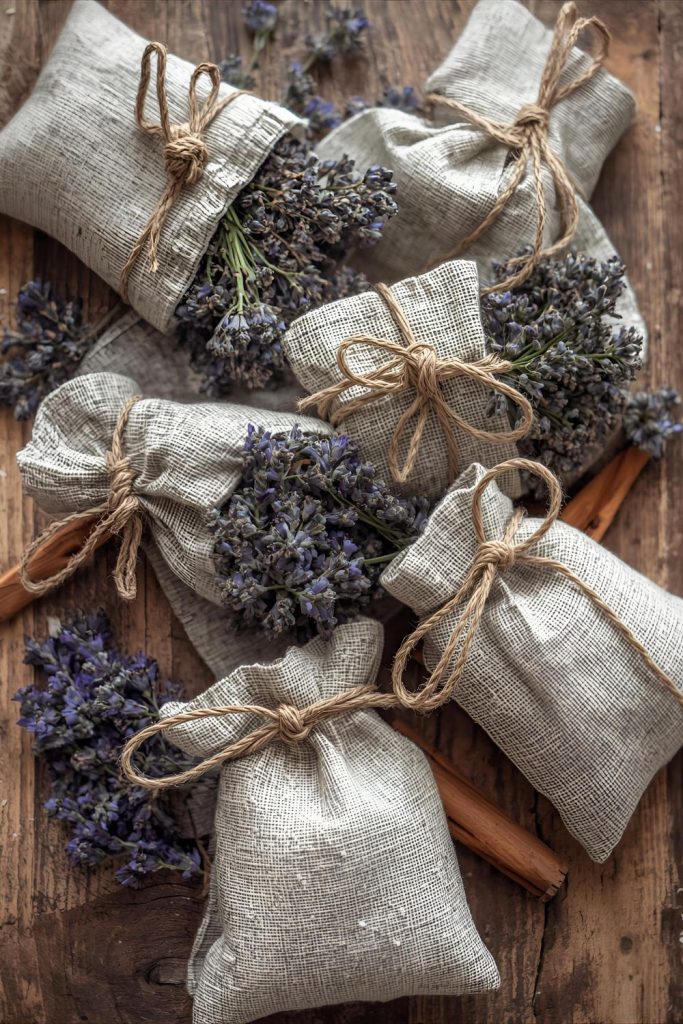
Steps:
- Mix herbs: Combine dried lavender, crushed pine needles, and small cinnamon sticks in a bowl.
- Fill bags: Spoon herb mix into fabric bags or sewn pouches.
- Close bags: Sew or tie bags shut securely.
- Add ribbon: Tie with festive ribbons.
23. Holiday Pet Bandanas or Collars Embroidered with Festive Designs
Materials:
- Fabric (cotton or flannel)
- Embroidery floss and needle
- Scissors
- Velcro or snap fasteners
- Sewing machine or needle and thread
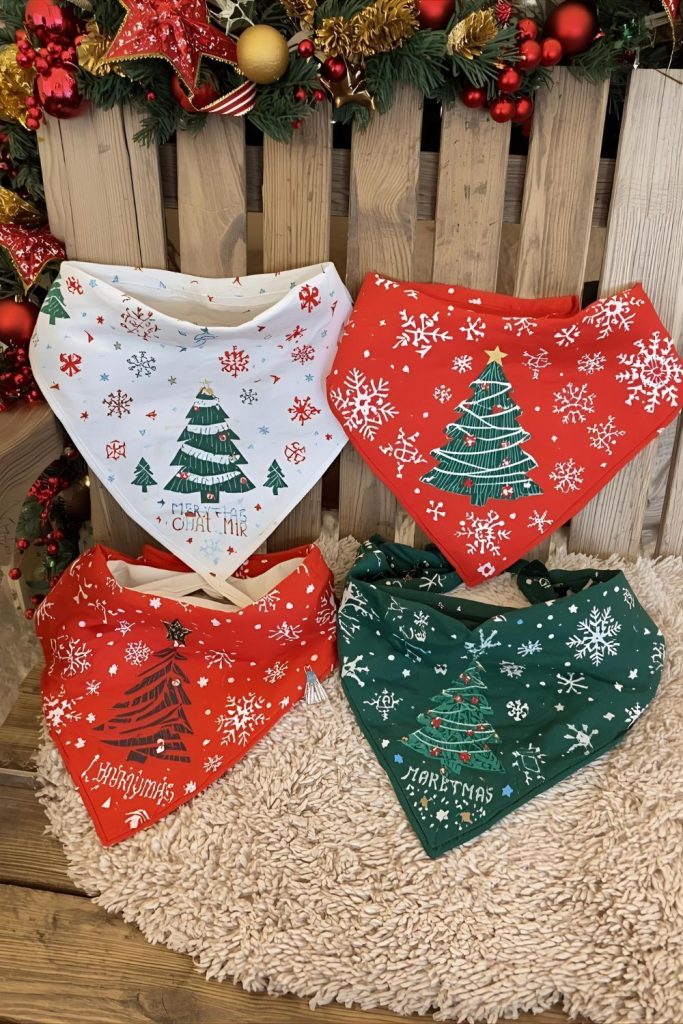
Steps:
- Cut fabric: Cut triangles or rectangles sized for pets.
- Embroider: Stitch holiday designs like snowflakes, trees, or names on fabric.
- Finish edges: Sew edges or use bias tape to prevent fraying.
- Add fasteners: Attach Velcro or snaps for easy wear.
24. Cookie Decorating Kits with Pre-made Sugar Cookies and Icing Tubes
You’ll need:
- Sugar cookie dough
- Royal icing tubes or pre-made icing
- Sprinkles and small decorations
- Clear bags or boxes

Steps:
- Bake cookies: Roll dough, cut into festive shapes, bake, and cool.
- Package: Place cookies, icing tubes, and sprinkles in clear packaging.
- Add instructions: Include tips for decorating cookies.
25. Embroidered Christmas Hoop Art with Abstract Winter Landscapes
Materials:
- Embroidery hoops
- Fabric for base
- Embroidery floss in winter colors
- Needle
- Pattern or design
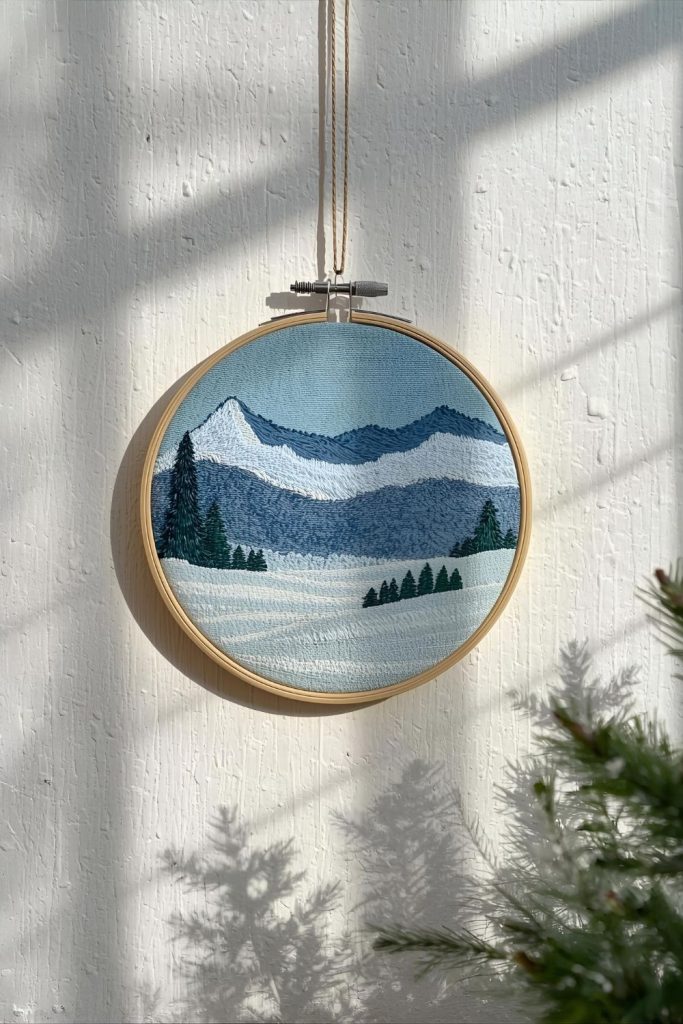
Steps:
- Stretch fabric: Place fabric in hoop tightly.
- Draw design: Lightly sketch abstract winter scene on fabric.
- Embroider: Use stitches like satin, backstitch, or French knots to fill in design.
- Finish: Tighten hoop and trim excess fabric.