Classroom doors during warmer months often become the first thing children notice when they enter school. A well decorated door sets a cheerful mood, gives students a sense of belonging, and turns a plain hallway into something that feels exciting to pass through each day. These ideas focus on real classroom materials like paper, paint, glue, and student made pieces, so teachers can involve young learners directly. Each design works as a full door setup rather than small isolated decorations, and everything is realistic for kindergarten through grade three classrooms.
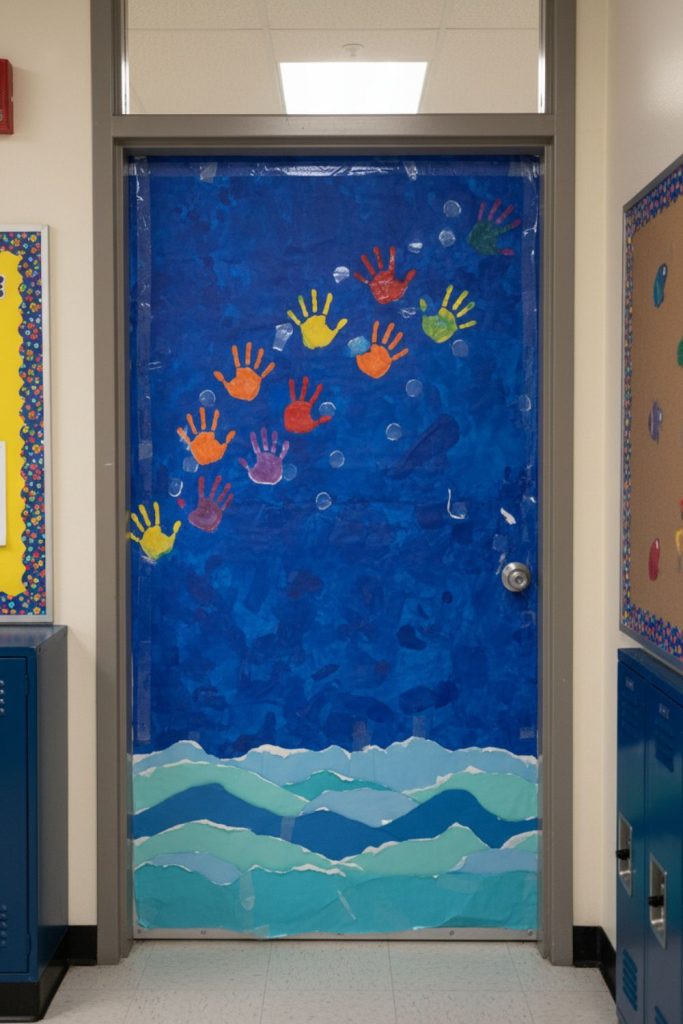
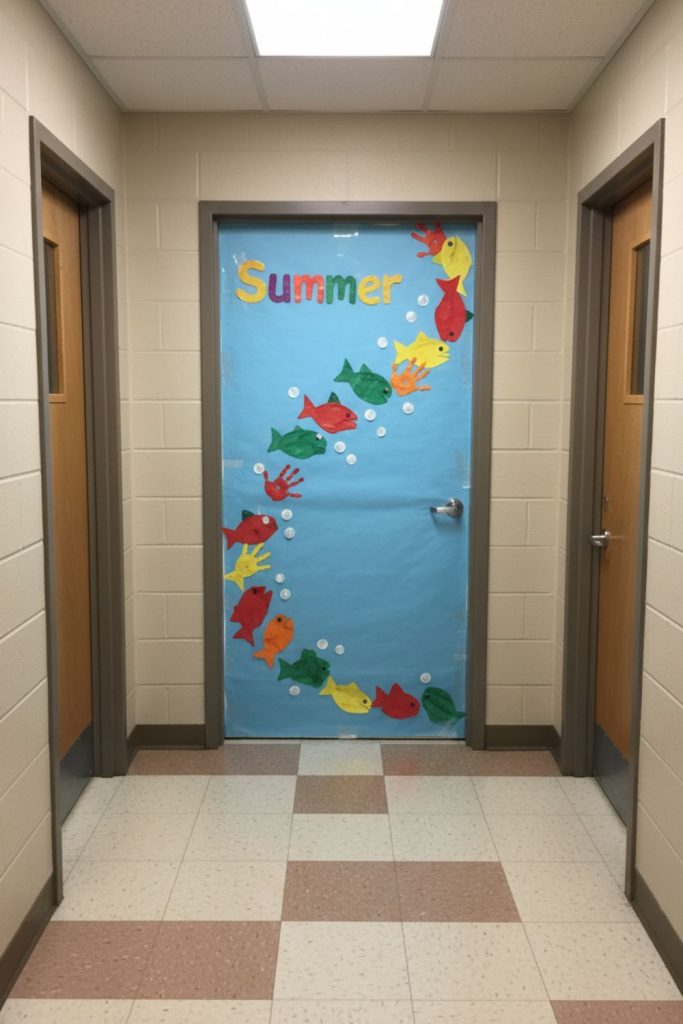
A full ocean scene door with layered torn-paper waves at the bottom, a school of handprint fish moving diagonally across, and a darker blue sponge-painted background for depth
This ocean themed door brings movement and color using simple classroom supplies. Children enjoy seeing their handprints become fish swimming across the door, while torn paper adds texture that feels like rolling waves.
Step by step method
- Cover the door with light blue paper or paint as base
- Use sponge painting with darker blue to create depth and uneven water tone
- Tear strips of green and blue paper for layered waves at the bottom
- Paste waves in overlapping rows so they look like moving water
- Trace and cut student handprints, then decorate them as fish
- Arrange fish diagonally so it looks like a moving school
- Add small white paper bubbles around fish for motion effect
The final look gives a sense of underwater motion that feels alive without needing complex materials.
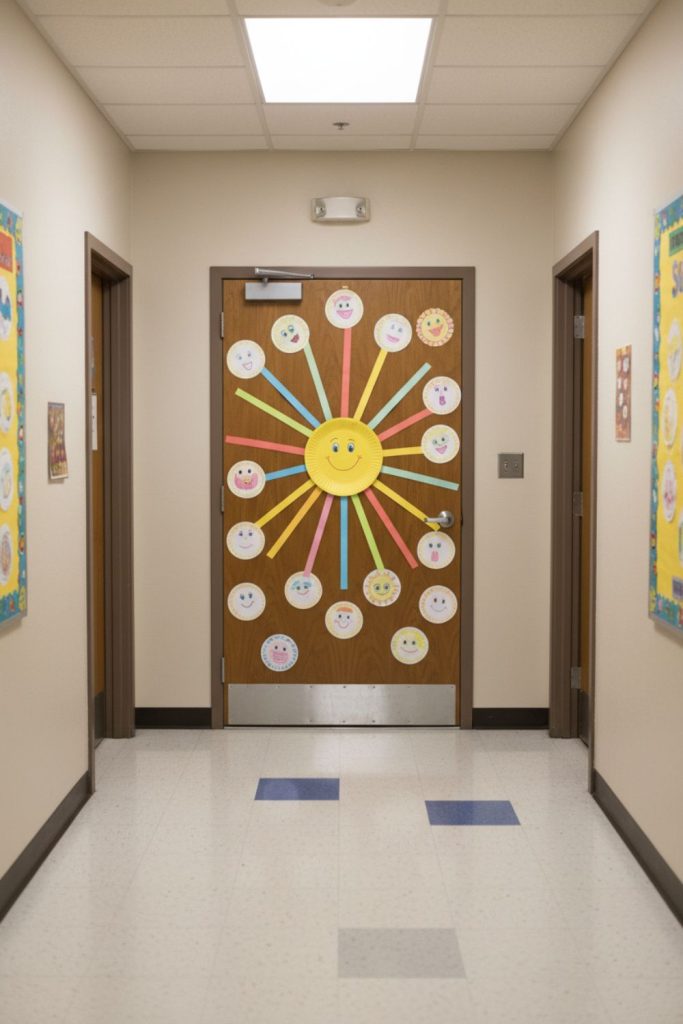
A large central sun made from a painted paper plate, with long accordion folded paper rays stretching across the entire door and small student created mini suns filling empty space
This sunny display brings warmth and brightness right into the classroom entrance. Students enjoy seeing their own mini suns join one big central sun.
Step by step method
- Paint a large paper plate yellow and orange for the center sun
- Place it in the middle of the door
- Fold strips of yellow paper into accordion style rays
- Attach rays so they spread outward in all directions
- Ask students to make small sun cutouts with crayons or paint
- Scatter mini suns around the door space
- Add slight shading around rays for extra depth
The design gives a glowing effect that feels cheerful and full of life.
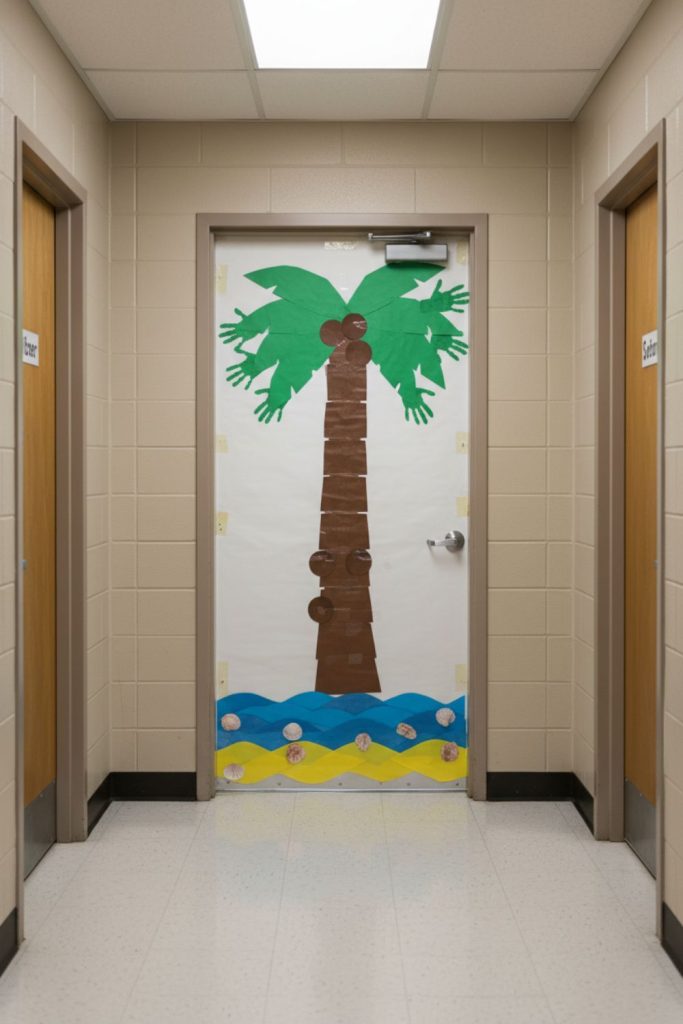
A tropical palm tree scene with one large trunk in the center and multiple green handprint leaves spreading outward, with small student made coconuts placed around
This palm tree door feels like a beach moment brought into the classroom. Children enjoy spotting their handprints forming the leaves.
Step by step method
- Create a brown paper trunk and place it vertically in center
- Trace student arms or use rolled paper for trunk texture
- Use green handprints for palm leaves at top
- Spread leaves in a fan shape outward
- Add small brown circles as coconuts with student names inside
- Place light blue paper at bottom for sand effect
- Add simple sun shapes in corners for balance
The design creates a relaxed summer feeling using very simple materials.
A vertical stack of oversized ice cream cones where each scoop is a crumpled tissue paper ball, forming a tall, colorful tower down the door
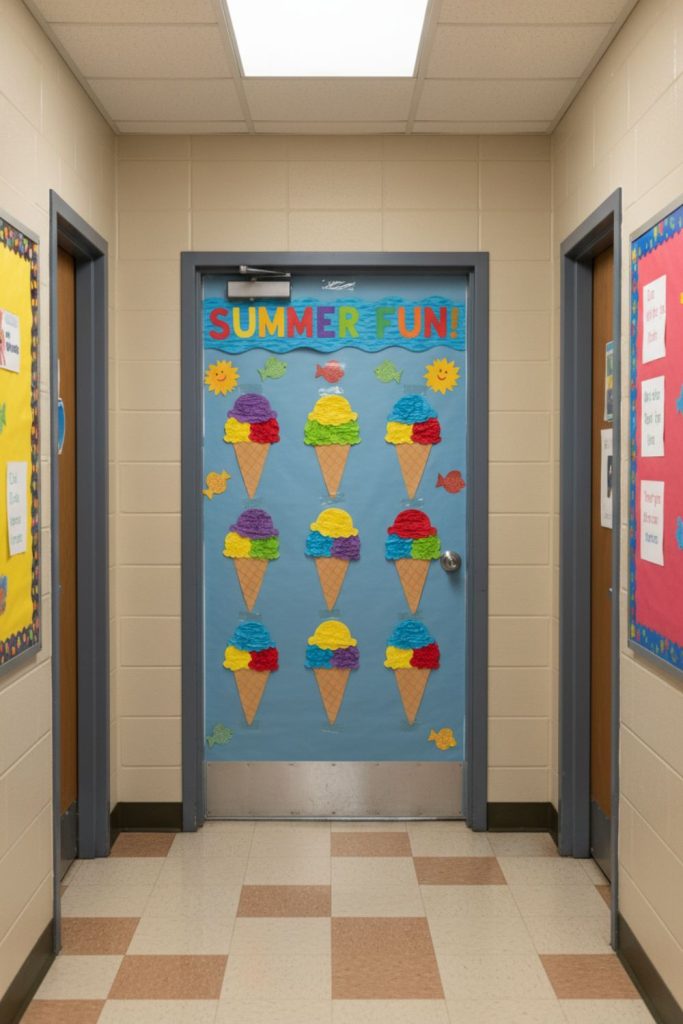
This ice cream display feels playful and fun, especially for younger children who enjoy bright textures and colors.
Step by step method
- Cut large cone shapes from brown paper and line them vertically
- Crumple tissue paper into balls for scoops
- Use different colors like pink, yellow, green, and blue
- Stack scoops on each cone shape
- Add sprinkles using marker dots or tiny paper pieces
- Let students choose scoop colors for personalization
- Fill gaps with small star or dot shapes
The stacked look gives a sense of height and fun energy.
A sky themed door filled with painted cardboard kites at different angles, each with real string tails flowing downward across the full length of the door
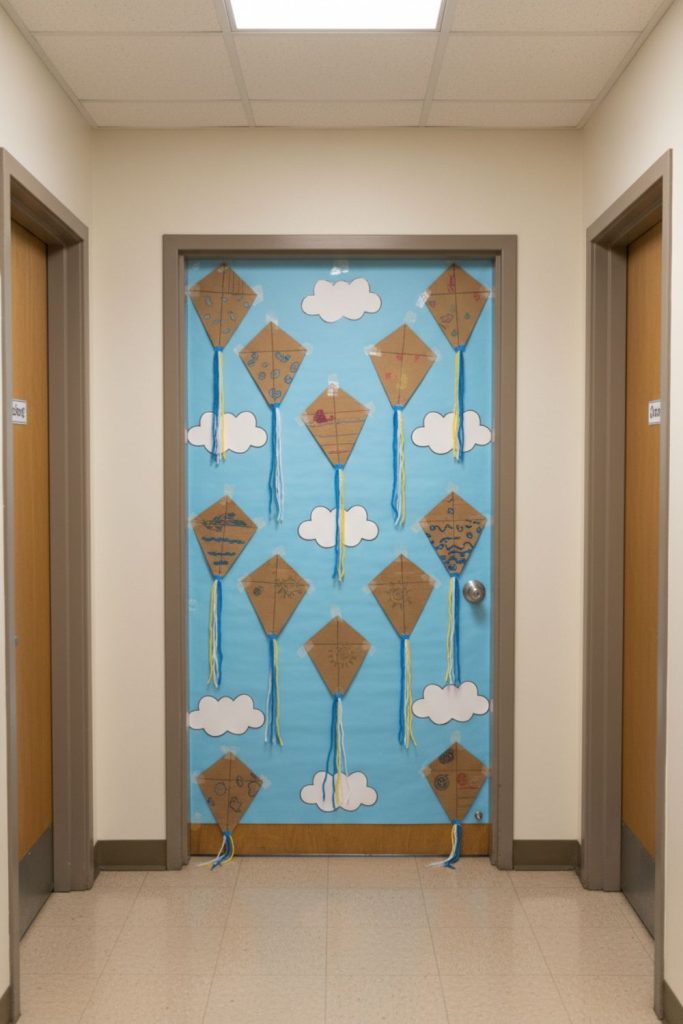
This kite themed design creates motion across the door, as if wind is carrying them upward.
Step by step method
- Paint background light blue with white cloud shapes
- Cut kite shapes from cardboard or thick paper
- Let students decorate each kite with patterns
- Attach real string or yarn tails
- Place kites at different angles across door
- Extend strings downward so they flow naturally
- Add small paper bows on strings for detail
The movement of strings adds a sense of wind and freedom.
A bold watermelon themed door with one giant slice across the bottom half and multiple smaller fingerprint seed slices scattered above
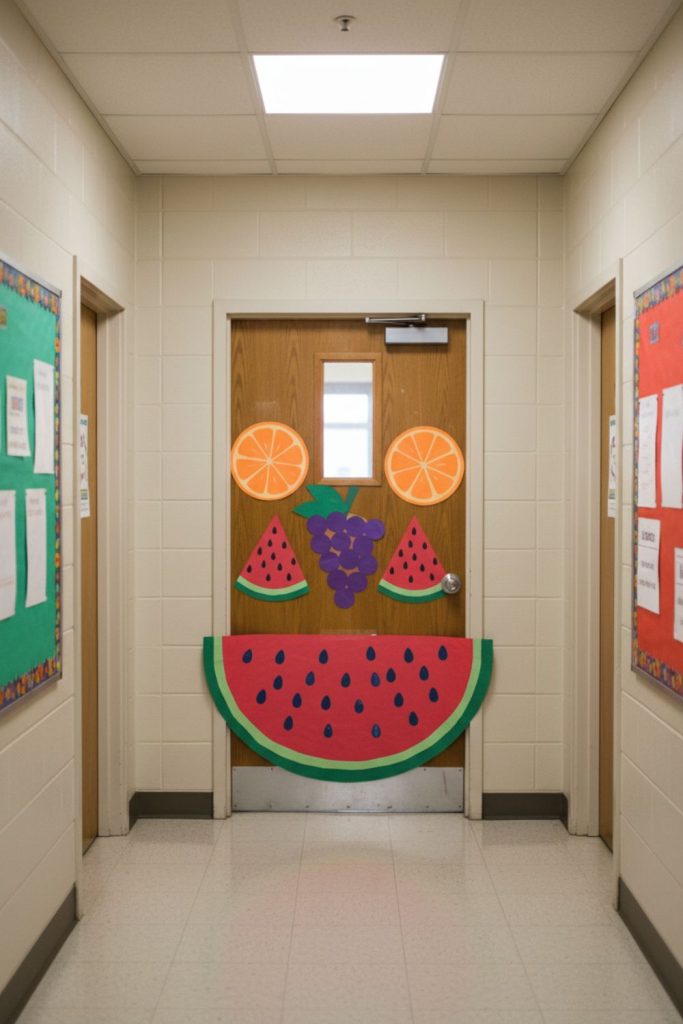
This fruit themed display is bright and easy for students to contribute to.
Step by step method
- Cut a large watermelon slice shape for bottom half
- Paint outer edge green and inside red
- Use black fingerprints for seeds
- Add smaller watermelon slices above
- Let students stamp seeds using paint
- Add green border strips for contrast
- Fill empty space with tiny fruit stickers or drawings
The strong colors make the door stand out immediately.
A textured underwater door using bubble wrap painted background, layered seaweed strips, and various student drawn sea creatures placed at different depths
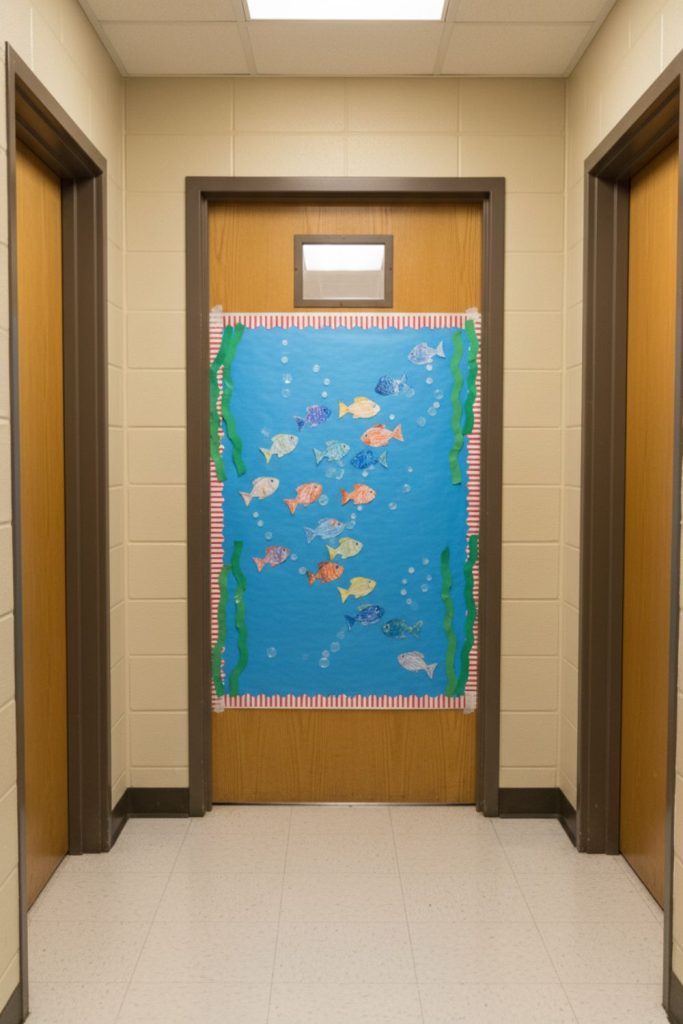
This underwater scene gives texture and layering that children enjoy exploring visually.
Step by step method
- Paint bubble wrap and press onto blue background for texture
- Add darker seaweed strips cut from green paper
- Draw or print sea creatures made by students
- Place creatures at different heights on door
- Add small bubbles using white paint dots
- Layer seaweed in front and behind creatures
- Leave slight empty spaces for movement effect
The layered arrangement creates depth without complicated materials.
A garden inspired door with rows of cupcake liner flowers, each with unique student decorated centers, filling the entire surface
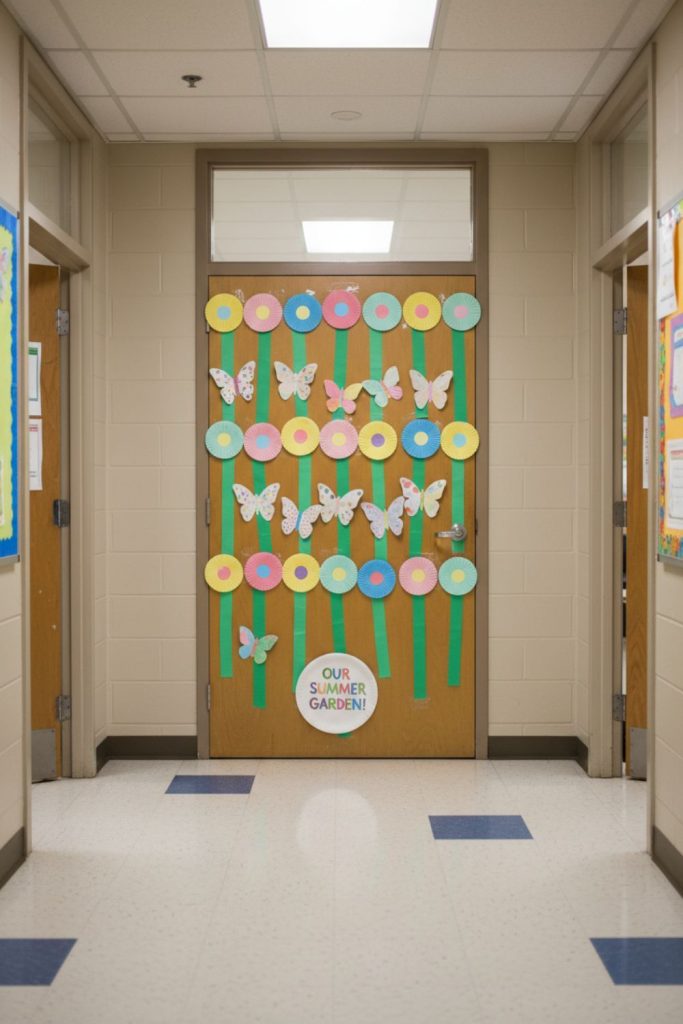
This flower garden door feels bright and full of student creativity.
Step by step method
- Flatten cupcake liners and glue across door in rows
- Add green paper stems and leaves
- Let students decorate flower centers with markers or stickers
- Mix different liner colors for variety
- Add small paper butterflies between flowers
- Fill gaps with grass strips at bottom
- Arrange flowers slightly uneven for natural feel
The result looks like a blooming classroom garden.
A rainbow explosion layout with large finger painted rainbow arcs spanning corner to corner, with cotton clouds overlapping edges for dimension
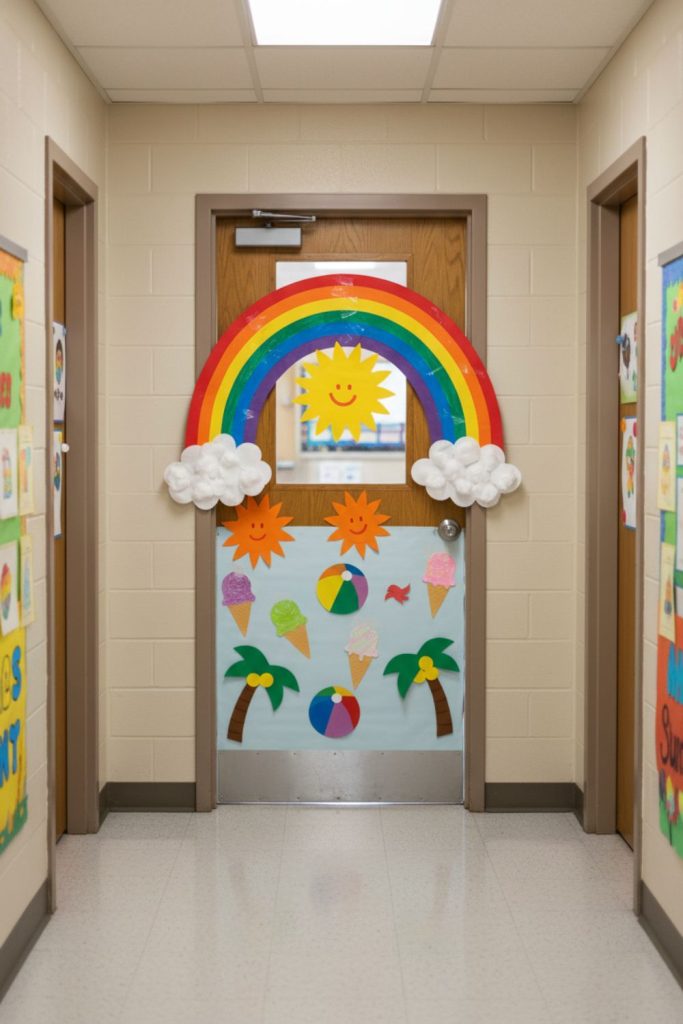
This rainbow design brings strong color movement across the door.
Step by step method
- Draw large rainbow arcs covering door diagonally
- Use finger painting for each color band
- Add cotton clouds at ends of arcs
- Let students add small color dots around rainbow
- Blend edges slightly with sponge for softness
- Place small stars between arcs
- Keep center open for balance
The arcs give a sense of movement across the door.
A rotating paper fan display where multiple accordion folded fans are spread in a circular burst pattern from the center outward
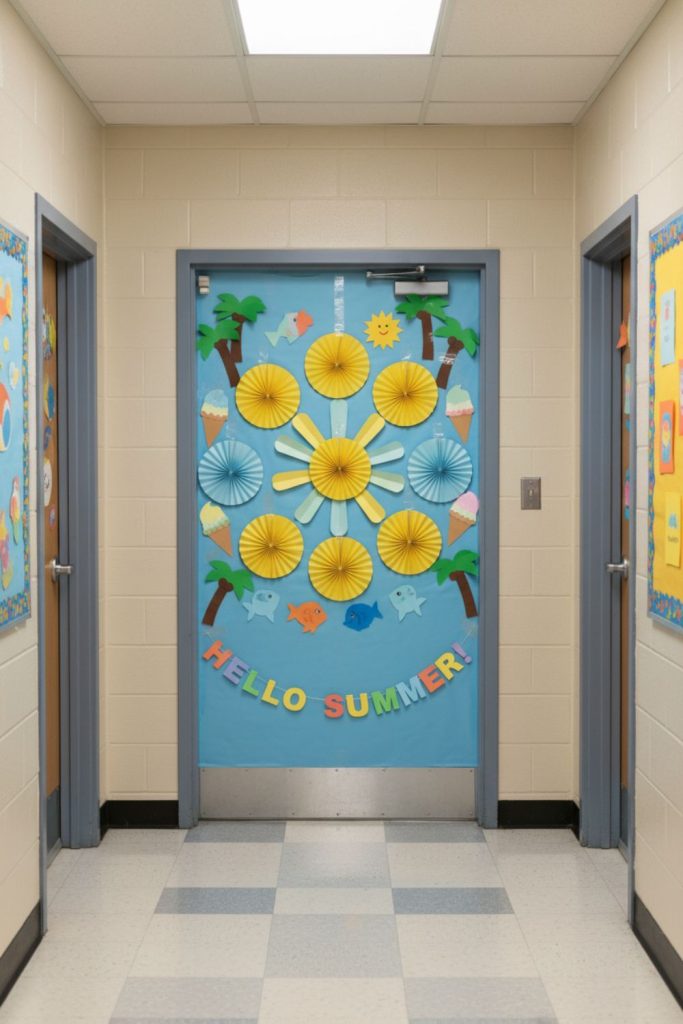
This design uses simple folding techniques to create strong visual impact.
Step by step method
- Fold colored paper into accordion fans
- Arrange fans in circular pattern on door
- Secure center point tightly
- Use alternating colors for contrast
- Let students decorate each fan section
- Add small paper circles at center
- Spread fans evenly outward
The circular burst makes the door look active and lively.
A flip flop pathway scene with large traced flip flops arranged like stepping stones diagonally across a sandy colored background
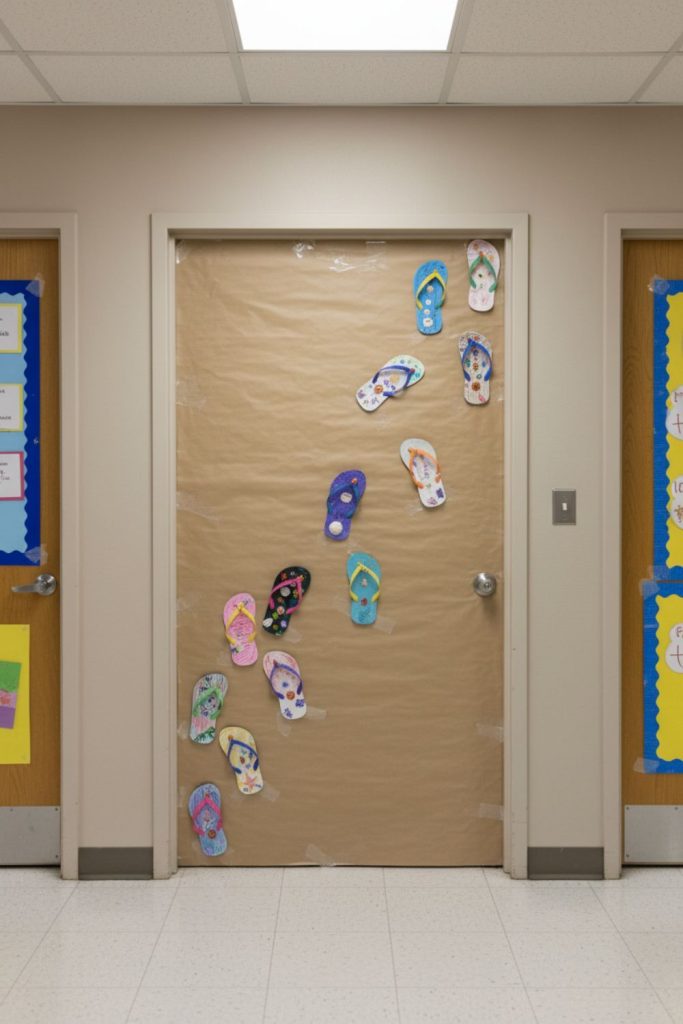
This beach themed door feels like a walking path.
Step by step method
- Paint base sandy yellow background
- Trace student feet or flip flop shapes
- Decorate each flip flop differently
- Arrange them diagonally across door
- Add small pebble shapes around path
- Include tiny seashell drawings
- Leave soft gaps for sand effect
The pathway design gives a storytelling feel.
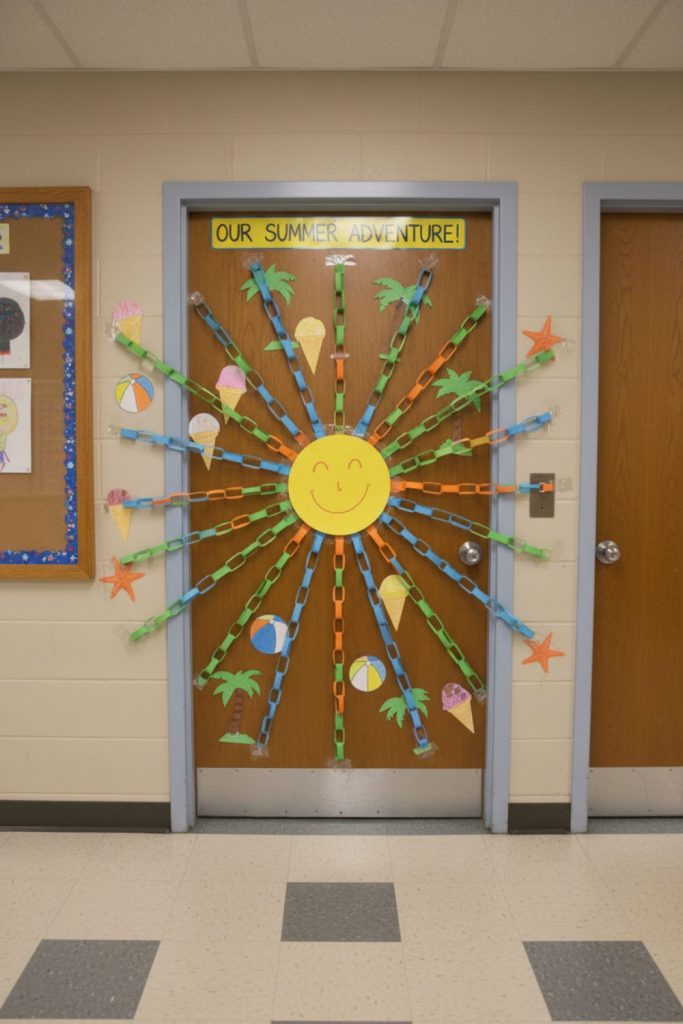
A radiant yarn sun centerpiece with thick yarn strands extending outward across the door, connecting to smaller student made sun shapes
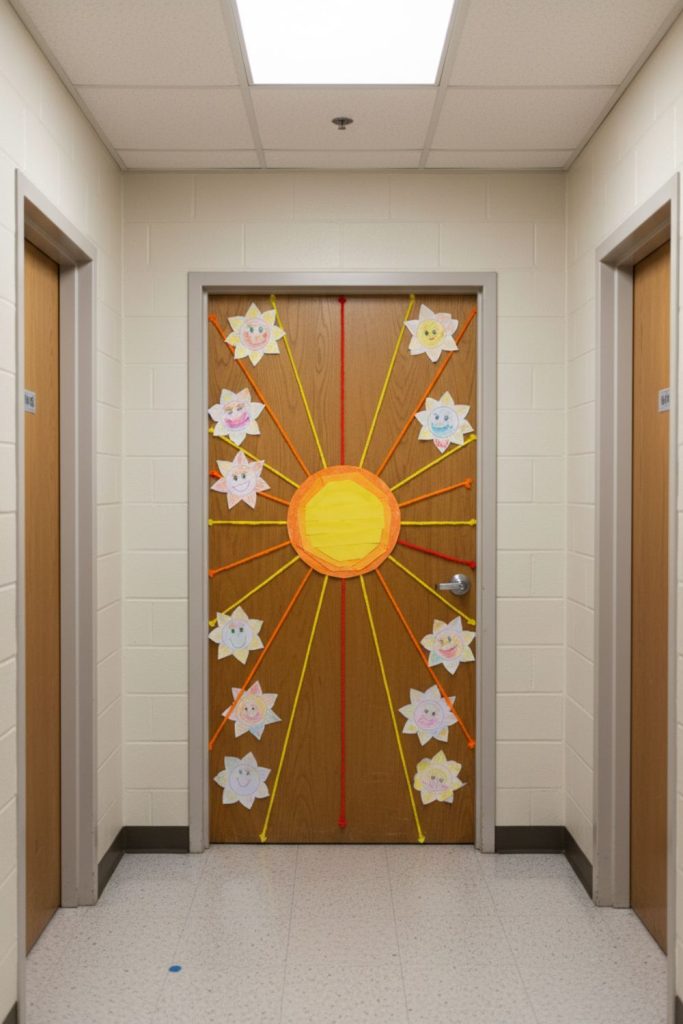
This sun display adds texture using yarn lines.
Step by step method
- Place large sun shape in center
- Attach thick yellow yarn strands outward
- Stretch yarn across full door
- Add small student suns along strands
- Use glue dots to hold yarn in place
- Mix yarn lengths for uneven rays
- Add soft paper clouds around edges
The yarn adds strong tactile contrast.
A “cool summer” sunglasses wall where oversized cardboard sunglasses overlap in layers, creating a bold collage effect
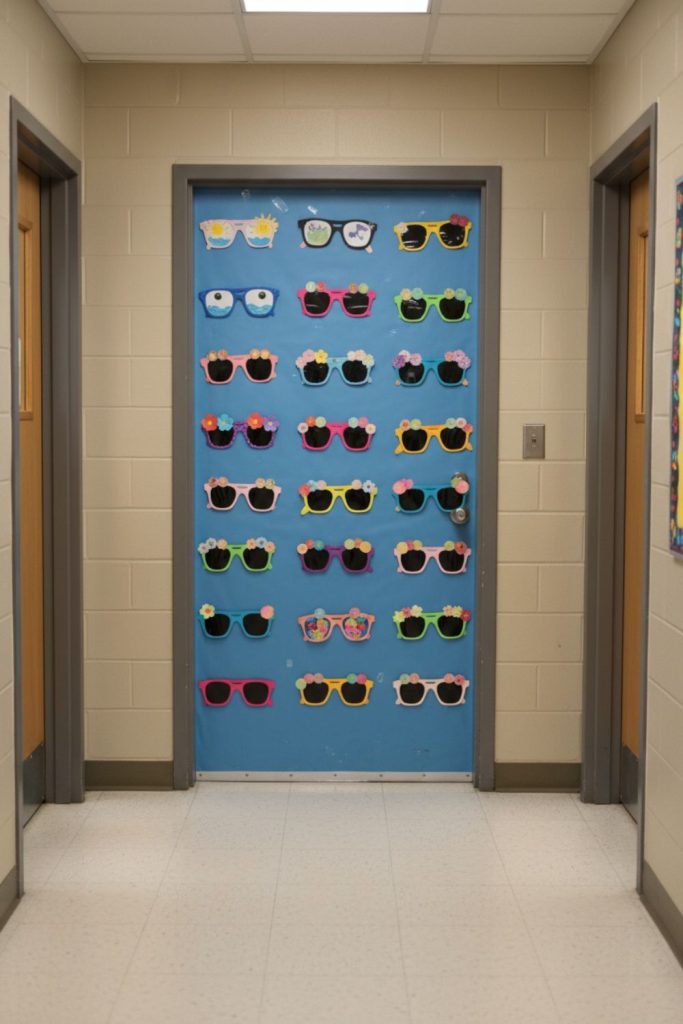
This playful design uses shapes students recognize easily.
Step by step method
- Cut large sunglasses from cardboard
- Paint lenses in bright colors
- Let students decorate frames
- Overlap sunglasses across door
- Add small shine marks using white paint
- Mix different lens colors
- Place randomly for layered look
The overlap creates a fun stacked display.
A butterfly motion scene with paper collage butterflies arranged in a swirling pattern from one corner to another
This design shows movement through placement.
Step by step method
- Cut butterfly shapes from colored paper
- Let students decorate wings
- Arrange butterflies in spiral flow
- Start from one corner and move across door
- Add dotted trails behind butterflies
- Use different wing sizes
- Fill gaps with tiny flowers
The swirl pattern gives soft motion.
A popsicle gallery door where framed popsicle stick borders hold individual student summer drawings arranged in a neat grid
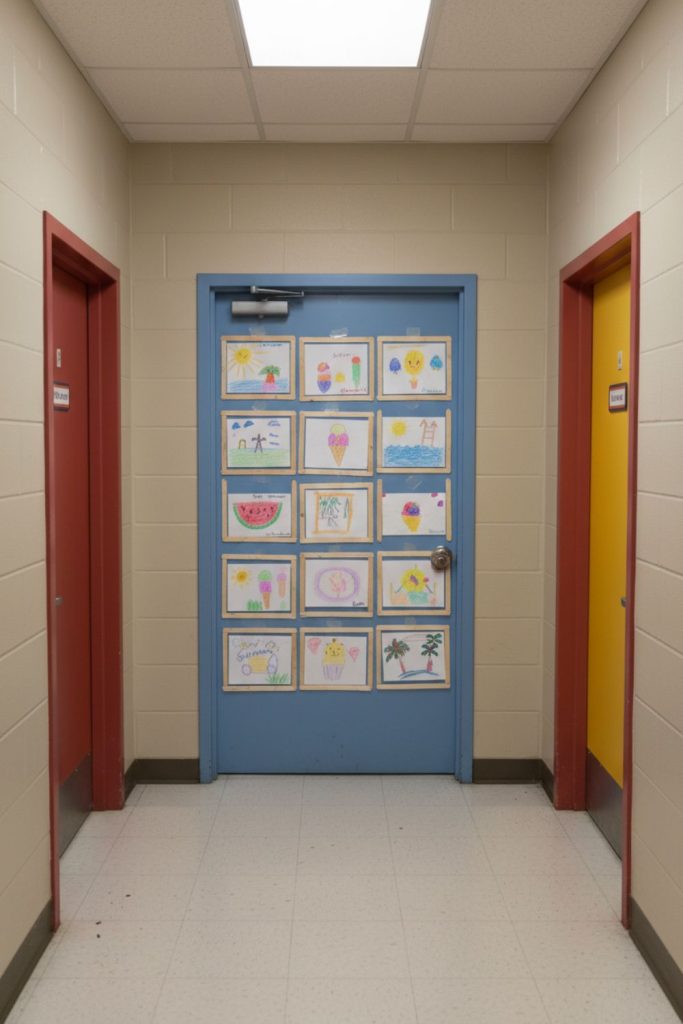
This design highlights student work clearly.
Step by step method
- Build frames using popsicle sticks
- Place student drawings inside each frame
- Arrange frames in grid format
- Paint sticks in light colors
- Add small decoration stickers on corners
- Keep spacing even across door
- Add small sun icons between frames
The grid makes each student piece visible.
A pineapple pattern door with repeated textured tissue paper pineapples forming a bright, repeating visual across the entire surface
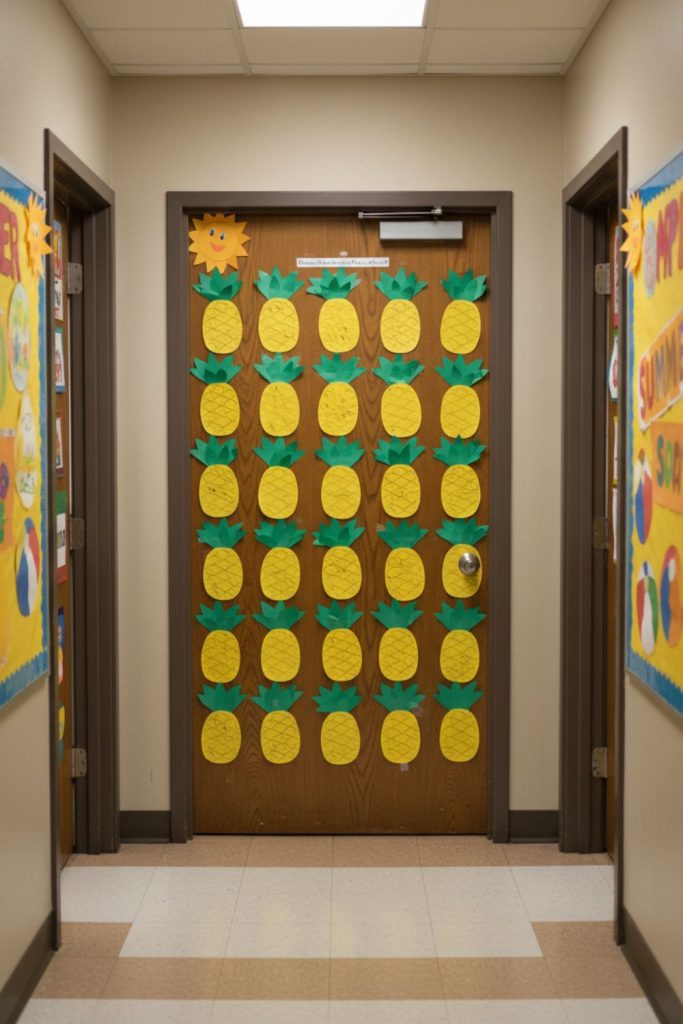
This fruit pattern gives bold repetition.
Step by step method
- Cut pineapple shapes from cardboard
- Cover with yellow tissue paper
- Add green paper tops
- Repeat across full door
- Slightly rotate each pineapple
- Add brown dot texture
- Leave small spacing between shapes
The repeating pattern feels energetic.
A seashell shore design with salt painted shells scattered over a sandy background, with a soft wave border at the bottom
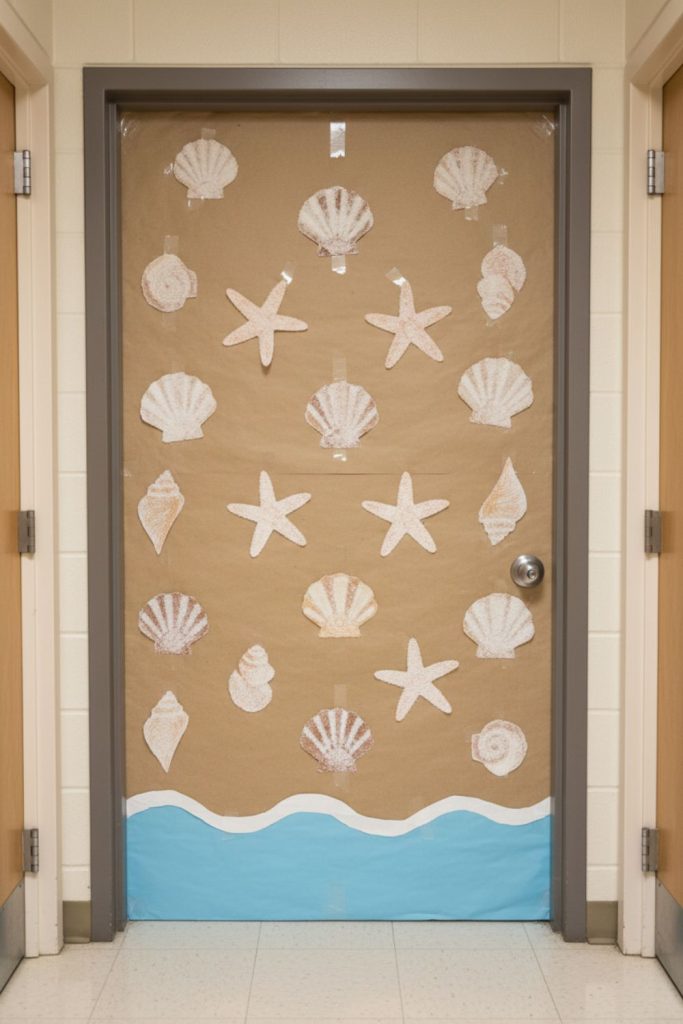
This beach theme uses texture contrast.
Step by step method
- Paint base sandy color
- Draw shell shapes and add salt for texture
- Place shells randomly across door
- Add blue wave strip at bottom
- Let students color shells
- Sprinkle small dots for sand grains
- Keep top area lighter
The texture gives a beach feel.
A sunburst chain effect with a central circle and long paper chains radiating outward in all directions, filling the full door
This design uses chains for movement.
Step by step method
- Create large central circle
- Attach paper chains in all directions
- Use bright colors for chains
- Let students decorate chain links
- Spread chains unevenly for motion
- Add small sun shapes between chains
- Fill gaps with dots
The radiating effect covers the door well.
A surfboard lineup scene with multiple painted cardboard surfboards standing vertically side by side like a beach rack
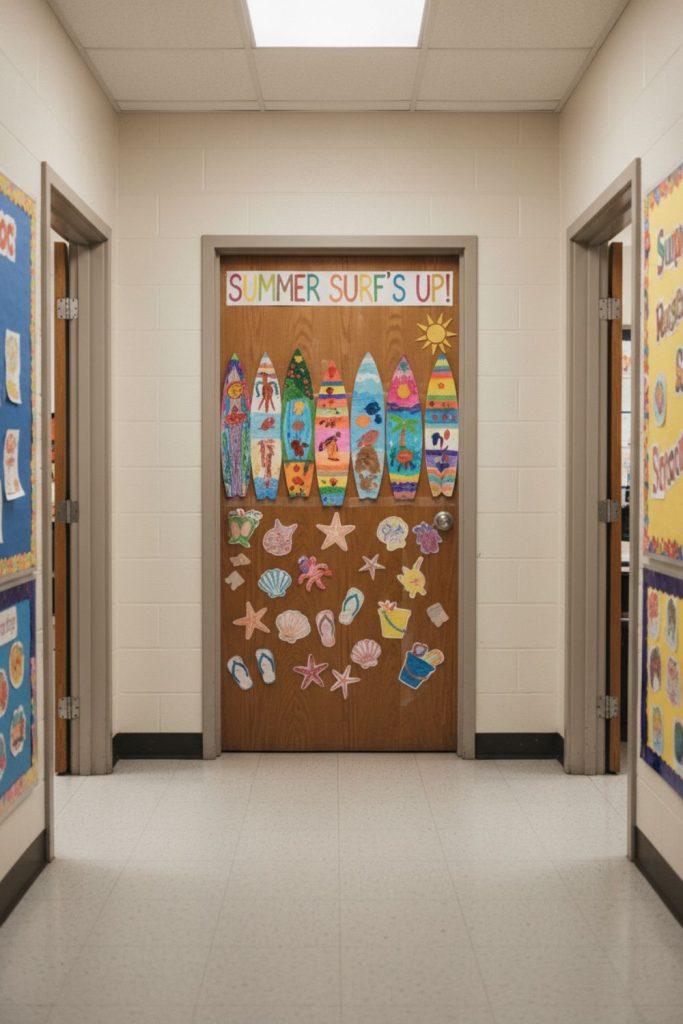
This display feels like a beach storage area.
Step by step method
- Cut surfboard shapes from cardboard
- Let students paint patterns
- Stand boards vertically side by side
- Mix sizes for variation
- Add small wave base at bottom
- Include sun shapes above
- Keep spacing tight
The lineup creates strong structure.
A flowing fish stream design with handprint fish arranged in a curved, wave like path across the door for a sense of movement
This fish design shows motion clearly.
Step by step method
- Create handprint fish from students
- Arrange fish in curved path
- Start from bottom corner to top
- Add small bubbles around fish
- Use different colors
- Slightly rotate each fish
- Fill gaps with wave lines
The curve gives direction across door.
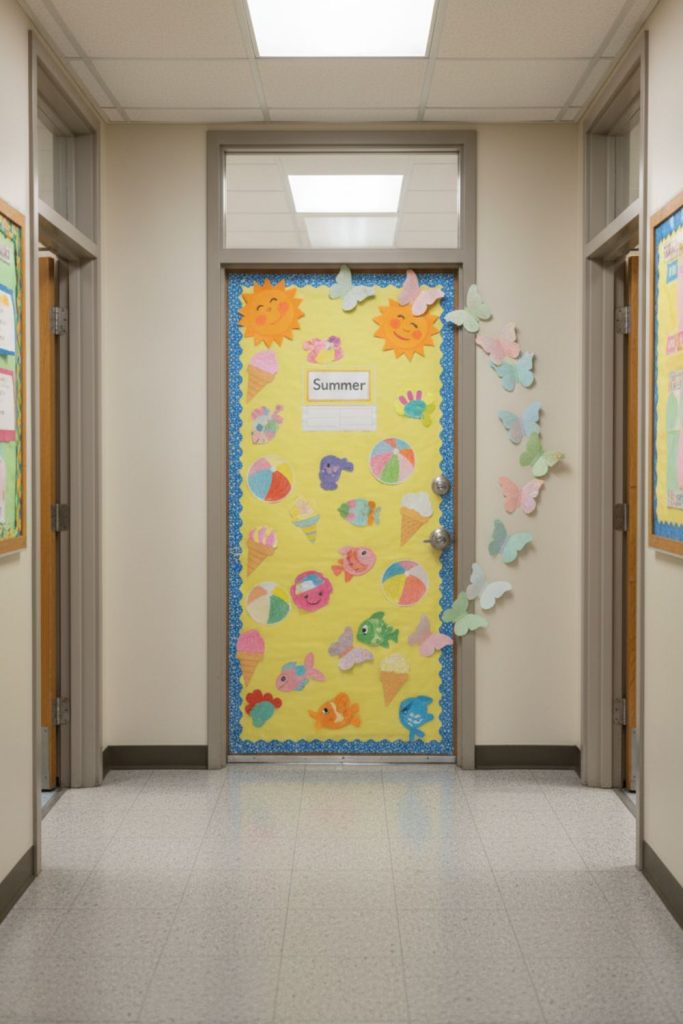
A layered summer collage door combining small student made elements like mini suns, shells, leaves, and waves arranged in organized sections to create a complete seasonal mural
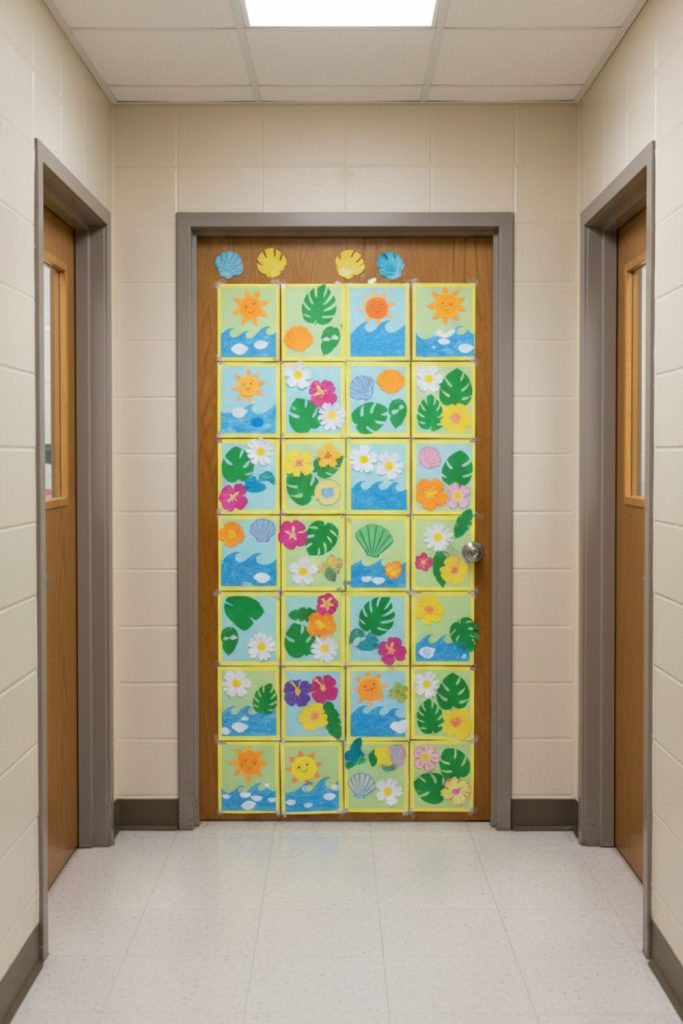
This final design brings many small works together.
Step by step method
- Divide door into soft sections
- Assign each section a summer item
- Place mini suns, shells, leaves, waves
- Let students contribute small pieces
- Arrange items in balanced spacing
- Add light background paint
- Connect sections with small dots
The grouped layout creates a full mural feel across the door.