
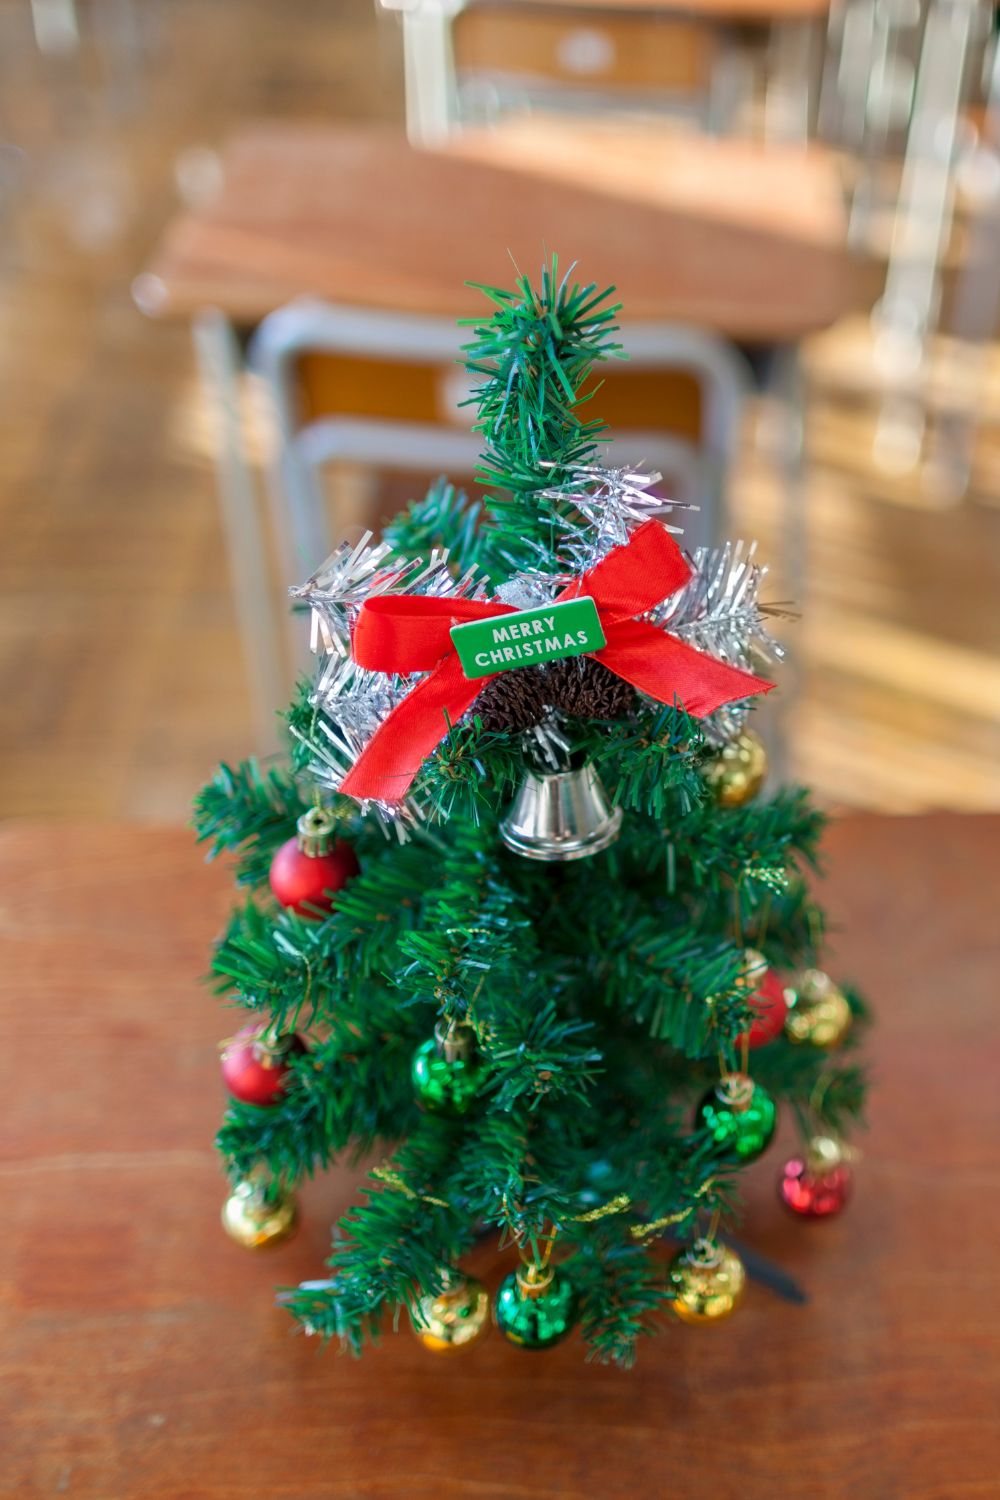
Christmas is a great time to give an elementary classroom a cheerful seasonal makeover without spending a lot on store bought decorations. With simple supplies such as paper plates, popsicle sticks, felt, yarn, cardboard, and cotton balls, teachers can create colorful DIY Christmas classroom decorations that are affordable, easy to prepare, and suitable for children ages 5 to 11.
DIY Paper Plate Santa Face for the Classroom Door
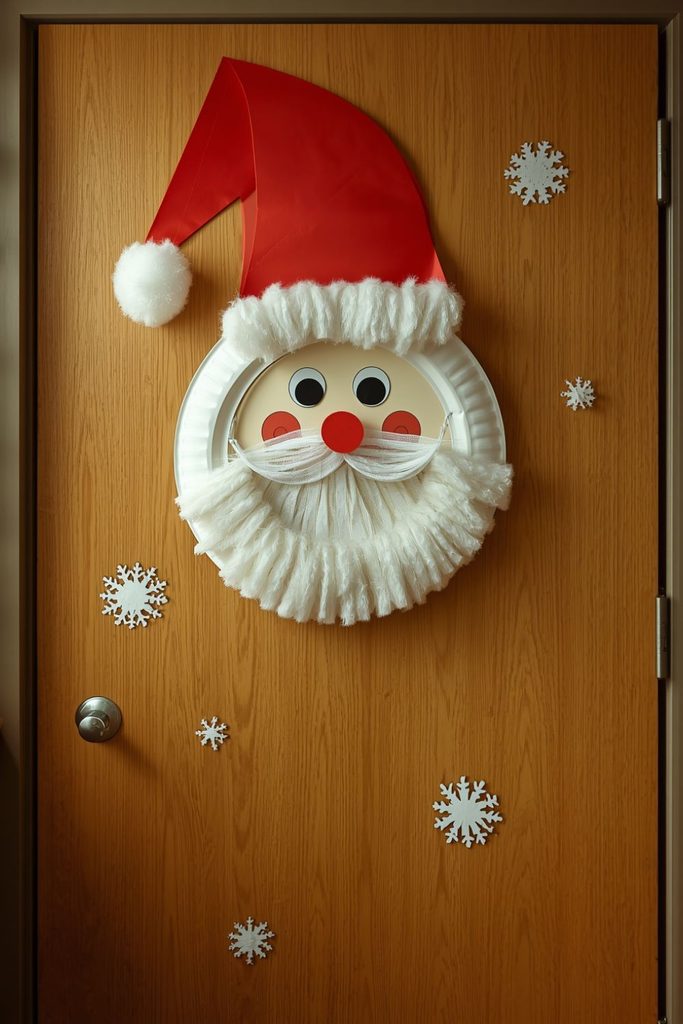
A paper plate Santa is an easy way to give the classroom entrance a cheerful Christmas look. The round plate already provides Santa’s face shape, so teachers only need a few simple materials to add his hat, beard, eyes, and rosy cheeks. Children can also help with painting and assembling the face.
Materials needed:
- White paper plate
- Red construction paper
- White cotton balls
- Black paper
- Pink or red paper
- White paint
- Black marker
- Glue
- Scissors
Step by step method:
- Paint the front of the paper plate white and allow it to dry.
- Cut a large red triangle for Santa’s hat.
- Add a strip of white paper or cotton balls along the bottom of the hat.
- Place a large cotton ball at the top of the hat.
- Cut two black circles for Santa’s eyes and attach them near the center.
- Add small pink circles for his cheeks.
- Cut a curved beard shape from white paper, or build the beard with cotton balls.
- Glue the beard around the lower part of the face.
- Add a small red or pink circle for the nose.
- Let all pieces dry before attaching Santa to the classroom door.
The finished Santa can sit in the middle of the door while a few paper snowflakes or stars are placed around him. This decoration gives the entrance a friendly Christmas feel without taking much time.
Popsicle Stick Christmas Trees for Desk Decorations
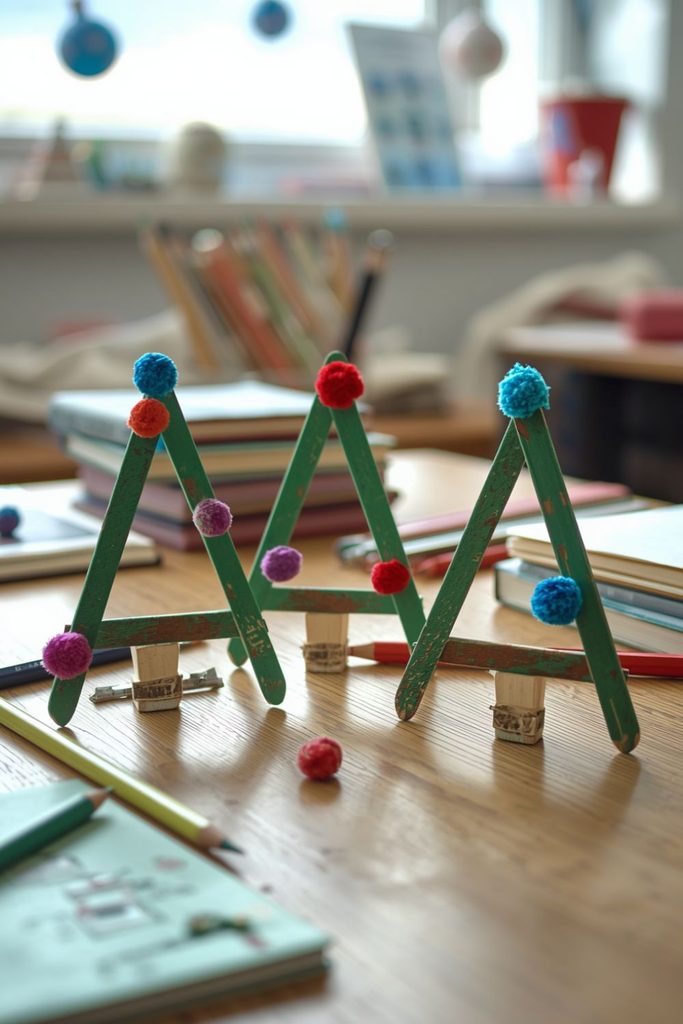
Popsicle stick trees are small enough to sit on teacher desks, reading tables, shelves, or activity stations. They also give children a chance to paint and decorate their own miniature Christmas trees. Since every tree can have a different color and pattern, the finished group feels handmade and playful.
Materials needed:
- Wooden popsicle sticks
- Green paint
- Brown paint
- Glue
- Small pom poms
- Sequins
- Small buttons
- Ribbon
- Cardboard
Step by step method:
- Paint several popsicle sticks green and let them dry.
- Arrange three sticks into a triangle.
- Glue the ends together to form the tree shape.
- Cut a small piece of cardboard for the tree trunk.
- Paint the trunk brown and attach it below the triangle.
- Add small pom poms, buttons, or sequins as ornaments.
- Cut a small cardboard star and place it at the top.
- Make several trees in different sizes.
- Arrange the finished trees on desks, shelves, or a reading table.
- Add a small piece of ribbon if you want each tree to have a hanging option.
Teachers can use different shades of green for a fuller display. A mixture of small and large trees can also create a little forest effect on a shelf.
Cotton Ball Snowmen for Classroom Windows
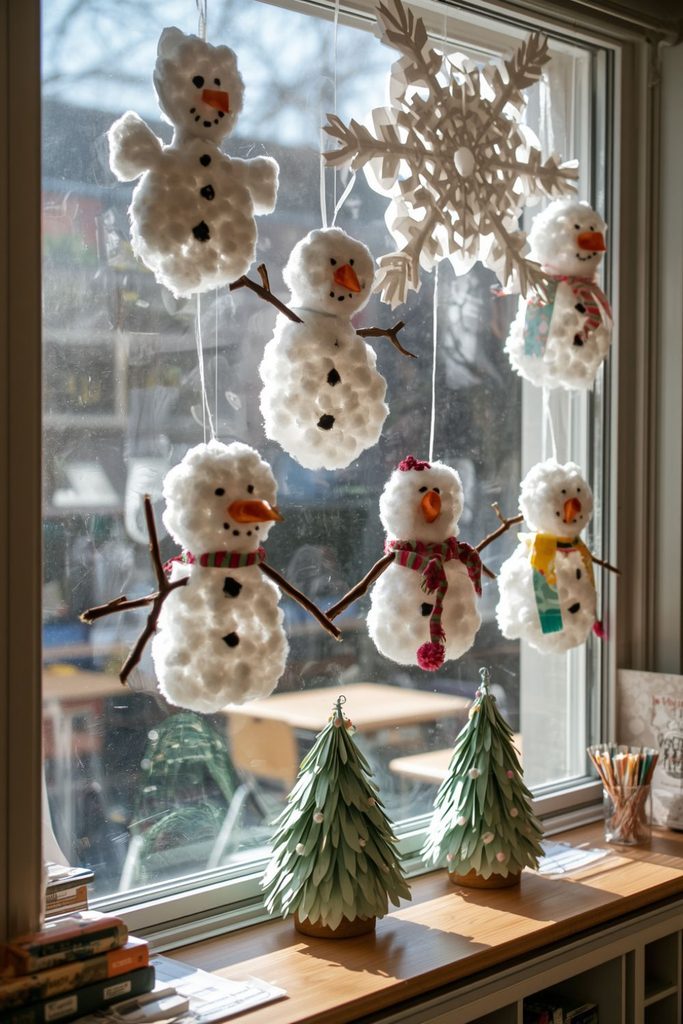
Cotton ball snowmen bring a soft winter appearance to classroom windows. The white cotton gives the snowmen a fluffy surface that children usually enjoy touching and arranging. This project is especially useful for teachers who want window decorations that do not require paint.
Materials needed:
- White cotton balls
- Clear contact paper or removable adhesive
- Black paper
- Orange paper
- Colored paper
- Scissors
- Glue
Step by step method:
- Cut three circles from white paper to create the basic snowman body.
- Cover each circle with cotton balls.
- Cut small black circles for the eyes and buttons.
- Cut a small orange triangle for the nose.
- Add a paper scarf in a bright color.
- Place the snowman pieces together on a window.
- Attach the pieces with removable adhesive or suitable contact material.
- Add cotton ball snowflakes around the snowman.
- Make two or three snowmen at different heights.
- Leave enough space between the figures so natural window light can still enter.
These snowmen work well beside winter themed artwork or paper snowflakes. Their white texture looks especially nice when sunlight passes through the window.
Paper Cup Christmas Bells for Ceiling Hanging
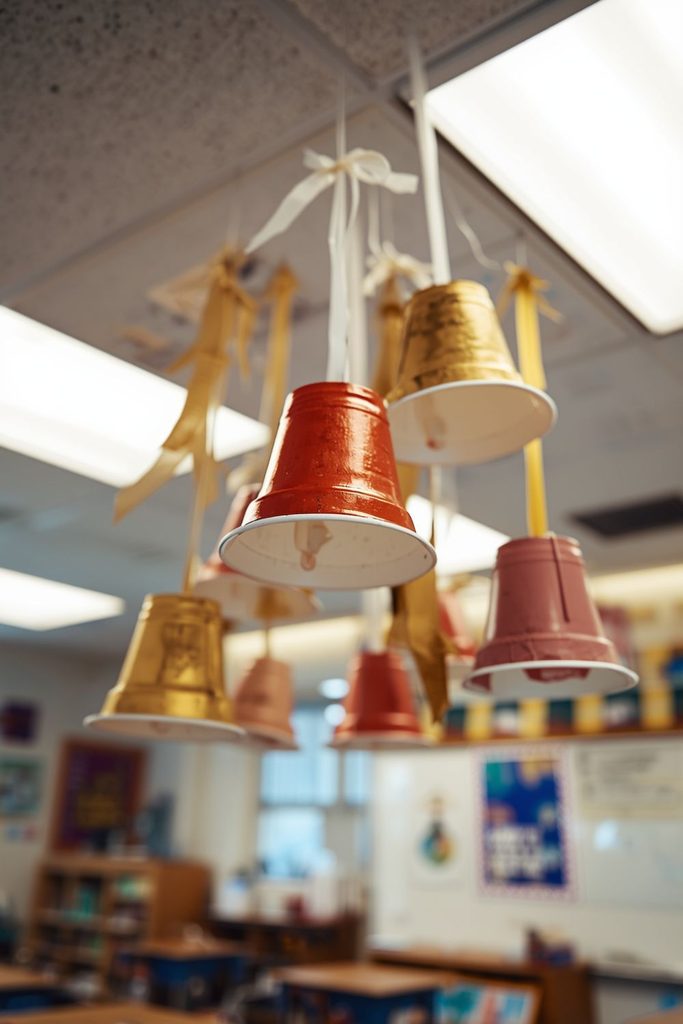
Paper cups can become simple Christmas bells with only a little paint and decoration. Hanging several bells from the ceiling gives the classroom a festive touch while using inexpensive supplies. Lightweight decorations are best for this project, and teachers should check school rules before attaching anything overhead.
Materials needed:
- Paper cups
- Gold or silver paint
- String
- Ribbon
- Small lightweight beads
- Glue
- Scissors
- Hole punch
Step by step method:
- Paint each paper cup gold, silver, red, or another Christmas color.
- Let the cups dry completely.
- Punch a small hole in the center of each cup base.
- Thread a piece of string through the hole.
- Tie a lightweight bead or small paper shape at the lower end.
- Add a ribbon bow around the upper part of the cup.
- Prepare several bells using different colors.
- Tie each bell to a longer piece of string.
- Hang them at different heights where permitted by the school.
- Check that every decoration is firmly secured before children enter the room.
A group of bells can be placed above a reading area, doorway, or teacher table. Keeping the colors consistent makes the display look neat rather than crowded.
Cardboard Gingerbread Houses for a Mini Christmas Village
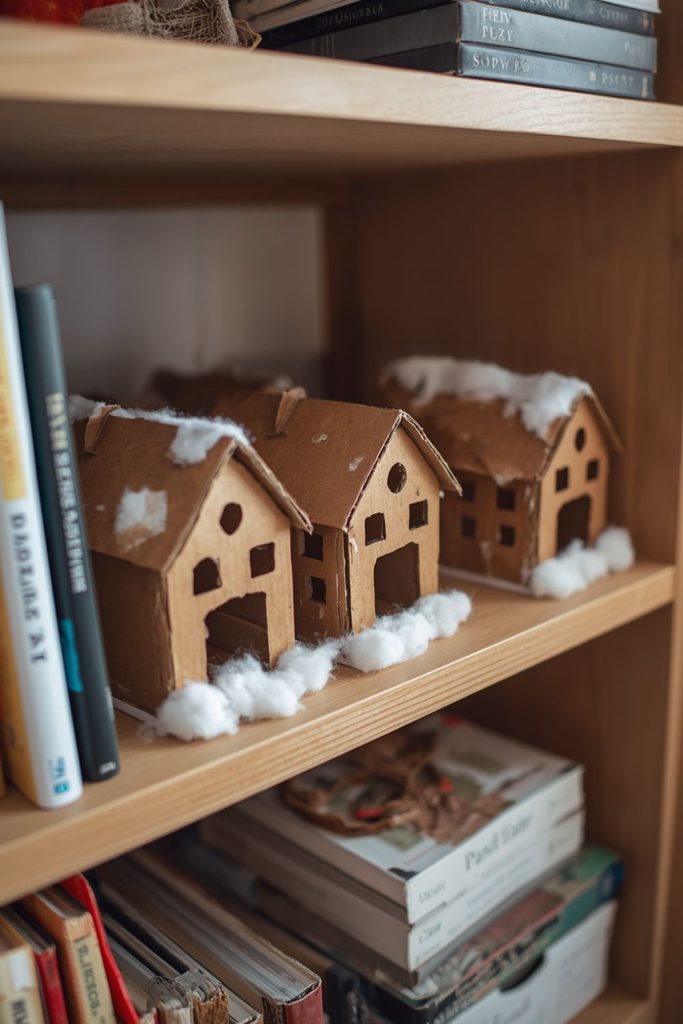
A small gingerbread village can turn an unused classroom shelf into a cheerful Christmas display. Cardboard makes the houses sturdy enough to stand on their own, while colored paper, cotton, and paint can give each building its own look.
Materials needed:
- Thin cardboard
- Brown paint
- White paper
- Colored paper
- Cotton balls
- Glue
- Scissors
- White marker
- Small cardboard pieces
Step by step method:
- Cut two matching house shapes from cardboard.
- Cut smaller cardboard pieces for the side walls.
- Glue the pieces together to form a simple house.
- Paint the outside brown.
- Cut white paper strips for snowy roof edges.
- Add cotton balls along the roof for a soft snow effect.
- Cut small windows and doors from colored paper.
- Add simple paper candy shapes around the house.
- Make several houses in different sizes.
- Arrange them together on a shelf to form a miniature village.
Teachers can place the village beside a small paper Christmas tree or pinecone tree. Keep the pieces firmly positioned so children cannot easily knock them over during classroom activities.
Pinecone Christmas Trees for Classroom Shelves
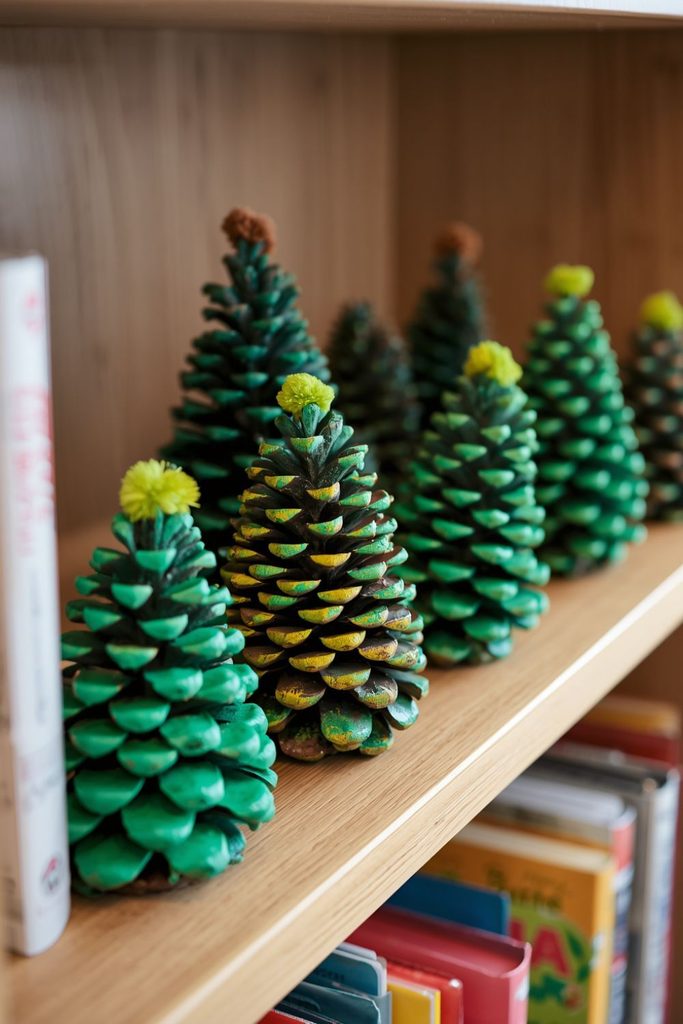
Pinecones have a natural shape that makes them perfect for miniature Christmas trees. With green paint and a few small decorations, ordinary pinecones can become charming shelf pieces. This project also introduces children to natural materials in a simple seasonal activity.
Materials needed:
- Clean dry pinecones
- Green paint
- Small pom poms
- Glue
- Cardboard
- Gold or silver paper
- Paintbrushes
Step by step method:
- Check each pinecone and remove loose dirt or debris.
- Paint the pinecone green.
- Allow it to dry completely.
- Glue small pom poms between the pinecone scales.
- Cut tiny stars from gold or silver paper.
- Attach one star to the top.
- Cut a small cardboard circle for the base.
- Glue the pinecone to the base if extra stability is needed.
- Make several trees in different sizes.
- Arrange them across a classroom shelf.
The natural brown parts of the pinecone can also be left visible instead of painting the entire piece. A mix of green and natural pinecones gives the shelf a warm handmade appearance.
Layered Paper Snowflakes for a Winter Ceiling Display
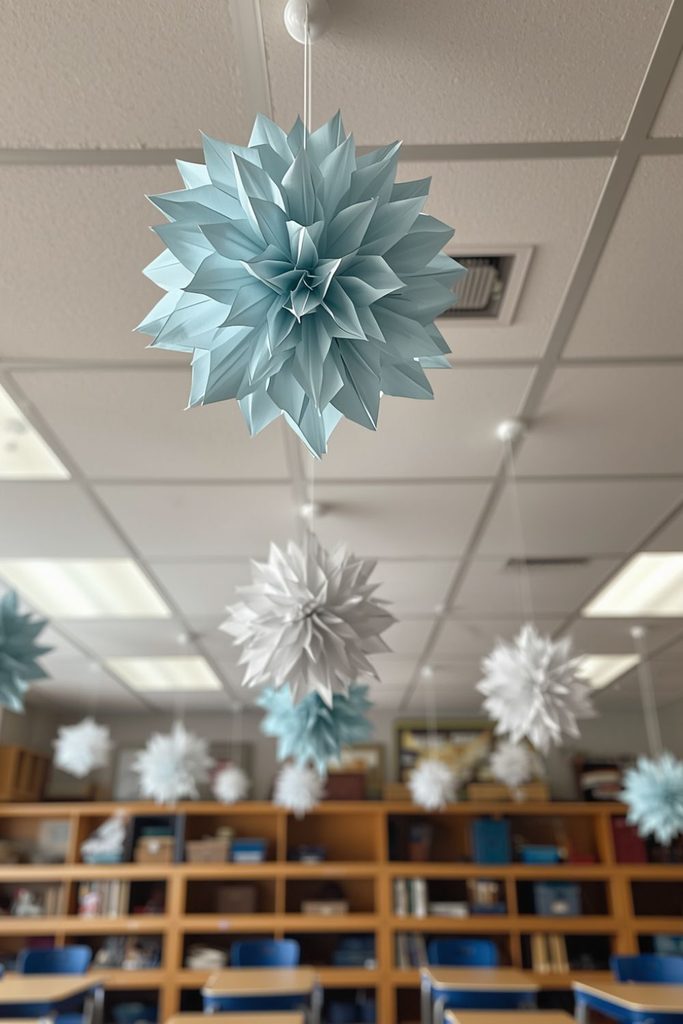
Layered snowflakes create more depth than a single sheet of paper. They are light, inexpensive, and can be made in several sizes. Teachers can hang them above desks, near windows, or over a reading corner to create a gentle winter effect.
Materials needed:
- White paper
- Light blue paper
- Scissors
- Glue
- String
- Pencil
- Ruler
Step by step method:
- Fold a sheet of paper several times.
- Cut small shapes along the folded edges.
- Open the paper carefully to reveal the snowflake.
- Make a second snowflake slightly smaller.
- Repeat using light blue paper.
- Layer the smaller snowflake over the larger one.
- Glue the centers together.
- Punch a small hole near the top.
- Thread string through the hole.
- Hang the snowflakes at different heights where allowed.
Mixing white and blue paper creates a simple winter color scheme. Larger snowflakes can go above the reading corner while smaller ones can fill open areas around the room.
Felt Christmas Wreath for the Classroom Door
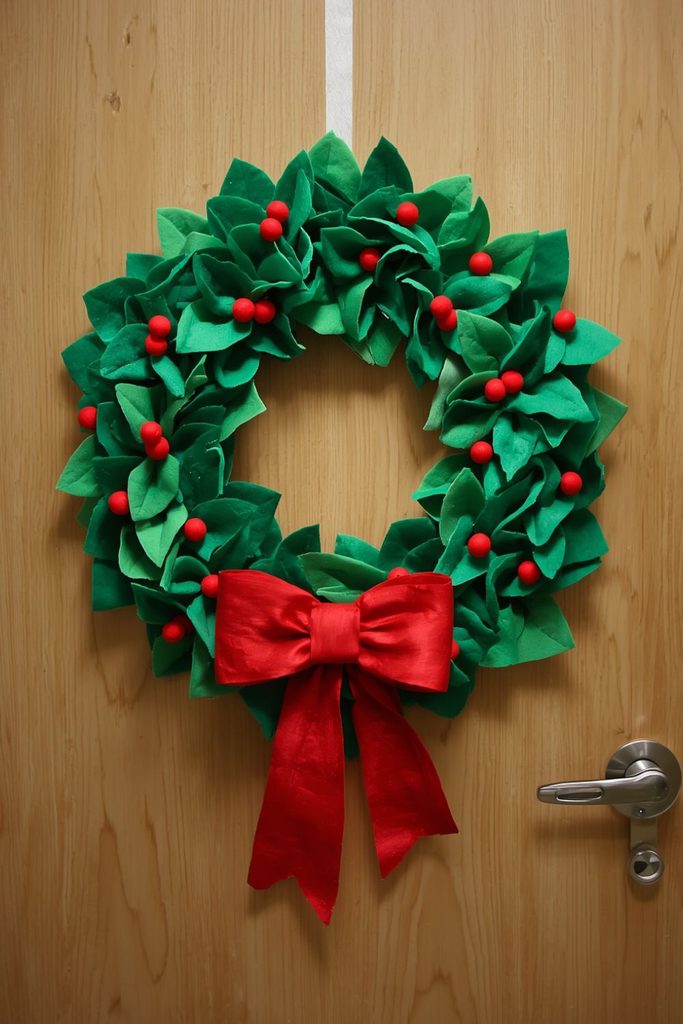
A felt wreath is soft, lightweight, and easy to store after the holiday season. It can be made with green felt leaves and simple red shapes rather than using breakable ornaments. The finished wreath gives the classroom door a warm seasonal touch.
Materials needed:
- Green felt
- Red felt
- Cardboard ring
- Scissors
- Glue
- Ribbon
- Pencil
Step by step method:
- Cut a large ring from sturdy cardboard.
- Cut many leaf shapes from green felt.
- Arrange the felt leaves around the cardboard ring.
- Glue each leaf in place.
- Cut small red circles or berry shapes.
- Add the red shapes between the green leaves.
- Make a felt bow from red or gold material.
- Attach the bow to the bottom or side.
- Check the wreath for loose pieces.
- Hang it on the classroom door using an appropriate removable hook.
A simple wreath can be made in one color, or teachers can mix several shades of green. Felt is also easy to pack flat and reuse in future Christmas seasons.
Yarn Wrapped Christmas Trees for Tabletop Displays
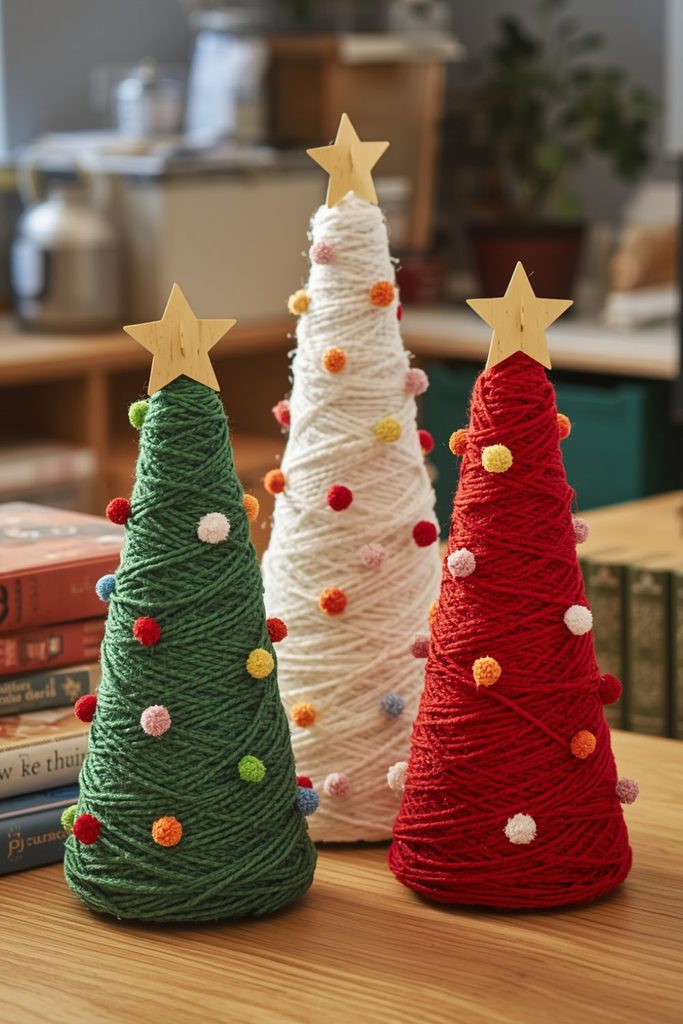
Yarn wrapped trees add texture to a classroom table without taking up much space. A cardboard cone becomes the base, while green yarn is wrapped around it until the surface is covered. Children can help choose colors and add small decorations.
Materials needed:
- Green yarn
- Cardboard
- Glue
- Scissors
- Small pom poms
- Ribbon
- Cardboard stars
Step by step method:
- Roll cardboard into a cone.
- Glue the edge so the cone keeps its shape.
- Add a small amount of glue near the bottom.
- Wrap green yarn around the cone.
- Continue wrapping upward while keeping the yarn close together.
- Add small drops of glue where needed.
- Cover the top carefully.
- Glue small pom poms around the tree.
- Add a small cardboard star at the top.
- Place the finished tree on a table or shelf.
Several yarn trees can be made in green, white, red, or gold. A group of three different sizes looks attractive beside books or classroom supplies.
Pipe Cleaner Candy Canes for Classroom Windows
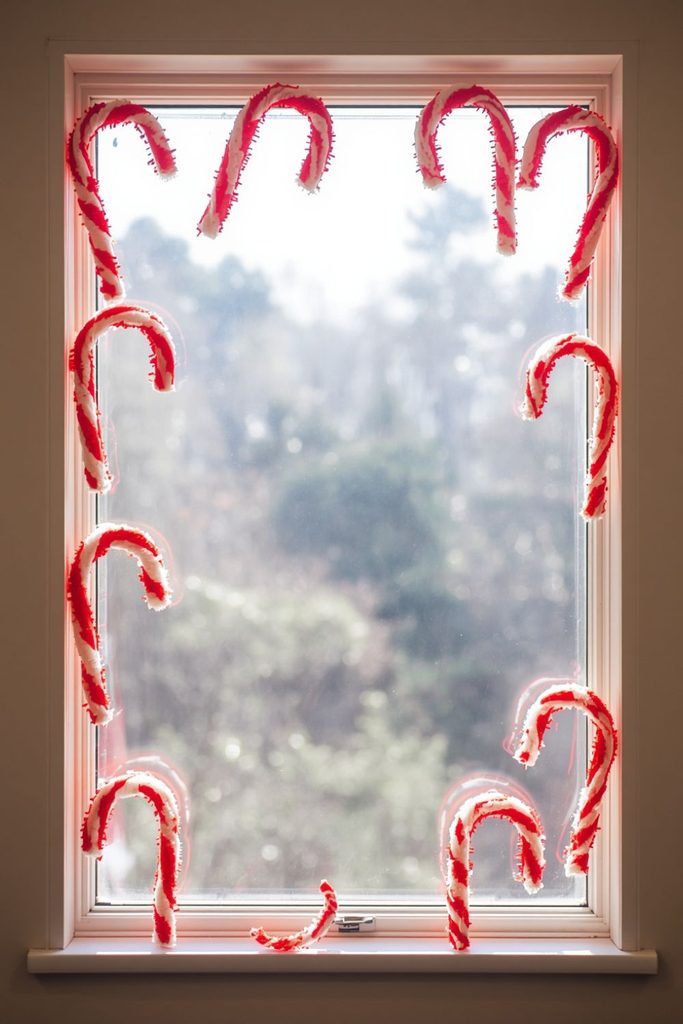
Pipe cleaner candy canes are flexible and very easy to shape. Red and white pipe cleaners can be twisted together before being bent into the familiar candy cane form. Since they are lightweight, they work nicely around windows or on small display areas.
Materials needed:
- Red pipe cleaners
- White pipe cleaners
- Scissors
- Clear removable tape
- Small ribbon pieces
Step by step method:
- Place one red and one white pipe cleaner side by side.
- Twist them together from one end to the other.
- Bend the top into a curved hook.
- Trim the lower ends to the same length.
- Make several candy canes in different sizes.
- Add a small ribbon bow if desired.
- Attach them around the classroom window using removable tape.
- Space the candy canes evenly.
- Combine larger and smaller shapes.
- Check that the tape is secure and does not damage the window surface.
The red and white pattern is easy for young children to recognize. A row of candy canes around a window can frame the glass without covering too much natural light.
Paper Roll Reindeer for Shelf or Desk Decoration

Empty paper rolls can be reused as little reindeer figures. This project gives cardboard tubes a second use and creates small decorations that can sit safely on a shelf or desk. Children can help paint and assemble the pieces with adult supervision.
Materials needed:
- Empty paper rolls
- Brown paint
- Brown paper
- Black paper
- Red paper
- Glue
- Scissors
- Googly eyes if permitted
Step by step method:
- Paint the paper roll brown.
- Allow it to dry.
- Cut two antlers from brown paper.
- Cut ears from brown paper.
- Glue the antlers and ears onto the top.
- Add two eyes to the front.
- Cut a small red circle for the nose.
- Glue the nose below the eyes.
- Add a small paper tail at the back.
- Stand the finished reindeer on a desk or shelf.
Several reindeer can be placed beside books, plants, or other Christmas decorations. Their small size makes them useful when classroom space is already busy.
DIY Balloon Christmas Ornaments for a Festive Ceiling

Balloons can become large lightweight ornaments that add color to an open ceiling area. They are best used where school safety rules permit them, and teachers should avoid placing them near fans, lights, or anything that could cause them to pop.
Materials needed:
- Red balloons
- Green balloons
- Gold balloons
- Ribbon
- Lightweight cardboard
- Tape
- Scissors
Step by step method:
- Inflate balloons to a suitable size.
- Tie each balloon securely.
- Cut small circles from lightweight cardboard.
- Make a small hole in each cardboard circle.
- Thread ribbon through the hole.
- Attach the cardboard piece to the balloon knot.
- Prepare several balloons in different colors.
- Group them into small clusters.
- Hang or position them only in approved classroom areas.
- Keep them away from heat sources, sharp objects, and moving fans.
The large shapes make a strong visual display without requiring many decorations. Red, green, and gold balloons can also be mixed with paper stars for extra color.
Folded Paper Christmas Stars for Hanging Decorations
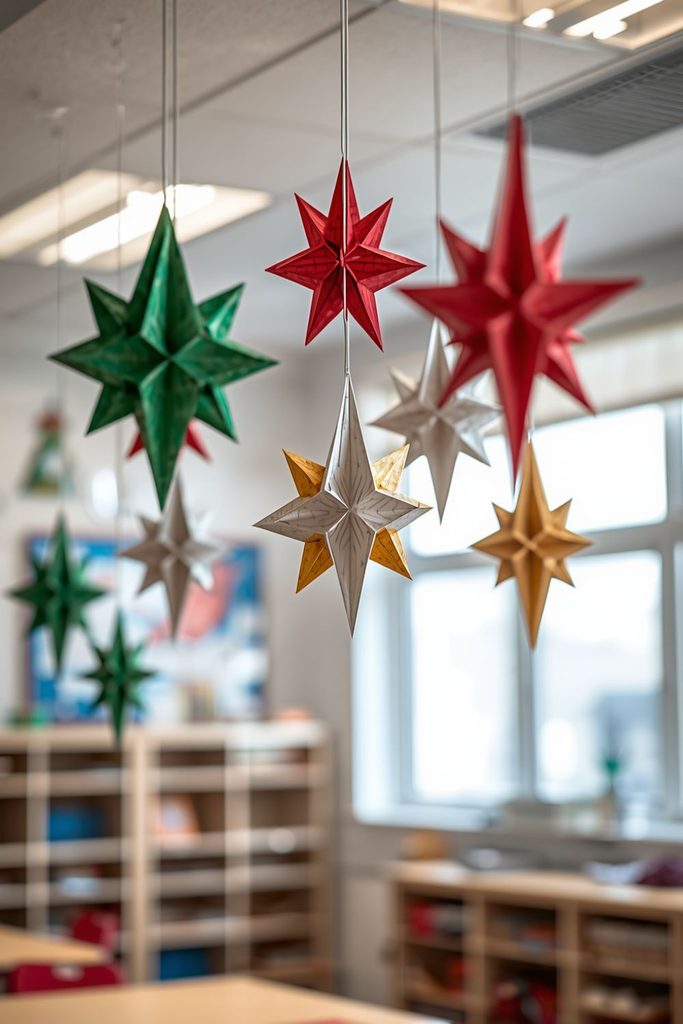
Paper stars are a simple way to fill empty space above shelves, windows, or classroom activity areas. Folding the paper creates a raised shape that looks more interesting than a flat star. Several sizes can be made from ordinary sheets of paper.
Materials needed:
- Colored paper
- White paper
- Scissors
- Glue
- Pencil
- String
- Ruler
Step by step method:
- Draw a five point star on paper.
- Cut the star carefully.
- Fold each point toward the center.
- Press the folds gently to create raised sections.
- Make another star in a different color.
- Glue two stars together at the center if a fuller shape is wanted.
- Punch a small hole near the top.
- Thread string through the hole.
- Make stars in several sizes.
- Hang them in open classroom areas where permitted.
Gold, silver, white, red, and green stars can be mixed for a cheerful display. The folded surface catches classroom light nicely.
Paper Cone Santa Hats for Classroom Chair Decorations

Paper cone Santa hats can give ordinary classroom chairs a seasonal look. They are easy to make and require very little space. Teachers can create one for each chair or use a smaller number around a special reading or activity area.
Materials needed:
- Red construction paper
- White paper
- Cotton balls
- Glue
- Scissors
- Tape
- Pencil
Step by step method:
- Roll red construction paper into a cone.
- Secure the side with tape or glue.
- Trim the bottom edge so it is even.
- Cut a white paper strip for the hat band.
- Glue the strip around the bottom.
- Add a cotton ball to the pointed top.
- Make several hats in matching sizes.
- Place the hats over the backs of classroom chairs.
- Adjust the size so the paper does not interfere with seating.
- Remove and store the hats after use.
The hats can also be placed on empty chairs around a classroom reading table. Because they are lightweight, they are easy to move when the room needs to be rearranged.
Recycled Cardboard Christmas Trees for a Classroom Corner
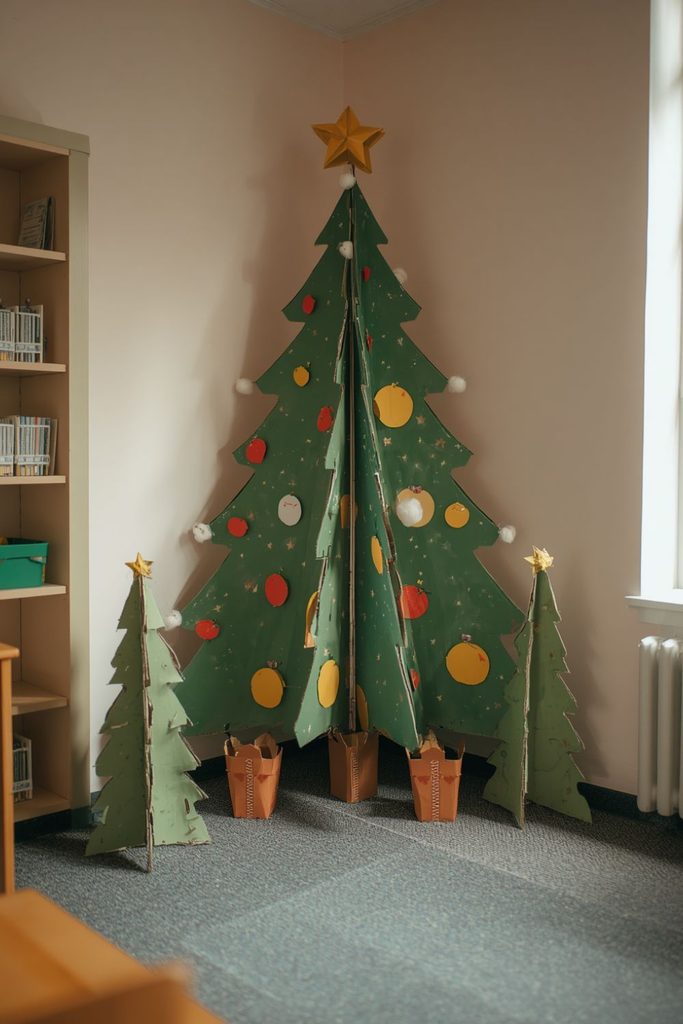
A larger cardboard Christmas tree can fill an empty classroom corner without the cost of a full sized artificial tree. Recycled boxes are useful for this project. Teachers can make a flat tree, a standing tree, or several connected cardboard sections.
Materials needed:
- Clean recycled cardboard
- Green paint
- Scissors or a craft knife for adult use
- Glue
- Colored paper
- White cotton
- Paintbrush
Step by step method:
- Draw a large Christmas tree outline on cardboard.
- Cut the shape carefully using an adult safe cutting method.
- Paint the tree green.
- Allow it to dry completely.
- Cut circles, stars, and other simple shapes from colored paper.
- Attach the shapes as ornaments.
- Add cotton along selected branches for snow.
- Create a cardboard stand if the tree needs to stand upright.
- Place the tree in an unused classroom corner.
- Check that it is stable before children move around it.
A large cardboard tree can become the main decoration in a small corner. It also stores flat, which makes it practical for teachers who reuse seasonal decorations.
Felt Snowman Figures for Wall or Window Decoration
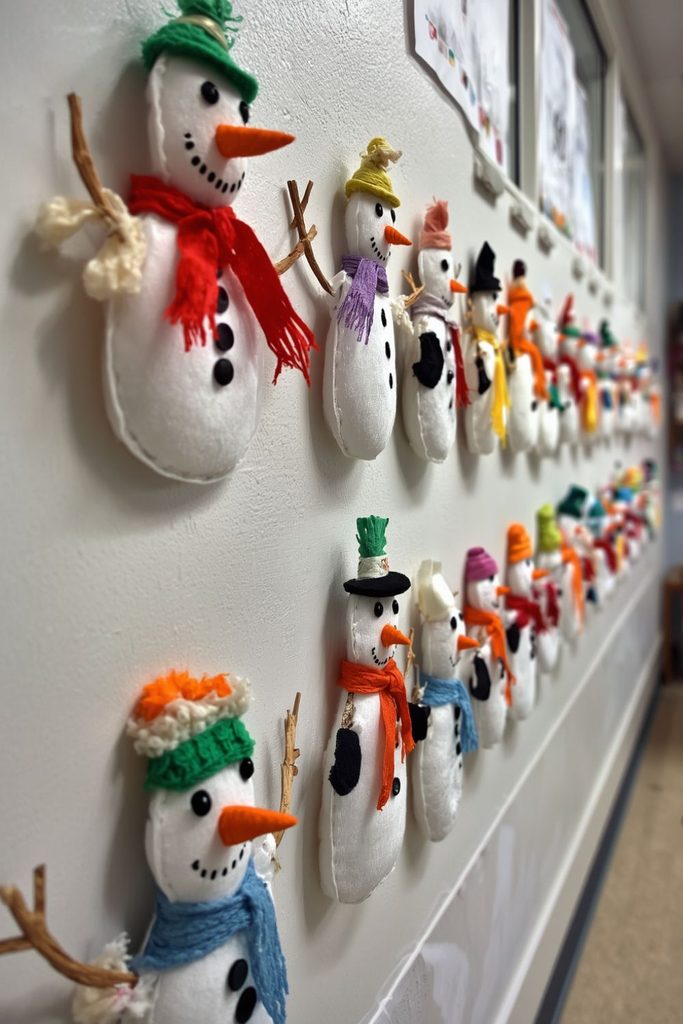
Felt snowmen provide a soft alternative to paper decorations. The material is easy to cut and does not create sharp edges. Teachers can make snowmen in several sizes and arrange them across a wall or window.
Materials needed:
- White felt
- Black felt
- Orange felt
- Red or blue felt
- Scissors
- Fabric glue
- Removable adhesive
Step by step method:
- Cut three white felt circles for each snowman.
- Arrange the circles from largest to smallest.
- Glue them together.
- Cut black circles for the eyes and buttons.
- Cut a small orange triangle for the nose.
- Cut a scarf from red, blue, or green felt.
- Add a small felt hat.
- Allow all glue to dry.
- Attach the finished snowman to a suitable wall or window area.
- Make two or three figures in different sizes.
The snowmen can be arranged as a small group without adding written signs. Their different sizes create a playful scene that works well in an elementary classroom.
DIY Pom Pom Christmas Garland for the Classroom Door Frame
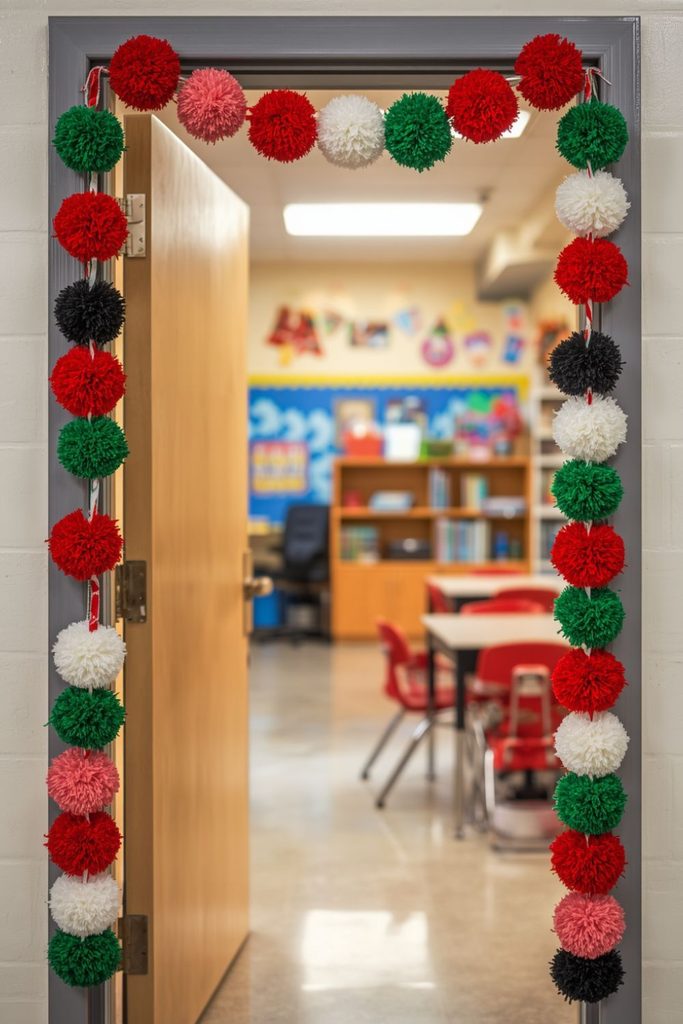
A pom pom garland adds soft texture around a doorway. It can be made with purchased pom poms or handmade yarn pom poms. The decoration is easy to adjust to different door widths and can be stored in a box after Christmas.
Materials needed:
- Red pom poms
- Green pom poms
- White pom poms
- Yarn or string
- Glue
- Scissors
- Ribbon
Step by step method:
- Measure the area around the classroom door.
- Cut a piece of yarn slightly longer than the measured space.
- Arrange pom poms in a repeating color pattern.
- Glue or tie each pom pom onto the yarn.
- Leave a small gap between each piece.
- Add ribbon bows at selected points.
- Check the garland for loose pieces.
- Attach it around the door frame using removable hooks or suitable tape.
- Keep the garland clear of the door hinges.
- Trim excess string once it is in place.
A red, white, and green pattern works well for Christmas. Teachers can also use only two colors for a cleaner appearance.
Wooden Craft Stick Snowflakes for Window Decoration
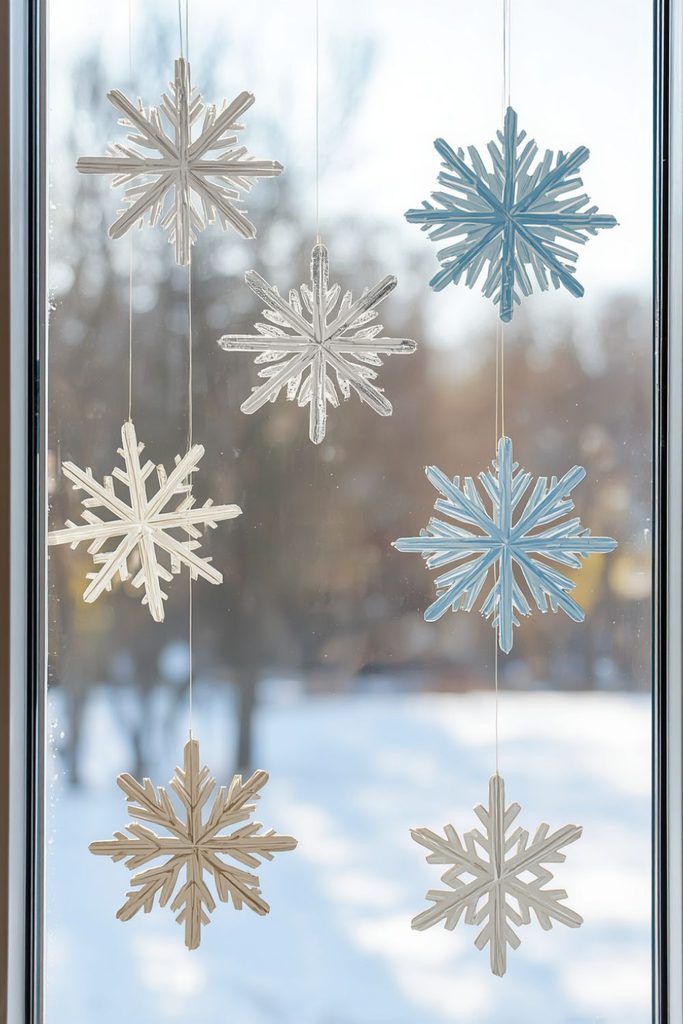
Wooden craft sticks can be arranged into snowflake shapes that are stronger than ordinary paper snowflakes. They can be painted white, blue, or silver and placed around windows. This project is also useful for creating decorations that can be packed away and reused.
Materials needed:
- Wooden craft sticks
- White paint
- Blue paint
- Glue
- Silver paper
- String
- Scissors
Step by step method:
- Paint the craft sticks white, blue, or silver.
- Allow them to dry completely.
- Place three sticks across one another to form a six arm shape.
- Glue the center carefully.
- Add shorter sticks to some arms for more detail.
- Let the glue dry fully.
- Add small silver paper shapes if desired.
- Tie a short string to the back.
- Hang the snowflake near the classroom window.
- Make several sizes for a fuller display.
The sturdy sticks give each snowflake a clear shape. A collection of white and blue snowflakes can make the window area feel like a gentle winter scene.
Paper Chain Christmas Garlands for Classroom Doorways
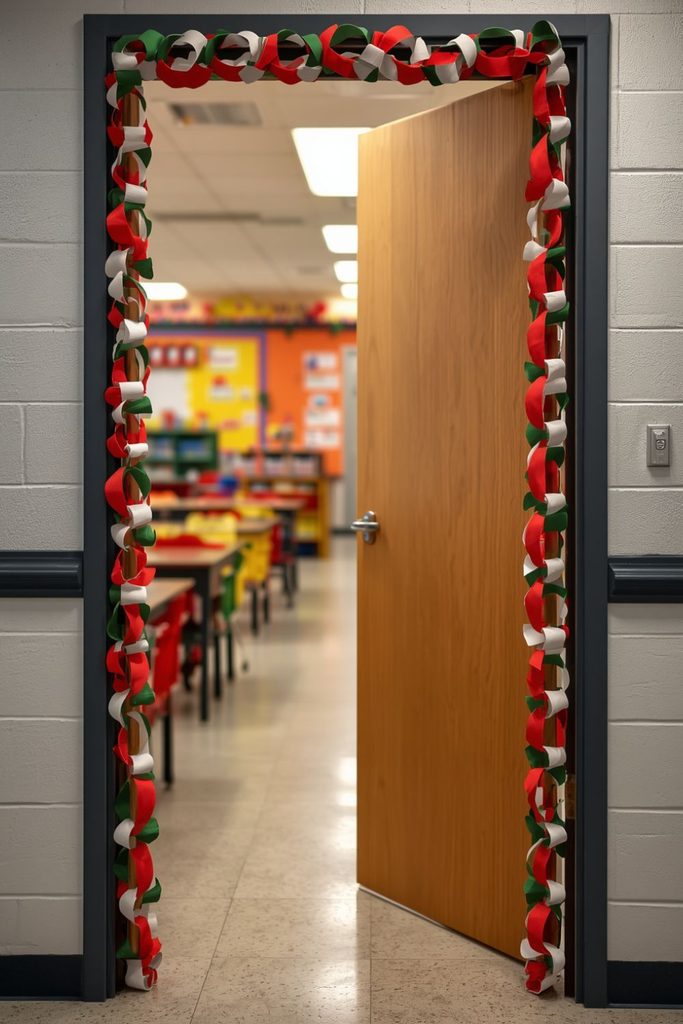
Paper chains are one of the easiest decorations for an elementary classroom. They require only strips of paper and glue or staples, and children can help connect the loops. The finished chain can be draped across a doorway or along a wall.
Materials needed:
- Red construction paper
- Green construction paper
- White paper
- Scissors
- Glue or tape
- Ruler
Step by step method:
- Cut paper into strips of equal width.
- Sort the strips by color.
- Take one strip and form it into a loop.
- Glue or tape the ends together.
- Thread another strip through the first loop.
- Close the second strip into a loop.
- Continue alternating colors.
- Make the chain long enough for the selected doorway.
- Attach the ends using removable hooks or tape.
- Keep the chain clear of doors that need to open and close freely.
Children can make sections of the chain during a short classroom activity. Red and green loops create a familiar Christmas color combination without needing printed decorations.
DIY Egg Carton Christmas Trees for Shelf Decorations
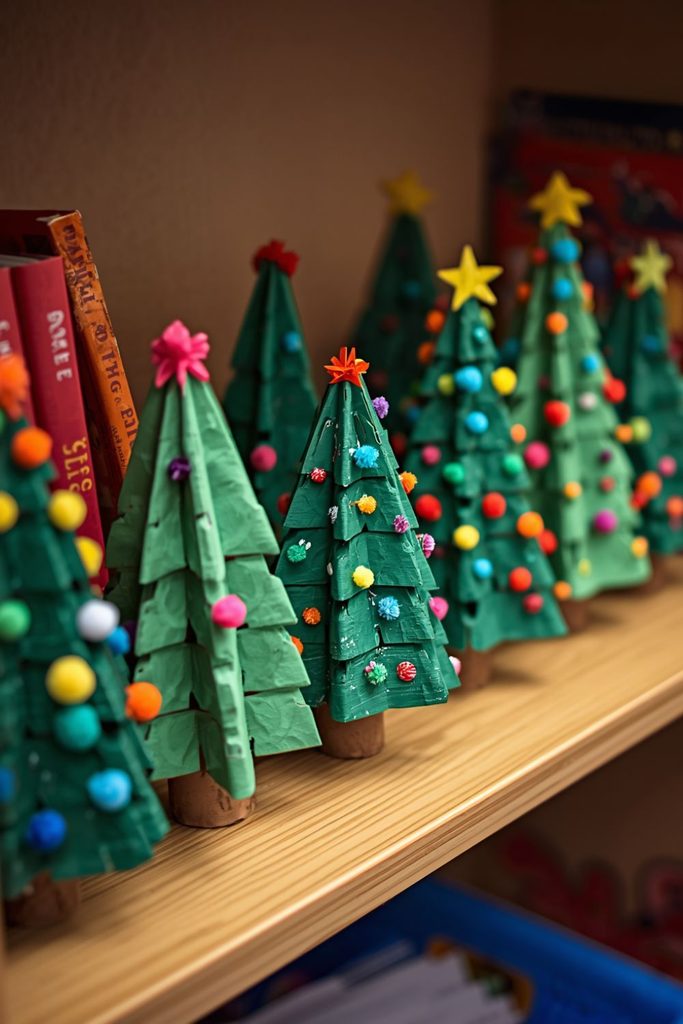
Empty egg cartons can be turned into small Christmas trees with a little paint and cutting. This is a useful reuse project because the carton sections naturally create several small tree shapes. Adult supervision is recommended when cutting the carton.
Materials needed:
- Clean cardboard egg cartons
- Green paint
- Brown paper
- Glue
- Scissors
- Small pom poms
- Colored paper
Step by step method:
- Separate the pointed sections of the egg carton.
- Trim the pieces into simple tree shapes.
- Paint them green.
- Let the paint dry.
- Cut tiny circles from colored paper.
- Glue the circles onto the trees.
- Add small pom poms as ornaments.
- Cut tiny brown paper strips for trunks.
- Attach the trunks underneath.
- Arrange the finished trees together on a shelf.
The trees can be made in several shades of green. A small group placed beside books or other seasonal decorations can fill an otherwise empty shelf neatly.
Paper Doily Angels for a Soft and Festive Classroom Window Display
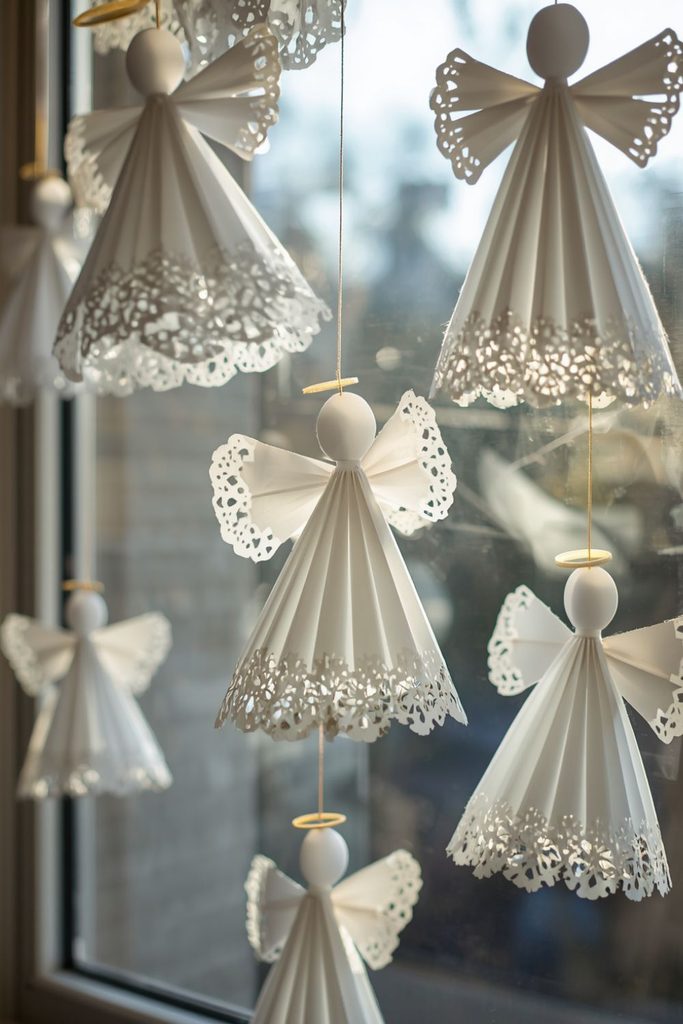
Paper doily angels have a delicate appearance and are simple enough for an elementary classroom project. The round doily forms the angel’s body while folded sections create the dress and wings. White paper keeps the display light and calm around a bright window.
Materials needed:
- White paper doilies
- White paper
- Gold paper
- Glue
- Scissors
- String
- Pencil
Step by step method:
- Fold a paper doily into a cone shape.
- Glue the edges together.
- Cut a small circle from white paper for the head.
- Cut two simple wing shapes.
- Attach the head to the top of the cone.
- Glue one wing on each side.
- Cut a small gold paper star or halo shape.
- Attach it above the head.
- Tie a short string to the back.
- Hang the angels around a classroom window where they will not block needed light.
Several angels can be made in matching sizes for a calm display. The white doilies also reflect natural light, making this decoration especially suitable for windows.