
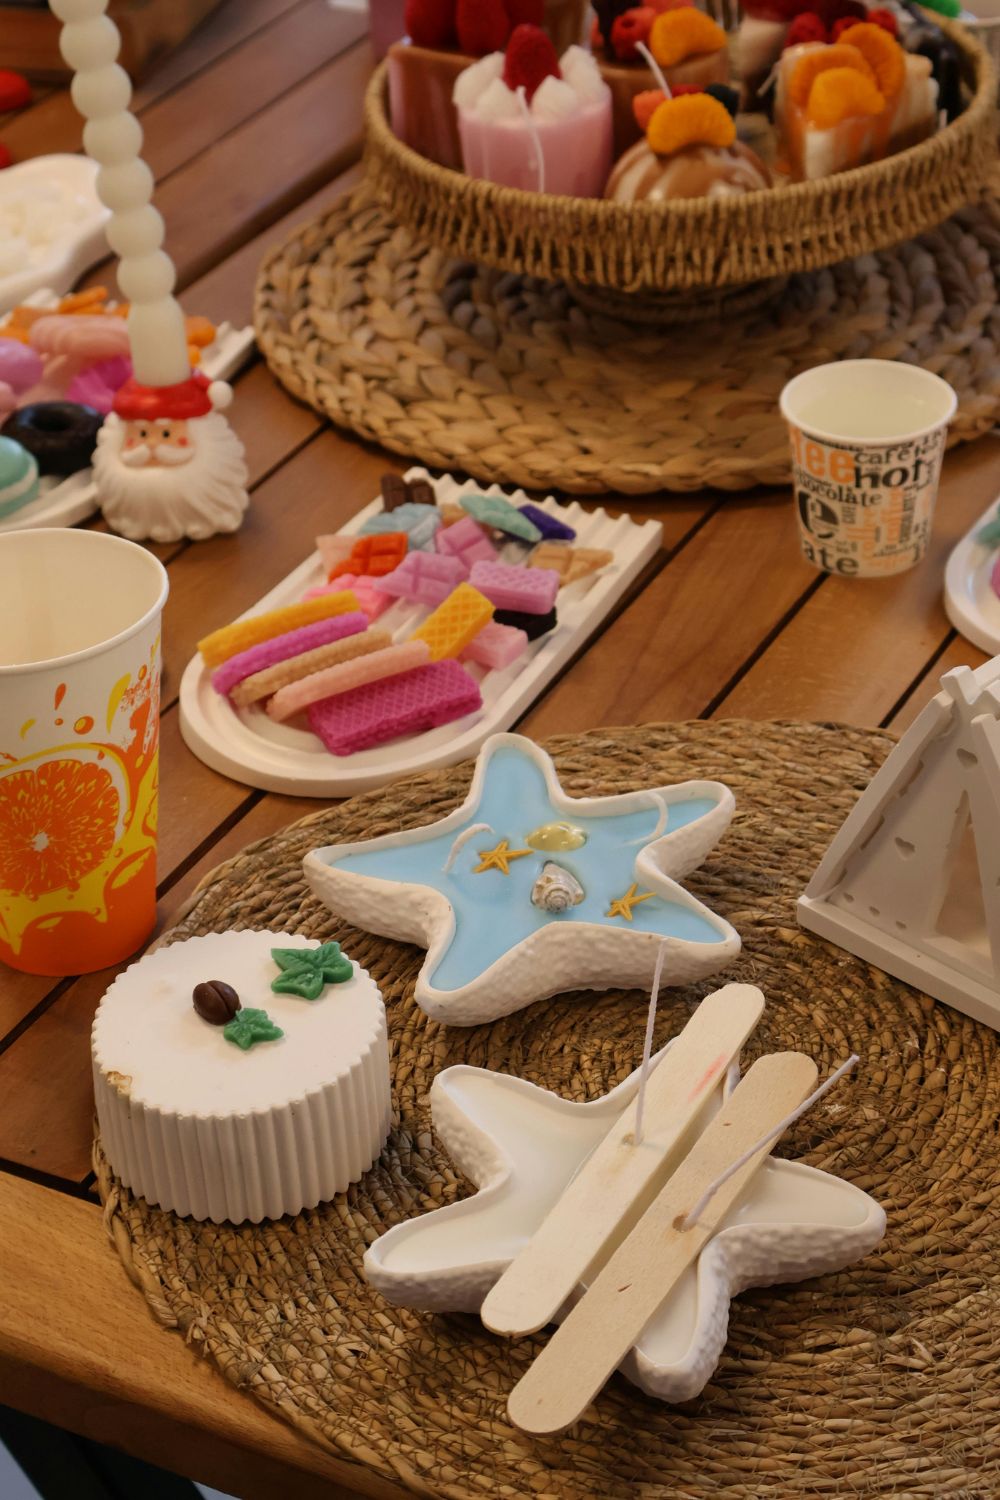
Christmas is a lovely time for toddlers to play with colors, textures, paper, paint, and simple household supplies. Parents do not need a large art room or costly supplies to create cheerful holiday projects at home. A kitchen table, some washable paint, paper, glue, and a little patience can be enough for hours of happy making.
These Christmas crafts for toddlers are designed for short attention spans and little hands. Most projects use easy materials that parents may already have at home. Some can become keepsakes for a memory box, while others can be given to grandparents, displayed around the house, used as decorations, or turned into handmade cards. The adult can handle cutting, hot glue, and other tasks that need care, while the toddler can paint, stick, stamp, tear, dab, count, and decorate.
The aim is not to create a perfect Christmas decoration. Toddlers are still learning how to control their fingers, follow simple instructions, make choices, and enjoy creative play. A crooked tree or a slightly messy Santa can be more precious than a perfectly finished decoration because it shows the child’s little hands at work.
Before starting, cover the table with old newspaper or a washable mat. Use child safe, washable supplies and supervise toddlers closely, especially when using small pieces. Allow the child to make choices about colors and decorations whenever possible. The finished project does not need to look exactly like the example. Letting toddlers have a little freedom makes each piece feel personal and memorable.
1. Footprint Reindeer Keepsakes

A footprint reindeer is one of the sweetest Christmas crafts for toddlers because it turns a tiny footprint into a holiday memory that parents can save for years. The child can help with the paint, while the adult creates the face and details after the footprint dries.
The finished reindeer can be placed in a frame, added to a Christmas album, or given to a grandparent as a small handmade present.
Materials Needed
- White or light brown cardstock
- Washable brown paint
- Paintbrush or sponge
- Red pom pom or red paper circle
- Black marker
- Glue
- Optional ribbon
- Baby wipes or a damp cloth
Step by Step Method
- Place the cardstock on a protected table or floor.
- Paint a thin layer of brown washable paint onto the toddler’s foot.
- Press the painted foot gently onto the paper.
- Lift the foot straight up to keep the print clear.
- Wash the child’s foot right away.
- Let the footprint dry completely.
- Add two paper antlers above the heel area.
- Glue on a red nose near the toe area.
- Draw two eyes and a smiling mouth with a marker.
- Write the child’s name and the year underneath.
Add a small ribbon at the top if you want to hang the picture on the Christmas tree. Parents can also write a short note such as, “My little reindeer, Christmas 2026.” The footprint will become a sweet record of how tiny those little feet once were.
- Related post Side Hustle Season: Christmas Crafts for Adults You Can Sell (and Actually Profit From)
2. Toddler Made Christmas Gift Wrap Paper

Homemade wrapping paper gives toddlers a chance to decorate something that will actually be used during Christmas. Instead of worrying about neat lines, give your child a large sheet of plain paper and let them stamp, dab, scribble, and decorate it with holiday colors.
This activity works especially well for presents going to grandparents, siblings, teachers, or close family members.
Materials Needed
- Plain brown paper or large white paper
- Washable red, green, and gold paint
- Sponges
- Potato stamps or simple foam shapes
- Paint tray
- Crayons
- Optional stickers
- Drying area
Step by Step Method
- Cover the table with newspaper.
- Roll out a large sheet of wrapping paper.
- Put small amounts of paint into shallow trays.
- Show your toddler how to press a sponge into the paint.
- Let the child stamp shapes across the paper.
- Add crayons for stars, lines, dots, and circles.
- Allow stickers if your toddler enjoys them.
- Leave the paper flat until every painted area is dry.
- Cut the paper into smaller sheets if needed.
- Wrap simple Christmas presents with the finished paper.
Toddlers may cover one section heavily and leave another almost blank. That is perfectly fine. The uneven pattern is part of the handmade look. Add the child’s name and year to the corner before wrapping a present, so the recipient knows who made the paper.
3. Handprint Christmas Trees

Handprint Christmas trees are easy to make and work well as wall art, cards, or family keepsakes. The child’s hand becomes the shape of a little Christmas tree, making the activity personal and playful.
Parents can help with paint application while toddlers choose decorations for their tree after the handprint has dried.
Materials Needed
- White cardstock
- Green washable paint
- Paintbrush
- Yellow paper
- Glue
- Red and colorful stickers
- Brown crayon
- Black marker
Step by Step Method
- Place the cardstock on a flat surface.
- Paint the toddler’s palm and fingers with green paint.
- Press the hand firmly onto the paper.
- Lift the hand carefully.
- Wash the child’s hand immediately.
- Allow the green print to dry.
- Cut a small yellow star from paper.
- Glue the star above the tree.
- Add stickers as Christmas ornaments.
- Draw a brown trunk under the palm.
- Write the child’s name and date near the bottom.
You can make three or four handprint trees in different shades of green if you have several children. Another idea is to add the whole family’s handprints and create a family Christmas forest. Use a large sheet of paper for a group display.
4. Fingerprint Christmas Lights
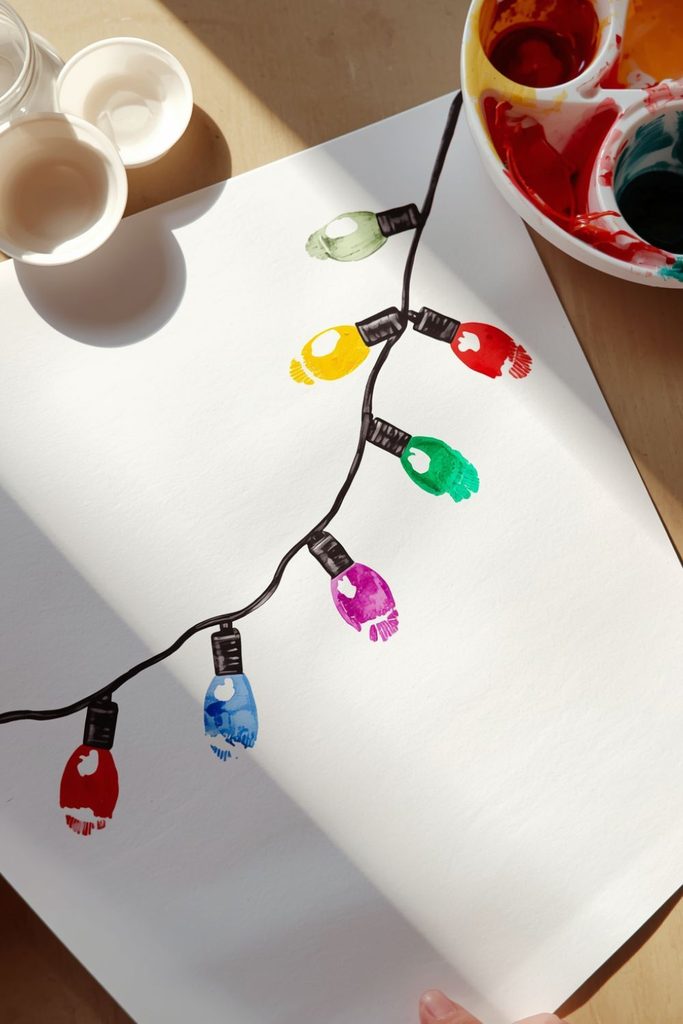
Fingerprint Christmas lights turn tiny fingertips into colorful bulbs. This project is especially suitable for toddlers because there is no need for precise painting skills. Children simply dip a fingertip into paint and press it onto the paper.
The activity also gives toddlers a chance to practice color recognition while creating a cheerful holiday picture.
Materials Needed
- White cardstock
- Washable red, green, blue, yellow, and purple paint
- Black marker
- Paper plate or paint tray
- Baby wipes
- Optional glitter glue
Step by Step Method
- Draw a long curved black line across the paper.
- Add small black lines where each bulb will hang.
- Put small amounts of colored paint onto a plate.
- Help your toddler dip one fingertip into the paint.
- Press the fingertip onto the end of a black line.
- Repeat with different colors.
- Wipe the child’s finger before changing colors.
- Let the picture dry.
- Add tiny white highlights if desired.
- Write “Merry Christmas” at the bottom.
Do not worry if some fingerprints overlap. That can make the lights look full and cheerful. Parents can also count the bulbs with their toddler after the picture dries, turning the art activity into a simple counting game.
5. Christmas Sticker Baubles

Sticker baubles are a low mess activity for days when parents want something simple. Toddlers can choose stickers and place them on paper circles, giving them control over the design without needing wet paint.
The finished baubles can become tree decorations, greeting cards, gift tags, or a paper garland for a child’s bedroom.
Materials Needed
- Colored cardstock
- Scissors
- Christmas stickers
- Crayons
- Glue
- Ribbon or string
- Hole punch
Step by Step Method
- Cut several large circles from cardstock.
- Draw a small rectangle at the top of each circle.
- Give the circles to your toddler.
- Let the child choose stickers.
- Encourage the toddler to place stickers across each bauble.
- Add crayons for dots, lines, and simple patterns.
- Write the child’s name on the back.
- Punch a hole at the top.
- Thread ribbon or string through the hole.
- Hang the finished baubles on a tree or wall.
Large stickers are easier for small fingers to handle than tiny ones. Keep very small pieces away from children who still put objects in their mouths. Parents can also use reusable stickers on laminated paper for a decoration that can be played with again.
6. Santa’s Beard Counting Craft

Santa’s beard can become a fun counting activity as well as a holiday picture. Toddlers can glue cotton balls onto Santa’s face while counting each piece with a parent.
This project combines simple number practice with an easy Christmas picture that can be displayed on the refrigerator.
Materials Needed
- White cardstock
- Red paper
- Cotton balls
- Glue
- Black marker
- Pink or peach paper
- Optional googly eyes
- Number cards
Step by Step Method
- Draw or cut a simple Santa face.
- Add a red hat using red paper.
- Place glue along the beard area.
- Give your toddler a small bowl of cotton balls.
- Ask the child to place one cotton ball onto the glue.
- Count each cotton ball together.
- Continue until the beard is full.
- Add eyes, a nose, and a mouth.
- Count the total number of cotton balls.
- Write the number at the bottom of the picture.
For younger toddlers, counting from one to five may be enough. Older toddlers can count higher or compare two Santas to see which beard has more cotton balls. Keep the lesson playful rather than turning it into a formal math exercise.
7. Paper Plate Santa Faces

Paper plates make a great base for a cheerful Santa face. Toddlers can paint, glue, and place large paper pieces while parents prepare the basic shapes.
This activity can become a Christmas decoration for a door, wall, bedroom, or family gathering area.
Materials Needed
- White paper plate
- Red paint
- Red cardstock
- Cotton balls
- Glue
- Black marker
- Pink paper
- Black paper
- Optional googly eyes
Step by Step Method
- Paint the paper plate red around the upper section.
- Leave the middle area white or add a light skin tone.
- Cut a red triangle for Santa’s hat.
- Glue the hat onto the plate.
- Add cotton balls along the hat edge.
- Place another cotton ball at the hat tip.
- Add eyes and a nose.
- Draw a smile.
- Glue cotton balls around the lower face for the beard.
- Allow the whole plate to dry before hanging it.
Toddlers can help press cotton balls into the glue, which is a useful fine motor activity. If the child wants to use lots of cotton balls, let the beard become extra fluffy. Santa does not need to look perfect to be fun.
8. Cotton Ball Snowman Cards
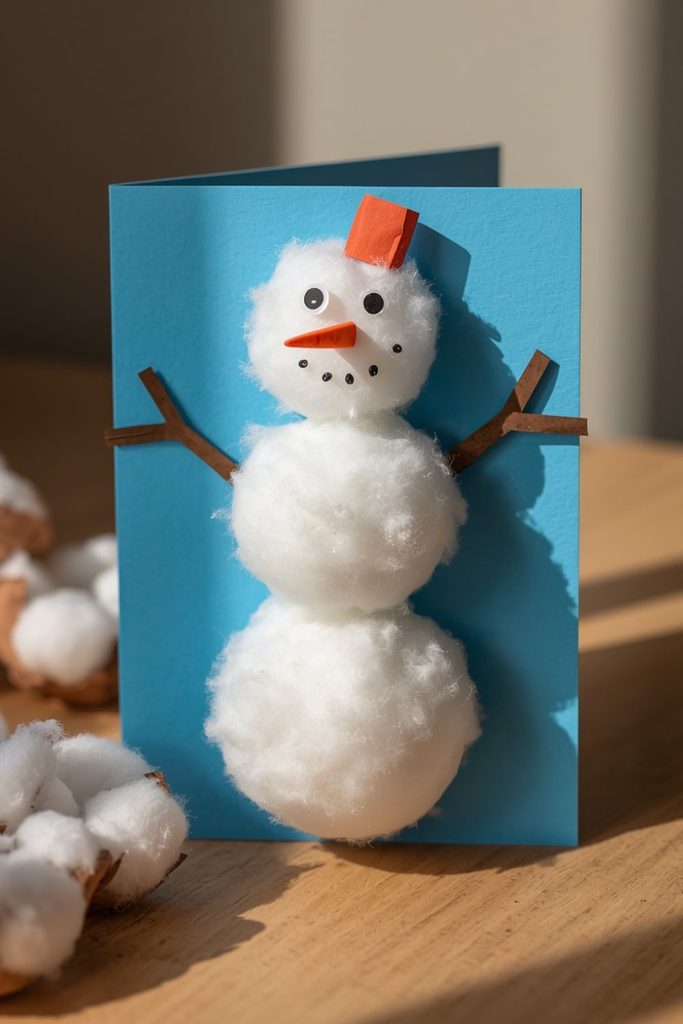
Cotton ball snowman cards are simple enough for toddlers and sweet enough to send to family members. The soft cotton texture gives children something interesting to touch while they work.
Parents can write the message inside, while toddlers decorate the front.
Materials Needed
- Folded cardstock
- Cotton balls
- Glue
- Orange paper
- Black marker
- Black buttons or paper circles
- Colored paper
- Optional ribbon
Step by Step Method
- Fold a piece of cardstock in half.
- Draw three circles for the snowman.
- Spread glue inside the circles.
- Give the toddler cotton balls.
- Let the child cover each circle.
- Cut a small orange triangle for the nose.
- Add black paper eyes.
- Add a small paper hat.
- Draw stick arms.
- Write a Christmas message inside the card.
For safety, use paper circles instead of buttons for very young children who may put small objects in their mouths. The card can be finished with the child’s fingerprint near the message, giving the recipient a small reminder of who made it.
9. Torn Paper Christmas Stockings

Tearing paper is a simple hand activity that toddlers often enjoy. A Christmas stocking project lets children tear colored paper into small pieces and glue them inside a stocking shape.
It can be used as a wall decoration or turned into a pretend stocking for dramatic play.
Materials Needed
- Red cardstock
- White paper
- Green paper
- Glue
- Child safe scissors for adult use
- Crayons
- Optional stickers
Step by Step Method
- Draw a large stocking shape on red cardstock.
- Cut out the stocking.
- Give your toddler strips of colored paper.
- Help the child tear the paper into small pieces.
- Add glue to one section of the stocking.
- Let the child place torn pieces onto the glue.
- Continue until the stocking is covered.
- Add a white paper cuff.
- Decorate the cuff with stickers or crayons.
- Write the child’s name on the stocking.
Paper tearing can strengthen finger and hand movements needed for later writing activities. Do not correct every piece of paper placement. A stocking covered with randomly placed colors can look cheerful and very much like a toddler made it.
10. Paper Bag Santa Puppets

A paper bag Santa puppet gives toddlers something they can play with after the activity is finished. Parents can prepare the basic shapes, while children help glue the face, beard, hat, and other pieces.
Afterward, Santa can become part of a simple Christmas story or pretend conversation.
Materials Needed
- Small paper lunch bag
- Red paper
- White paper
- Cotton balls
- Glue
- Black marker
- Pink paper
- Optional googly eyes
Step by Step Method
- Place the paper bag flat with the flap facing upward.
- Use the flap as Santa’s face area.
- Cut a red hat shape.
- Glue the hat onto the top.
- Add cotton balls around the hat edge.
- Add paper eyes or large googly eyes.
- Add a pink paper nose.
- Glue cotton balls around the lower face.
- Draw a smiling mouth.
- Let the puppet dry before playing.
Once the puppet is ready, parents can ask simple questions such as, “What is Santa carrying?” or “Where is Santa going?” Toddlers can answer with single words or short sentences. This makes the activity useful for pretend play and early language practice.
11. Cardboard Tube Christmas Characters
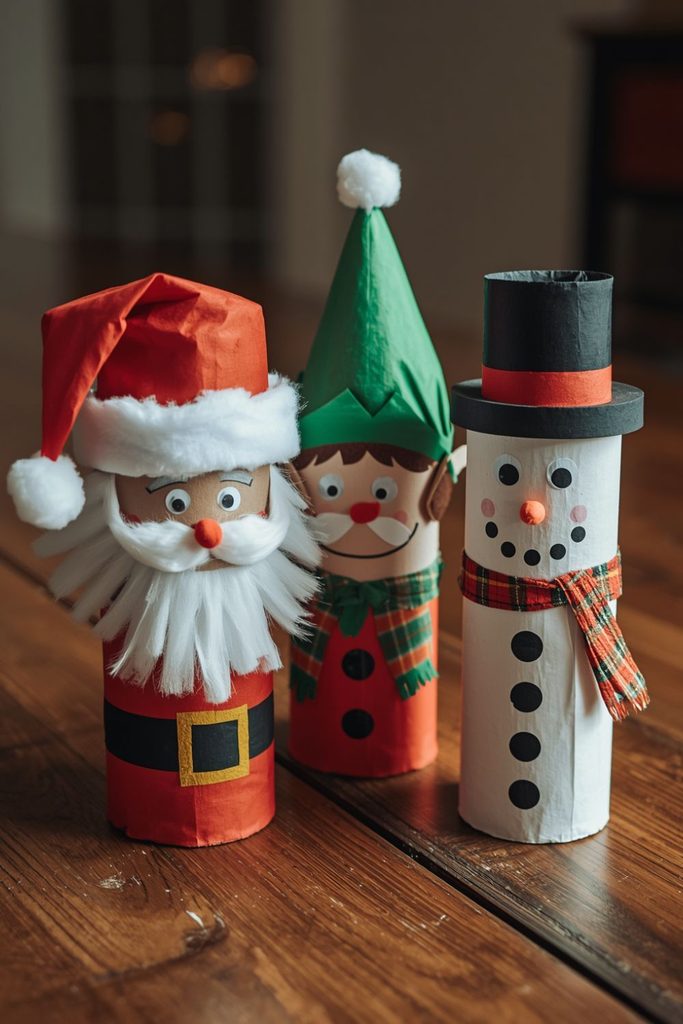
Empty cardboard tubes can become Santa, an elf, a snowman, or even a Christmas tree. Reusing household materials keeps the project affordable and gives toddlers a chance to see how ordinary objects can become toys.
Parents should handle any cutting, while toddlers can paint and decorate the tubes.
Materials Needed
- Clean cardboard tubes
- Washable paint
- Paintbrushes
- Colored paper
- Glue
- Markers
- Cotton balls
- Stickers
Step by Step Method
- Cover the work surface.
- Give each tube a simple holiday color.
- Let your toddler paint the tubes.
- Allow the paint to dry.
- Cut paper hats, ears, scarves, or faces.
- Let the child glue the pieces onto the tube.
- Add cotton balls for Santa’s beard or hat.
- Draw simple facial features.
- Add stickers as buttons or decorations.
- Place the finished characters on a shelf.
Make several characters and create a small pretend family. Toddlers can name each character and invent short stories. A cardboard tube can become a Santa one day and an elf the next, so there is plenty of room for creative play.
12. Christmas Tree Contact Paper Collage

A contact paper collage gives toddlers a sticky surface where they can place lightweight decorations without needing lots of glue. This makes it a fairly clean option for an indoor afternoon.
The project also lets children practice choosing, picking up, and placing small decorative pieces.
Materials Needed
- Clear contact paper
- Green paper
- Colored tissue paper
- Pom poms
- Large foam shapes
- Star stickers
- Scissors
- Tape
Step by Step Method
- Cut a large Christmas tree from green paper.
- Tape it to a table or wall.
- Cut a sheet of contact paper.
- Remove the backing carefully.
- Place the sticky side over the tree area.
- Give your toddler tissue paper and large decorations.
- Let the child press pieces onto the sticky surface.
- Add star stickers near the top.
- Press down loose corners gently.
- Display the finished tree where the child can see it.
Use large pieces for toddlers who are still very young. You can make several small trees and let each family member decorate one. The finished display can become a colorful Christmas wall without requiring paint.
13. Pom Pom Christmas Tree Decorating
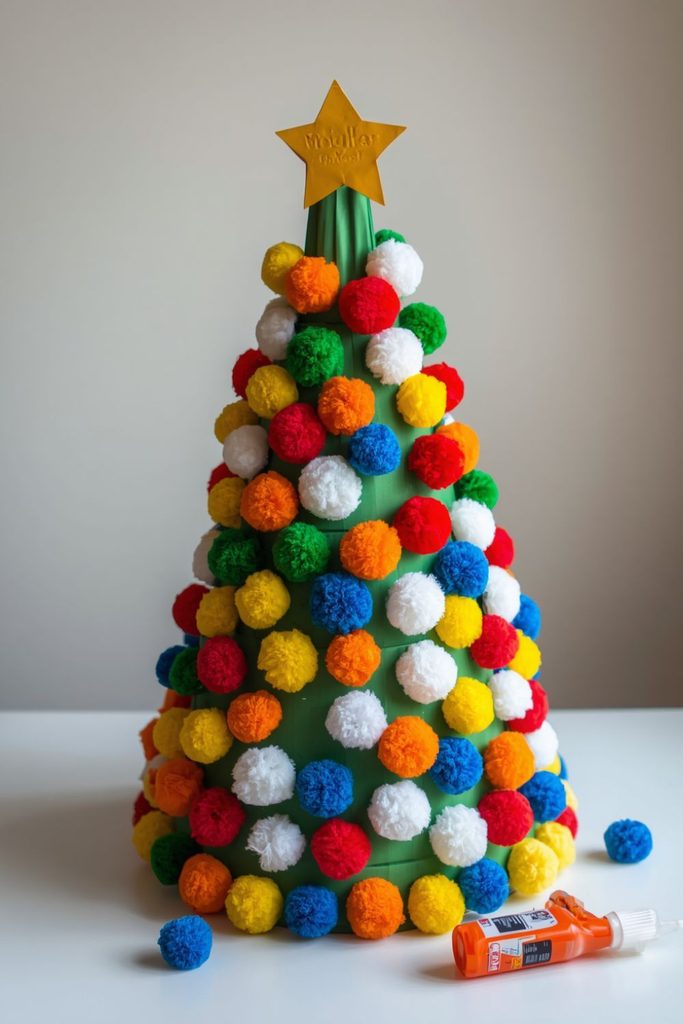
A paper Christmas tree covered with colorful pom poms is a fun activity for toddlers who enjoy picking up and placing objects. The soft pom poms also add a pleasant texture to the finished picture.
Parents can make the tree shape, while toddlers decide where each decoration should go.
Materials Needed
- Green cardstock
- Large pom poms
- Glue
- Yellow paper
- Crayons
- Optional sequins for older children
- Scissors for adults
Step by Step Method
- Cut a large triangle from green cardstock.
- Add a small brown trunk.
- Put small dots of glue across the tree.
- Give the toddler several large pom poms.
- Let the child place one pom pom on each glue spot.
- Add a yellow paper star at the top.
- Use crayons to add extra decorations.
- Leave the tree flat until the glue dries.
- Write the child’s name underneath.
- Hang the finished tree on a wall.
Parents can turn this into a color sorting game by giving the child red, green, yellow, and blue pom poms. Ask the toddler to find all the red ones before moving to another color. Keep the activity relaxed and playful.
14. Snowflake Sponge Painting

Sponge painting creates soft shapes without requiring toddlers to hold a small paintbrush carefully. A simple snowflake shaped sponge can make repeated prints across dark paper.
This activity works well as winter wall art or as a handmade card for family members.
Materials Needed
- Dark blue cardstock
- White washable paint
- Snowflake sponge
- Paint tray
- Silver or blue crayons
- Paper towel
- Optional white glitter
Step by Step Method
- Place the dark paper on a covered table.
- Pour white paint into a shallow tray.
- Press the sponge gently into the paint.
- Help your toddler stamp it onto the paper.
- Repeat across the page.
- Use a lighter touch for smaller snowflakes.
- Add dots with a fingertip if desired.
- Let the painting dry.
- Add silver crayon details.
- Write a short Christmas greeting.
If you do not have a snowflake sponge, cut a simple shape from a clean kitchen sponge. An adult should handle the scissors. Toddlers can also use round sponges to make snowballs, creating a winter scene with very little preparation.
15. Popsicle Stick Christmas Trees

Popsicle stick trees are small enough to use as ornaments, gift decorations, or fridge decorations. Parents can assemble the basic triangle while toddlers paint and decorate it.
This activity can be repeated with different colors, allowing each child to make several small trees.
Materials Needed
- Wooden popsicle sticks
- Green washable paint
- Glue
- Yellow paper
- Small stickers
- Ribbon
- Brown paper
- Paintbrush
Step by Step Method
- Place three popsicle sticks into a triangle shape.
- An adult can glue the corners.
- Add one stick underneath as the trunk.
- Let the glue dry.
- Allow the toddler to paint the tree green.
- Leave it to dry.
- Add stickers as ornaments.
- Glue a yellow paper star at the top.
- Add ribbon to the back.
- Hang the finished tree.
Parents should handle the glue if using a stronger adhesive. For very young toddlers, larger stickers are easier to manage. Write the child’s name and year on the back so the ornament becomes part of your yearly Christmas collection.
16. Salt Dough Christmas Ornaments

Salt dough ornaments are a classic holiday activity that can become part of the family Christmas decorations. Toddlers can press their hands, fingers, or simple shapes into the dough.
Parents should handle baking and any hot trays. The child can help with shaping and decorating after the ornaments cool.
Materials Needed
- Plain flour
- Salt
- Water
- Rolling pin
- Christmas cookie cutters
- Straw
- Paint
- Paintbrush
- Ribbon
Step by Step Method
- Mix flour, salt, and water into a firm dough.
- Place the dough on a clean surface.
- Roll it flat with a rolling pin.
- Let the toddler press a hand gently into the dough if desired.
- Cut Christmas shapes with cookie cutters.
- Use a straw to make a hanging hole.
- Place the shapes on a baking tray.
- An adult should bake the ornaments according to the chosen dough recipe.
- Allow them to cool completely.
- Let the toddler paint the ornaments.
- Add ribbon through the hole.
A handprint ornament can show just how small your child was that Christmas. Add the year to the back with a marker after the paint dries. Store the finished pieces carefully between sheets of paper each year.
17. Christmas Sensory Ornament Bags

A sensory ornament bag gives toddlers a mess free way to play with Christmas colors and shapes. Instead of touching loose materials, children can press and move sealed decorations inside a clear bag.
Parents should supervise closely and check the bag for leaks or damage before each use.
Materials Needed
- Strong resealable plastic bag
- Clear hair gel or water
- Red and green foam shapes
- Large sequins
- Christmas stickers
- Strong tape
- Food coloring if desired
Step by Step Method
- Place a small amount of clear gel into the bag.
- Add large Christmas shapes.
- Add a little red or green coloring if desired.
- Press out extra air.
- Seal the bag firmly.
- Check every corner for leaks.
- Tape the opening securely.
- Place the bag flat on a table.
- Let the toddler press and move the shapes.
- Talk about the colors, shapes, and textures.
Do not use tiny loose pieces inside a bag that could open easily. This activity is best done with an adult nearby. Ask your toddler to find the star, move the red shape, or count the green pieces.
18. Pasta Christmas Wreaths

Dry pasta can be painted and arranged into a simple Christmas wreath. Toddlers can help paint large pasta pieces and place them onto a paper circle.
This activity uses inexpensive pantry materials and produces a decoration that can hang on a bedroom door or wall.
Materials Needed
- Large dry pasta shapes
- Cardboard
- Green washable paint
- Red paint
- Glue
- Ribbon
- Paper plate
- Scissors for adults
Step by Step Method
- Cut the center from a paper plate or cardboard circle.
- Paint the pasta green.
- Let the pasta dry completely.
- Give your toddler the pasta pieces.
- Add glue around the cardboard ring.
- Let the child place pasta around the ring.
- Add red pasta pieces as berries.
- Allow the wreath to dry.
- Tie ribbon around the top.
- Hang it on a door or wall.
You can use several pasta shapes to make the wreath more interesting. For very young toddlers, use larger pasta pieces and watch closely during the activity. Painting the pasta can be just as enjoyable as assembling the wreath.
19. Pinecone Christmas Trees

A pinecone can become a tiny Christmas tree with a little paint and a few decorations. This project gives toddlers an interesting natural texture to touch while they decorate.
Adults should check pinecones carefully and remove dirt or sharp pieces before giving them to a child.
Materials Needed
- Clean dry pinecones
- Green washable paint
- Paintbrush
- Large pom poms
- Glue
- Yellow paper
- Small cardboard base
- Optional ribbon
Step by Step Method
- Place the pinecone on a covered table.
- Let your toddler paint it green.
- Leave the pinecone until the paint dries.
- Add small dots of glue between the scales.
- Let the toddler press large pom poms onto the glue.
- Cut a yellow paper star.
- Glue the star onto the top.
- Place the pinecone on a cardboard base.
- Add a little cotton around the base as snow.
- Display the finished tree.
You can make a small group of pinecone trees for a table display. Let your toddler choose whether the trees should be green, white, red, or a mixture of colors. Natural objects can make simple home activities feel fresh and interesting.
20. Paper Cup Christmas Elves

Paper cup elves are easy to hold and fun for pretend play. A plain cup becomes a little Christmas character with a paper hat, ears, face, and colorful decorations.
Toddlers can paint and stick the pieces while adults handle the cutting.
Materials Needed
- Paper cups
- Green or red paint
- Colored paper
- Glue
- Markers
- Cotton balls
- Large stickers
- Optional yarn
Step by Step Method
- Turn a paper cup upside down.
- Let the toddler paint it green or red.
- Leave the cup to dry.
- Cut two pointed ears from paper.
- Glue the ears onto the sides.
- Cut a pointed hat from colored paper.
- Add a cotton ball to the hat tip.
- Draw eyes and a smile.
- Add paper hair or yarn.
- Decorate the body with stickers.
Once the elf is finished, use it for pretend play. Give each elf a name and let your toddler decide what the elf is doing. Several paper cup elves can become characters in a short Christmas story made up by the child.
21. Recycled Cardboard Christmas Village
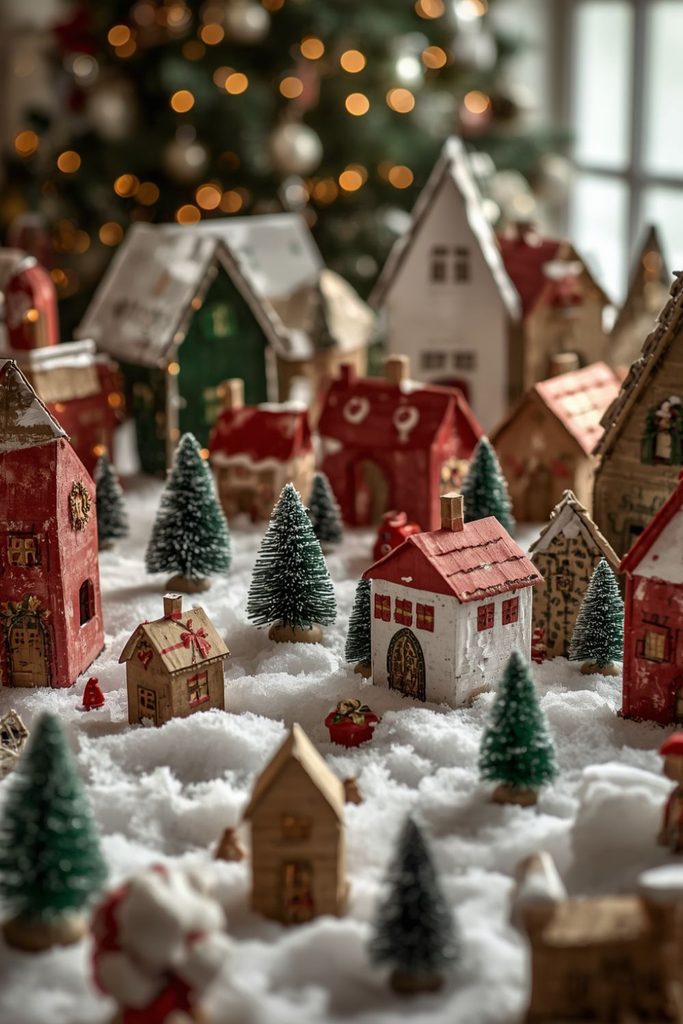
A recycled cardboard Christmas village can become a larger family activity that grows over several days. Boxes, tubes, and cartons can be turned into little houses, shops, trees, and holiday buildings.
Toddlers can paint large surfaces and add decorations while adults handle cutting and assembly.
Materials Needed
- Clean cardboard boxes
- Cardboard tubes
- White paper
- Washable paint
- Glue
- Markers
- Cotton balls
- Colored paper
- Stickers
- Scissors for adults
Step by Step Method
- Collect clean cardboard boxes of different sizes.
- Decide which boxes will become houses.
- An adult should cut doors and windows.
- Let the toddler paint the boxes.
- Allow the paint to dry.
- Add paper roofs and windows.
- Turn cardboard tubes into trees or small characters.
- Use cotton balls as snow.
- Add stickers and drawn details.
- Arrange all the pieces together on a large sheet of cardboard.
- Give the village a name.
- Let your toddler use toys to play in the village.
This project can become a multi day activity. One day can be used for painting houses, another for decorating trees, and another for arranging the village. It also gives parents a chance to talk with toddlers about houses, shops, colors, family members, and holiday traditions.