Autumn brings a shift in color, air, and daily routines, making it a good moment for indoor and outdoor toddler activities that use simple household items. Parents often look for easy ideas that keep little hands busy while also helping them learn through touch, color play, and movement. This guide brings a collection of seasonal projects that use paper, paint, leaves, and recycled items found at home. Each idea is designed for short attention spans and does not require expensive materials or complicated setup. You will notice a focus on textures, bright shades, and hands on fun that supports early coordination skills. Some steps may get a bit messy, and that is part of the fun, even if cleanup takes a little extra time after. Every activity below is simple to set up and can be adjusted based on age or interest of the child.
Handprint Fall Tree with Fingerprint Leaves Activity
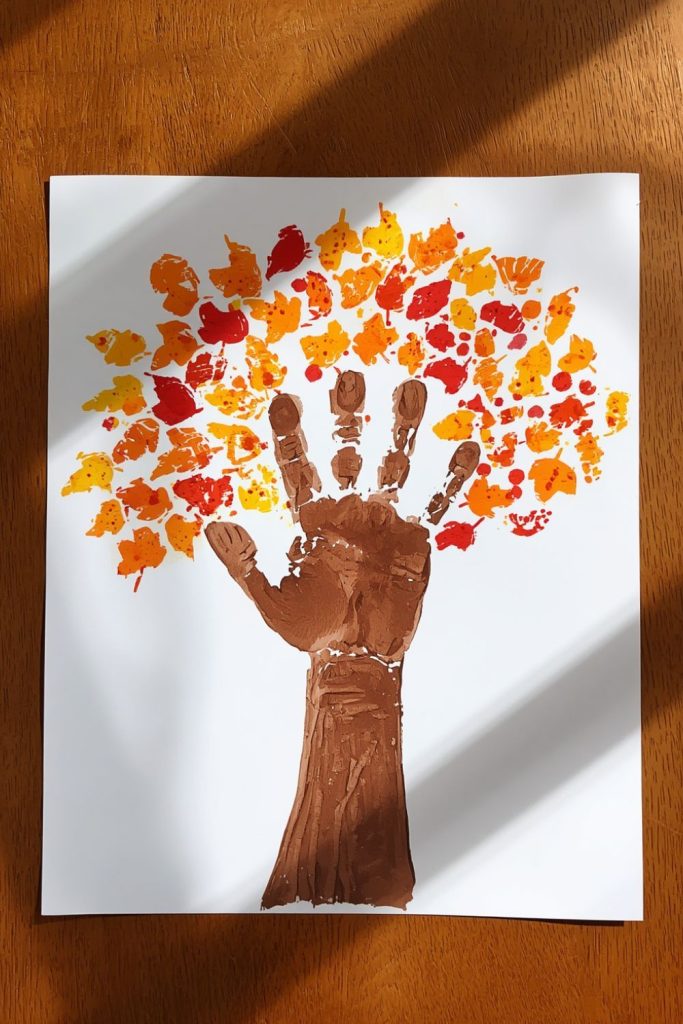
This activity turns a simple hand trace into a colorful seasonal tree scene using paint and little finger dots. It works well for toddlers who enjoy touching paint and seeing quick results on paper. Parents often find it becomes a keepsake piece too.
Step by step method:
- Place brown paint on the childs palm and press it onto white paper to form the tree trunk shape
- Use fingers dipped in red, orange, and yellow paint to add leaf prints around the top area
- Let the child repeat dotting patterns until the tree looks full and bright
- Add small ground dots to show fallen leaves if desired
- Allow it to dry fully before moving it, some smudges may appear but that adds charm
This activity may get a bit messy, so keeping wipes nearby helps a lot. Some toddlers may press too hard or mix colors into brown patches, which is fine since the final look still comes out warm and seasonal. It also supports hand strength and early color recognition, even if the paper ends up slightly wrinkled or uneven at the edges.
Leaf Rubbing Art Using Real Autumn Leaves Activity
This simple paper rubbing method uses real leaves collected from outside and brings out their hidden patterns. It is a calm activity that helps toddlers notice shapes and lines in nature. The results often surprise children when leaf veins appear like magic on paper.
Step by step method:
- Collect flat leaves of different shapes from outside, dry ones work better
- Place a leaf under a plain sheet of paper on a flat surface
- Rub crayons sideways over the paper until the leaf pattern appears
- Switch colors to show different leaves on the same page
- Repeat with several leaves to fill the page with prints
Toddlers may press too lightly at first so parents might guide hand pressure. Some leaves may move under the paper, causing uneven prints, which still creates interesting textures. The final page often looks like a patch of nature collected in one place. It also helps children notice differences in leaf edges, lines, and shapes while they play without needing paint or glue.
Coffee Filter Fall Leaves with Watercolor Markers Activity
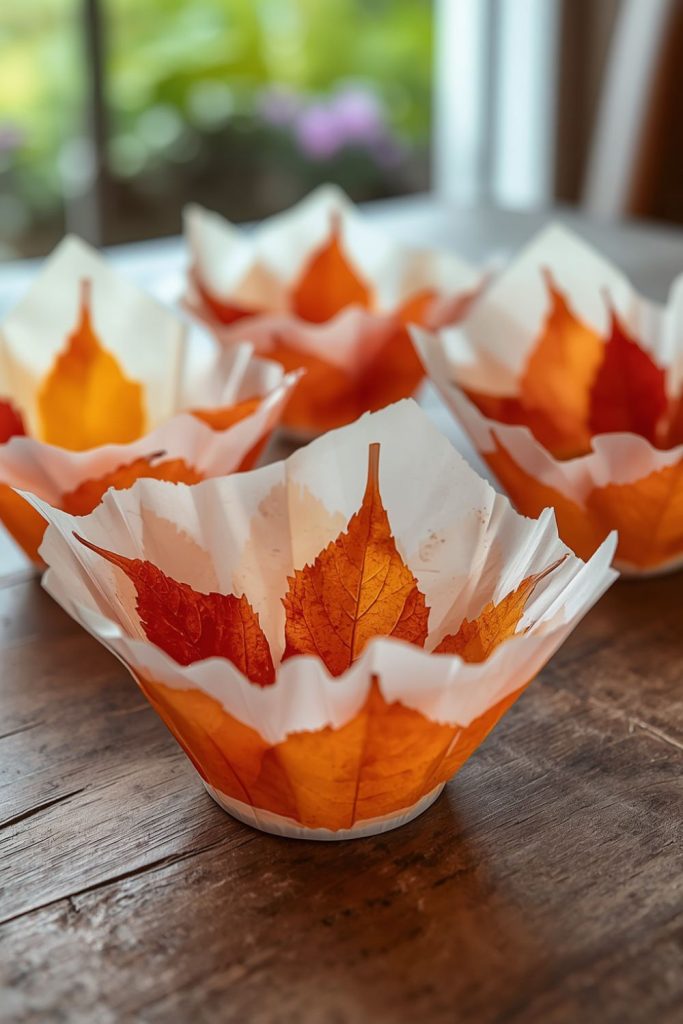
This colorful paper activity uses coffee filters and marker bleeding effects to create soft blended leaf shapes. It is visually bright and very easy for small children since there is no strict drawing needed. The surprise color spread is usually the most exciting part for toddlers.
Step by step method:
- Flatten coffee filters on a protected table surface
- Let the child draw random spots and lines using washable markers
- Lightly spray water over the filter or use a wet brush
- Watch colors spread and mix into soft patterns
- Let it dry and then shape it into leaf forms if desired
Some toddlers may over spray water which makes the filter tear slightly, but it still holds shape once dry. The blending of colors can create orange, red, and yellow tones that resemble autumn shades without much effort. Parents can cut leaf shapes later or simply hang the circles as window decorations. The process is often more fun than the final result since children enjoy seeing colors move.
- Related post Elementary Teachers’ Guide to Fall Door Decorations: Quick, Creative, and Budget-Friendly
Pumpkin Paper Plate Activity with Tissue Paper

This paper plate idea creates a bright pumpkin look using torn tissue pieces. It works well for toddlers who like sticking and pressing objects onto surfaces. The texture of tissue paper adds a soft layered look.
Step by step method:
- Draw or outline a pumpkin shape on a paper plate
- Tear orange tissue paper into small pieces
- Apply glue across the plate surface
- Let the child press tissue pieces until the shape is filled
- Add green paper for a stem at the top
Some toddlers may use too much glue causing paper to slide, but that can be fixed by gently pressing it down. The final piece often looks uneven but colorful and bold. This activity helps with finger control and patience while still keeping it fun and quick. It also allows children to explore tearing paper which supports grip strength development.
Apple Stamp Painting Using Fresh Apples Activity
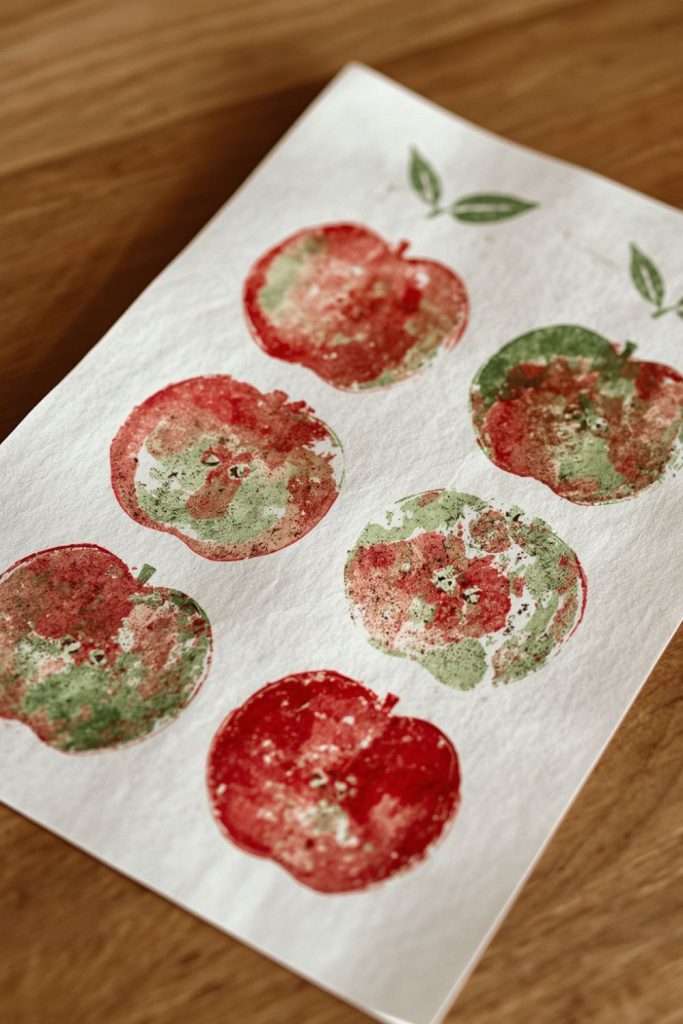
This activity uses cut apple halves dipped in paint to form simple prints that look like little stamps on paper. Toddlers usually enjoy the surprise shape that appears after each press, and the smell of apples adds a nice sensory touch to the activity. It works well for short attention spans since each stamp gives instant results.
Step by step method:
- Cut an apple in half and remove seeds
- Pour red, green, or yellow paint onto a plate
- Let the child dip the apple flat side into paint
- Press it onto paper and lift slowly to see the print
- Repeat to form patterns or scattered prints
Some toddlers may press too hard, causing paint to spread unevenly, but that still creates interesting marks. A few prints may look blurry, especially if too much paint is used, yet the page still turns out colorful. This activity also helps children notice fruit shapes and patterns while improving hand pressure control.
Pinecone Owl Activity with Felt Wings and Googly Eyes

This project uses pinecones as the base body and adds small decorations to form a cute owl figure. Toddlers enjoy picking pieces and sticking them onto rough surfaces, which makes pinecones a good natural base. The final result has a playful forest feel.
Step by step method:
- Collect a dry pinecone and place it upright
- Glue small googly eyes near the top
- Cut felt or paper into wing shapes
- Attach wings to both sides of the pinecone
- Add small paper beak in the center
Some pinecones may wobble while decorating, which can be a bit tricky for small hands, but holding them steady helps. Glue may take time to set so pieces might shift slightly during drying. The uneven placement often adds charm and personality to each owl.
Pinecone Turkey Activity with Colorful Craft Feathers
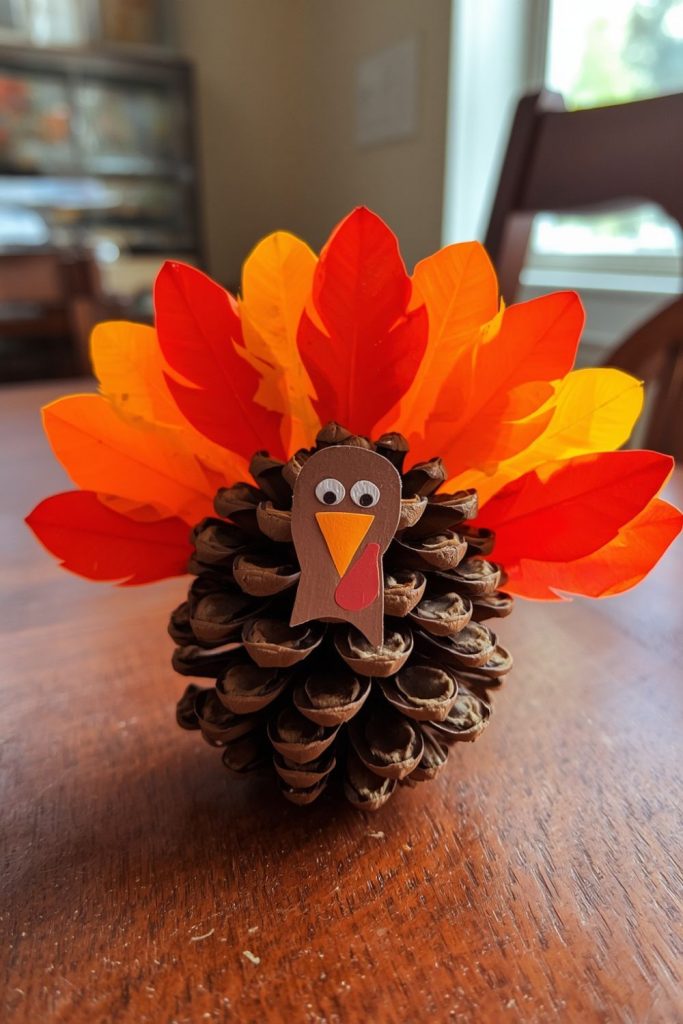
This activity turns a pinecone into a small turkey figure using bright feathers and simple paper pieces. It is especially popular around seasonal celebrations since the colors stand out strongly against the brown base. Toddlers enjoy choosing feather colors and sticking them in place.
Step by step method:
- Take a clean pinecone and lay it flat
- Insert or glue colorful feathers into the back side
- Cut a small circle for the turkey face
- Add eyes and a small triangle beak
- Attach face to front of pinecone
Some feathers may fall out if glue is not strong enough, so a bit of patience is needed while drying. Children may also mix colors randomly, which still looks bright and cheerful. The texture difference between soft feathers and rough pinecone keeps toddlers interested.
Popsicle Stick Scarecrow Activity with Raffia Hair
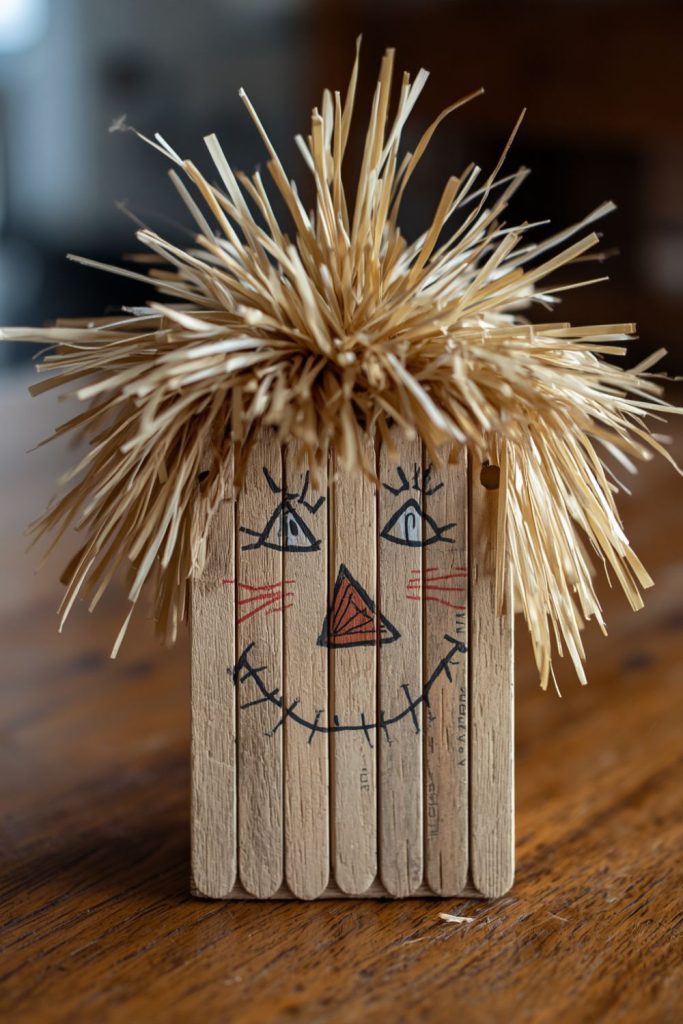
This project uses sticks to form a simple scarecrow face and body. It is easy to assemble and allows toddlers to place pieces in basic shapes. Raffia or paper strips give it a straw like look.
Step by step method:
- Arrange popsicle sticks in a square or cross shape
- Glue sticks together to form a base
- Draw or stick a face onto the top area
- Attach raffia or paper strips as hair
- Add small clothing details using scraps of paper
Sometimes sticks may shift before glue dries, which can make the shape uneven, but that is fine once it sets. Toddlers may enjoy rearranging pieces before final placement, which adds a playful step to the process. The finished piece often looks rustic and friendly.
Paper Plate Fox Activity with Fluffy Tissue Tail
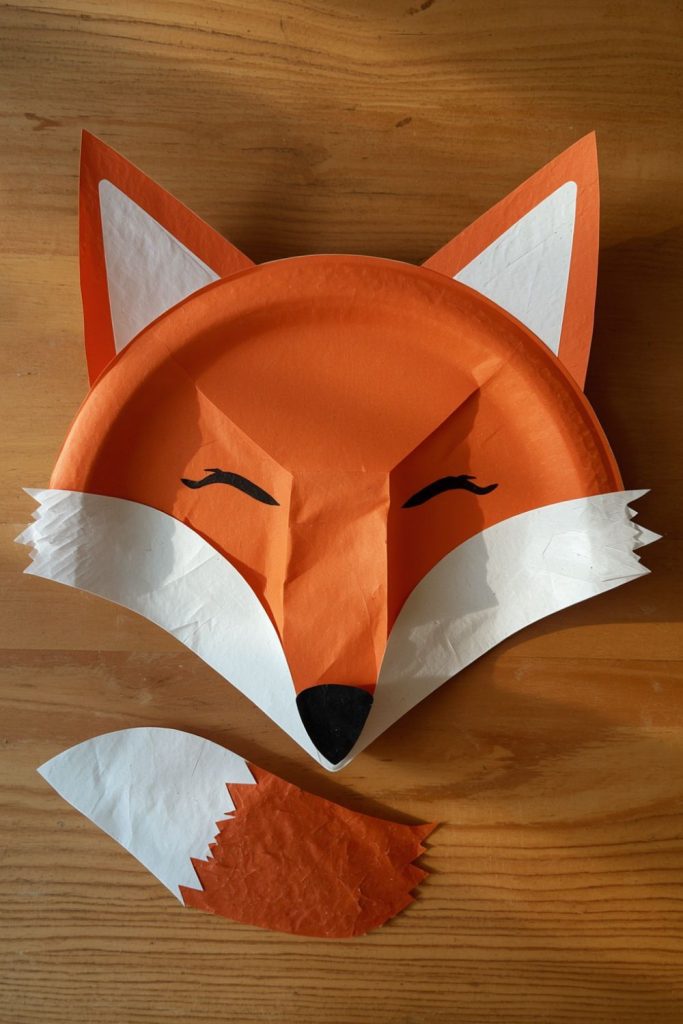
This paper plate idea creates a fox face using simple cutting and layering techniques. The fluffy tail made from tissue paper gives it a soft textured finish that stands out visually. Toddlers enjoy seeing animal faces come together from flat materials.
Step by step method:
- Paint or color a paper plate orange
- Cut triangle ears from orange paper
- Attach ears to the top of the plate
- Add eyes and a small nose using paper or markers
- Create a tail using crumpled tissue paper and attach it
Some toddlers may place facial parts unevenly, which gives each fox a different expression. Glue marks may show slightly but do not affect the final look. The mix of smooth plate and fluffy tail keeps the activity visually interesting.
Construction Paper Hedgehog with Real Leaf Spikes Activity
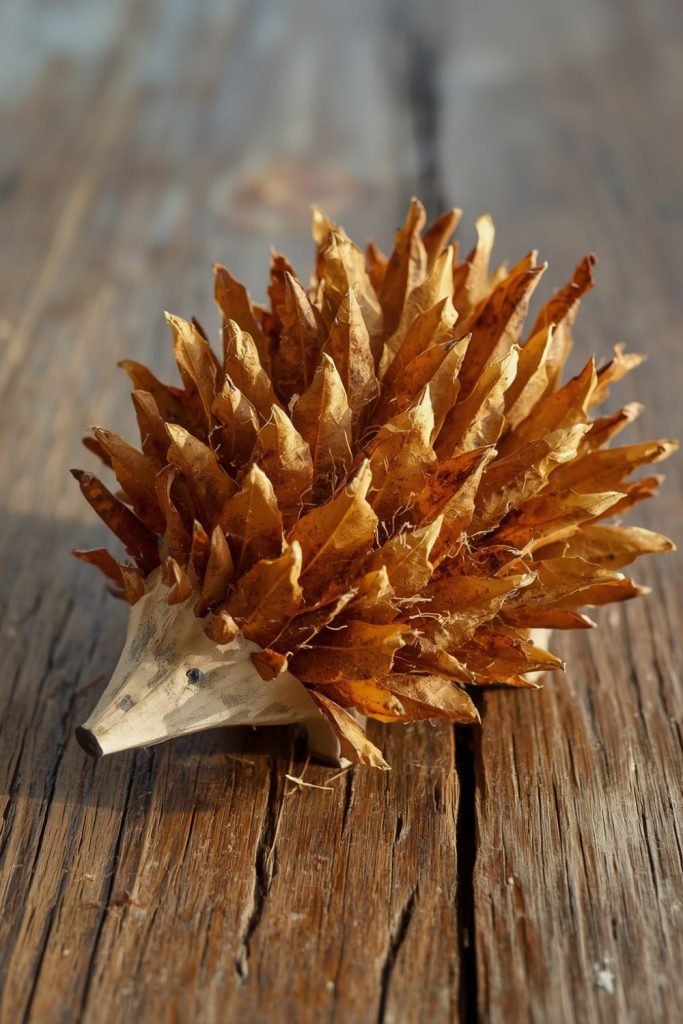
This activity builds a small hedgehog using paper shapes and real leaves for the back texture. Toddlers usually enjoy placing leaves one by one, almost like building spikes on a soft animal shape. The contrast between drawn face and natural leaves gives a strong visual result.
Step by step method:
- Cut a simple hedgehog body shape from brown paper
- Draw or stick eyes and a small nose on the front
- Collect small dry leaves from outside
- Glue leaves along the back of the hedgehog shape
- Press gently and let it dry on a flat surface
Some leaves may curl or overlap in uneven ways, which still looks nice and natural. A few pieces may fall off if glue is too light, so pressing them firmly helps. Toddlers often place leaves randomly, creating different spike patterns each time. The mix of natural texture and paper makes the final look interesting and seasonal.
Contact Paper Nature Suncatcher with Leaves and Petals Activity
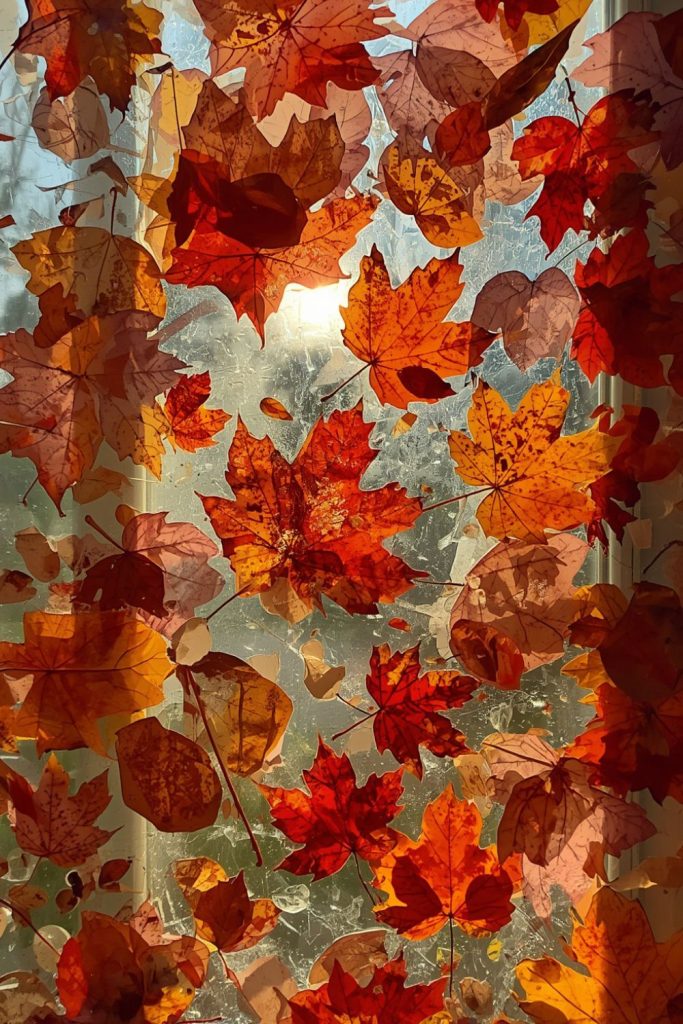
This activity uses sticky contact paper to hold leaves and petals in place, creating a bright window decoration. Light passing through makes colors glow softly, which catches a child’s attention quickly. It is a calm, hands-on activity with simple steps.
Step by step method:
- Cut two matching sheets of clear contact paper
- Peel one side and place it sticky side up
- Let the child place leaves, petals, or grass pieces
- Cover with second sheet to seal everything inside
- Stick it on a window using tape
Some pieces may slide before sealing, so adjusting them gently helps. Toddlers may overlap items heavily, which still creates a layered look when sunlight passes through. The final result changes throughout the day as light shifts, giving a soft glowing effect on the window.
Bubble Wrap Pumpkin Printing for Textured Art Activity
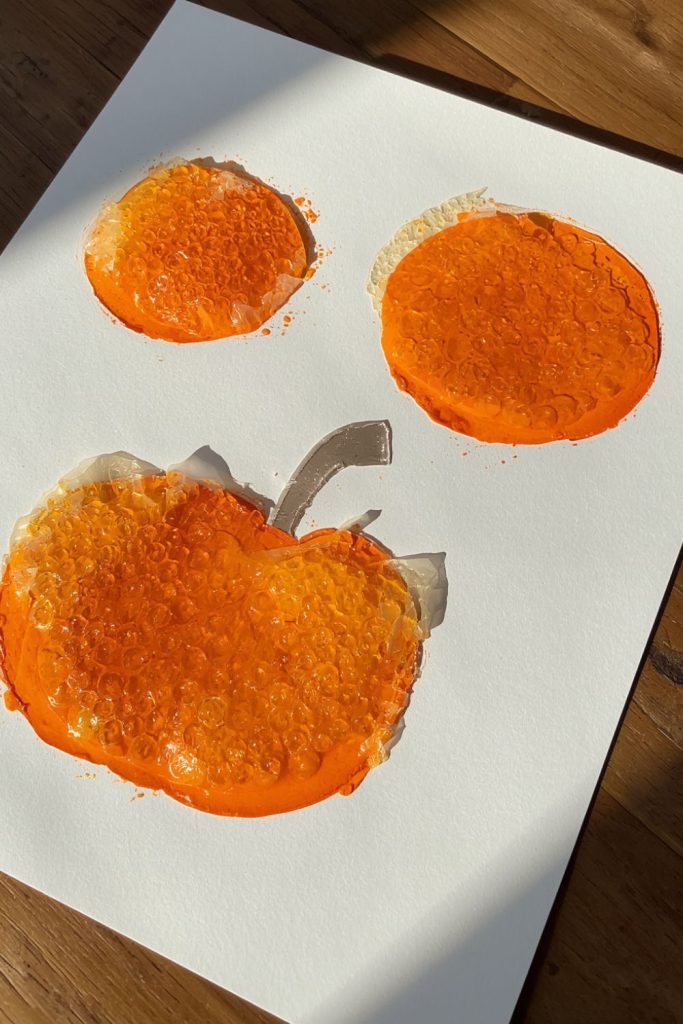
This activity uses bubble wrap to create a stamped pumpkin texture on paper. The popping surface makes printing fun before even painting begins, which keeps toddlers interested. The final pattern looks bumpy and bold.
Step by step method:
- Wrap bubble wrap around a small block or roll
- Dip the bubble side into orange paint
- Press onto white paper to form pumpkin shapes
- Repeat to build multiple prints
- Add green stem details using paint or marker
Some prints may come out uneven if pressure changes, but that adds variety. Toddlers may press too hard and flatten the bubbles, which still works for stamping. The texture effect is the main highlight and gives each pumpkin a unique look.
Pumpkin Seed Mosaic Art with Dyed Seeds Activity
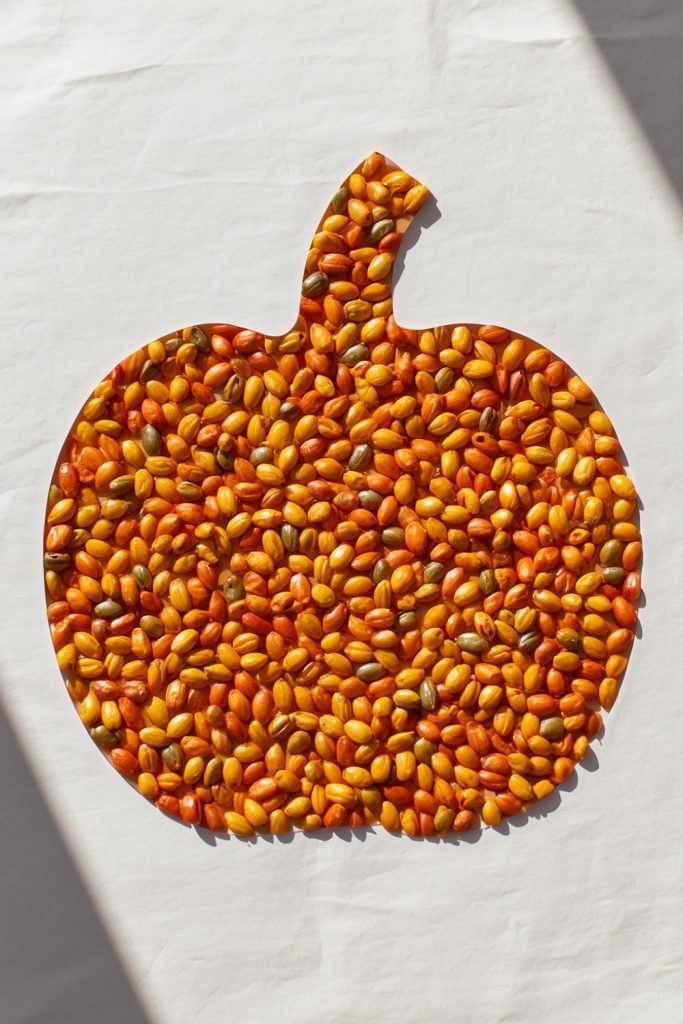
This activity uses pumpkin seeds that are dyed in different colors to form small mosaic patterns. It requires a bit of preparation but gives a bright finished look that feels textured and detailed. Toddlers enjoy placing small pieces in simple patterns.
Step by step method:
- Dye pumpkin seeds in orange, yellow, and green shades
- Let seeds dry completely before use
- Draw a pumpkin outline on paper
- Apply glue inside the shape area
- Let the child place seeds inside the outline
Some seeds may shift or overlap, which is expected with small pieces. Glue may stick to fingers, causing slow placement, but that is part of the process. The final result looks colorful and slightly raised, adding texture to the paper.
Paper Strip Woven Pumpkin Activity
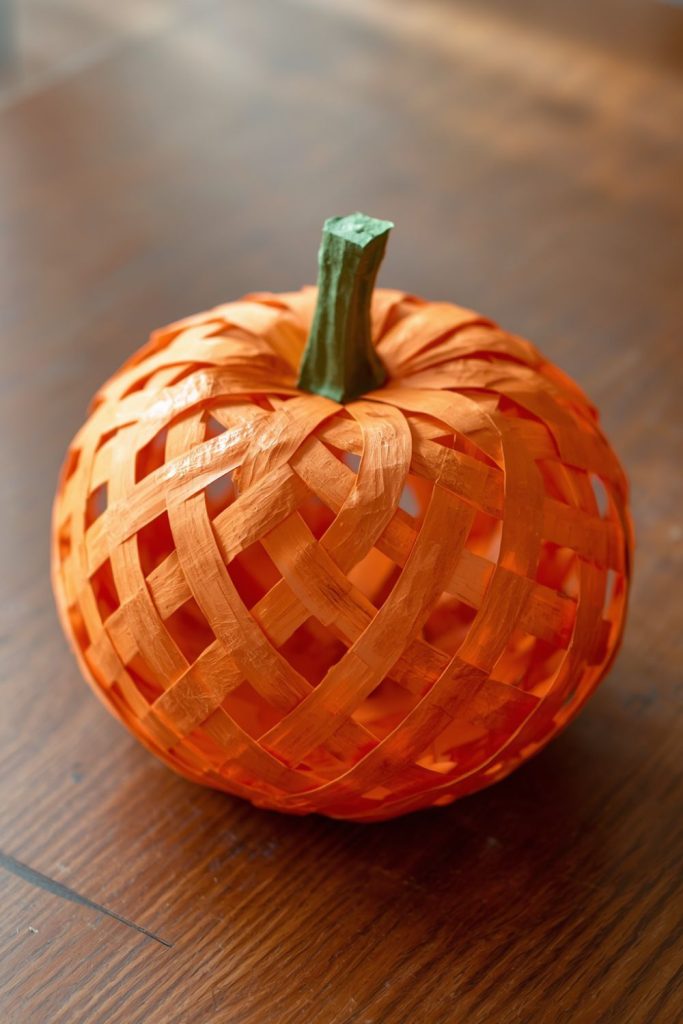
This activity uses weaving strips of paper to form a pumpkin shape. It helps toddlers practice simple hand movements while building a patterned surface. The finished look shows crisscross lines that resemble pumpkin ridges.
Step by step method:
- Cut orange paper into long strips
- Cut slits in another paper base shaped like a pumpkin
- Weave strips over and under through the slits
- Trim extra ends if needed
- Add a green stem at the top
Some strips may come loose or not align perfectly, which is fine for a toddler level activity. Younger children may need help with weaving motion. The slightly uneven pattern still creates a nice handmade look.
Q-Tip Painted Autumn Tree Activity
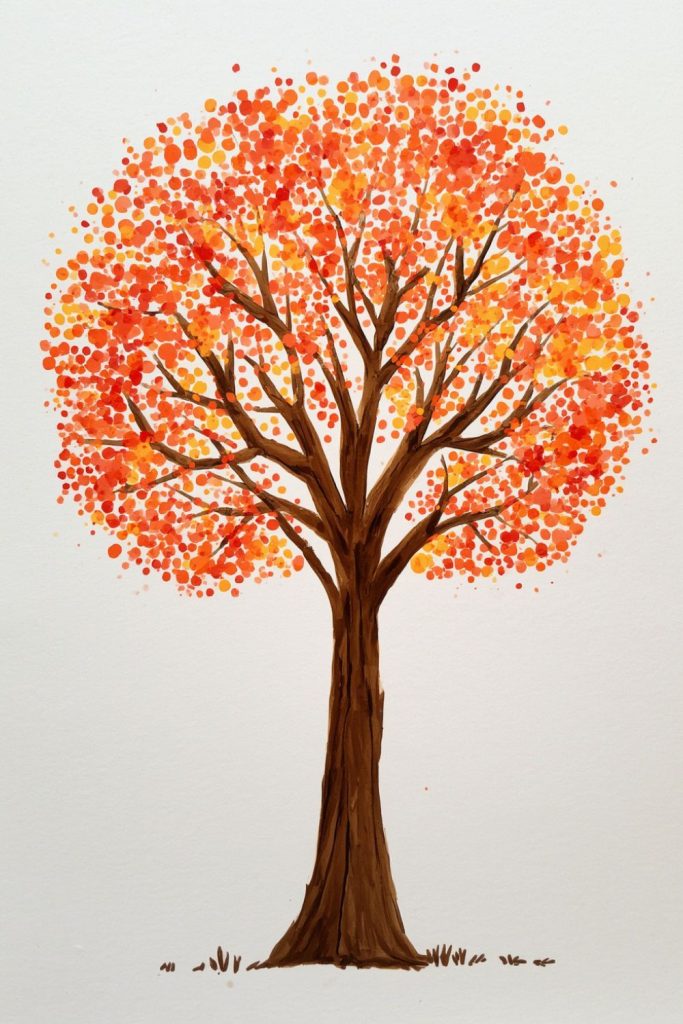
This activity uses cotton swabs instead of brushes, giving a dotted paint effect that forms colorful leaf clusters. Toddlers enjoy tapping the swabs into paint and stamping small spots on paper. The result looks like a tree filled with tiny bright leaves.
Step by step method:
- Draw a simple tree trunk using brown paint or marker
- Dip cotton swabs into red, yellow, and orange paint
- Tap dots around the top branches
- Mix colors to fill empty spaces
- Let the paper dry flat
Some toddlers may press too hard, creating larger blobs instead of dots, but that still works visually. Paint may mix into muddy shades in some areas, which is normal. The dotted texture gives a soft, leafy look without needing detailed drawing skills.
Salt Dough Leaf Impressions Painted in Fall Colors Activity
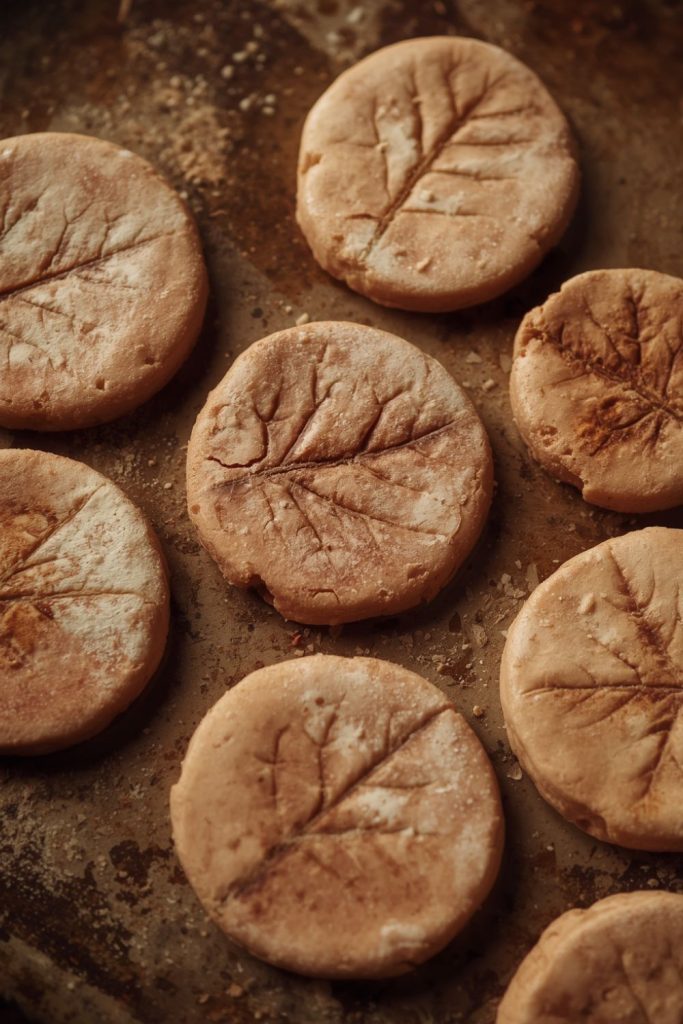
This activity uses simple dough made at home to press real leaves into soft shapes. After drying, the impressions are painted in warm shades. It takes more time than other activities, but the final pieces feel solid and keepsake worthy.
Step by step method:
- Mix flour, salt, and water to form dough
- Roll dough flat into small circles
- Press real leaves onto the surface
- Lift leaves gently to reveal patterns
- Bake or air dry until hardened, then paint
Some impressions may come out faint if leaves are too dry or pressure is light. Cracks may appear after drying, which adds a rustic texture. Toddlers enjoy pressing leaves even if results vary each time.
Torn Paper Candy Corn Collage Activity
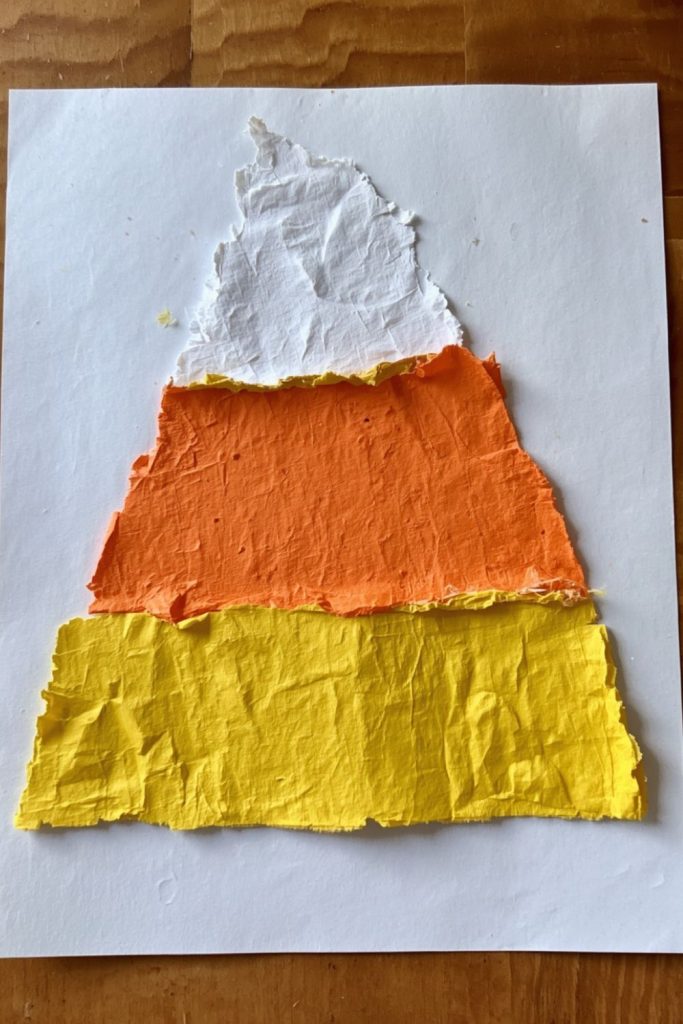
This activity uses ripped paper pieces to form a candy corn shape. It helps toddlers practice tearing and placing paper while learning color order. The bright contrast of colors makes the final piece eye catching.
Step by step method:
- Draw a large candy corn outline on paper
- Tear yellow, orange, and white paper into small bits
- Apply glue inside sections
- Fill bottom with yellow, middle with orange, top with white
- Press gently to flatten pieces
Some paper pieces may overlap outside the outline, which still looks fun. Glue may make fingers sticky, so wiping hands helps during the process. The rough texture gives a handmade look that children enjoy seeing.
Brown Paper Bag Scarecrow Puppet Activity
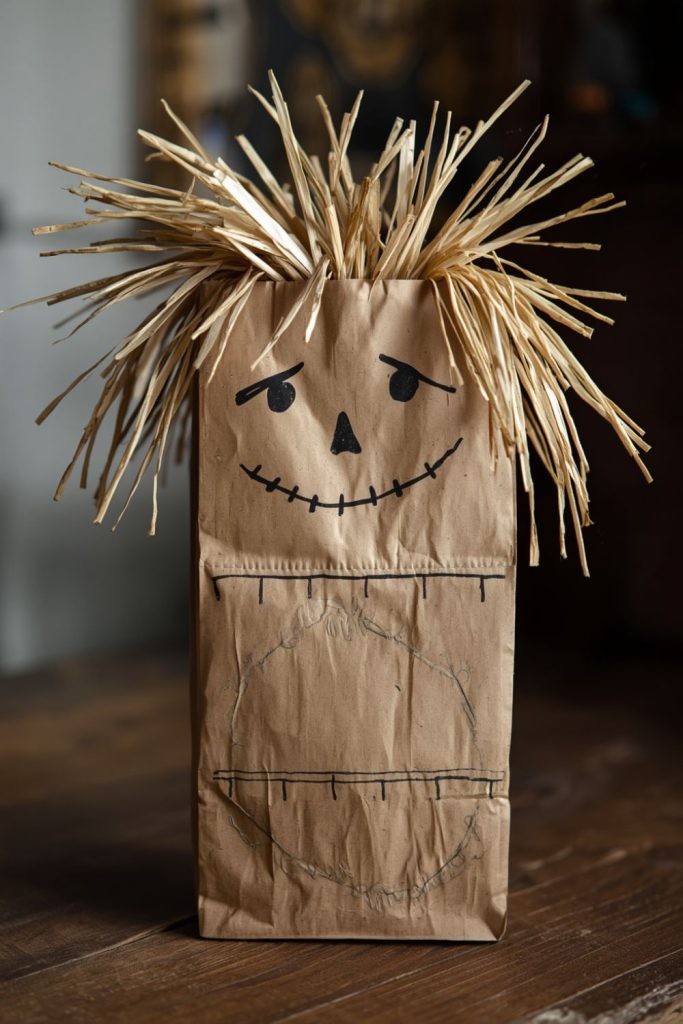
This activity turns a simple paper bag into a moving puppet face. Toddlers enjoy opening and closing the bag while seeing the character come alive. It also works well for pretend play afterward.
Step by step method:
- Take a brown paper bag and lay it flat
- Draw or stick a face on the bottom flap
- Add straw like paper strips for hair
- Draw or attach clothing details on the bag body
- Let it dry before play
Some decorations may wrinkle when the bag moves, but that does not affect use. Glue may not hold evenly on all surfaces, so tape can help. The puppet becomes more fun once children start moving it.
Toilet Paper Roll Squirrel Holding an Acorn Activity
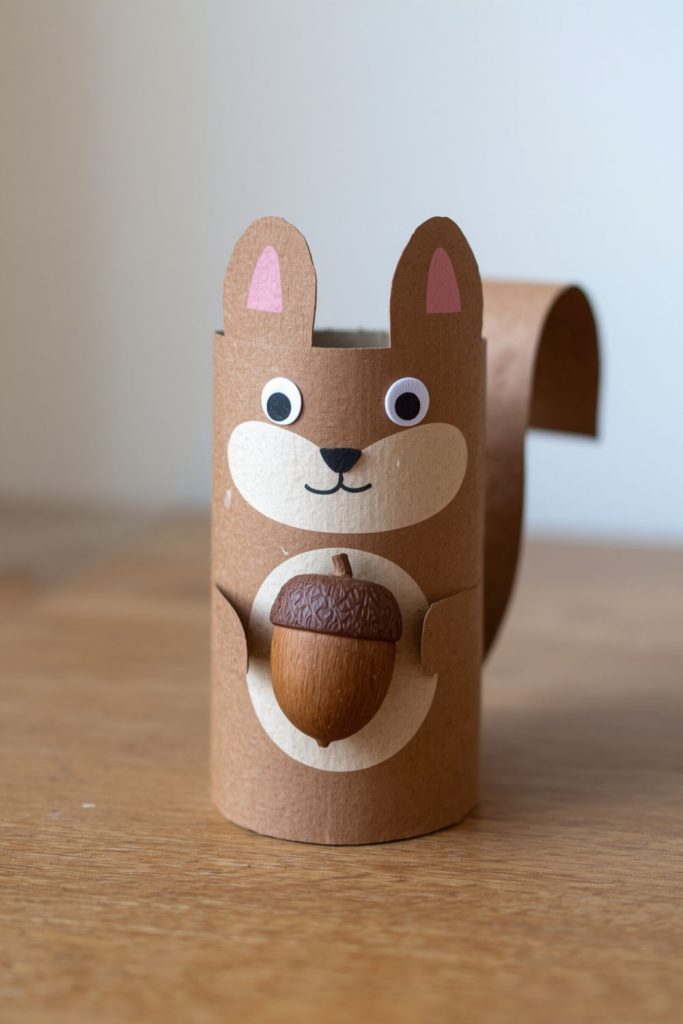
This activity uses a recycled tube to form a small squirrel figure holding a tiny acorn. Toddlers enjoy wrapping paper and sticking pieces around a round base. The shape is easy to hold and decorate.
Step by step method:
- Take a clean toilet paper roll
- Cover it with brown paper or paint
- Add ears, tail, and face using cut paper
- Create a small acorn from brown and tan paper
- Attach acorn to squirrel hands
Some parts may peel slightly if glue is light, but pressing helps them stick. The tail may not stay upright unless supported, which can be adjusted with thicker paper. The final figure looks playful and simple.
Button Pumpkin Mosaic on Cardstock Activity
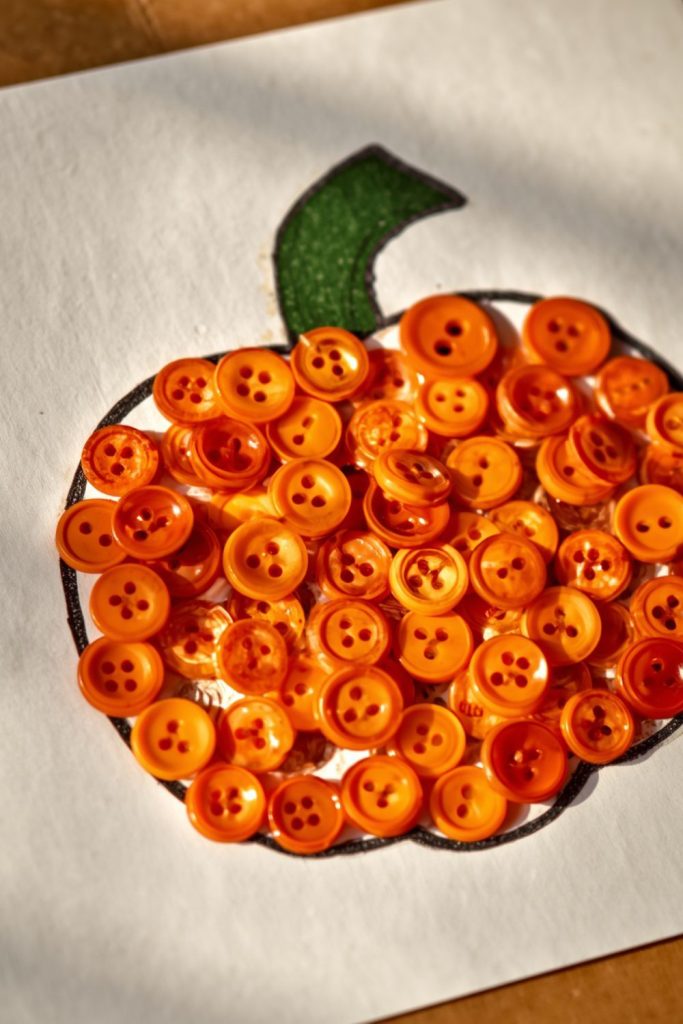
This activity uses buttons to form a pumpkin shape filled with color and texture. It is visually strong due to the round shapes and mixed shades. Adult supervision is needed since buttons are small pieces.
Step by step method:
- Draw a pumpkin outline on cardstock
- Apply glue inside the shape
- Place orange buttons within the outline
- Add green buttons or paper for stem
- Press and let dry completely
Some buttons may not align perfectly, which creates a layered look. Glue drying time may vary depending on thickness. This activity is better for older toddlers with supervision due to small parts.
Cotton Ball Pumpkin Painting Activity
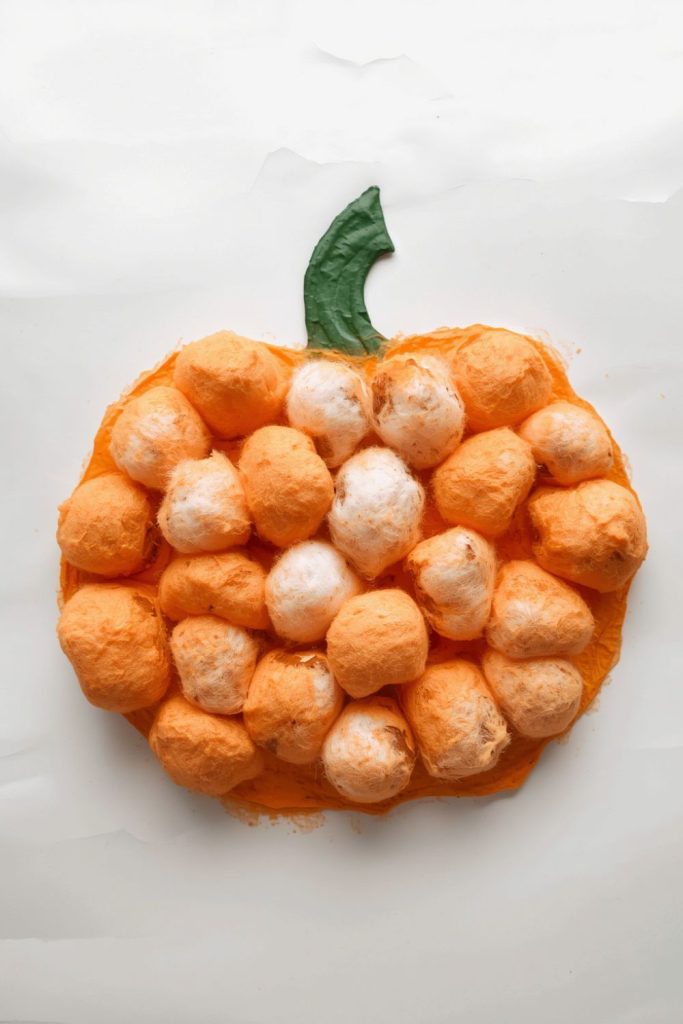
This activity uses cotton balls instead of brushes to dab paint onto paper. The soft texture creates a cloudy pumpkin look that toddlers enjoy pressing. It is quick and very sensory based.
Step by step method:
- Attach cotton ball to a clothespin or hold directly
- Dip into orange paint
- Dab onto paper to form pumpkin shape
- Add green paint for stem area
- Let it dry completely
Some dabs may spread unevenly, but that adds texture. Paint may soak into cotton quickly, so re dipping is needed often. The soft stamped look makes the pumpkin appear fluffy.
Fork Painted Hedgehog with Textured Spikes Activity
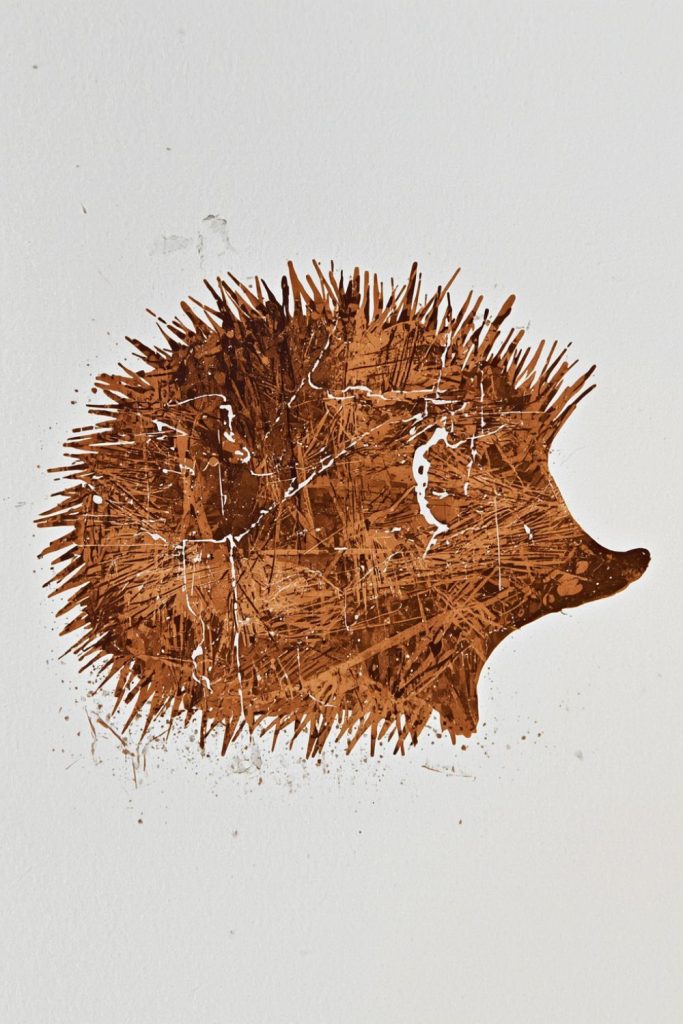
This activity uses a fork to create spike patterns for a hedgehog. It is fun for toddlers because the fork creates lines easily without much control needed. The result looks spiky and textured.
Step by step method:
- Draw a simple hedgehog body on paper
- Dip fork into brown paint
- Drag or press fork outward from body edge
- Repeat to form spike pattern
- Add face details with marker
Some strokes may go in different directions, which still works visually. Paint may splatter slightly depending on pressure. The textured spikes make the hedgehog look lively.
Paper Plate Sunflower with Real Sunflower Seeds Activity
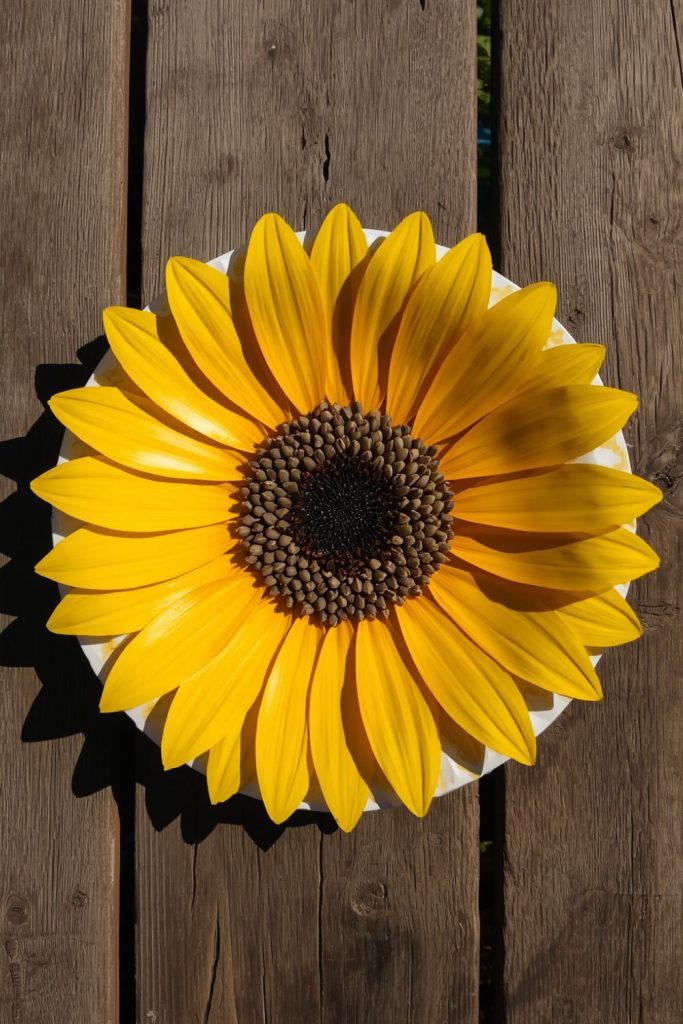
This activity uses sunflower seeds to decorate a bright paper flower. It connects natural seeds with colorful petals, making it visually strong. Toddlers enjoy placing seeds one by one.
Step by step method:
- Paint a paper plate yellow
- Cut petal shapes around edges
- Glue sunflower seeds in center circle
- Add brown paint or paper for center if needed
- Let it dry flat
Some seeds may fall if glue is weak, so pressing helps. The petals may bend slightly, which gives a soft natural shape. The contrast between bright yellow and dark seeds stands out strongly.
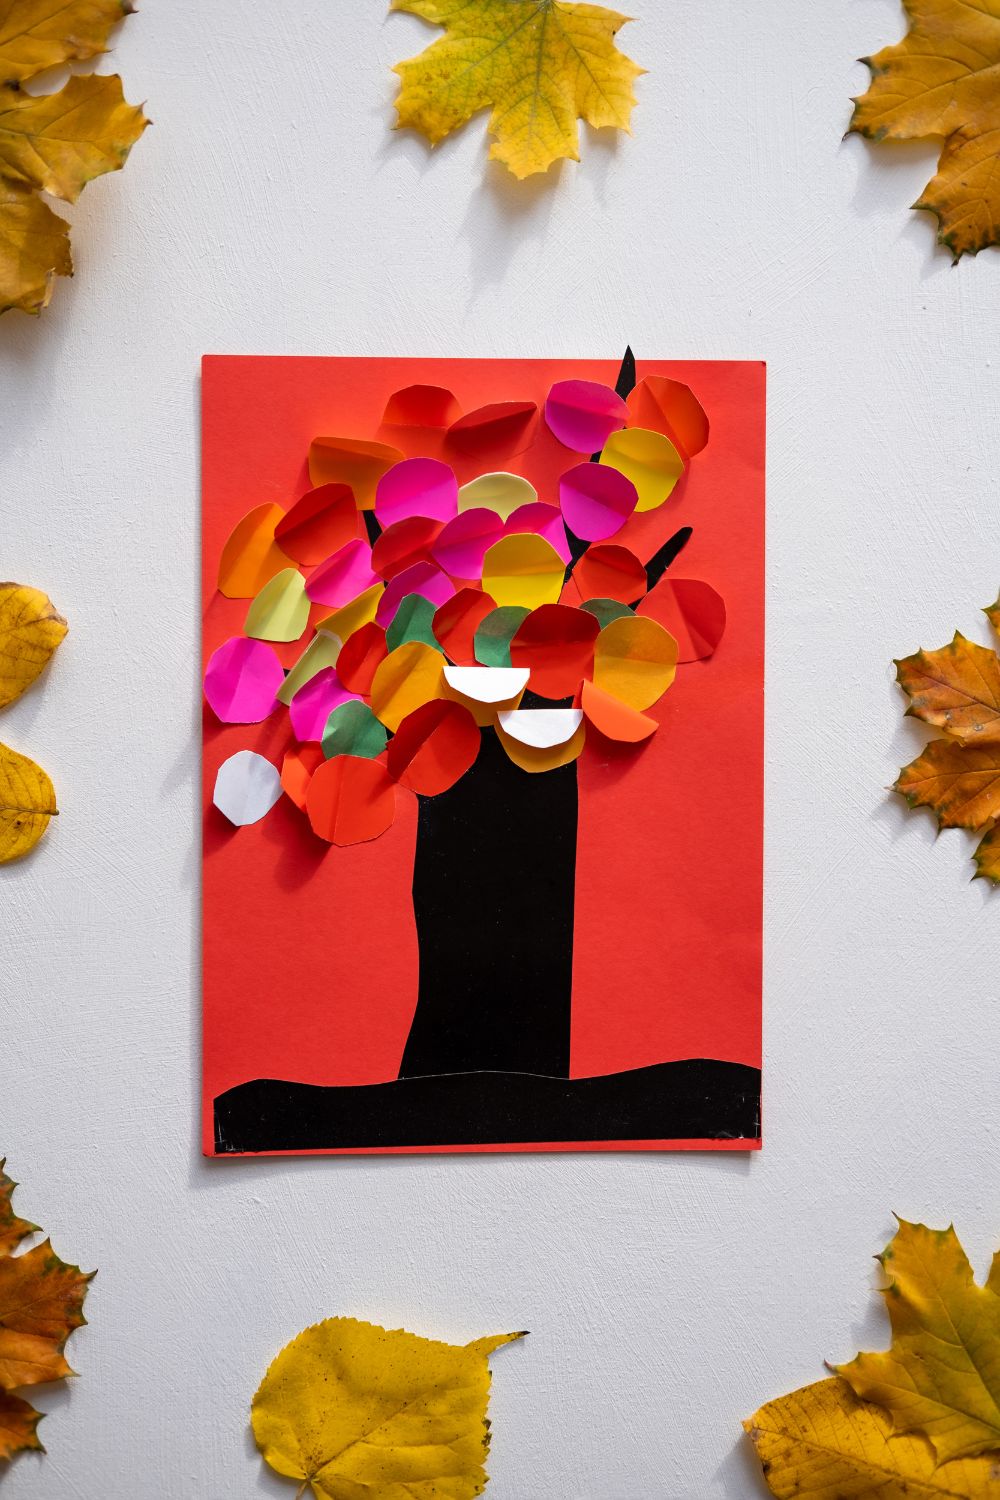
Autumn Handprint Wreath with Colorful Paper Leaves Activity
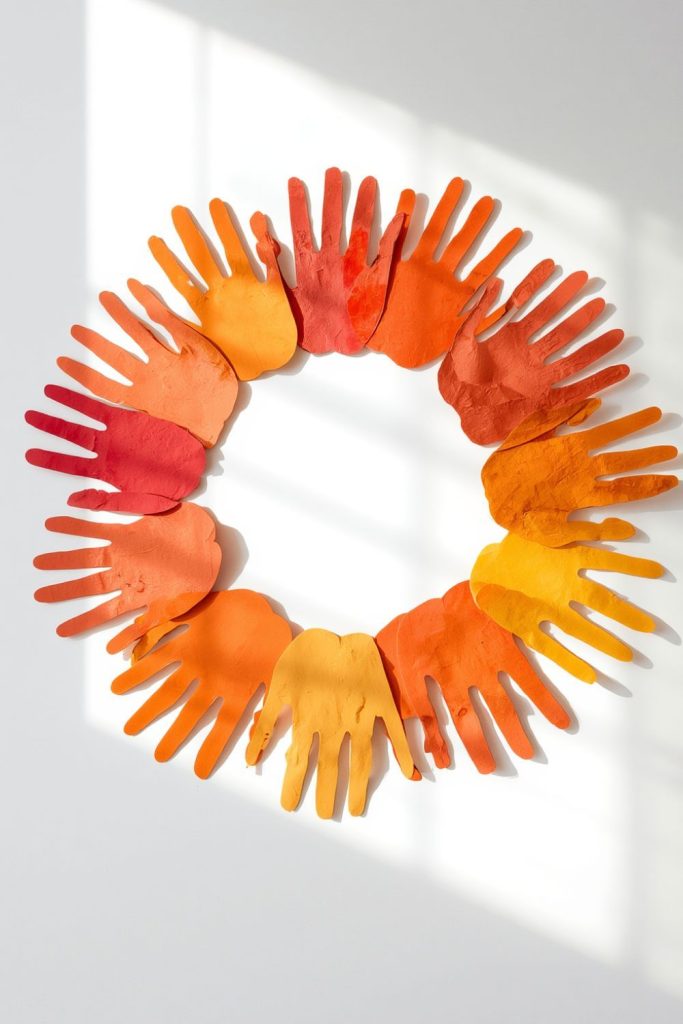
This activity uses handprints to form a circular wreath filled with paper leaves. It is often kept as a seasonal decoration because it records small hand shapes.
Step by step method:
- Trace or stamp child handprints on colored paper
- Cut out hand shapes
- Arrange them in a circle on a base
- Glue leaves around to fill gaps
- Add bow or decoration at top
Some handprints may overlap unevenly, which adds character. Glue may wrinkle paper slightly during placement. The final wreath looks full and colorful.
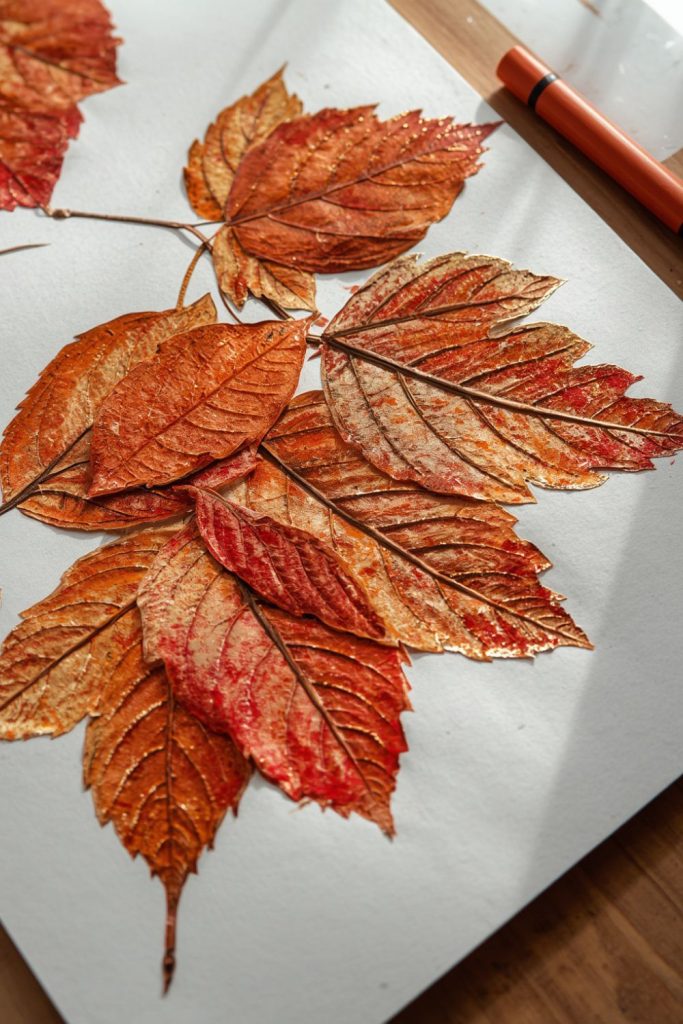
Leaf Printed Canvas Art Using Tempera Paint Activity
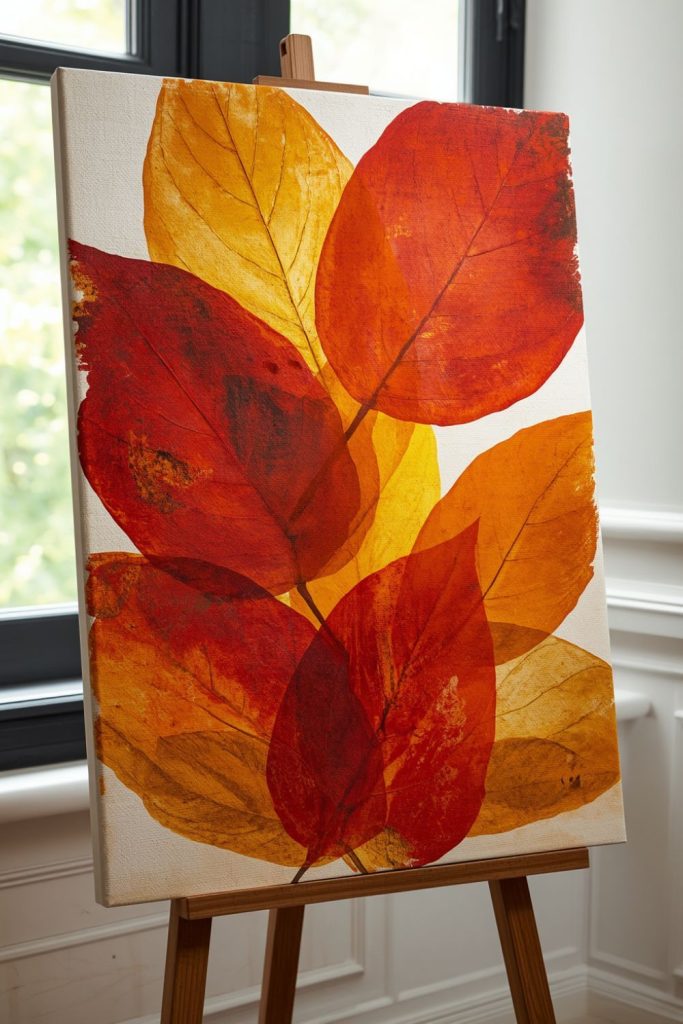
This activity uses real leaves dipped in paint and pressed onto canvas. It creates bold prints that show leaf veins clearly. Toddlers enjoy the stamping motion and color mixing.
Step by step method:
- Choose sturdy leaves with visible veins
- Dip leaf into paint evenly
- Press onto canvas surface
- Lift slowly to reveal print
- Repeat with different colors
Some prints may smudge if the leaf moves while lifting. Paint may mix on canvas edges, which still looks artistic. The layered prints create a natural pattern across the surface.