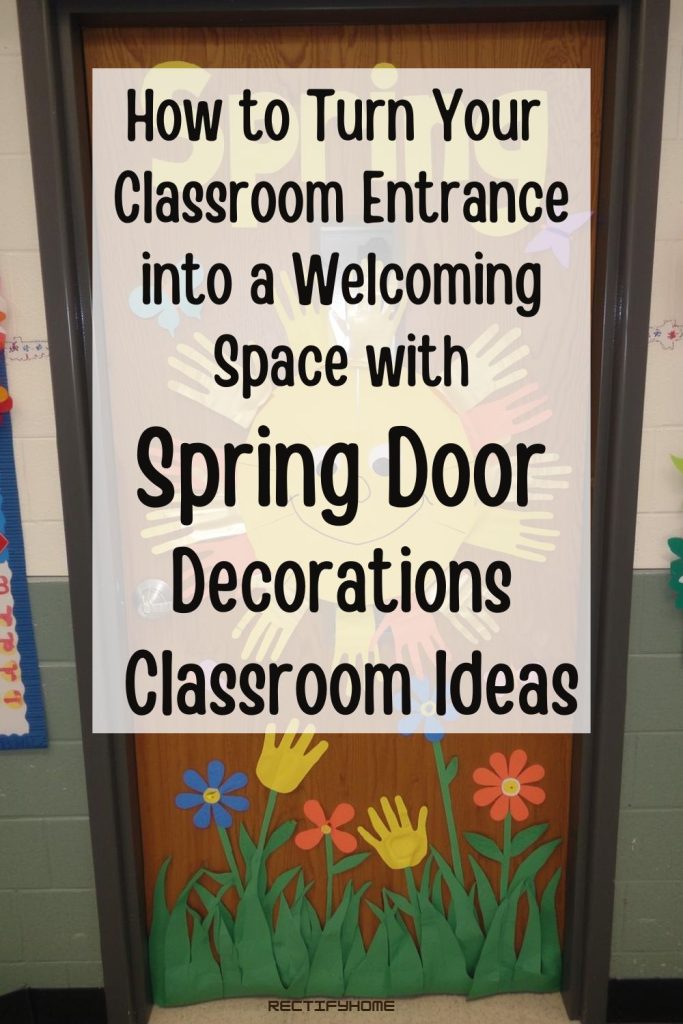
Spring is a magical time for classrooms, especially for young learners in kindergarten through third grade. One of the simplest yet most impactful ways to brighten a classroom is through spring door decorations classroom. A colorful, welcoming door sets the tone for the day, sparks excitement, and encourages students to step into a cheerful, inspiring space. With the right ideas, themes, and student involvement, your classroom entrance can become a vibrant reflection of springtime joy, growth, and learning. In this article, we’ll explore creative ideas, practical tips, and step-by-step instructions to help teachers create doors that are both visually striking and meaningful.
What are the most effective spring door decorations classroom ideas to make a classroom entrance feel warm and inviting for K–3 students?
The most effective spring door decorations classroom ideas combine visual appeal with playful, interactive elements that resonate with young learners.
For example, a smiling sun with rays made from student handprints in bright colors instantly brings warmth and a personal touch to the classroom. Another fun idea is a giant 3D tulip that pops out of the door, with each petal labeled with a student’s name.
For classrooms that want a magical feel, a “rainy day rainbow” with cascading glitter raindrops or a butterfly garden where each wing is painted by a different student can create excitement as students arrive each morning.
These designs aren’t just decorative—they connect to spring themes like growth, renewal, and teamwork, which are perfect for K–3 learners.
Even whimsical elements like a caterpillar transforming into a butterfly or a playful bunny hopping along a 3D flower meadow capture children’s imaginations while making the classroom inviting. The key is to choose decorations that combine bright colors, playful shapes, and a sense of motion, so the door feels lively and cheerful every day.
How can elementary teachers choose themes, colors, and designs for spring door decorations classroom projects that engage young learners?
Selecting the right theme, colors, and designs for spring door decorations classroom projects is essential for engagement.
Teachers should start by thinking about the elements of spring students find most exciting—flowers, rainbows, butterflies, animals, and sunshine. Bright, cheerful colors like yellows, pinks, purples, and blues naturally attract attention and lift moods.
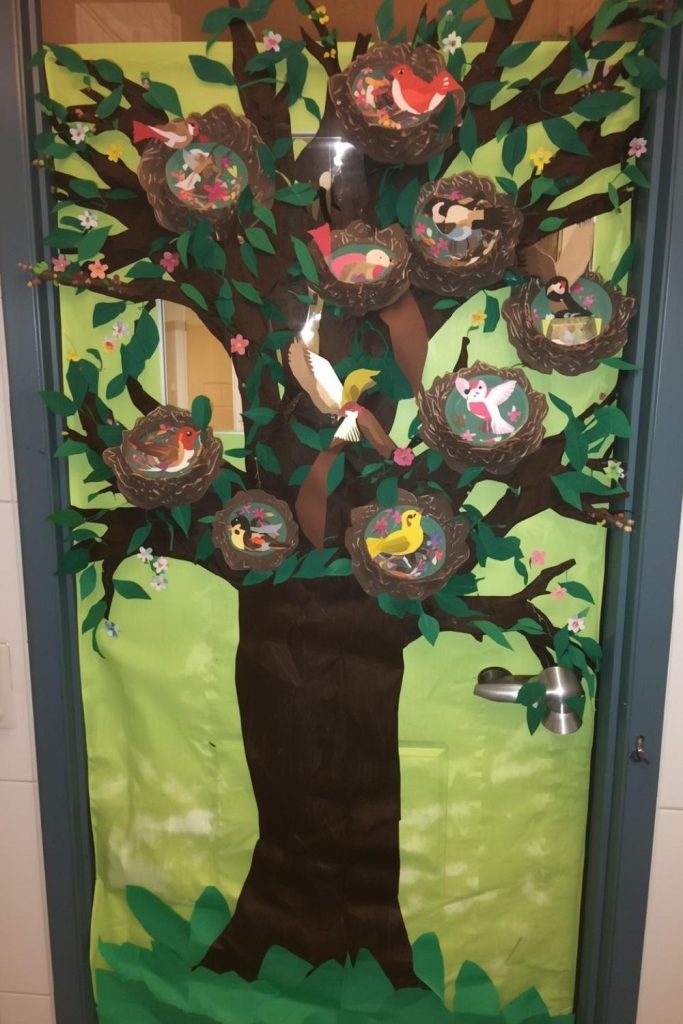
For themes, consider storytelling or seasonal scenes: a frog pond with layered lily pads and mid-jump frogs, a whimsical tree with 3D bird nests, or a magical hot air balloon floating over a paper flower field.
Student involvement can help determine design choices, too. Let children vote on the main elements or colors, or assign small groups to create different parts of a larger design.
Designs should also balance simplicity with impact. For instance, a pastel-colored rainbow made of layered tissue paper can be eye-catching yet simple to assemble, whereas a “flower explosion” with overlapping 3D flowers requires more effort but creates a striking visual centerpiece.
By focusing on seasonal relevance, student interest, and visual contrast, teachers can craft doors that feel cheerful, personal, and perfectly suited for a springtime classroom entrance.
What simple DIY techniques and budget-friendly materials work best for creating eye-catching spring door decorations classroom displays?
Creating memorable spring door decorations classroom doesn’t require expensive materials. Teachers can use craft paper, tissue paper, construction paper, cardstock, cotton balls, glitter, string, and recycled materials to create striking effects.
For a smiling sun with handprint rays, all you need is yellow and orange construction paper and scissors. Simply cut triangles for rays, trace students’ hands on paper, and attach them around a circular sun shape.
For a 3D tulip, use colored cardstock folded and glued into petal shapes, adding student names with markers.
Layering techniques make designs pop—tissue paper layers for rainbows, stacked paper for lily pads, or overlapping petals for a flower explosion create depth. Double-sided tape, glue dots, or mounting putty helps secure pieces without damaging doors.
Step-by-step planning matters: sketch your design, gather materials, cut shapes, assemble pieces, and attach interactive elements last (like handprints or student names). Simple, cost-effective strategies like these make it easy to transform a classroom door into a visually stunning, welcoming space while staying within budget and saving prep time.
How can teachers involve students in designing and decorating the classroom door to boost excitement and ownership?
Student participation is one of the best ways to make spring door decorations classroom feel personal and exciting.
Young learners love to contribute directly, and their involvement fosters pride and ownership. Begin by assigning small sections of a larger design to groups of students.
For example, one group can paint butterfly wings for a butterfly garden, another can color tulip petals, while a third assembles a 3D hot air balloon scene. Teachers can also use interactive elements: tracing student handprints for sun rays, having each child paint a raindrop in a rainy day rainbow, or letting students write messages or positive affirmations to hang from paper clouds.
Step-by-step, this works best when teachers pre-cut some basic shapes for younger students and supervise gluing and assembly. The process not only results in a beautiful door but also encourages teamwork, fine motor skill practice, and pride in a shared project. When students arrive each morning and see their contributions on display, it boosts morale and strengthens the sense of classroom community.
What tips help teachers maintain and refresh spring door decorations classroom displays so they stay inspiring throughout the season?
Even the most vibrant spring door decorations classroom can lose their appeal if they aren’t maintained. To keep designs fresh, teachers can rotate elements weekly or biweekly. For instance, a “butterfly window” can feature different colored butterflies each week, or a field of tulips can be refreshed by swapping student-painted stems. Laminating pieces like raindrops, paper bees, or butterfly wings helps prevent tearing and keeps colors bright.
If 3D elements start drooping, reattach them with double-sided tape or glue dots. Adding interactive touches—like new handprints for a sun or additional flowers to a garden path—helps maintain excitement throughout the season. Seasonal decorations can also reflect classroom lessons: incorporate vocabulary words, counting activities, or positive messages into raindrops or petals. By planning ahead and keeping spare materials on hand, teachers can continually adjust and refresh decorations, ensuring that the classroom entrance remains welcoming, engaging, and a bright reflection of spring energy from the first day to the last.
1. Smiling Sun with Handprint Rays
Bring instant warmth and personality to your classroom door with a cheerful sun. Using student handprints as rays adds a playful, personal touch that makes every student feel included. This design creates a welcoming atmosphere while celebrating spring.
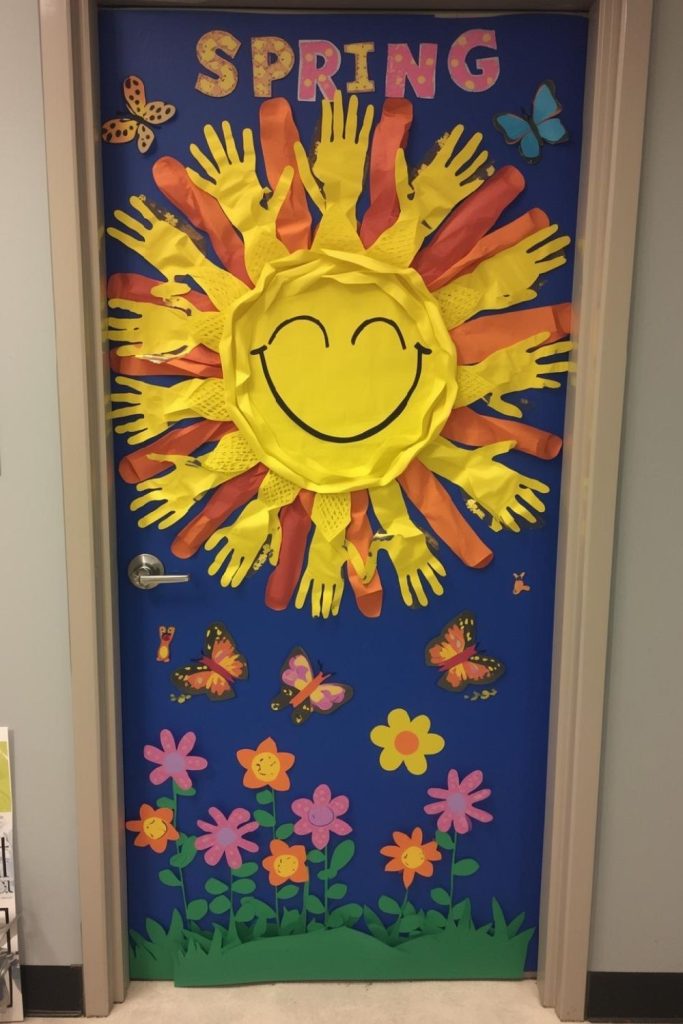
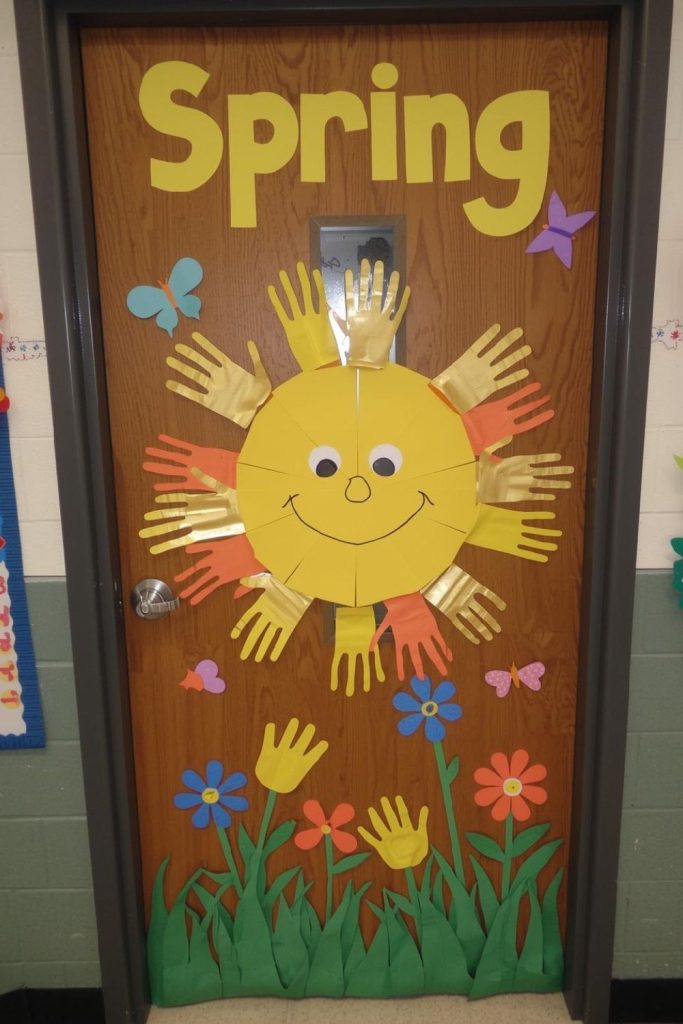
Materials needed: Yellow and orange construction paper, scissors, glue, markers, tape.
Step-by-step method:
- Cut a large yellow circle for the sun’s center.
- Trace each student’s hand on orange and yellow paper and cut them out.
- Arrange the handprints around the circle to form sun rays and glue or tape in place.
- Draw a happy face on the sun with markers.
- Mount the finished sun on the classroom door.
2. Giant 3D Tulip with Student Names
A giant tulip popping out of the door instantly draws attention and creates a playful spring vibe. Adding student names to the petals gives everyone a sense of ownership and pride.
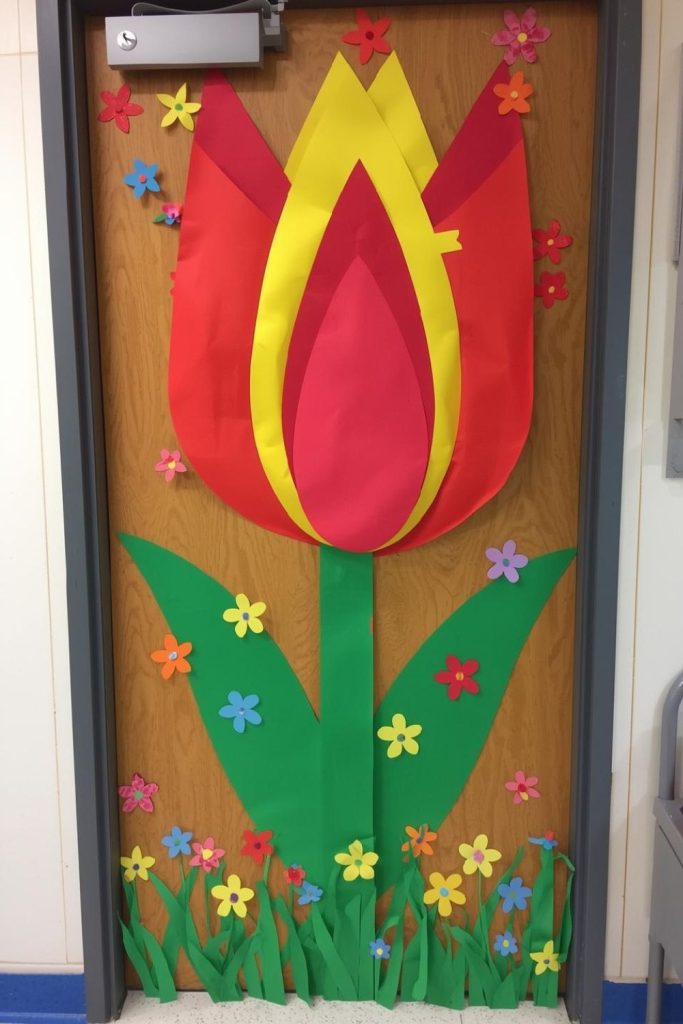
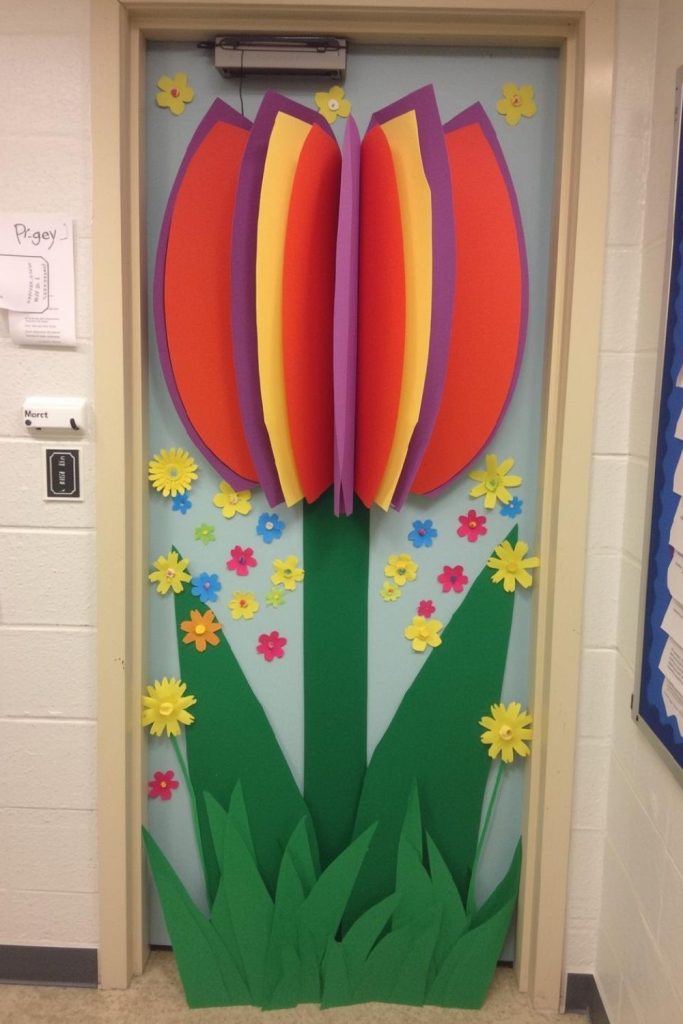
Materials needed: Colored cardstock, scissors, glue, markers, tape.
Step-by-step method:
- Cut three large petal shapes from colored cardstock.
- Fold the petals slightly to create a 3D effect.
- Write each student’s name on a petal.
- Glue the petals together at the base to form a tulip.
- Attach the tulip to the classroom door.
3. “Rainy Day Rainbow” with Glitter Raindrops
A rainbow with cascading raindrops brightens the door even on dreary spring days. Glittery raindrops add sparkle and movement, capturing children’s attention immediately.
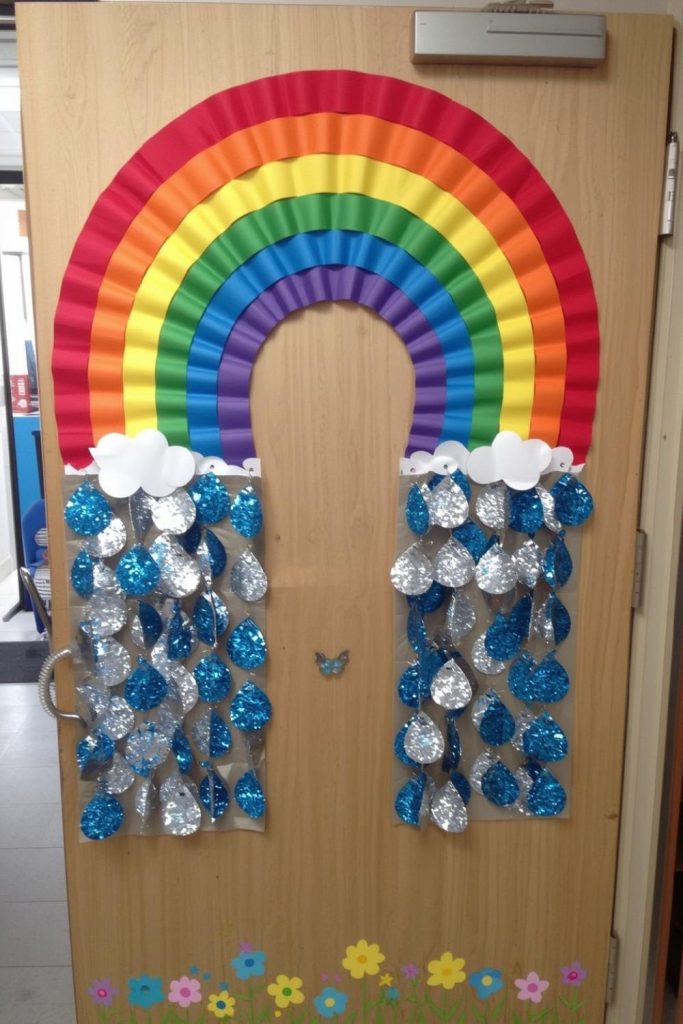
Materials needed: Colored tissue paper or construction paper, scissors, glue, glitter, string, tape.
Step-by-step method:
- Cut strips of tissue paper in rainbow colors.
- Layer the strips in a semi-circle on the door to form the rainbow.
- Cut small raindrop shapes from paper and sprinkle glue and glitter on them.
- Hang the raindrops from the top of the rainbow using string.
- Adjust spacing so they appear to cascade naturally.
4. Butterfly Garden
A butterfly garden lets students explore creativity by designing their own wings. Each wing represents a student’s unique contribution while adding a colorful, lively touch to the door.
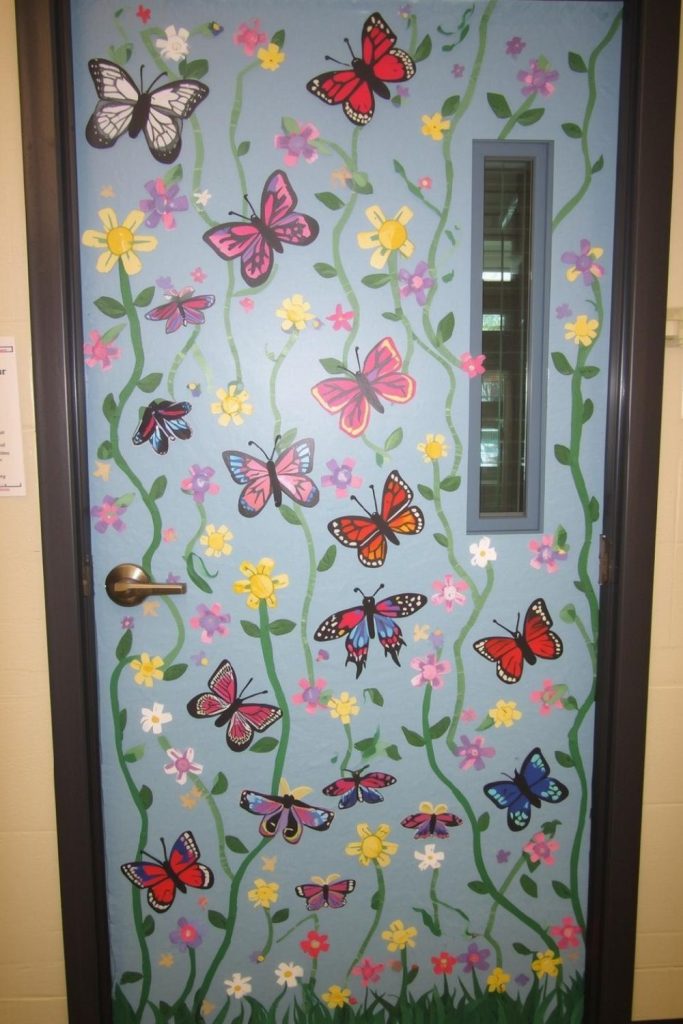
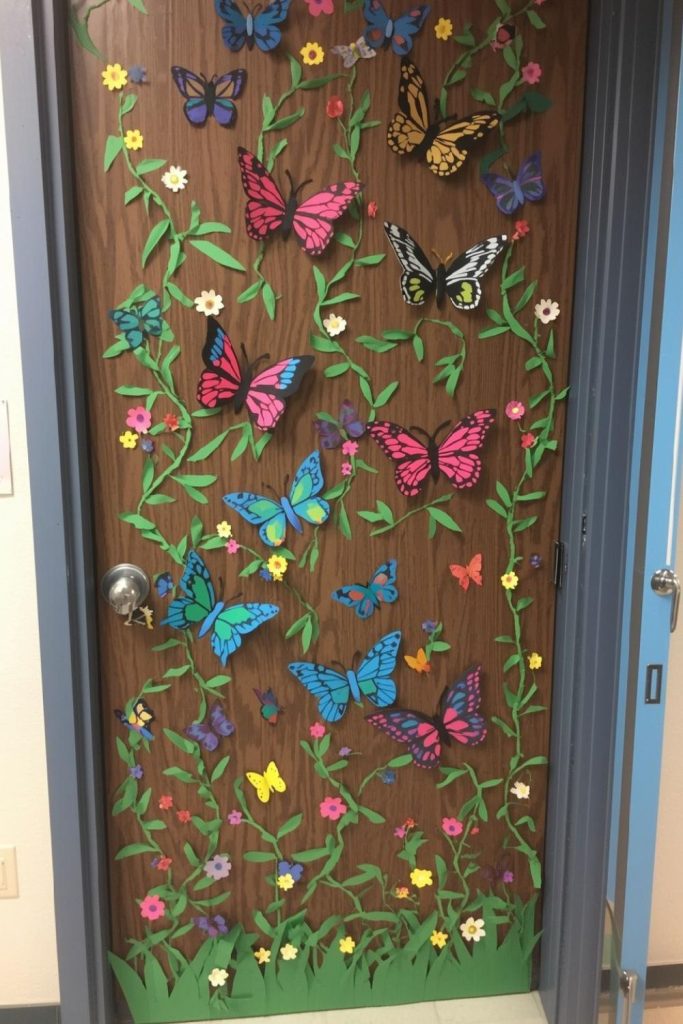
Materials needed: Watercolor paper or cardstock, markers, scissors, glue, tape.
Step-by-step method:
- Cut butterfly wing shapes for each student.
- Have students decorate their wings with colors, patterns, or glitter.
- Attach the wings to a central butterfly body or directly on the door.
- Layer wings to create a 3D garden effect.
- Add flowers or small insects around for extra detail.
5. Whimsical Tree with Bird Nests
A tree with 3D bird nests adds playful depth to the door and gives a springtime forest vibe. Students love spotting hidden birds and nests among the branches.
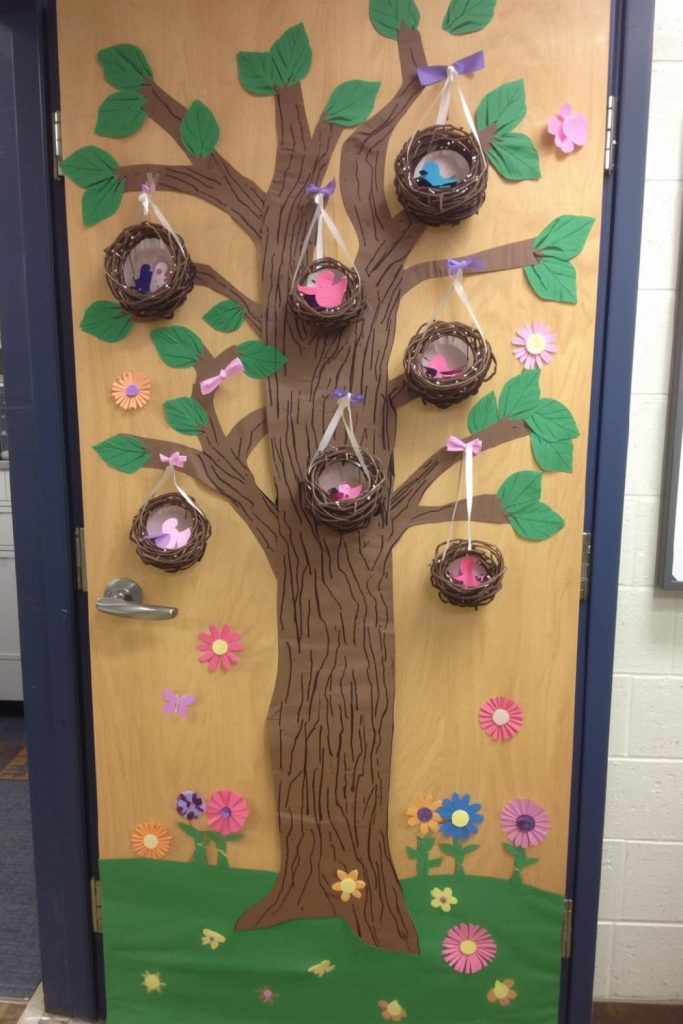
Materials needed: Brown and green construction paper, colored paper for nests, scissors, glue, tape, markers.
Step-by-step method:
- Cut out a tree trunk and branches from brown paper.
- Attach branches to the door in a natural arrangement.
- Make small nests from colored paper and place them on branches.
- Add tiny paper birds inside nests.
- Decorate leaves and add flowers for extra color.
6. Magical Hot Air Balloon Over Flowers
Floating hot air balloons create a whimsical, airy feeling for your classroom entrance. Paper flowers beneath the balloon complete the springtime scene.

Materials needed: Colored cardstock, string, scissors, glue, tape, markers.
Step-by-step method:
- Cut a balloon shape from cardstock and a small rectangle for the basket.
- Decorate the balloon with colors or patterns.
- Attach the basket to the balloon with string.
- Make paper flowers in various colors and attach them below the balloon.
- Mount the scene on the door, suspending the balloon if possible.
7. Playful Bunny Hopping Through a Flower Meadow
A hopping bunny adds movement and fun to a spring display. Layered paper flowers create a lively meadow that students love to explore visually.
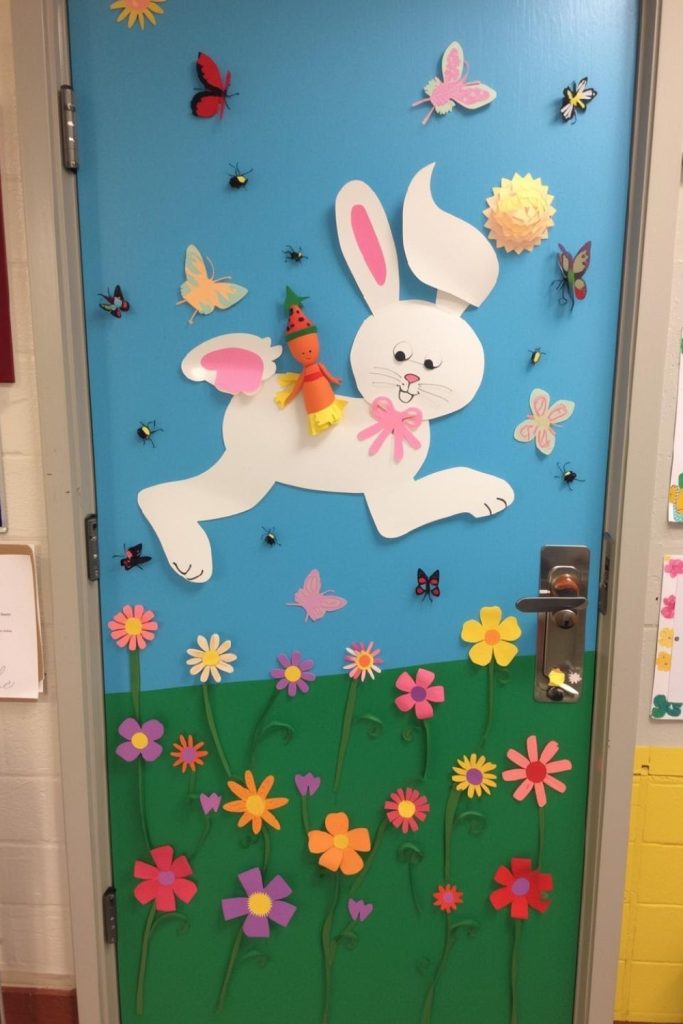
Materials needed: White or brown cardstock, colored construction paper, scissors, glue, tape, markers.
Step-by-step method:
- Cut bunny shapes from cardstock and flowers from colored paper.
- Layer flowers on the bottom of the door to create a meadow.
- Arrange bunnies hopping through the flowers and attach with tape.
- Add small details like grass or butterflies around the bunnies.
- Ensure bunnies are spaced to suggest motion across the door.
8. Frog Pond with Lily Pads and Dragonflies
A layered frog pond brings playful spring wildlife to the door. 3D lily pads and mid-jump frogs add depth and movement.
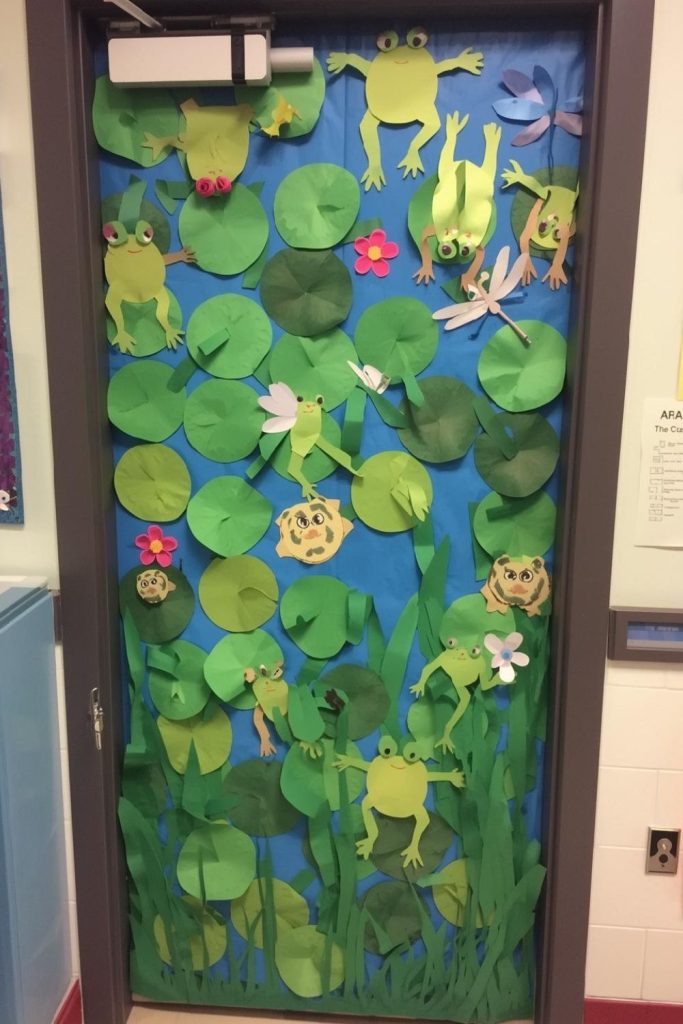
Materials needed: Green cardstock, blue paper, scissors, glue, tape, markers.
Step-by-step method:
- Cut blue paper to cover the pond area.
- Make lily pads from green cardstock and layer them.
- Cut frog shapes and place them jumping over lily pads.
- Add dragonflies using small colored paper shapes.
- Attach all elements securely to prevent sagging.
9. Storybook Garden
Turning open book pages into blooming flowers combines literacy and springtime fun. Students can help create flowers growing out of the books.
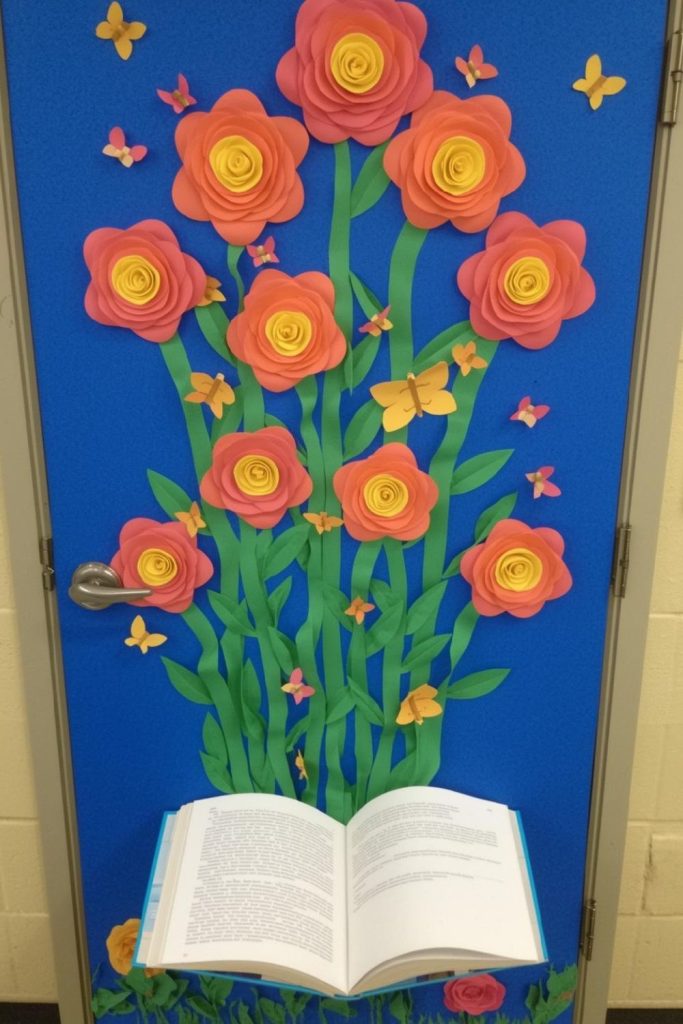
Materials needed: Old books or paper, colored paper, scissors, glue, tape, markers.
Step-by-step method:
- Open a few book pages and fold them slightly for dimension.
- Cut flowers from colored paper.
- Glue flowers to the top edges of the book pages as if they are growing.
- Arrange multiple books along the bottom of the door.
- Add leaves or insects for detail.
10. Caterpillar Transforming into a Butterfly
This design shows growth and transformation, perfect for spring and teaching life cycles.
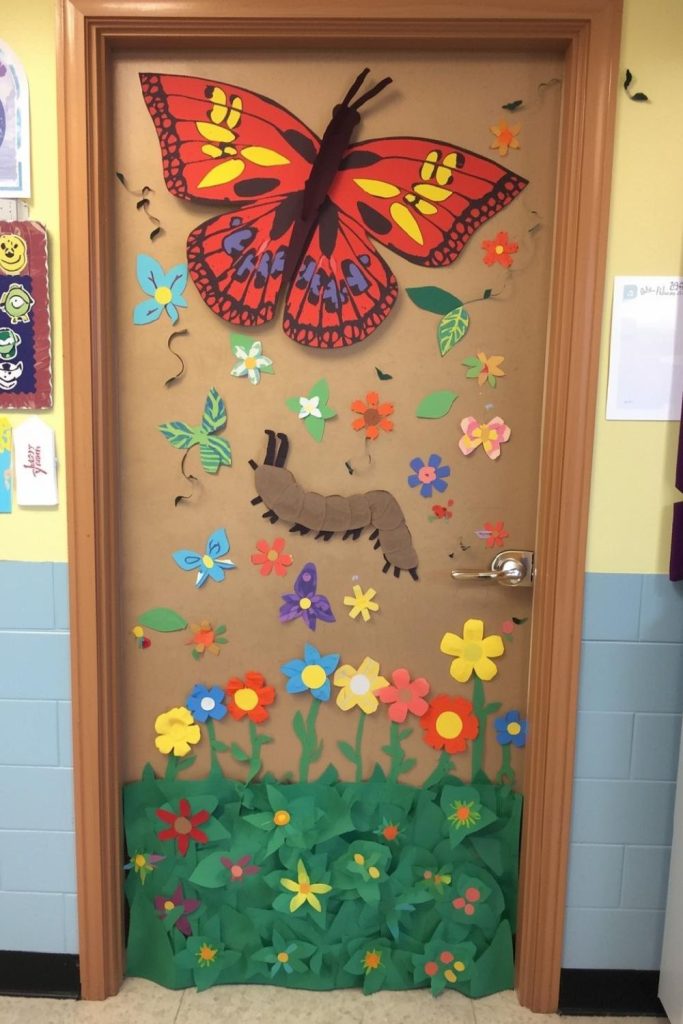
Materials needed: Colored paper, scissors, glue, markers, tape.
Step-by-step method:
- Cut circles for the caterpillar body and arrange in a line.
- Attach a head with a smiling face.
- Create a butterfly with larger wings at the end of the caterpillar line.
- Connect the caterpillar to the butterfly visually on the door.
- Add flowers or grass for extra color.
11. Pastel-Colored Rainbow Over a Garden Scene
A layered rainbow adds brightness and cheer to any classroom door. Pairing it with a flower garden below creates a classic springtime vibe that children love.

Materials needed: Tissue paper in pastel colors, scissors, glue, tape, construction paper for flowers.
Step-by-step method:
- Cut strips of tissue paper in rainbow colors.
- Layer strips in arches on the top of the door.
- Create paper flowers from colored construction paper.
- Attach flowers at the bottom to form a garden.
- Adjust spacing to make the rainbow and garden blend naturally.
12. Bee Parade with 3D Honeycomb Clusters
A buzzing bee parade brings energy and playfulness. Students will enjoy spotting bees moving across the door while learning about spring pollinators.
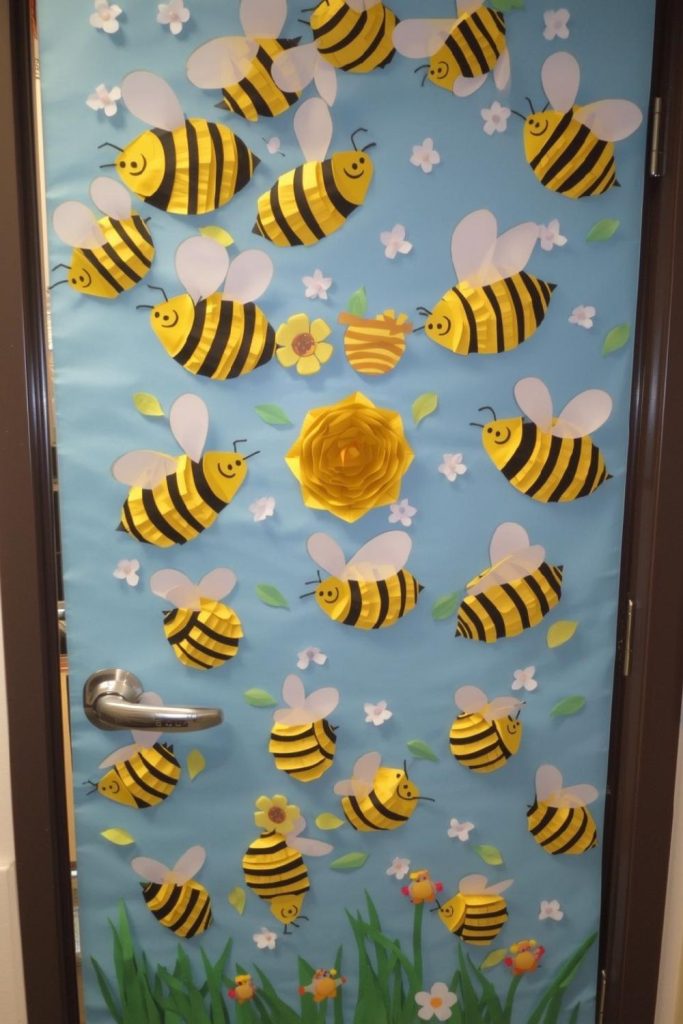
Materials needed: Yellow and black paper, scissors, glue, tape, hexagon templates for honeycomb, string.
Step-by-step method:
- Cut bees from yellow and black paper.
- Draw stripes and faces with markers.
- Create 3D honeycomb clusters by folding hexagons slightly.
- Attach bees “flying” across the door toward the honeycomb.
- Layer clusters and bees to add depth.
13. Paper Kite Flying Across a Sunny Sky
A paper kite adds motion and fun, making the door feel lively. Ribbons trailing behind create a sense of movement.
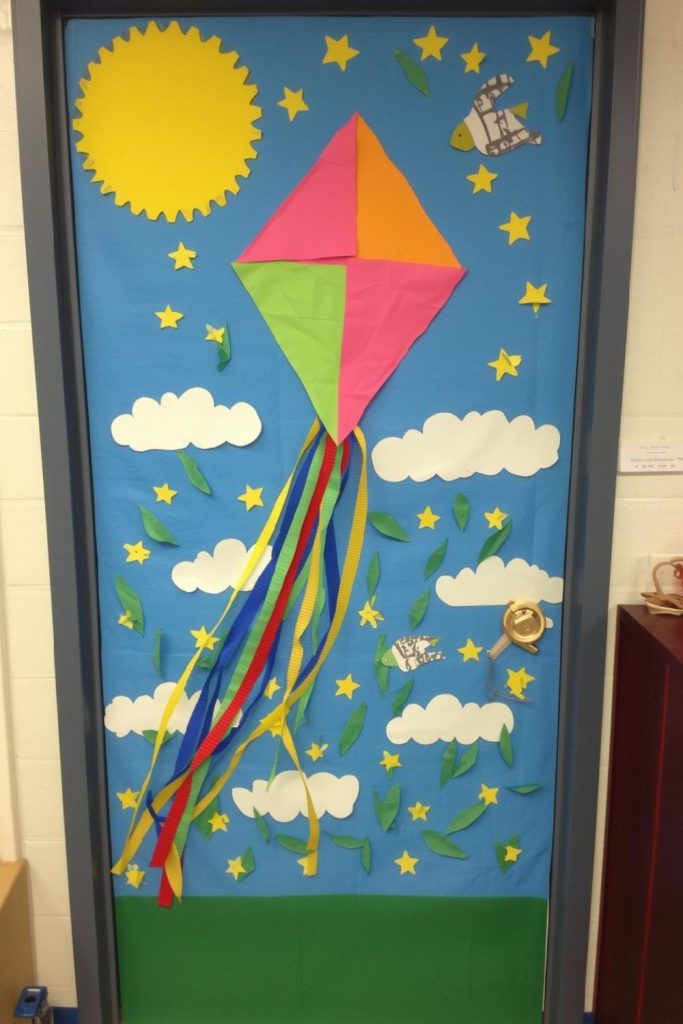
Materials needed: Colored cardstock, scissors, string, tape, markers, ribbon.
Step-by-step method:
- Cut a kite shape from cardstock.
- Decorate the kite with markers or stickers.
- Attach ribbons to the bottom as tails.
- Tape string above the door to simulate it flying.
- Mount kite at an angle to appear as if soaring across the sky.
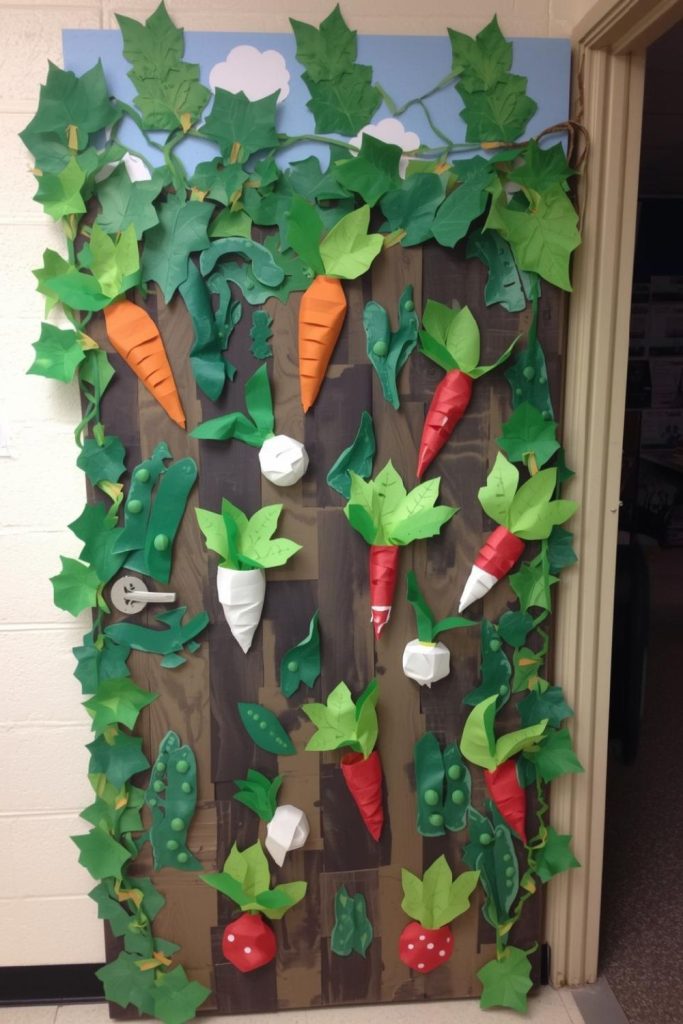
14. Garden Path with 3D Paper Vegetables
Turn your classroom door into a spring garden path with playful vegetables. This adds both color and a tactile, 3D effect.
Materials needed: Colored cardstock, scissors, glue, tape, markers.
Step-by-step method:
- Cut carrot, radish, and pea shapes from colored paper.
- Layer vegetables along a winding path across the door.
- Add small green leaves to each vegetable for realism.
- Secure each vegetable with tape or glue.
- Ensure the path looks natural and playful.
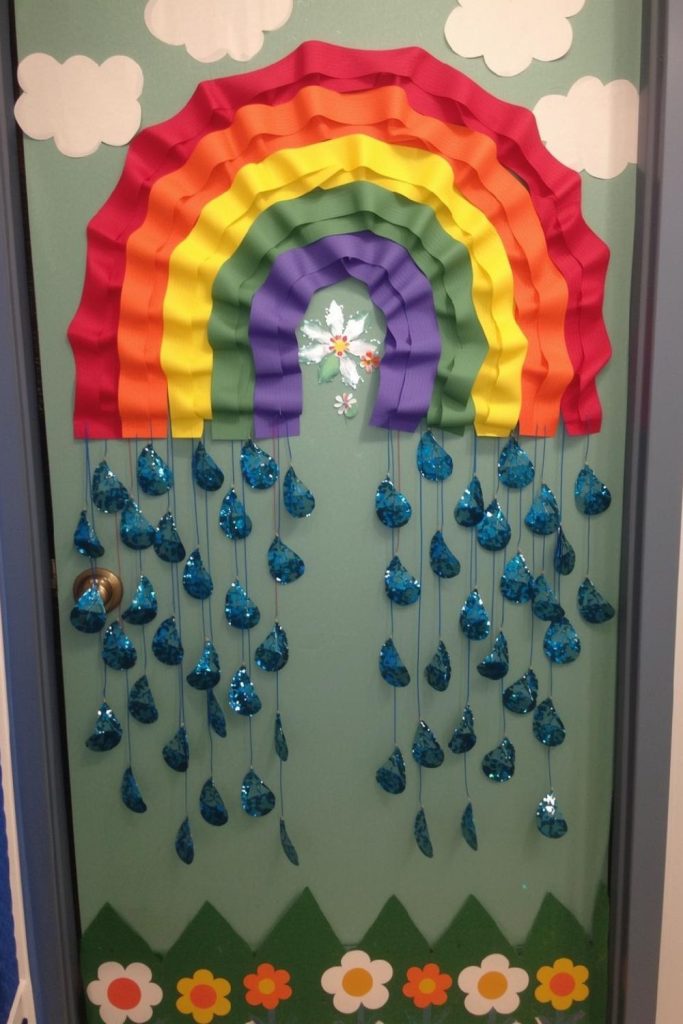
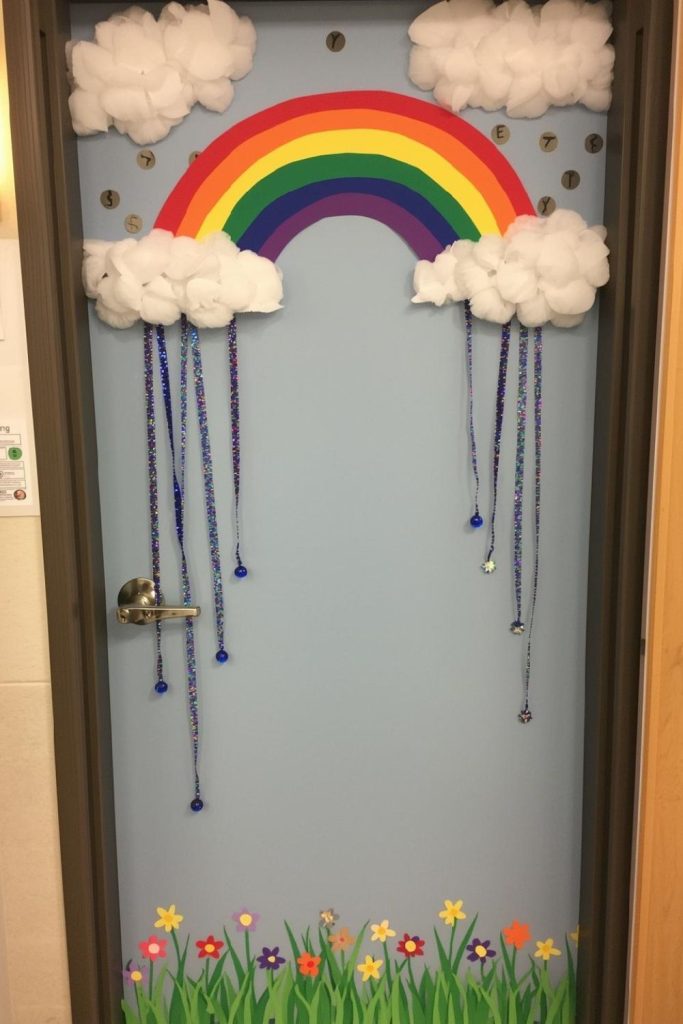
15. Cloud and Rainbow Scene with Dangling Raindrops
This design combines soft clouds with a bright rainbow and hanging raindrops for interactive movement.
Materials needed: Cotton balls, colored paper, scissors, glue, string, tape, markers.
Step-by-step method:
- Glue cotton balls to form clouds on the door.
- Cut rainbow strips from colored paper and attach beneath clouds.
- Cut small raindrop shapes and attach them to strings.
- Hang raindrops from clouds so they dangle freely.
- Arrange spacing to make a balanced scene.
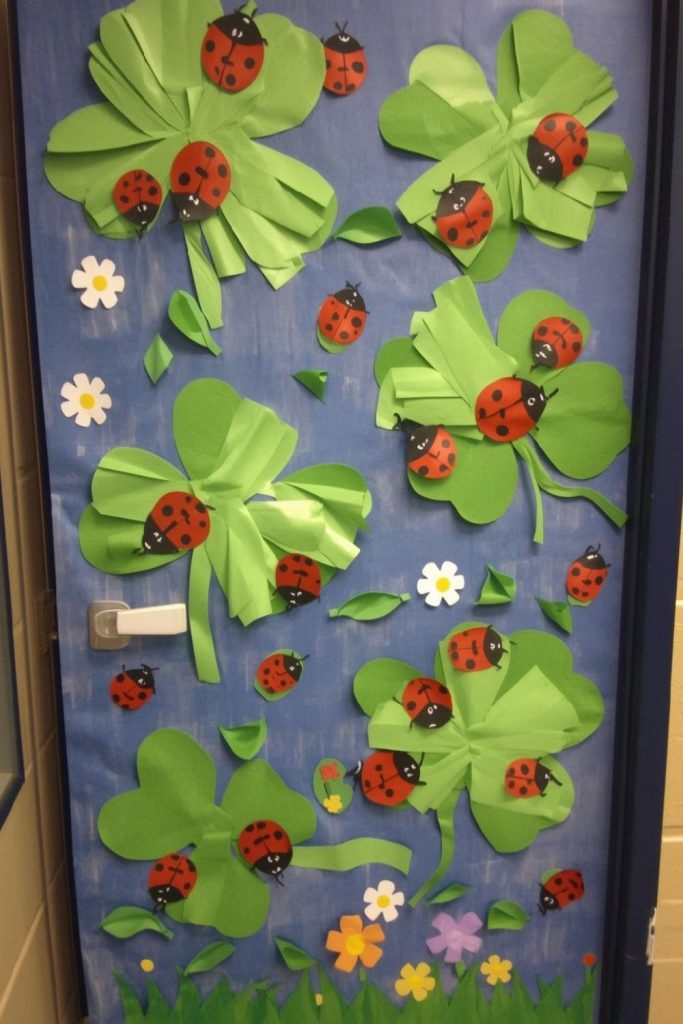
16. Ladybug Adventure Across Oversized Clovers
Bright red ladybugs crawling across oversized clovers add whimsy and movement to the door. Perfect for springtime fun.
Materials needed: Red and black paper, green cardstock, scissors, glue, tape.
Step-by-step method:
- Cut large green clovers from cardstock.
- Cut ladybugs from red paper and draw black spots.
- Attach clovers across the door in a playful pattern.
- Place ladybugs crawling along the clovers.
- Layer a few small leaves for added depth.
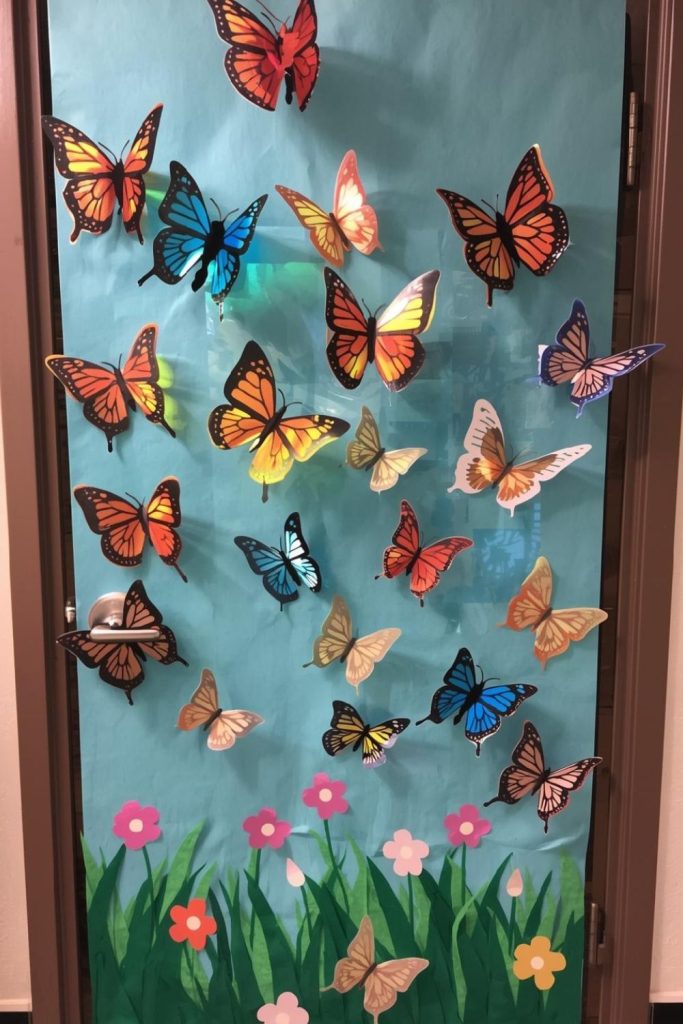
17. Magical Butterfly Window
Translucent paper butterflies appear to fly off the door, giving the classroom a magical, airy look.
Materials needed: Colored vellum or tissue paper, scissors, glue, tape.
Step-by-step method:
- Cut butterfly shapes from vellum or tissue paper.
- Decorate with markers if desired.
- Fold slightly in the middle to create 3D wings.
- Tape or glue butterflies onto the door as if flying away.
- Layer some butterflies for a dynamic effect.
18. Family of Paper Birds Building Nests
A tree full of birds and nests brings nature indoors and teaches students about springtime growth.
Materials needed: Brown and green paper, colored paper for birds, scissors, glue, tape.
Step-by-step method:
- Cut a tree trunk and branches from brown paper.
- Cut birds from colored paper and small nest shapes.
- Attach nests along the branches and place birds inside.
- Add leaves and extra birds flying nearby.
- Secure everything with tape, ensuring 3D effect where possible.
19. Whimsical Picnic Scene
Paper sandwiches, fruits, and tiny paper ants create a fun spring picnic scene. Students enjoy spotting all the details.

Materials needed: Colored paper, scissors, glue, markers, tape.
Step-by-step method:
- Cut sandwiches, fruits, and picnic items from colored paper.
- Layer items in clusters on the bottom of the door.
- Add paper ants crawling between items.
- Tape securely to create a 3D effect.
- Adjust placement for a playful, inviting layout.
20. Field of Tulips with Student-Painted Stems
A tulip field encourages student involvement and brightens the classroom entrance with spring colors.
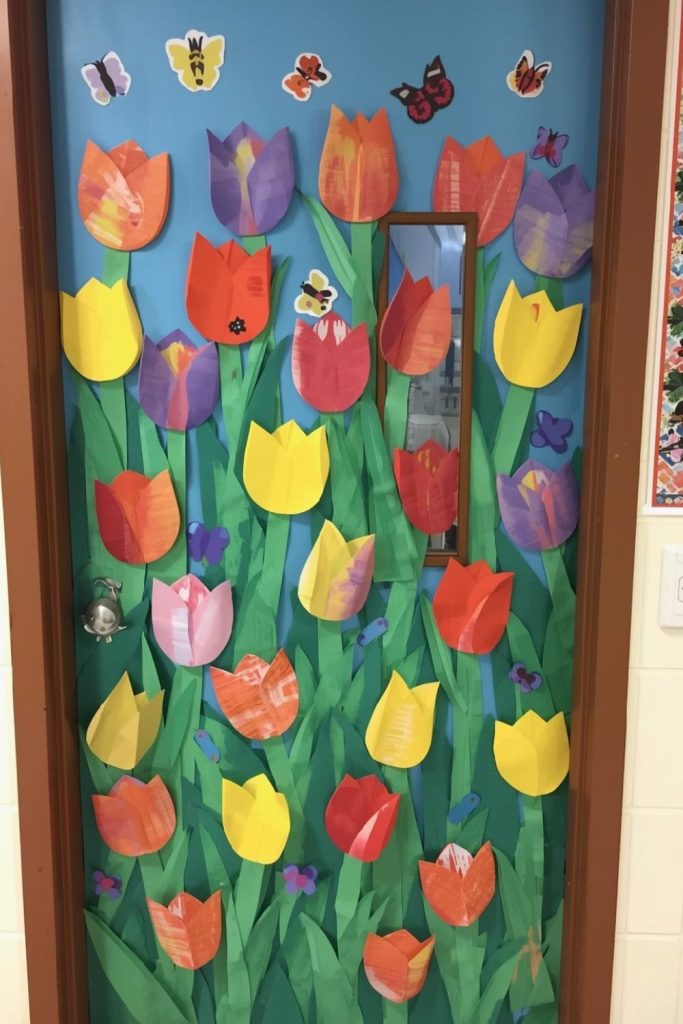
Materials needed: Colored cardstock, paint, brushes, scissors, glue, tape.
Step-by-step method:
- Cut tulip petals from cardstock.
- Have students paint stems or petals.
- Assemble tulips with petals layered on stems.
- Attach to the door in rows to simulate a field.
- Add leaves and grass details for realism.
21. Colorful Paper Hot Air Balloon Festival
Multiple balloons rising above a paper flower field create a festive spring scene.
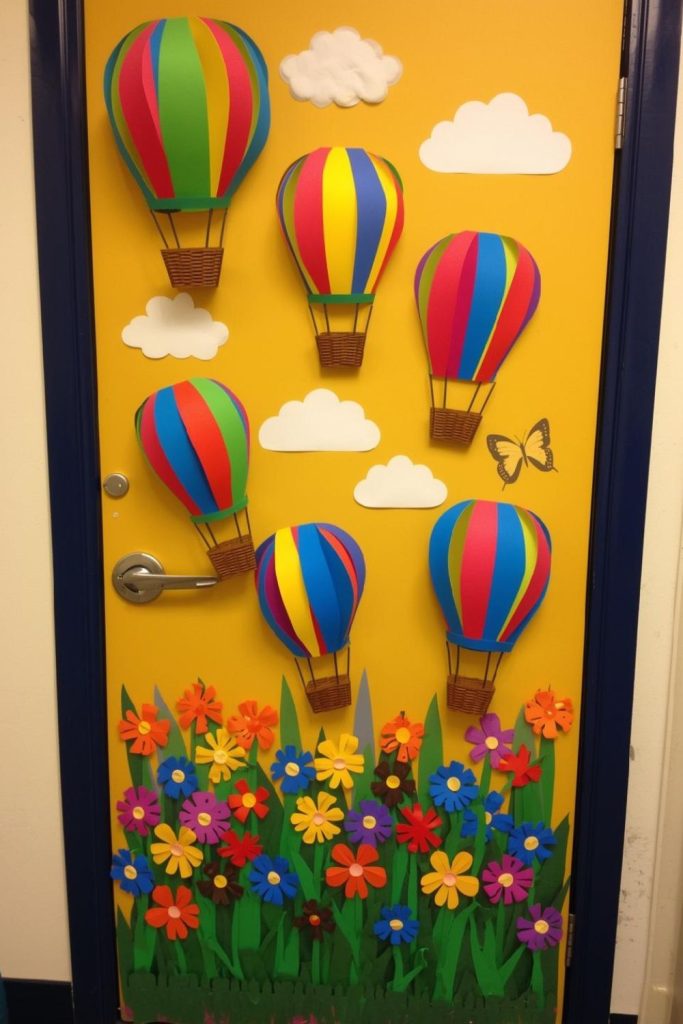
Materials needed: Colored cardstock, string, scissors, glue, tape, markers.
Step-by-step method:
- Cut multiple balloon shapes and baskets.
- Decorate balloons with colors and patterns.
- Attach baskets with string.
- Layer balloons at different heights above paper flowers.
- Secure with tape and adjust spacing for visual balance.
22. Paper Rainbow Slide with Cartoon Children
A rainbow slide adds whimsy while inviting imaginative play. Cartoon children appear to slide into a colorful meadow.
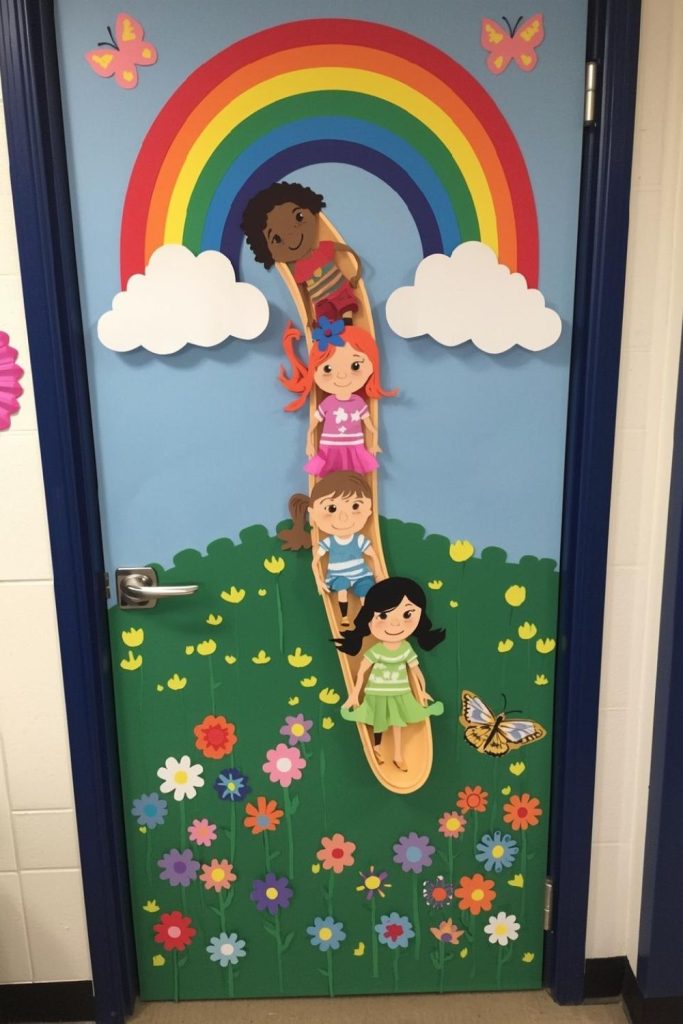
Materials needed: Colored paper, scissors, glue, tape, markers, construction paper for characters.
Step-by-step method:
- Cut rainbow shapes and attach to the door in a slide formation.
- Draw or cut cartoon children and position them on the slide.
- Layer meadow elements like flowers at the bottom.
- Tape all elements securely.
- Adjust spacing so children appear mid-slide.
23. Flower Explosion with Overlapping 3D Flowers
Overlapping flowers create a burst of spring color and texture that immediately catches the eye.
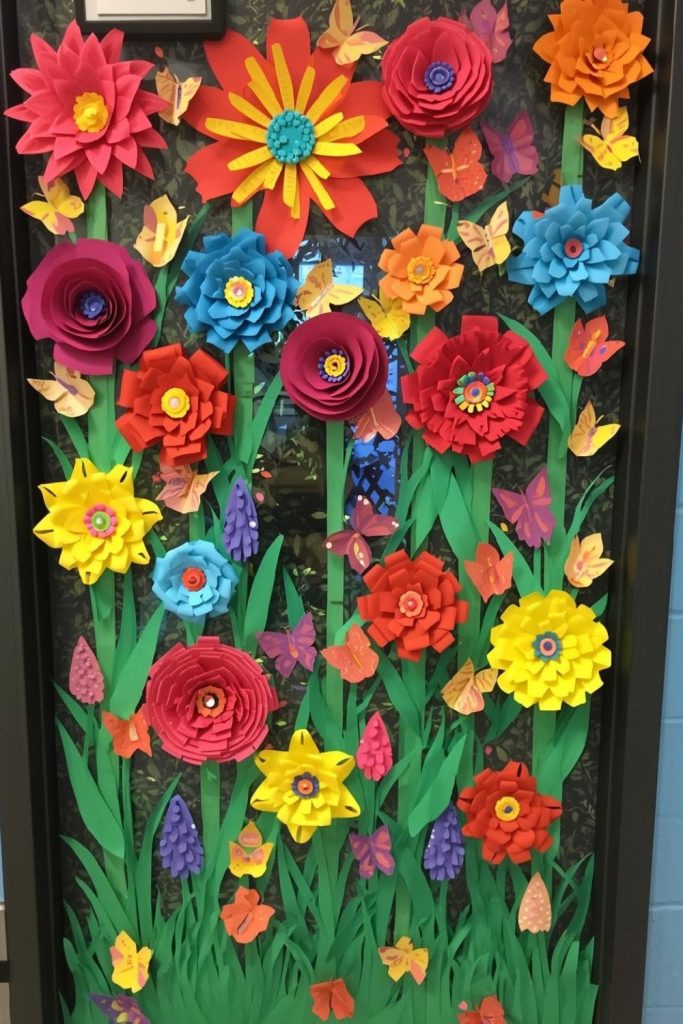
Materials needed: Colored cardstock, scissors, glue, tape, markers, optional glitter.
Step-by-step method:
- Cut flowers in various sizes and colors.
- Layer flowers on the door, slightly overlapping for depth.
- Add small leaves or stems for detail.
- Secure with glue or tape to maintain 3D effect.
- Sprinkle glitter sparingly if desired.
24. Floating Cloud Scene with Butterflies and Bees
Hanging clouds with interacting butterflies and bees create a dynamic and cheerful spring scene.
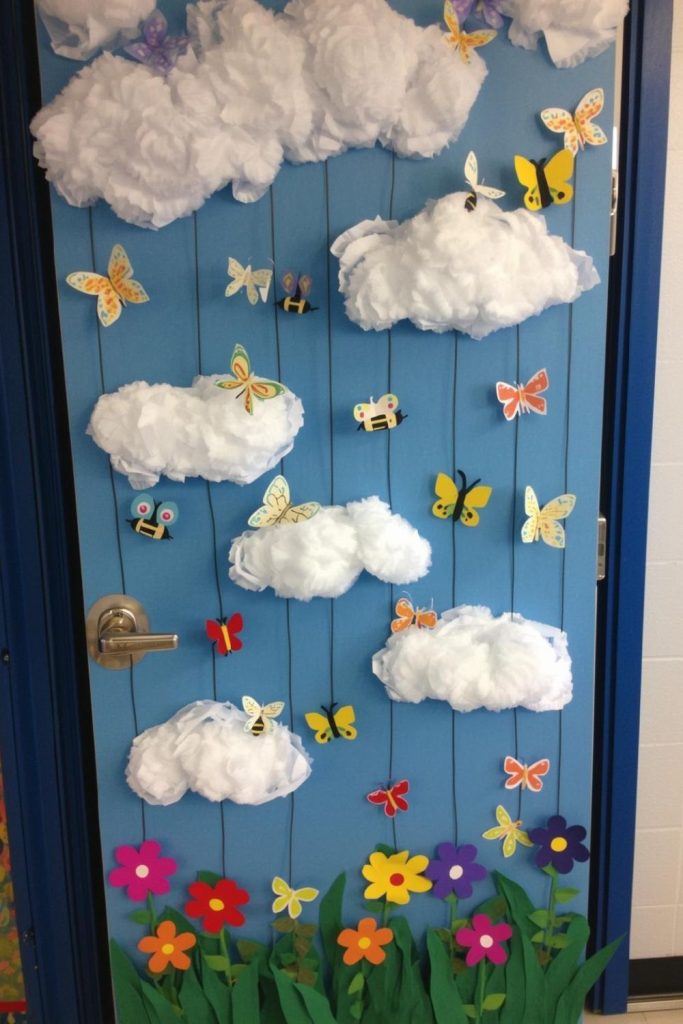
Materials needed: Cotton balls, colored paper, string, scissors, glue, tape, markers.
Step-by-step method:
- Form clouds using cotton balls on the door.
- Cut butterflies and bees from colored paper.
- Hang some butterflies and bees from strings for a floating effect.
- Arrange additional paper elements around clouds.
- Adjust heights and layers for a lively look.
25. Garden Gate Archway
Transform your classroom door into a welcoming garden entrance with an archway covered in vines and flowers.
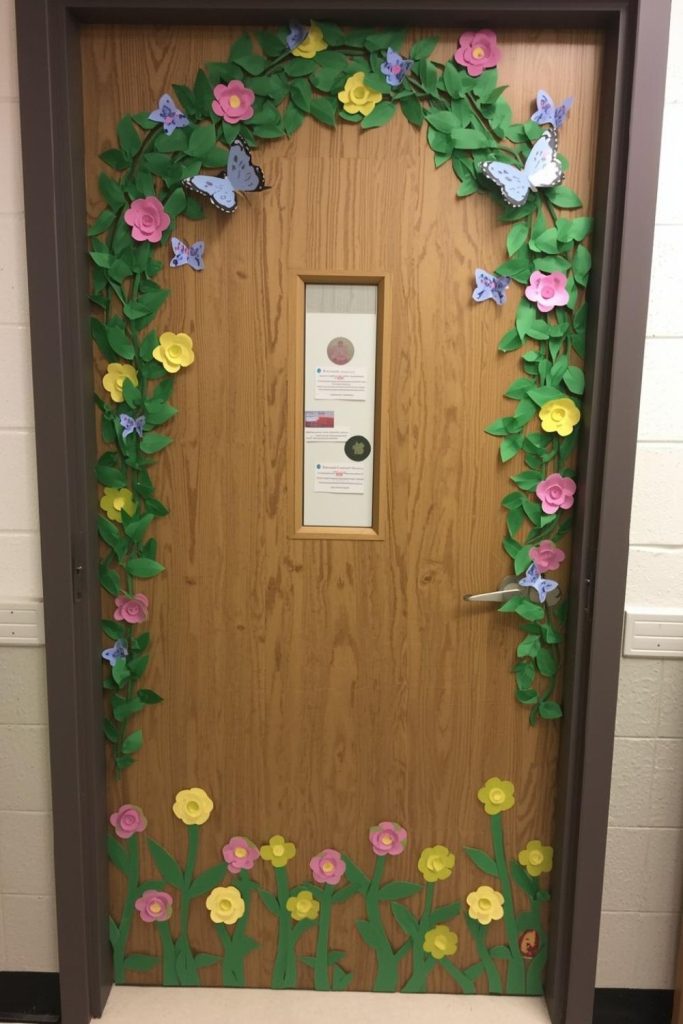
Materials needed: Green cardstock, colored paper for flowers, scissors, glue, tape, markers.
Step-by-step method:
- Cut vine shapes from green cardstock and attach around the door frame.
- Cut flowers from colored paper and glue along the vines.
- Layer flowers to create depth and fullness.
- Add small leaves or butterflies along the arch.
- Step back and adjust for a balanced, inviting garden look.