Spring is the perfect season to get kids excited about learning, exploring, and creating. As a parent, you might be looking for ways to combine fun, seasonal activities with opportunities that help prepare your preschooler for kindergarten. Spring crafts preschool projects offer the perfect balance — they encourage creativity, fine motor skills, hand-eye coordination, and early problem-solving, all while keeping children actively engaged. From colorful flowers to playful animals and sensory projects, there’s a wide variety of activities that let kids experiment, learn, and have fun at the same time. Below are some inspiring spring projects designed for preschoolers that will capture their interest and help them practice essential skills for school readiness.
3D Paper Tulip Bouquets Using Folded and Layered Colored Paper
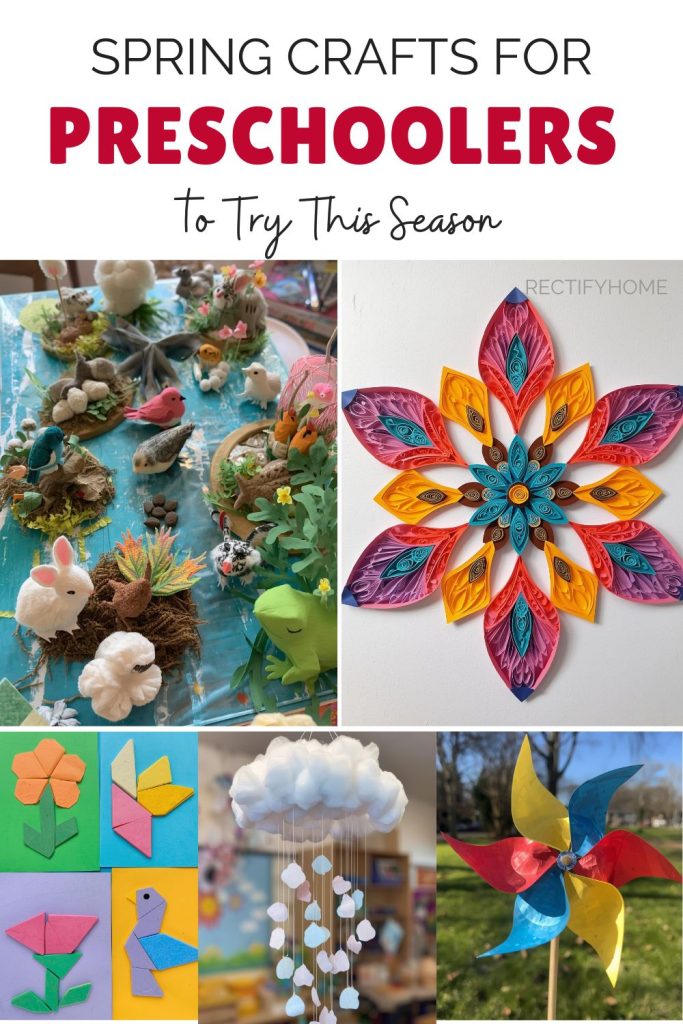
Bright and cheerful tulip bouquets are a wonderful spring-themed activity that combines color recognition with fine motor skills. Kids love seeing a flat sheet of paper transform into a three-dimensional flower arrangement that they can proudly display.

Materials Necessary:
- Colored construction paper (red, pink, yellow, green)
- Child-safe scissors
- Glue sticks or liquid glue
- Tape
- Pencil
Step-by-Step Method:
- Start by cutting out simple tulip petal shapes from the colored paper. Each flower should have three to four petals.
- Fold each petal gently to create a natural curve, giving it a 3D effect.
- Cut green strips for stems and attach petals at the top using glue.
- Layer multiple petals together to form fuller blooms.
- Once the flowers are made, arrange them into a small bouquet and tape the stems together.
- Encourage kids to experiment with different color combinations or sizes to create a visually striking arrangement.
This activity encourages spatial awareness and helps children practice layering and assembling parts — skills that translate into early problem-solving and design thinking, all while celebrating spring.
Butterfly Pattern Collages Using Painted Handprints
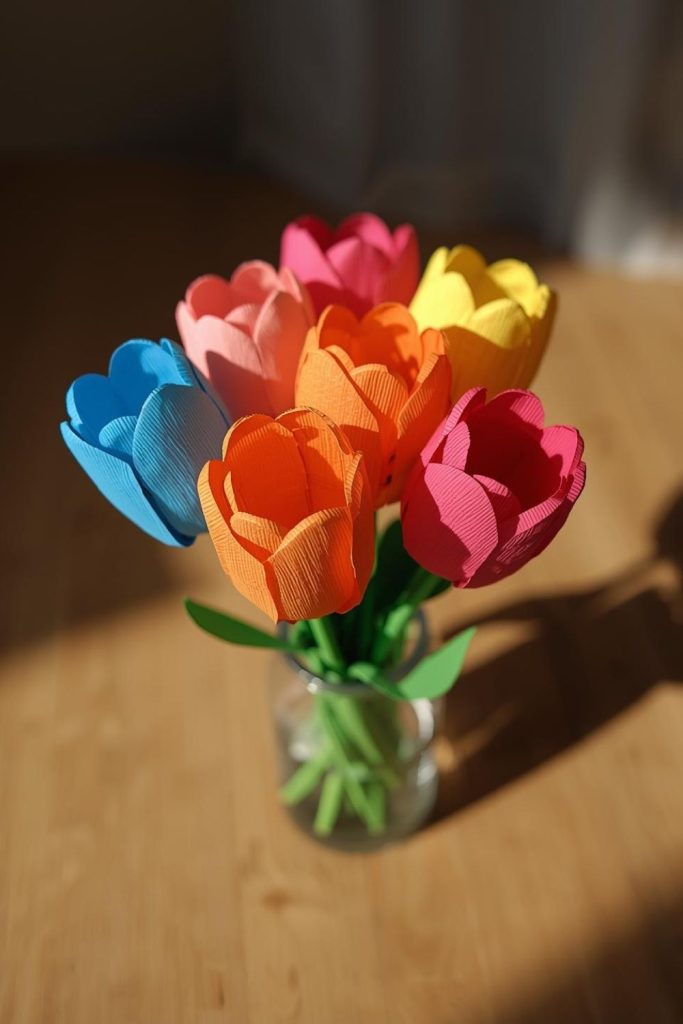
Butterflies are a springtime favorite, and turning them into handprint collages makes this activity personal, tactile, and colorful. It’s also a fun way to practice symmetry and coordination.
Materials Necessary:
- Washable paint in various colors
- Thick white paper or cardstock
- Paintbrushes
- Wet wipes for clean-up
- Pencil to outline butterfly body
Step-by-Step Method:
- Begin by sketching a simple butterfly body in the center of the paper.
- Have kids dip their hands in paint and press them on either side of the body to create wings.
- Allow them to use multiple colors, layering prints if they want a more dynamic look.
- After the handprints dry, add extra decorations like dots, lines, or glitter if desired.
- Encourage kids to look at the symmetry of their butterfly and compare both sides.
This project not only strengthens fine motor skills but also introduces early concepts of symmetry and color blending, all while producing a visually striking spring-themed piece.
Paper Plate Sunflowers with Cut-and-Paste Petals
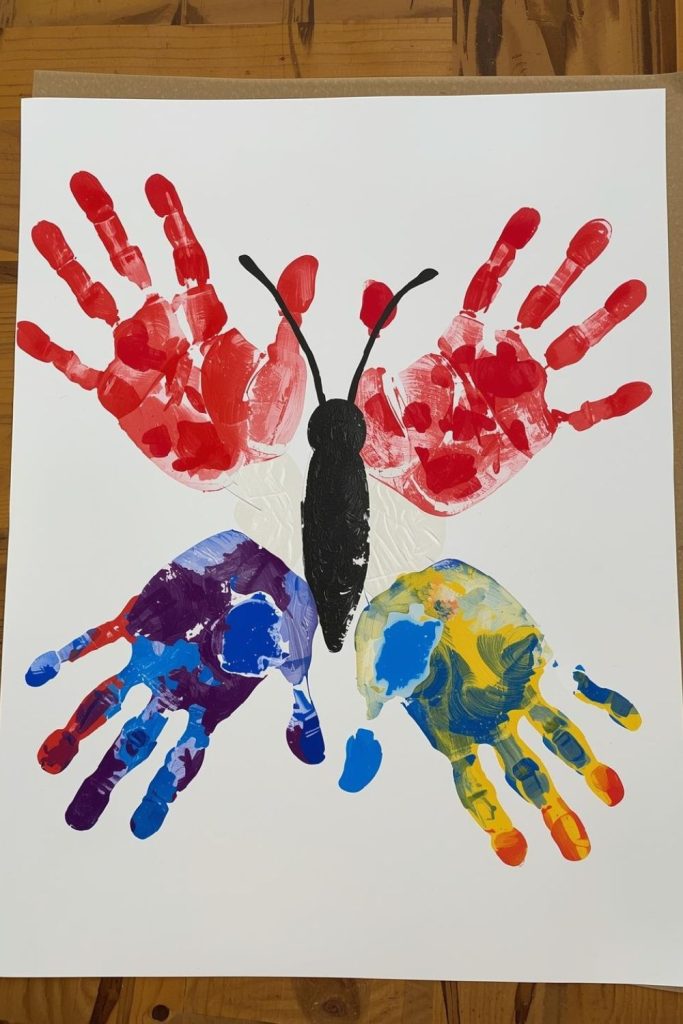
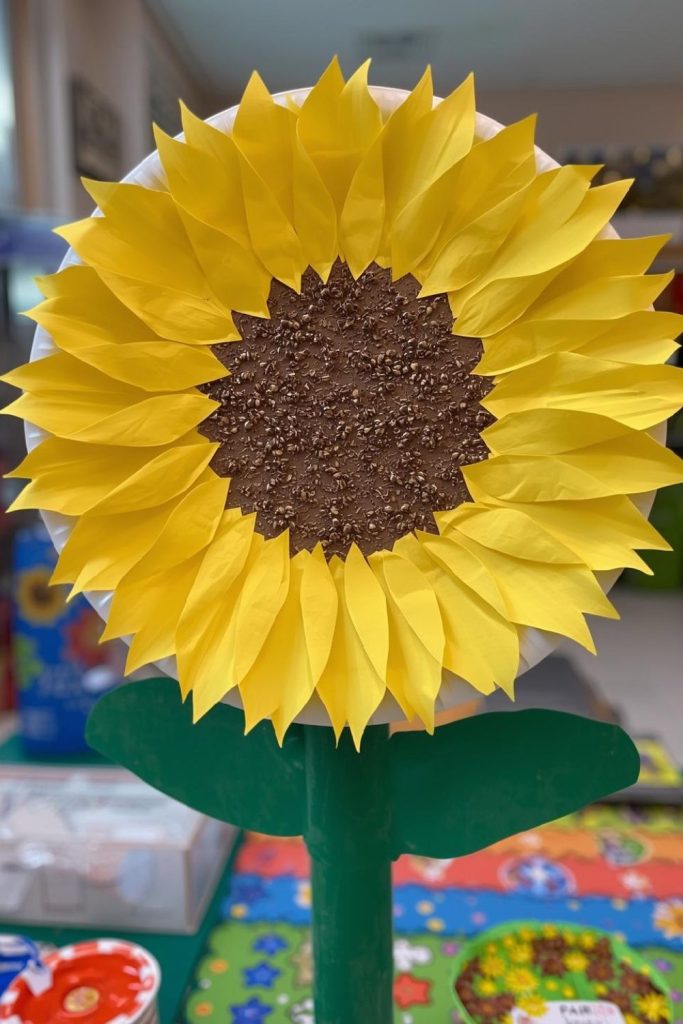
Sunflowers are bold, bright, and perfect for preschoolers to practice scissor skills and assembly. Paper plate bases make them sturdy and easy to handle for little hands.
Materials Necessary:
- Paper plates
- Yellow and brown construction paper
- Child-safe scissors
- Glue stick or liquid glue
- Markers for extra details
Step-by-Step Method:
- Cut yellow paper into long petal shapes and brown paper into small circles for the sunflower center.
- Have kids glue petals around the edge of the paper plate, slightly overlapping each other.
- Once petals are complete, attach the brown circle in the center.
- Add extra details with markers if desired, like small dots or lines to mimic seeds.
- Display sunflowers on walls or windows to celebrate spring colors indoors.
This activity provides opportunities for hand strengthening, repetitive motions, and following multi-step instructions, all while resulting in a cheerful decoration.
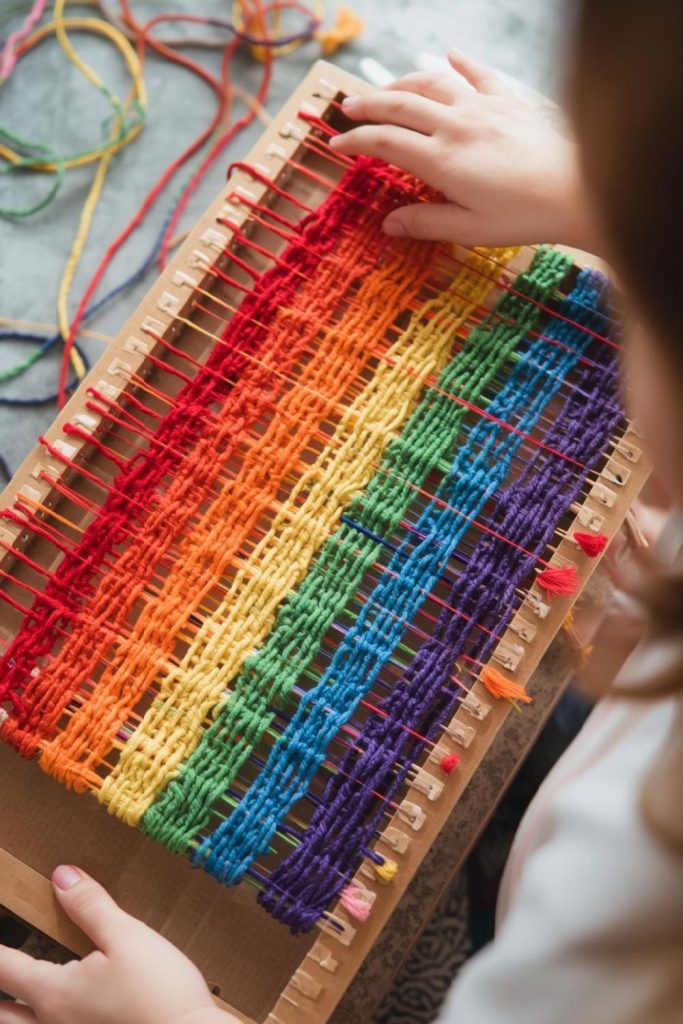
Rainbow Weaving Using Yarn and Cardboard Looms
Weaving is an excellent way to develop hand-eye coordination and patience. A rainbow-themed weaving project adds seasonal colors and makes it playful for preschoolers.
Materials Necessary:
- Cardboard pieces for simple looms
- Colorful yarn
- Child-safe scissors
- Tape or clips to hold yarn in place
Step-by-Step Method:
- Cut slits along the top and bottom edges of the cardboard loom to create spaces for yarn.
- Stretch a base yarn vertically and secure it with tape.
- Provide kids with various colored yarns to weave horizontally through the vertical threads.
- Encourage them to alternate colors and practice over-and-under movements.
- Once the weaving is complete, trim excess yarn and secure the ends.
Weaving promotes coordination, focus, and sequencing, and the final rainbow results are visually stunning and perfect for classroom displays or home decoration.
Spring Animal Habitats with Paper and Textured Materials (Bunnies, Birds, Frogs)
Creating animal habitats allows preschoolers to explore nature, storytelling, and imaginative play while practicing cutting and gluing skills.

Materials Necessary:
- Construction paper in green, blue, brown, and other colors
- Cotton balls, tissue paper, and textured scraps
- Child-safe scissors and glue
- Animal cutouts or printed templates (optional)
Step-by-Step Method:
- Start with a base sheet of blue or green paper for the background.
- Let kids create habitats by gluing textured materials to represent grass, water, or burrows.
- Add paper or printed animal cutouts, positioning them within the habitat.
- Encourage children to discuss where each animal belongs and what it might need to survive.
- Display finished habitats as a mini spring diorama collection.
This activity combines creativity, learning about animals, and tactile play, reinforcing observation skills and introducing environmental awareness concepts.
Layered Rain Cloud Mobiles with Cotton, Tissue, and String Raindrops
Mobiles are interactive and dynamic, perfect for teaching cause and effect and layering skills. Rain cloud mobiles let kids explore textures and movement in a spring-themed project.

Materials Necessary:
- Cotton balls
- Tissue paper in blue and white
- String or yarn
- Scissors and glue
- Lightweight paper or cardboard for cloud bases
Step-by-Step Method:
- Cut cloud shapes from cardboard or thick paper.
- Layer cotton balls and tissue paper on top, creating fluffy cloud textures.
- Cut raindrop shapes from tissue paper or cardstock and attach them to strings.
- Hang the raindrops from the bottom of the cloud at different lengths.
- Secure the cloud with a string or yarn for hanging from the ceiling or a hook.
This project encourages pattern recognition, layering, and understanding gravity while producing a visually engaging spring decoration that moves gently with air currents.
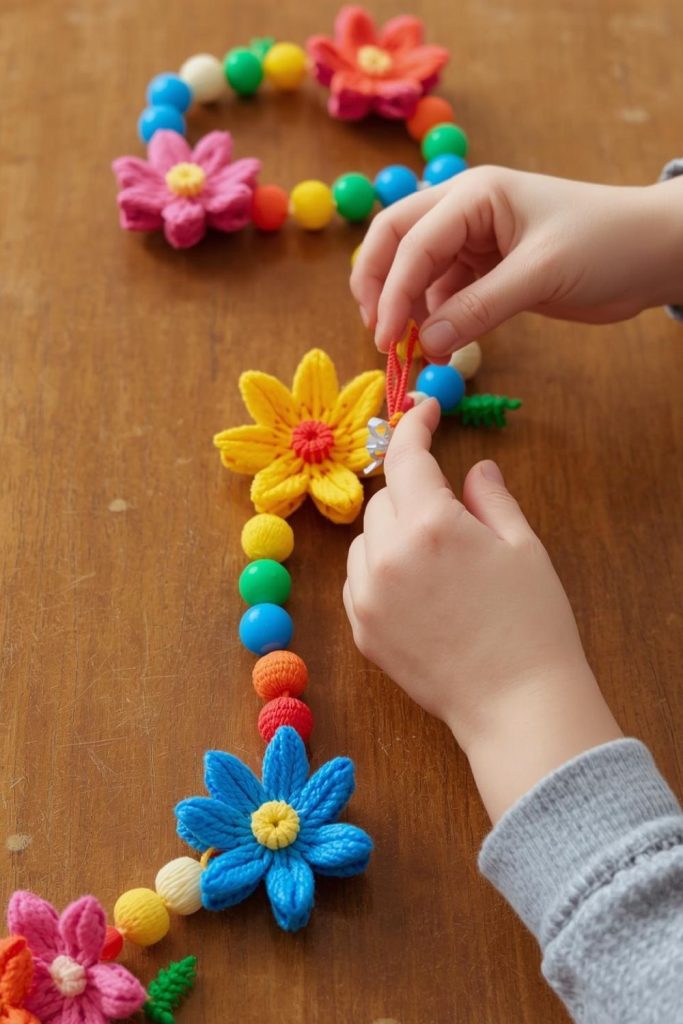
Bead-and-String Flower Garlands to Improve Hand–Eye Coordination
Stringing beads is a simple yet powerful activity for preschoolers, helping develop fine motor skills and focus. Adding a spring theme with flower shapes turns this into a colorful and rewarding project.
Materials Necessary:
- Plastic or wooden beads in flower shapes or colors
- Yarn or string
- Child-safe scissors
- Tape or clips to secure ends
Step-by-Step Method:
- Cut a length of yarn long enough for a garland and tape one end to the table or wall to keep it steady.
- Encourage children to thread beads onto the yarn, alternating colors and flower shapes.
- Discuss patterns like alternating colors or creating clusters of the same bead to introduce basic sequencing.
- When the garland is complete, tie knots at each end to secure the beads.
- Hang the garland across a window, wall, or classroom display.
This activity improves hand-eye coordination, strengthens finger muscles, and introduces early concepts of patterns and sequences while producing a vibrant spring decoration.
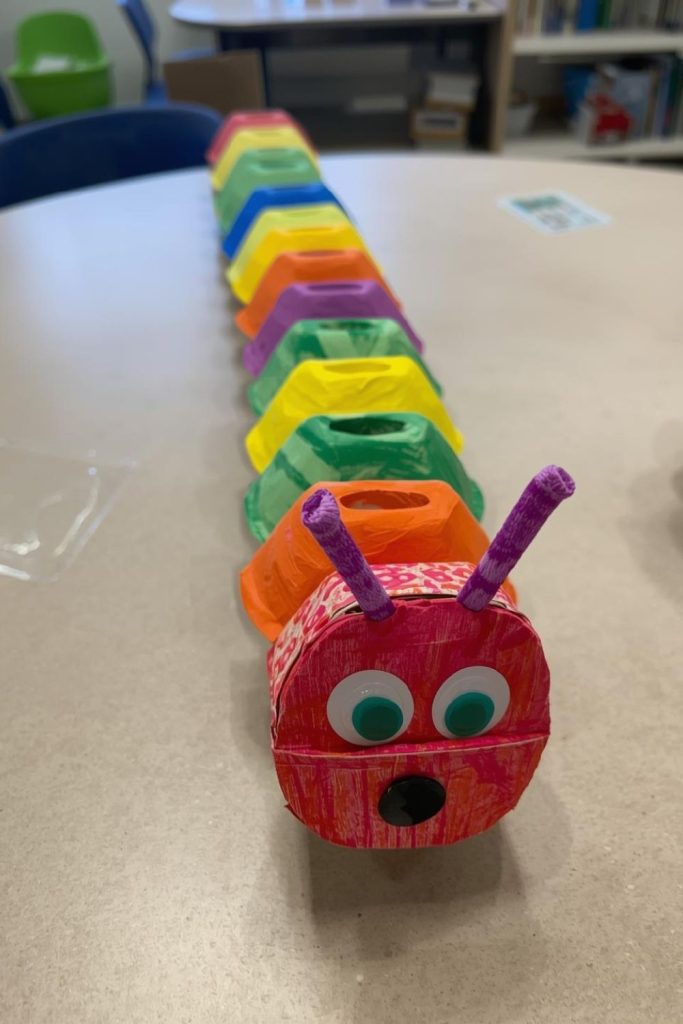
Egg Carton Caterpillars with Colorful Segments Forming Patterns
Egg cartons provide the perfect structure for creating segmented caterpillars, combining creativity, color practice, and early pattern recognition.
Materials Necessary:
- Egg cartons
- Paint or markers
- Child-safe scissors
- Glue or tape
- Googly eyes or stickers for decoration
Step-by-Step Method:
- Cut egg cartons into strips of three to five cups for the caterpillar body.
- Have children paint each segment in bright colors, optionally forming repeating patterns.
- Allow the pieces to dry completely.
- Attach a head by painting or adding a sticker with eyes at one end.
- Tape or glue the caterpillar body onto paper for display.
This craft teaches color awareness, sequencing, and counting segments, while also being tactile and visually appealing. Kids enjoy both creating and arranging their caterpillars.
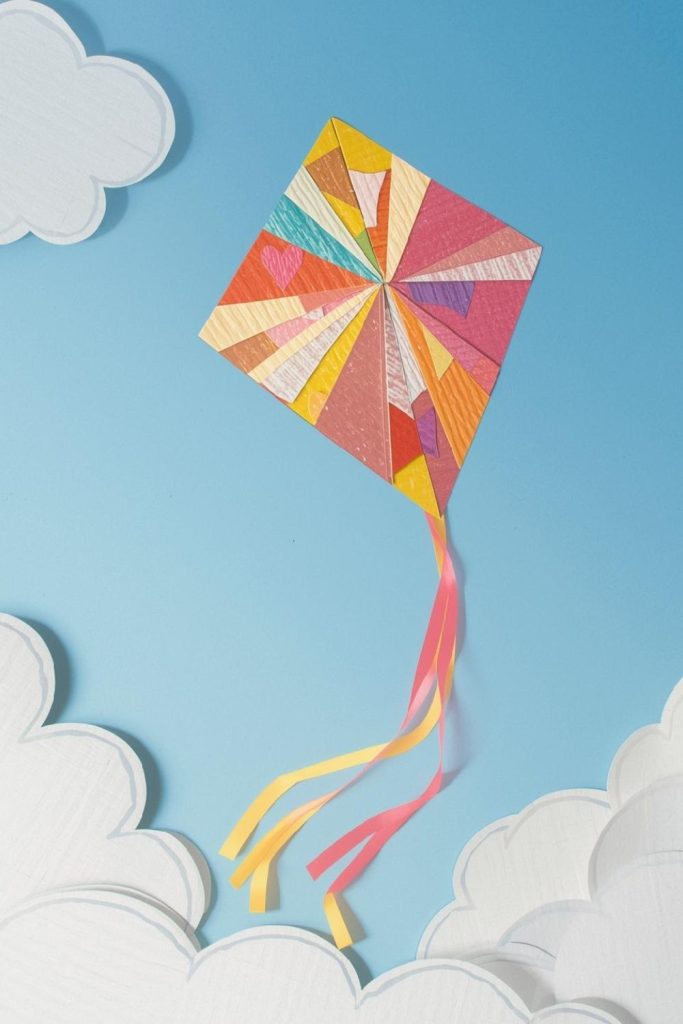
Paper Kite Craft with Layered Shapes and Decorative Tails
Kites are an iconic symbol of spring, and making them with paper introduces preschoolers to shapes, layering, and early design skills.
Materials Necessary:
- Construction paper in various colors
- Child-safe scissors
- Glue stick or liquid glue
- String for the kite tail
- Decorative items like tissue paper or stickers
Step-by-Step Method:
- Cut the main kite shape from a piece of paper.
- Cut smaller shapes (triangles, diamonds) for layering on the kite body.
- Glue the shapes onto the kite to create a fun pattern.
- Attach a long string with paper pieces or ribbons as the tail.
- Optionally, let children decorate further with markers, stickers, or sequins.
This project helps kids explore spatial arrangement, layering, and simple geometric shapes while creating a fun, spring-themed decoration.
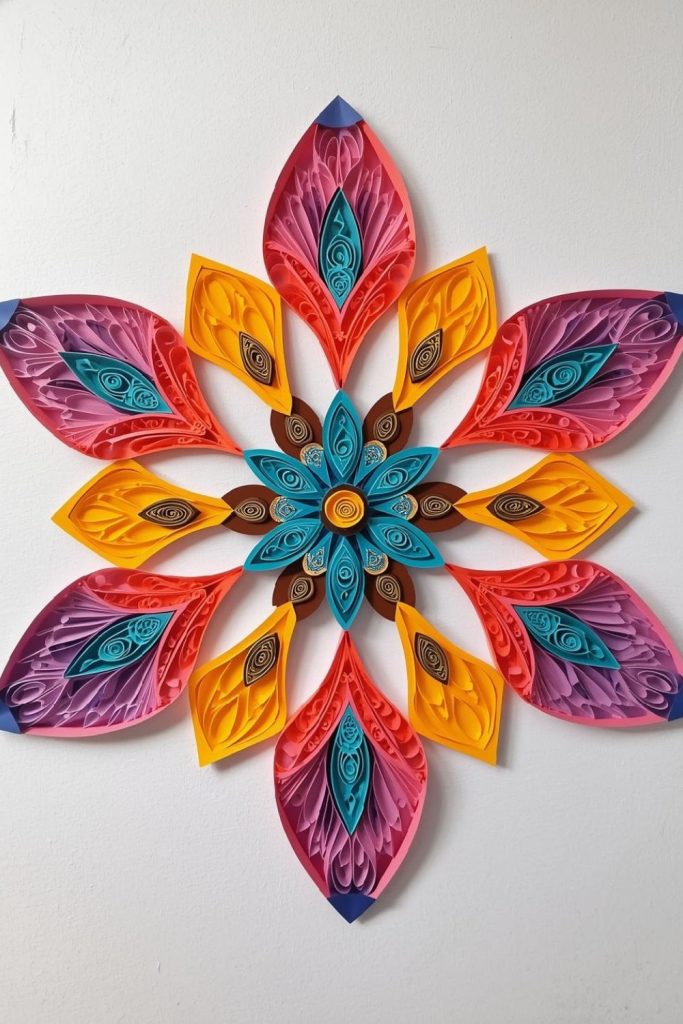
Flower Mandala Collages with Repetitive Shapes for Symmetry Practice
Mandalas are excellent for teaching symmetry, focus, and pattern repetition. Using simple flower shapes keeps the project accessible for preschoolers.
Materials Necessary:
- Colored paper in multiple shades
- Child-safe scissors
- Glue sticks
- Pencil for guidelines
Step-by-Step Method:
- Lightly draw a circle on paper to serve as a guideline.
- Cut out flower shapes in various colors.
- Starting at the center, glue flower shapes in repetitive, circular patterns.
- Continue layering outward, keeping the symmetry consistent.
- Encourage kids to experiment with colors and flower sizes while maintaining the circular structure.
This activity encourages focus, patience, and an early understanding of balance and symmetry. It’s visually striking and makes a beautiful display.
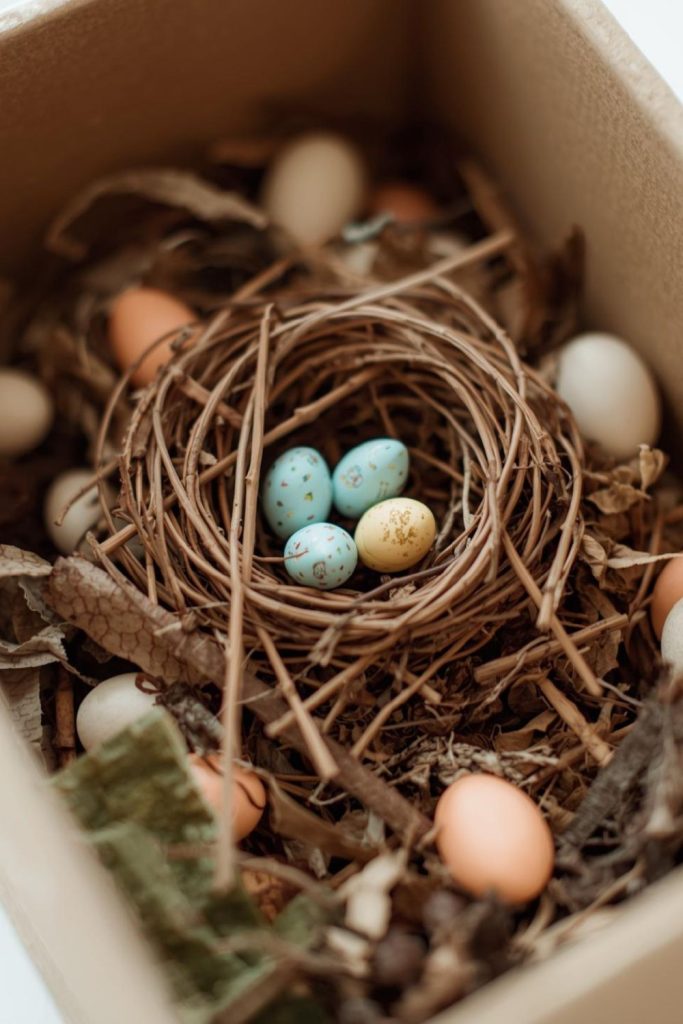
Bird Nest Dioramas Using Twigs, Paper Eggs, and Shredded Paper
Creating bird nests combines tactile exploration, creativity, and an introduction to nature. Kids can use a mix of natural and paper materials for a spring-inspired diorama.
Materials Necessary:
- Small twigs and sticks
- Shredded paper or tissue
- Paper for eggs
- Glue and scissors
- Small container or paper plate for base
Step-by-Step Method:
- Arrange twigs in a small circular pattern to form a nest.
- Add shredded paper inside the circle to mimic soft nesting material.
- Cut out small paper eggs and place them inside the nest.
- Use glue to secure everything in place.
- Optionally, paint or decorate eggs for added personalization.
This project encourages observation of nature, tactile exploration, and assembly skills. Children enjoy creating a realistic nest and watching their mini birds “come to life.”
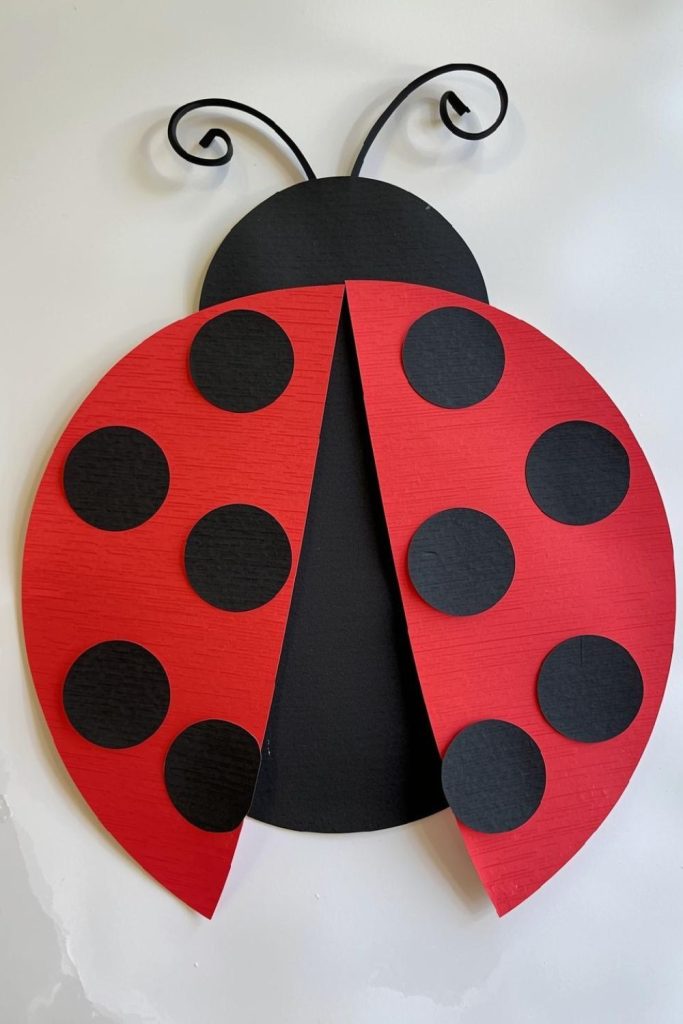
Ladybug Wing Symmetry Craft Using Cut Paper Shapes
Ladybugs are playful and instantly recognizable. Using paper shapes allows children to explore symmetry while practicing cutting and assembling skills.
Materials Necessary:
- Red and black construction paper
- Child-safe scissors
- Glue sticks or liquid glue
- Pencil for sketching wings
Step-by-Step Method:
- Cut a red circle for the ladybug’s body.
- Cut small black dots from paper for wings.
- Fold a white piece of paper in half and glue dots on one side.
- Fold the paper again to transfer the pattern and create symmetry.
- Attach wings to the red circle, and add a head and antennae with black paper.
This activity promotes early spatial awareness, symmetry, and hand-eye coordination. Children can experiment with dot patterns and arrangement, making each ladybug unique.
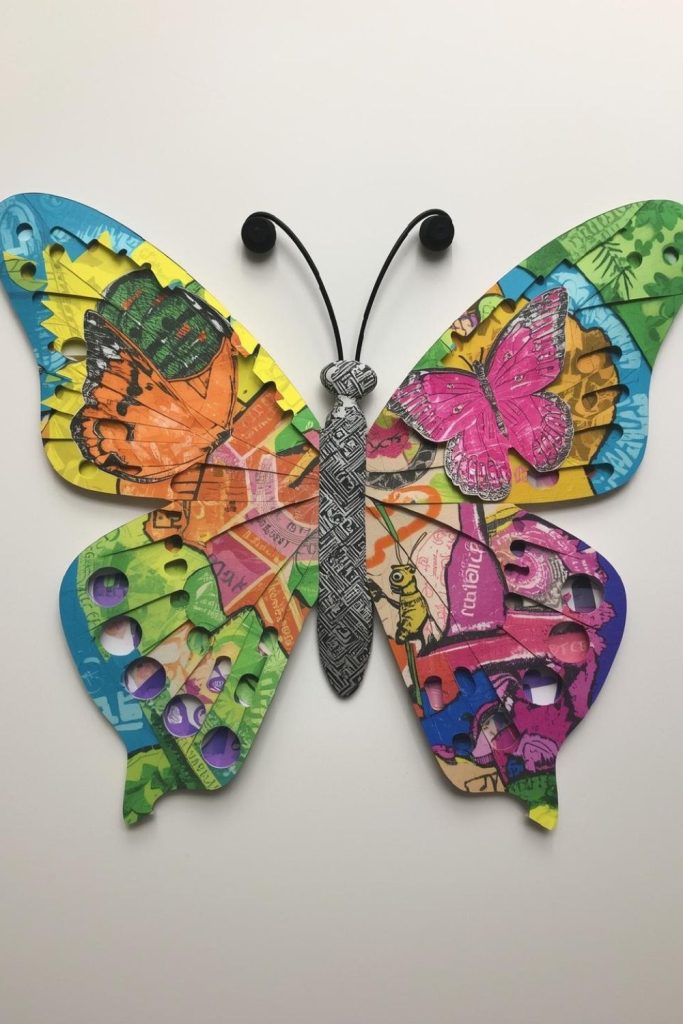
Patterned Butterfly Wings Using Stamps or Layered Paper
Butterflies are colorful and captivating, making them ideal for spring crafts preschool activities. Kids can explore patterns, color combinations, and early design thinking while creating their wings.
Materials Necessary:
- Construction paper in multiple colors
- Stamps, sponges, or cut paper shapes
- Washable paint or markers
- Child-safe scissors
- Glue
Step-by-Step Method:
- Fold a piece of paper in half to create a symmetrical wing template.
- Use stamps, sponges, or cut paper shapes to decorate one side with patterns.
- Carefully fold the paper to press the patterns onto the other side, creating symmetrical wings.
- Once dry, cut the outline of the wings and attach a small paper body in the center.
- Optionally, add glitter, stickers, or small details to enhance the wings.
This activity encourages early pattern recognition, symmetry, and creativity, while giving kids a sense of accomplishment with a visually striking butterfly.
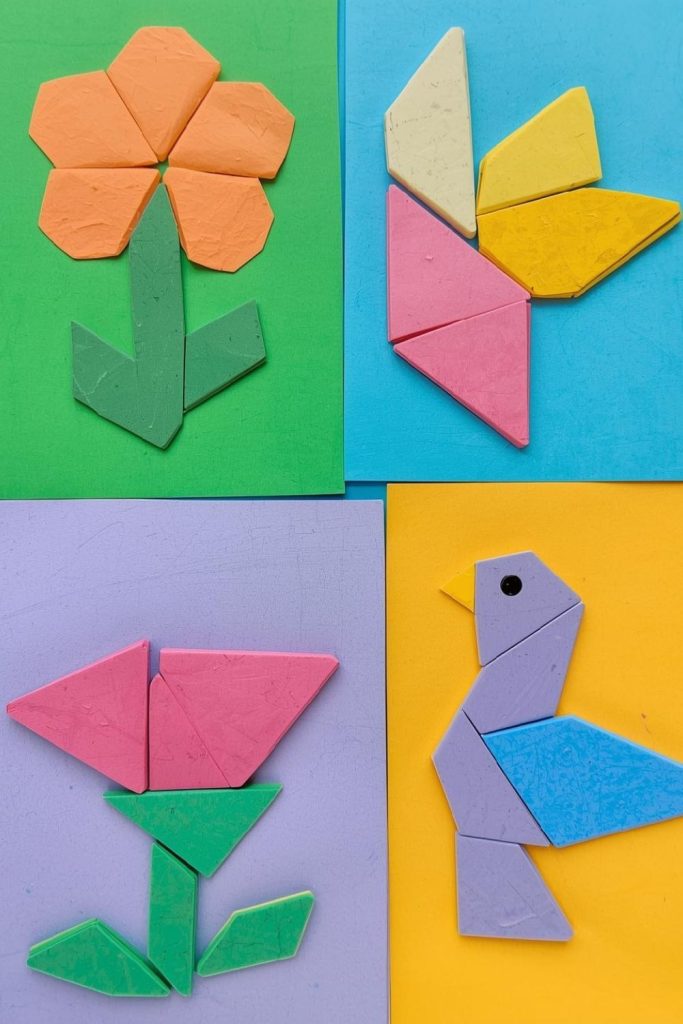
Spring-Themed Tangram Puzzles on Colored Cardstock
Tangrams are fantastic for preschoolers to explore shapes, problem-solving, and spatial relationships in a hands-on way. A spring theme makes the activity visually engaging and fun.
Materials Necessary:
- Colored cardstock
- Child-safe scissors
- Pencil
- Reference templates for spring shapes (flowers, butterflies, birds)
Step-by-Step Method:
- Draw a square or rectangle on cardstock and divide it into standard tangram pieces (triangles, squares, parallelogram).
- Cut the pieces carefully for kids to handle.
- Provide templates of spring-themed shapes and challenge kids to arrange the tangram pieces to match the shape.
- Encourage experimentation with rotations and placement until the shape is complete.
- Discuss the different solutions or variations kids find for the same figure.
Tangrams strengthen shape recognition, spatial thinking, and fine motor control, all while keeping children excited with spring visuals.
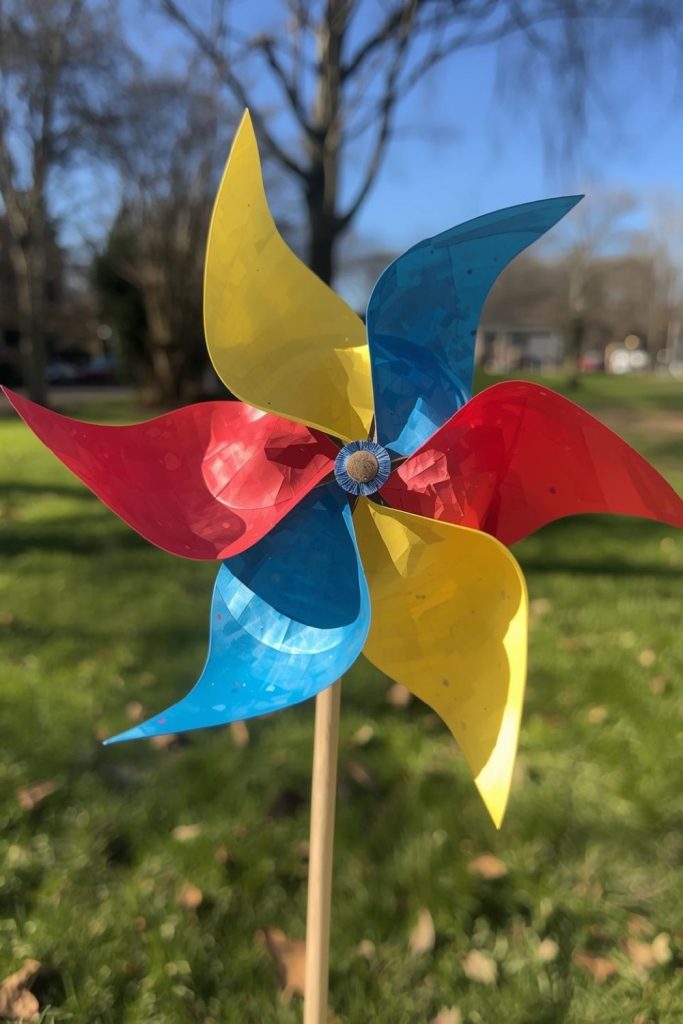
Paper Windmill Craft Demonstrating Rotation and Cause-Effect
Windmills are a playful way for preschoolers to see movement and cause-and-effect while crafting something colorful and interactive.
Materials Necessary:
- Colored construction paper
- Child-safe scissors
- Push pin or brad
- Pencil
- Small wooden stick or straw for the base
Step-by-Step Method:
- Cut a square of paper and make diagonal cuts from each corner toward the center.
- Fold every other corner toward the center and secure with a push pin or brad.
- Attach the paper square to a stick or straw.
- Let children gently blow on the windmill or move it to see it spin.
- Decorate the windmill with patterns or stickers for added creativity.
This craft introduces cause-and-effect concepts, early engineering awareness, and coordination while producing a visually dynamic spring decoration.
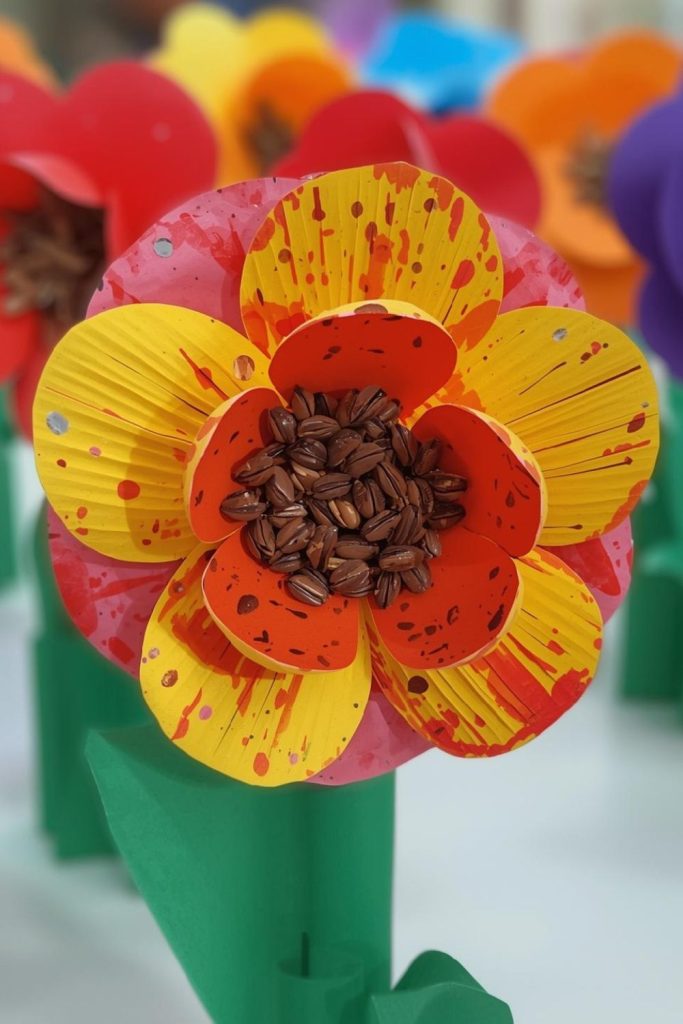
Seed-and-Paper Flower Art Exploring Textures and Layering
Using seeds and textured paper allows preschoolers to experiment with layering and tactile experiences while creating vibrant spring flowers.
Materials Necessary:
- Colored textured paper
- Seeds (sunflower, pumpkin, or beans)
- Child-safe glue
- Scissors
- Paper for background
Step-by-Step Method:
- Cut flower shapes from colored textured paper.
- Apply glue to petals or center areas where seeds will be placed.
- Let children press seeds onto the glue, experimenting with patterns or textures.
- Layer additional paper petals to create a 3D effect.
- Allow the artwork to dry completely and display.
This activity engages tactile senses, encourages exploration, and results in visually striking spring flower art that children feel proud of.
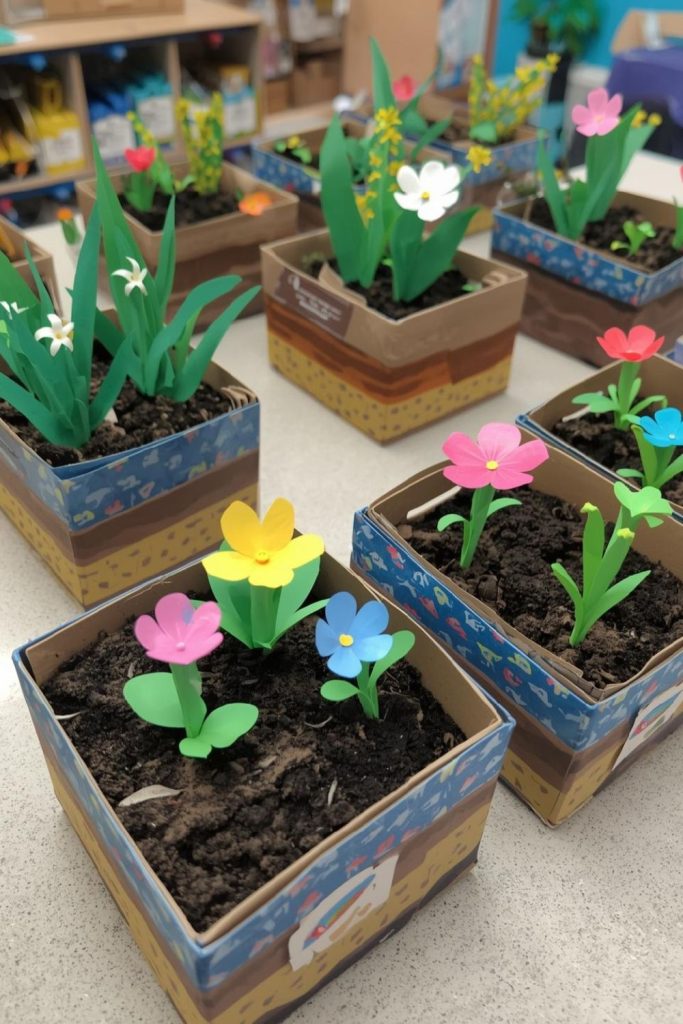
Mini Garden Boxes with Layered Paper Plants Showing Growth Stages
Creating a mini paper garden lets preschoolers explore the concept of plant growth while building layering and arrangement skills.
Materials Necessary:
- Small cardboard boxes
- Colored paper for flowers, stems, and leaves
- Glue sticks or liquid glue
- Scissors
- Optional: small rocks or paper soil
Step-by-Step Method:
- Prepare the mini box base as the garden container.
- Cut out paper plants in different growth stages: seed, sprout, small plant, full bloom.
- Layer the plants inside the box, arranging from shortest to tallest for visual effect.
- Glue each layer securely and optionally add paper rocks or “soil” at the base.
- Encourage children to name each stage and talk about plant growth.
This craft develops sequencing understanding, layering skills, and a basic connection to nature, all while producing a visually organized spring garden.
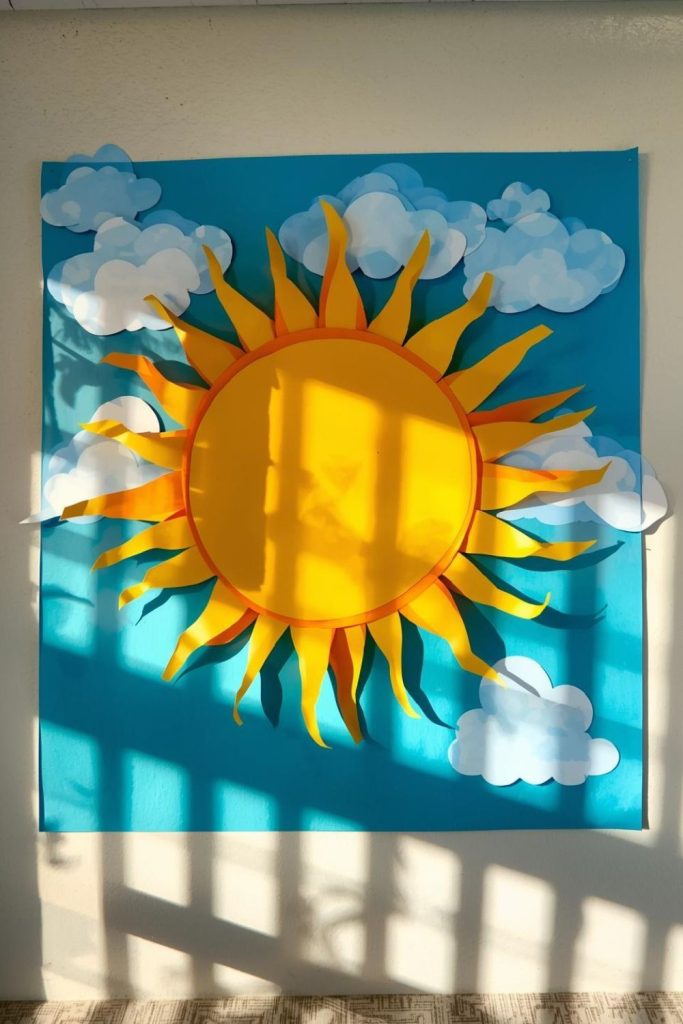
Sun-and-Shadow Art Using Cut-Out Suns and Layered Shapes
Sun-and-shadow art introduces light and layering concepts in a colorful and simple spring craft for preschoolers. Kids can see how shapes overlap and create effects.
Materials Necessary:
- Colored construction paper or cardstock
- Scissors
- Glue
- White or light-colored background paper
Step-by-Step Method:
- Cut out sun shapes and rays in various sizes and colors.
- Layer them on a background paper, experimenting with overlaps.
- Glue each piece carefully, showing how overlapping colors and shapes create new visual effects.
- Discuss shadows and light with children while placing shapes.
- Optional: add clouds, flowers, or other spring details to the scene.
This project reinforces color contrast, spatial arrangement, and creative experimentation, while keeping kids engaged with spring-themed visuals.
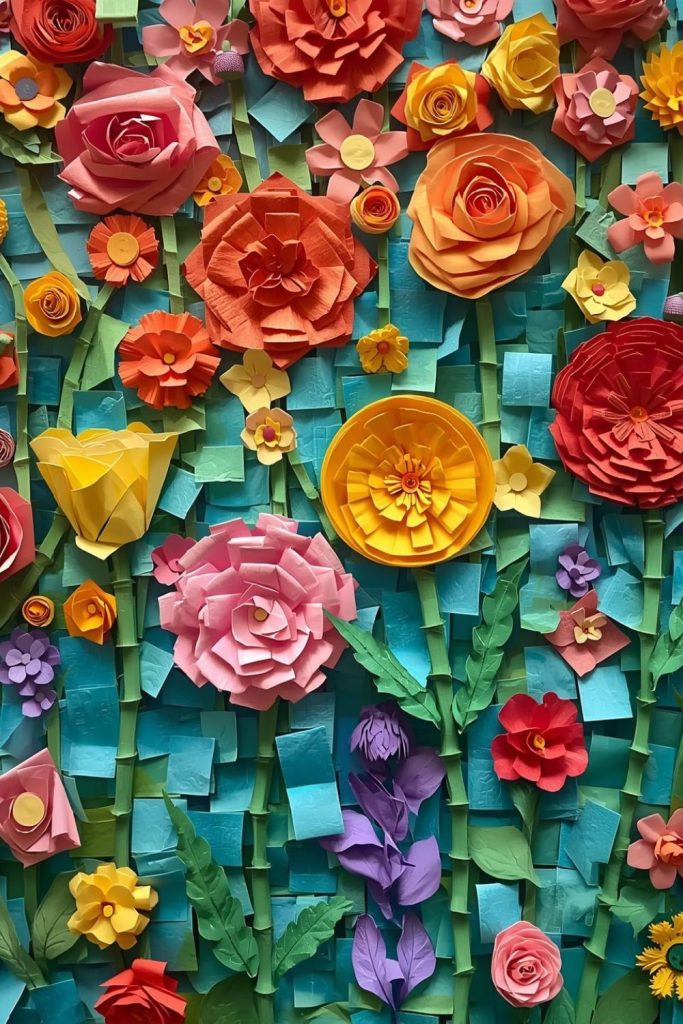
Flower Field Mosaic Using Small Squares of Colored Paper
Mosaics are a fantastic way for preschoolers to explore color, shape, and spatial placement while creating a vibrant spring scene. Using small squares of paper, kids can form visually striking flower fields.
Materials Necessary:
- Colored construction paper
- Scissors
- Glue sticks or liquid glue
- Large sheet of background paper
Step-by-Step Method:
- Cut colored paper into small squares, about 1–2 cm each.
- Draw a simple outline of flower shapes or leave it freeform for creative exploration.
- Children glue the squares onto the background, filling in petals, stems, or the whole flower field.
- Layer squares slightly for depth or color mixing.
- Allow the artwork to dry and then display as a bright spring scene.
This activity strengthens fine motor skills, color recognition, and focus, producing a cheerful, tactile, and visually rich spring field.
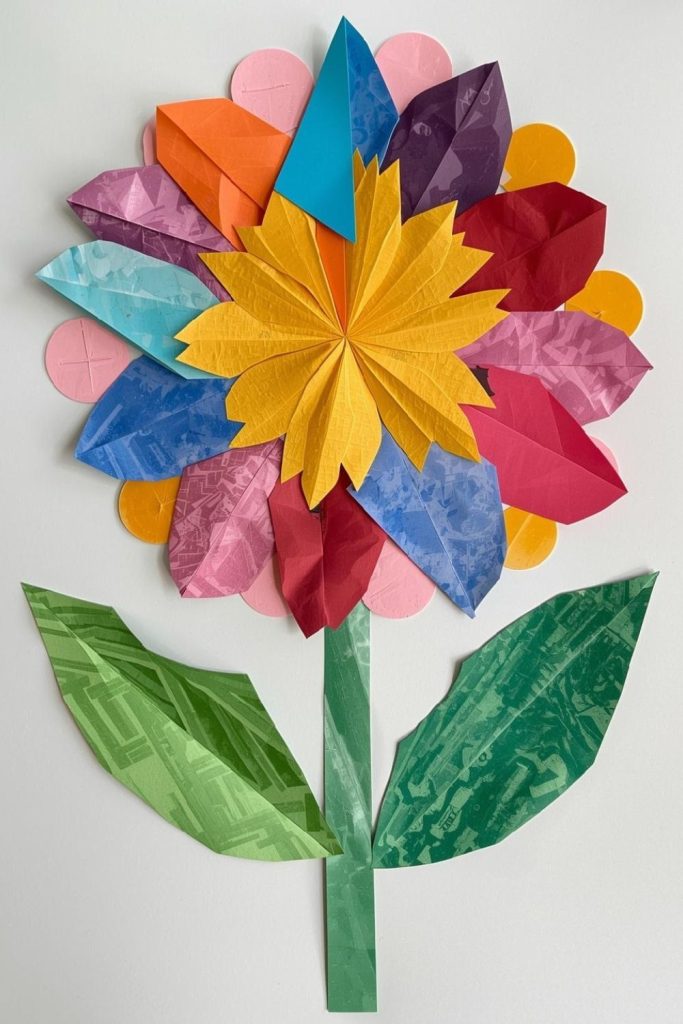
Spring Shape Collages Combining Triangles, Circles, and Rectangles into Flowers
Using basic shapes to form flowers helps preschoolers recognize geometric forms and combine them creatively. Shape collages are perfect for a spring-themed classroom display.
Materials Necessary:
- Construction paper in multiple colors
- Child-safe scissors
- Glue
- Background paper
Step-by-Step Method:
- Pre-cut or help children cut triangles, circles, and rectangles from colored paper.
- Encourage them to combine the shapes to create flowers: circles for petals, triangles for leaves, rectangles for stems.
- Glue each shape onto the background, experimenting with patterns or colors.
- Layer shapes for 3D effect or mix colors for a playful result.
- Allow the collage to dry before displaying.
Shape collages reinforce recognition, spatial arrangement, and creativity while giving children a sense of accomplishment with a visually structured spring theme.
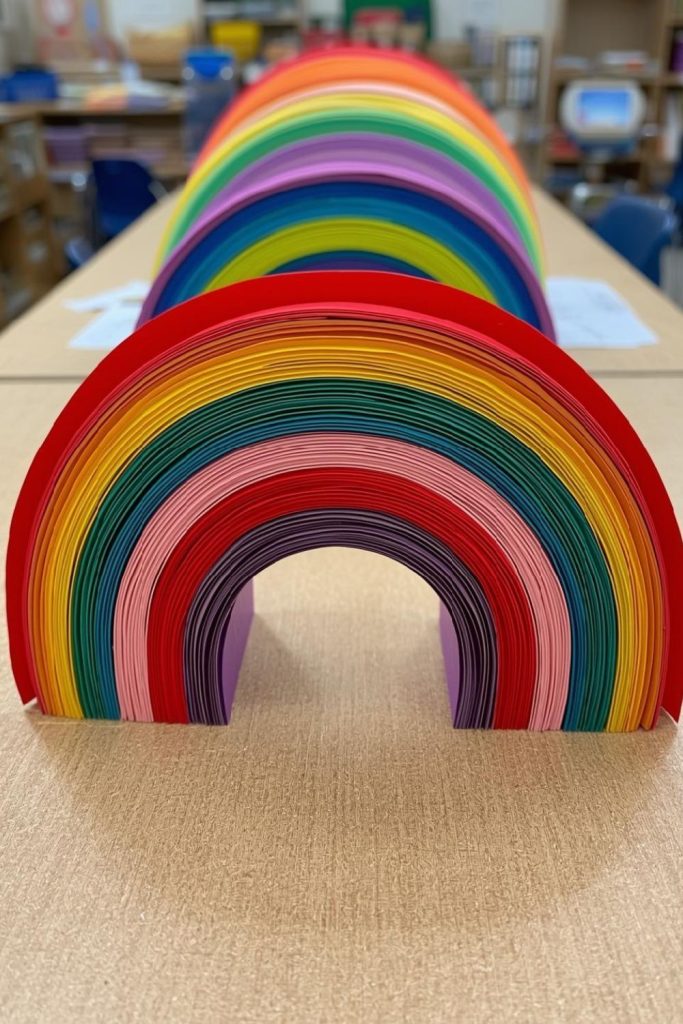
Rainbow Arches with Layered Paper Strips in Color Order
Rainbow arches are simple but visually stunning, introducing preschoolers to sequencing, color order, and layering while keeping the craft hands-on and exciting.
Materials Necessary:
- Construction paper in red, orange, yellow, green, blue, indigo, violet
- Scissors
- Glue sticks or liquid glue
- Background paper
Step-by-Step Method:
- Cut paper strips for each rainbow color, around 1–2 cm wide.
- Arrange the strips on the background paper in the correct color order.
- Glue each strip carefully to create a clean arch.
- Encourage kids to layer strips slightly for a textured look.
- Optionally, add clouds, flowers, or other spring elements to the scene.
This craft develops sequencing, color recognition, and fine motor coordination while producing a bright, cheerful display perfect for spring.
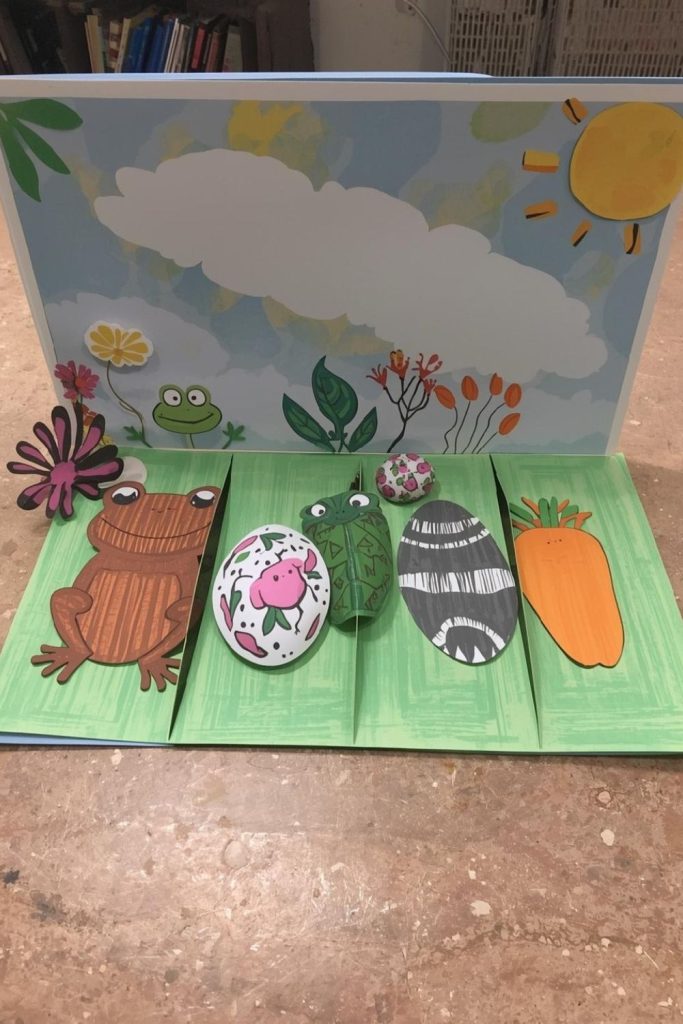
Frog Life-Cycle Flipbook with Movable Paper Pieces
A frog life-cycle flipbook helps preschoolers explore nature, sequencing, and movement while building a playful and educational spring project.
Materials Necessary:
- Colored construction paper
- Child-safe scissors
- Brass fasteners or paper clips
- Markers or crayons
Step-by-Step Method:
- Draw and cut frog life-cycle stages: egg, tadpole, growing tadpole, adult frog.
- Stack the pieces in order, largest on top.
- Attach with a brass fastener or paper clip so children can flip between stages.
- Add details or labels for each stage.
- Encourage kids to flip through and talk about the frog’s growth process.
This activity strengthens sequencing understanding, fine motor skills, and introduces basic science concepts in a visually interactive way.
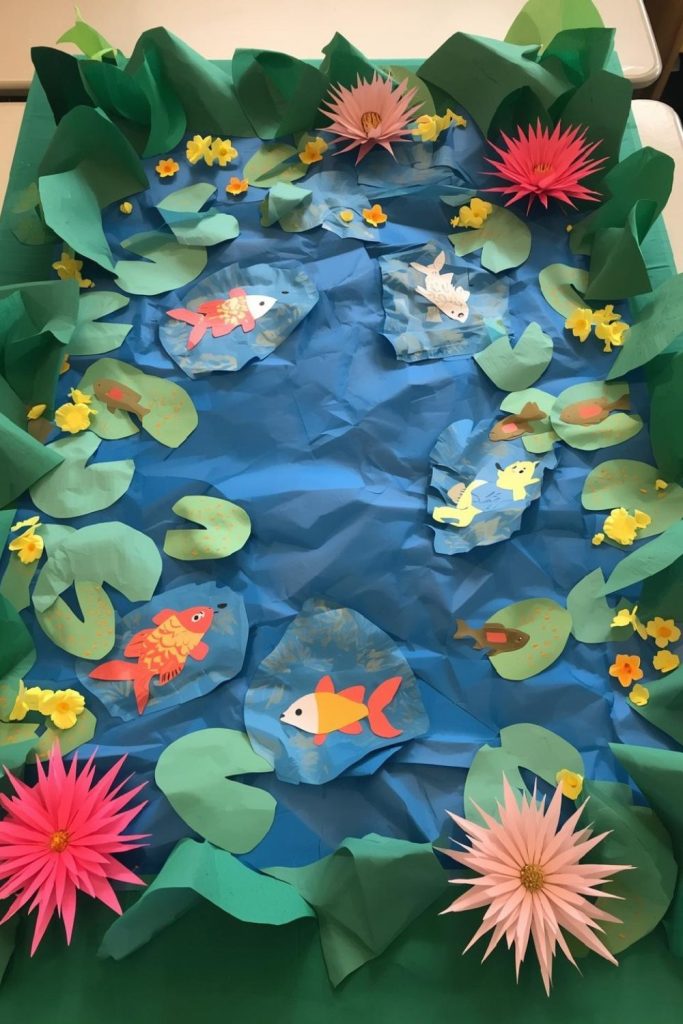
Spring Pond Scene with Layered Paper, Fish, and Lily Pads
Creating a layered pond scene allows preschoolers to explore water habitats and layering techniques while making a visually rich spring display.
Materials Necessary:
- Blue construction paper for water
- Green paper for lily pads
- Colored paper for fish
- Glue sticks or liquid glue
- Scissors
Step-by-Step Method:
- Use blue paper as the pond background.
- Cut out green lily pads and glue them onto the pond.
- Cut small fish shapes from colored paper and layer them across the pond.
- Add details like reeds, ripples, or insects using paper or markers.
- Encourage children to arrange elements freely to explore composition.
This activity encourages creativity, layering, and an understanding of natural habitats while producing a visually dynamic and spring-themed artwork.
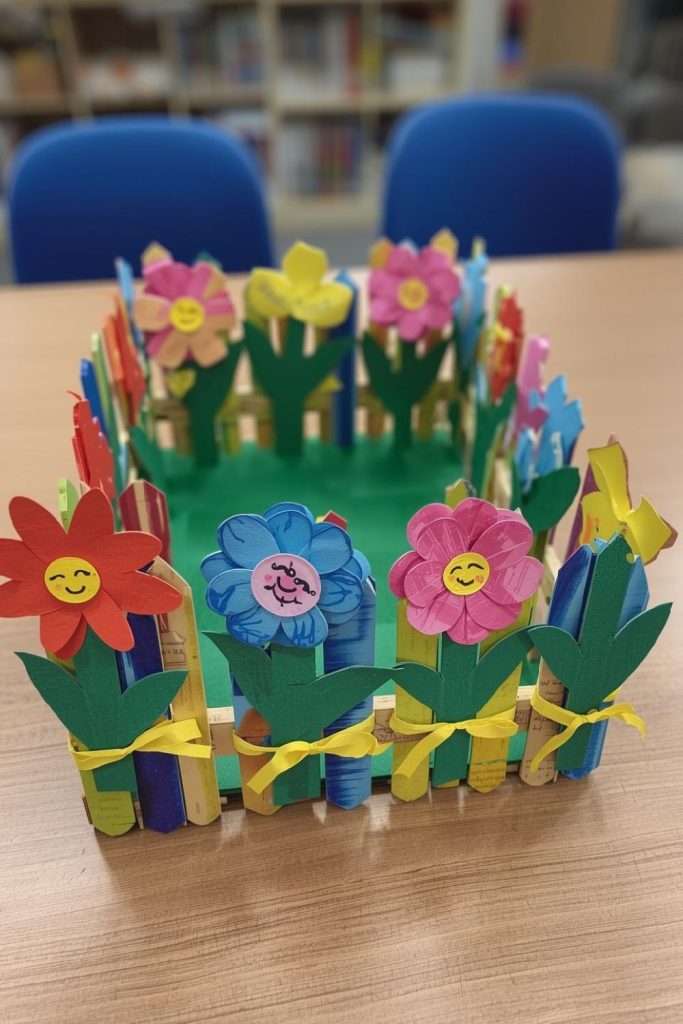
3D Popsicle Stick Fence with Attached Paper Flowers for Spatial Arrangement
Building a 3D fence adds a construction element to spring crafts preschool activities while encouraging spatial awareness and layering skills.
Materials Necessary:
- Popsicle sticks
- Glue
- Colored paper for flowers
- Scissors
- Cardboard base
Step-by-Step Method:
- Cut a cardboard base for the fence.
- Glue popsicle sticks upright along the edge of the base to form a fence.
- Cut paper flowers in various colors and glue them on or between the sticks.
- Encourage kids to layer flowers, overlap colors, and space them creatively.
- Let dry fully and display as a 3D spring garden scene.
This project strengthens spatial awareness, hand-eye coordination, and creativity while giving kids a sense of accomplishment with a tactile, spring-inspired 3D display.
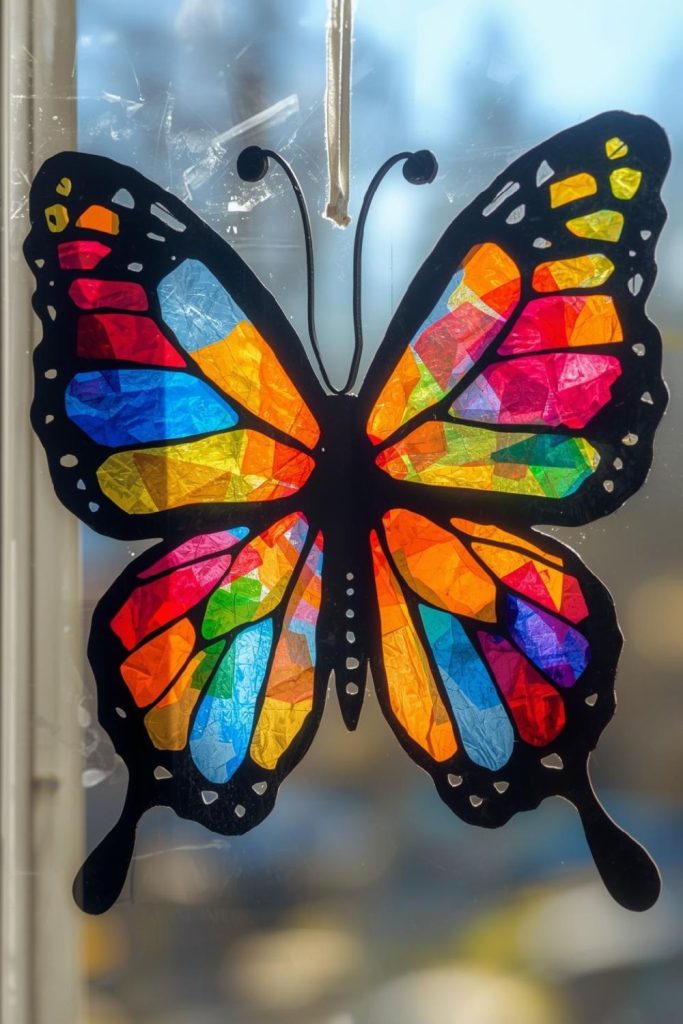
Butterfly Sun Catchers Made with Contact Paper and Tissue Paper
Butterfly sun catchers are bright, translucent, and interactive, making them perfect for spring crafts preschool. Children can explore color, shape, and layering while creating decorations that glow in sunlight.
Materials Necessary:
- Contact paper
- Tissue paper in multiple colors
- Scissors
- Cardstock or template for butterfly shape
- Optional: ribbon for hanging
Step-by-Step Method:
- Cut a butterfly shape from cardstock for a template.
- Place contact paper sticky side up and trace the butterfly shape.
- Cut small pieces of tissue paper and let children press them onto the sticky surface.
- Cover with another layer of contact paper to seal.
- Attach a ribbon and hang near a window to catch the light.
This craft encourages color exploration, layering, and fine motor coordination while producing a visually stunning and interactive spring decoration.