Finding room for creativity when space is tight can be tricky. But if you’re a DIY-loving woman juggling small living quarters and a big passion for making, don’t sweat it. Small craft rooms don’t have to feel cramped or chaotic. With the right layout ideas, you can turn even the tiniest nook into a powerhouse of productivity and inspiration. Let’s get real—this is about making your craft space work hard without eating up your whole home. Ready? Here’s how to make every inch count.
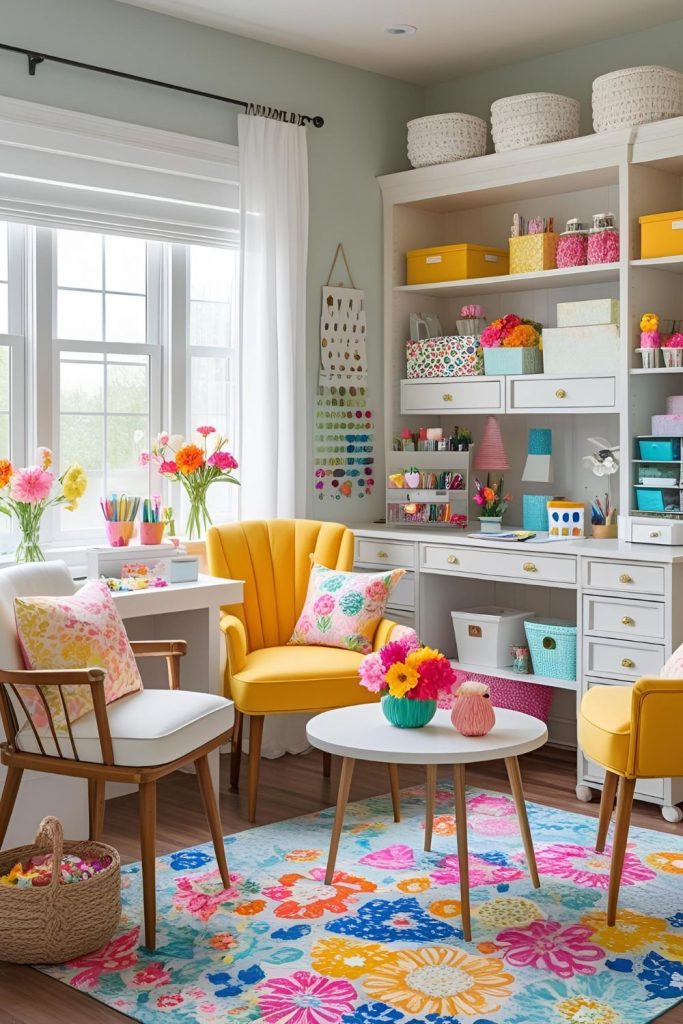
Plan your craft room layout around natural light sources
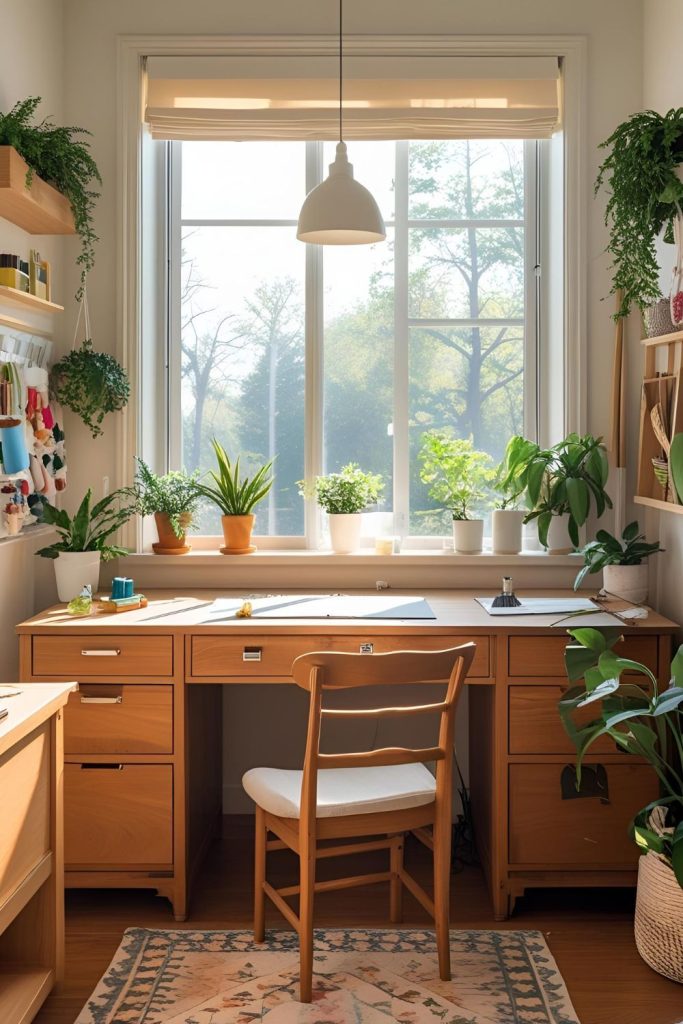
Nothing beats crafting bathed in natural light. Set up your workspace near windows to catch those rays. Natural light wakes up your senses, cuts down eye strain, and brightens your mood. Plus, it makes colors pop when you’re sewing, painting, or scrapbooking. If your spot doesn’t get much sunlight, consider placing your desk in a way that maximizes what little light you have. Trust me, working where you can soak up daylight feels like a mini boost every time.
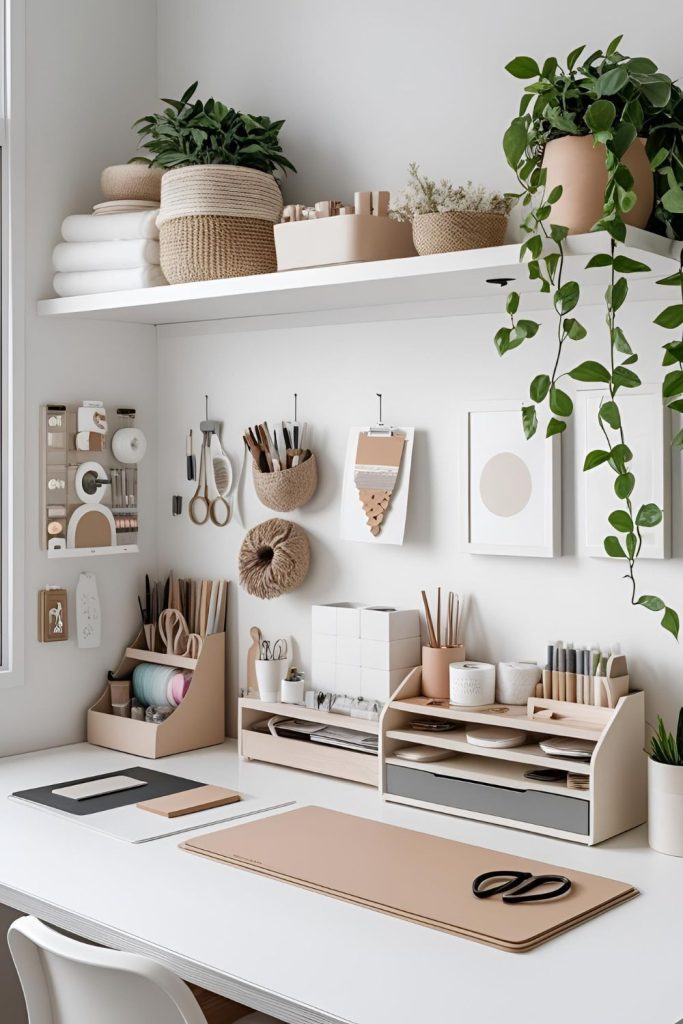
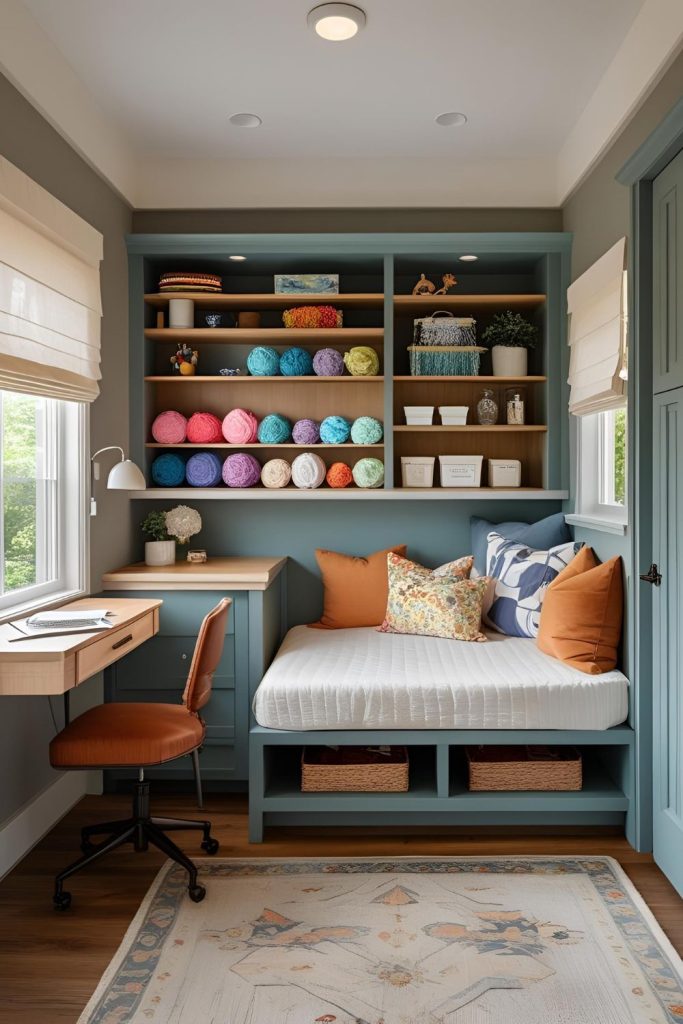
Use vertical shelving to maximize wall space
When floor space is tight, look up. Installing vertical shelves lets you stack materials, books, and tools without cluttering your table. Plus, you’re free to display supplies you reach for often. Floating shelves keep things light and open, while cubbies help organize everything with a spot for each item. If you’re someone who loves seeing your stash, this setup keeps everything visible and within reach.
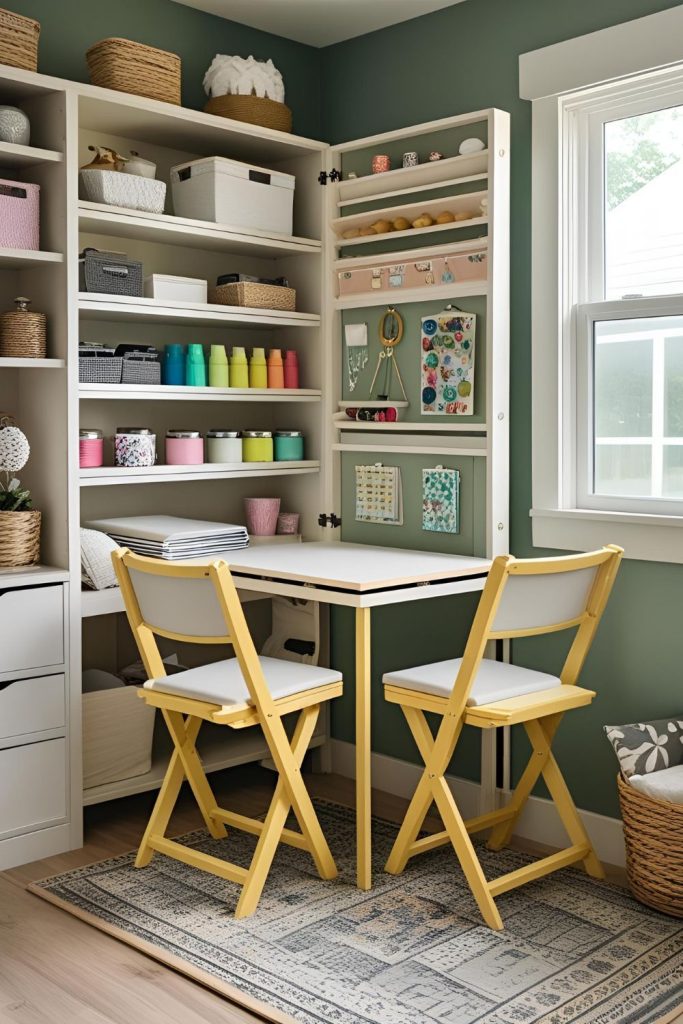
Install fold-down tables for flexible workspace
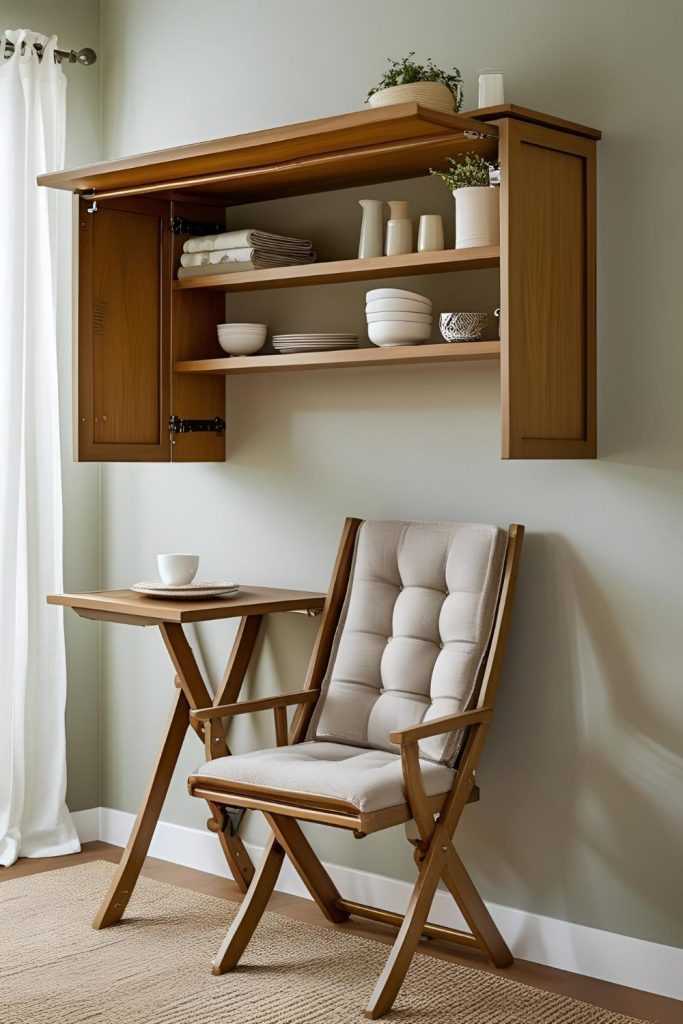
Fold-down tables are a game changer in tiny spaces. When you need a work surface, flip it down. When you don’t, fold it back to free up room. These tables give you the luxury of a dedicated workspace without sacrificing square footage. I had one tucked behind my door, and it saved me from feeling boxed in. Bonus: they’re easy on the wallet and come in styles that match your vibe.
Incorporate rolling carts for mobile storage and workstations
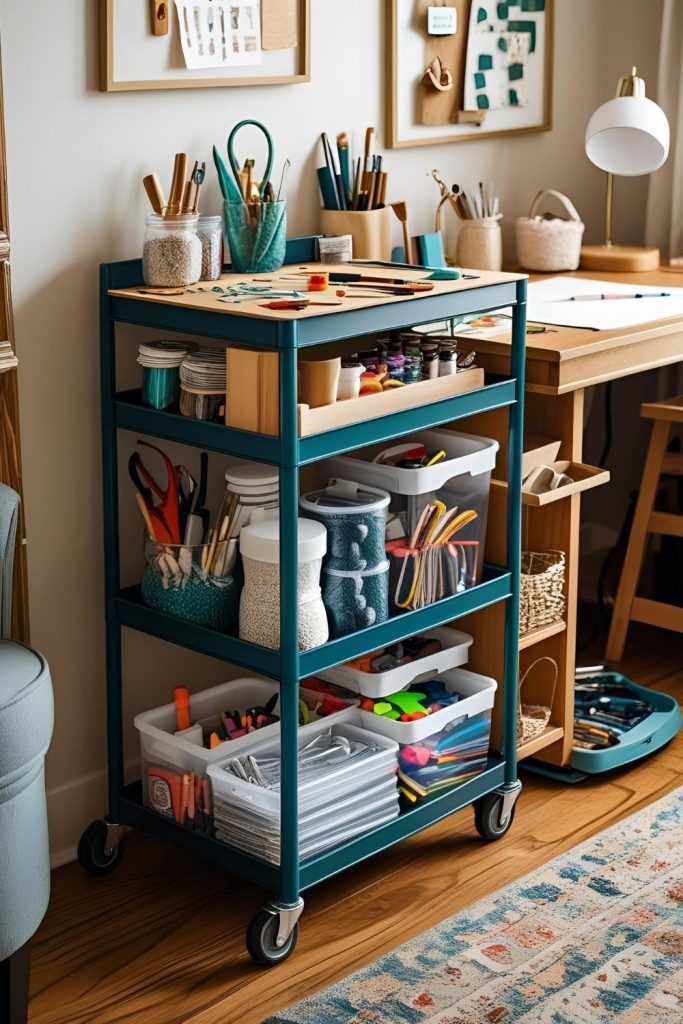
Rolling carts bring freedom to your craft room. You can wheel your supplies wherever you’re inspired—by the window, to the kitchen table, or even outside on a sunny day. Their mobility means your craft space isn’t static; it moves with your mood. Stash your paint, fabrics, or papers in these carts and roll out whenever creativity calls.
Convert a closet into a compact craft nook
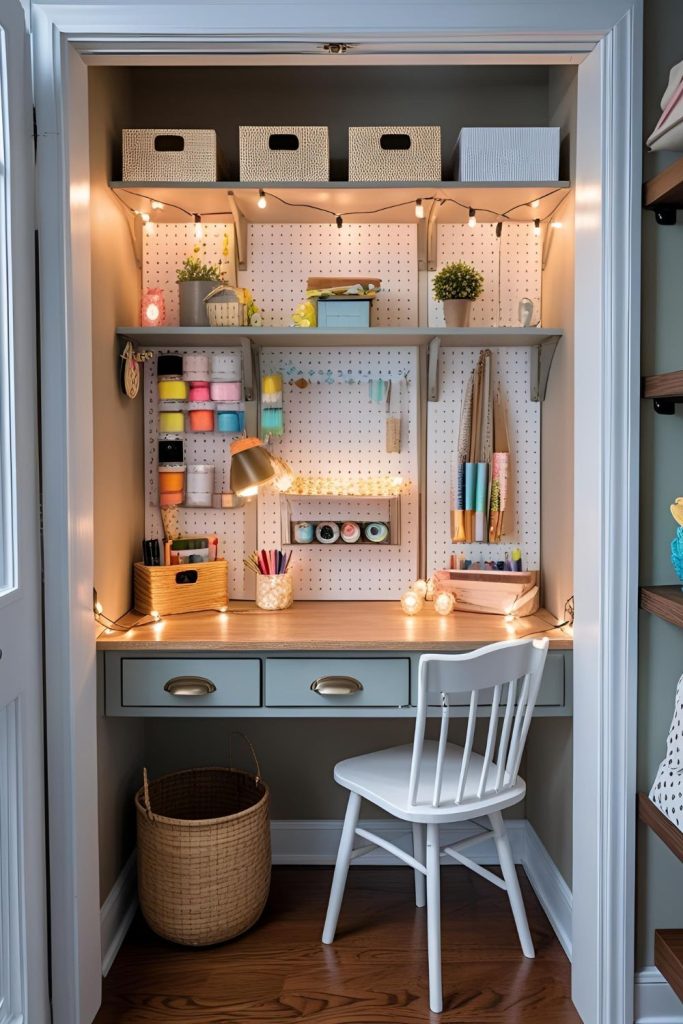
Closets often get overlooked, but they’re perfect for a mini craft room. Clear out the clothes, add shelves and a small desk, and suddenly you’ve got a private hideaway for projects. Closets make your craft zone cozy, contained, and easy to close up when you’re done. It’s a neat little secret that can save you a ton of space elsewhere.
Utilize under-window areas for small desks or shelves
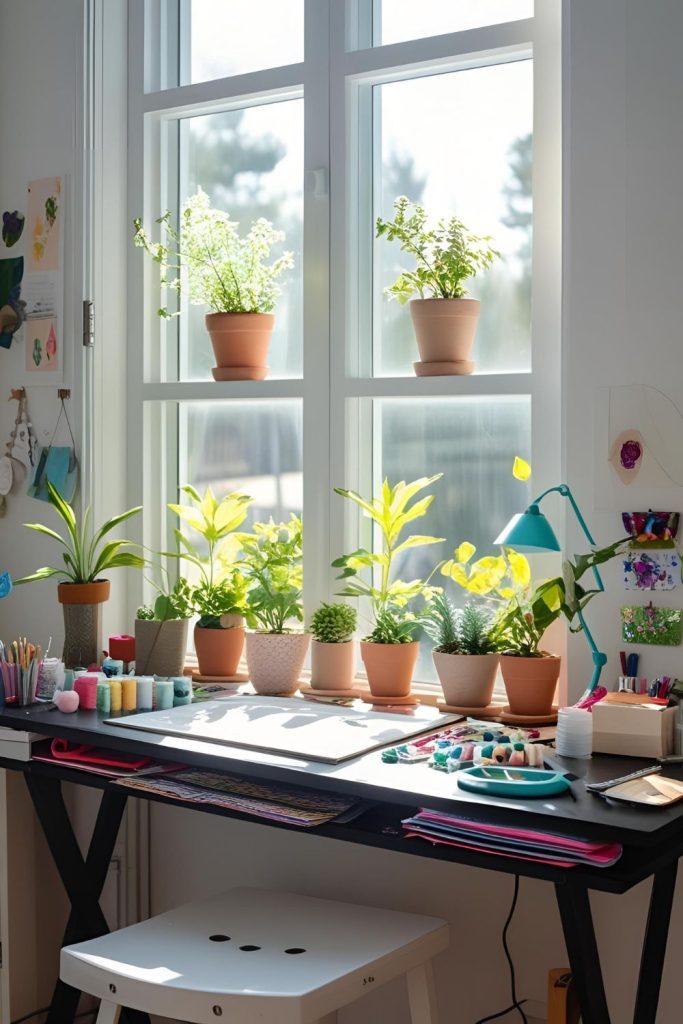
The space beneath windows is prime real estate. Slim desks or low shelves fit right here without blocking the light. This area is perfect for quick projects or displaying your favorite materials. Plus, the view keeps things fresh when you need a breather. I once turned my windowsill into a tiny herb garden and craft supply spot—double win!
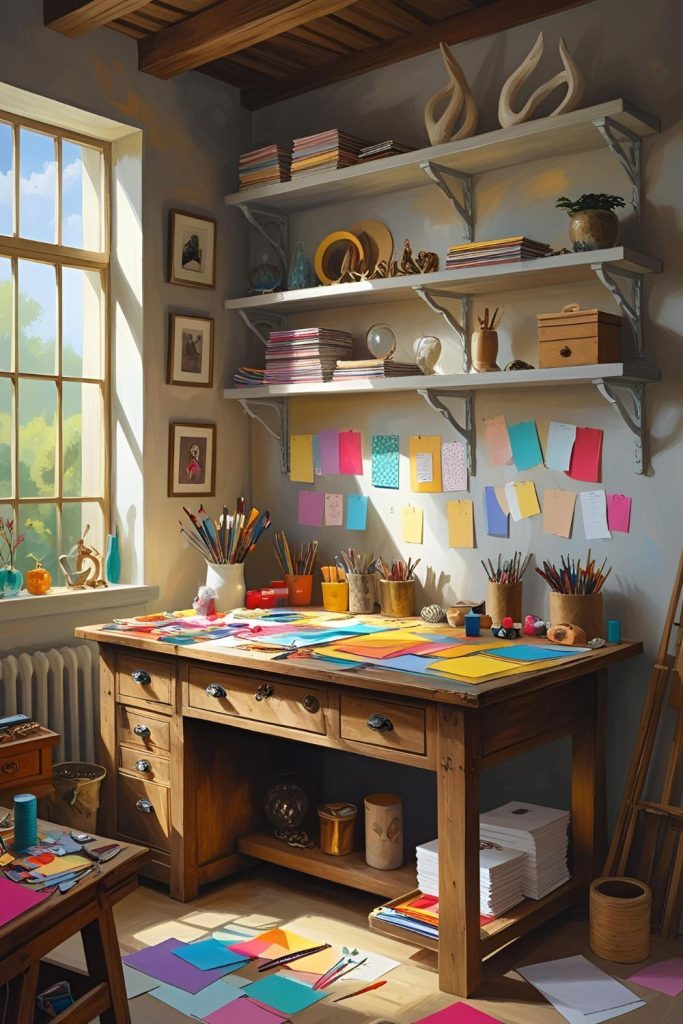
Add task lighting tailored to crafting needs
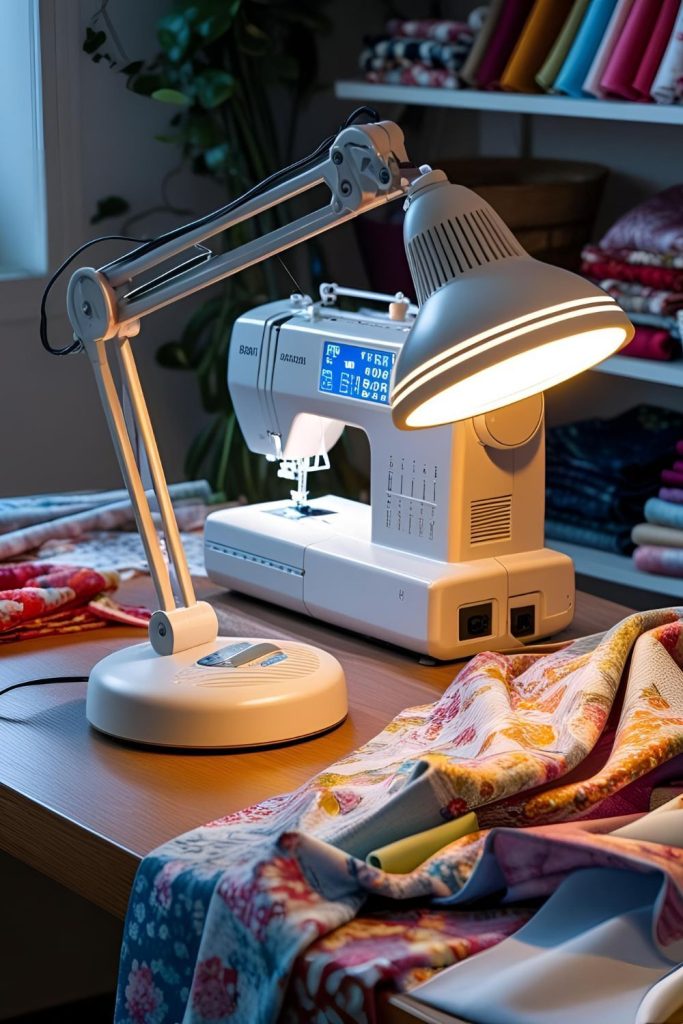
Good lighting is a must. Task lights with adjustable arms help you focus on the tiniest details without straining your eyes. Clip-on lamps, LED strips, or desk lamps that mimic daylight work wonders. I recommend flexible lighting you can move around, so you always have the perfect glow no matter your project.
Create portable craft stations for easy cleanup and storage

When space is tight, sometimes you gotta pack it up and move. Portable craft stations on trays or small carts let you gather all your supplies and tuck them away fast. When you’re done, just slide them under a table or into a closet. This keeps your main area tidy and your tools ready for next time.
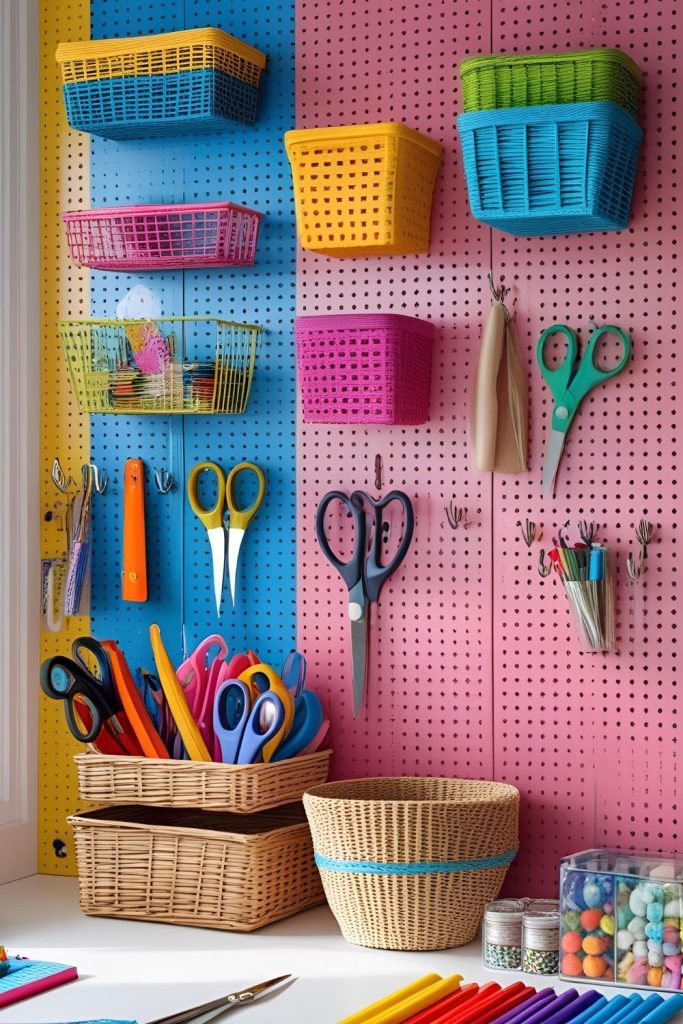
Use magnetic boards to organize tools and supplies
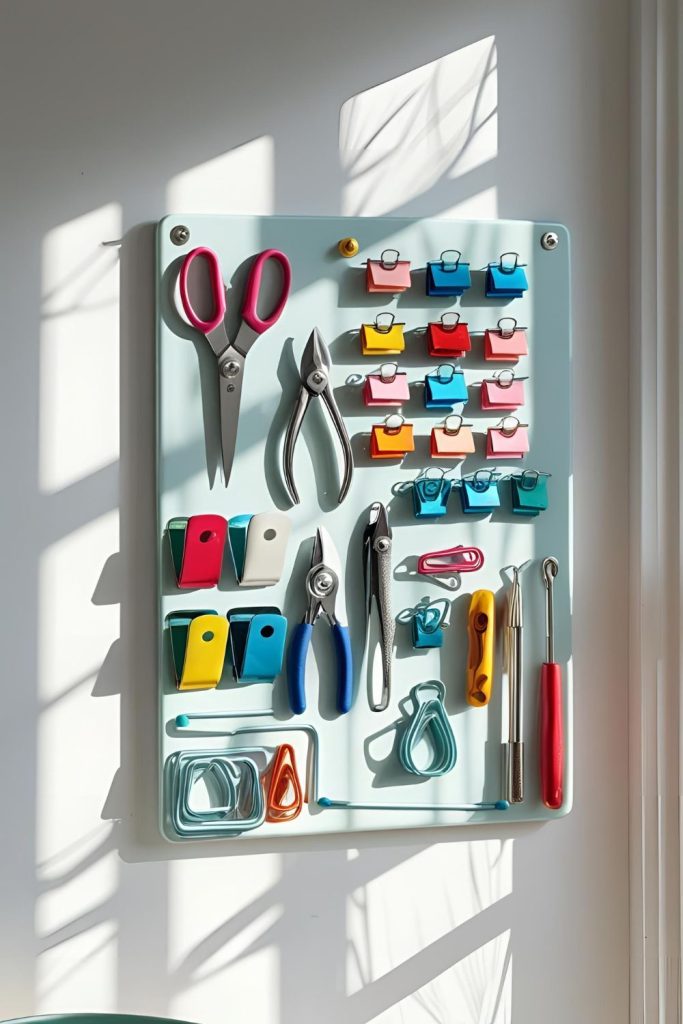
Magnetic boards are a neat trick for keeping metal tools handy. Attach scissors, clips, and rulers so you can grab them without digging through drawers. They save drawer space and add an element of order to your workspace. Plus, you can decorate the board with inspirational magnets or notes.
Design dedicated zones for different crafts within one room
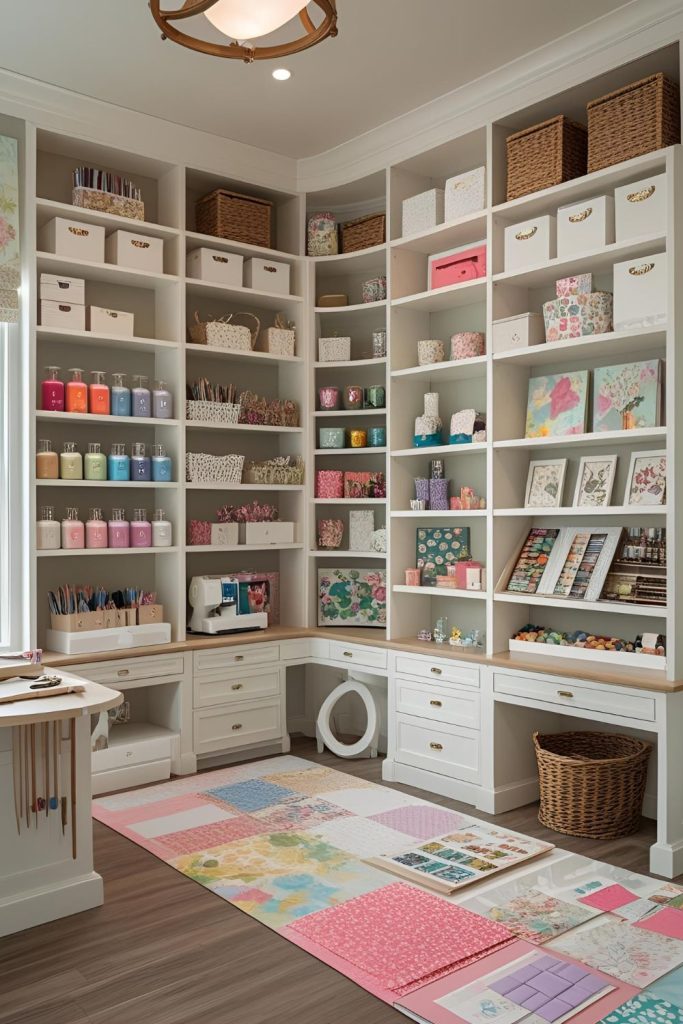
Even a small room can have zones. Whether it’s a spot for sewing, paper crafts, or painting, separating areas helps keep supplies organized and your brain focused. Use rugs, shelves, or tables to mark each zone. I found that having “zones” stops me from mixing up my glue with my fabric—total lifesaver.
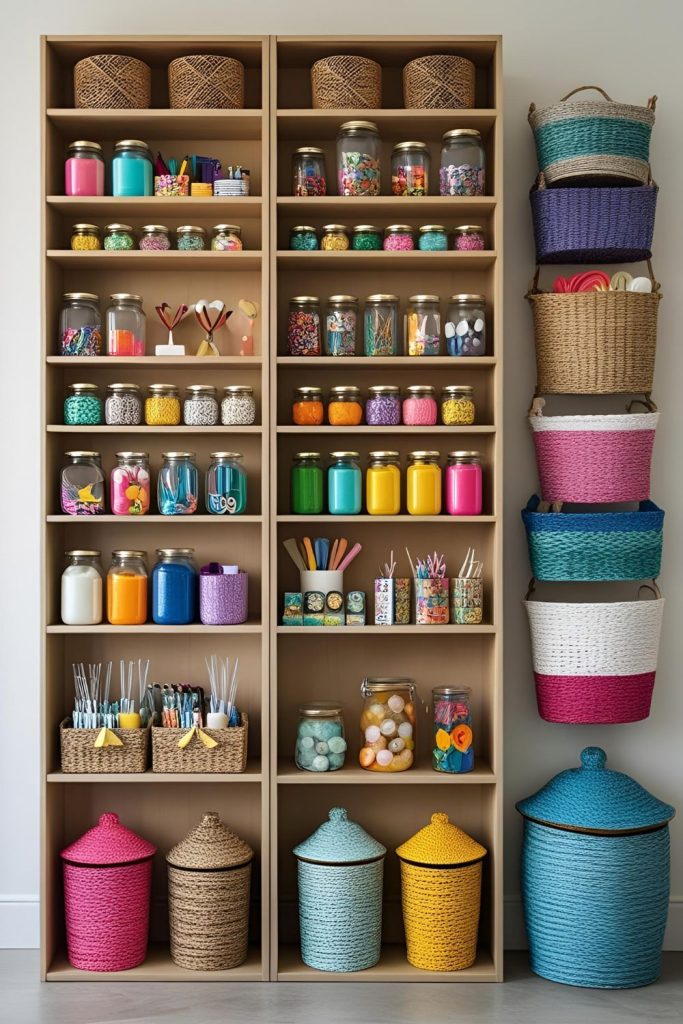
Store supplies in clear, stackable containers for visibility
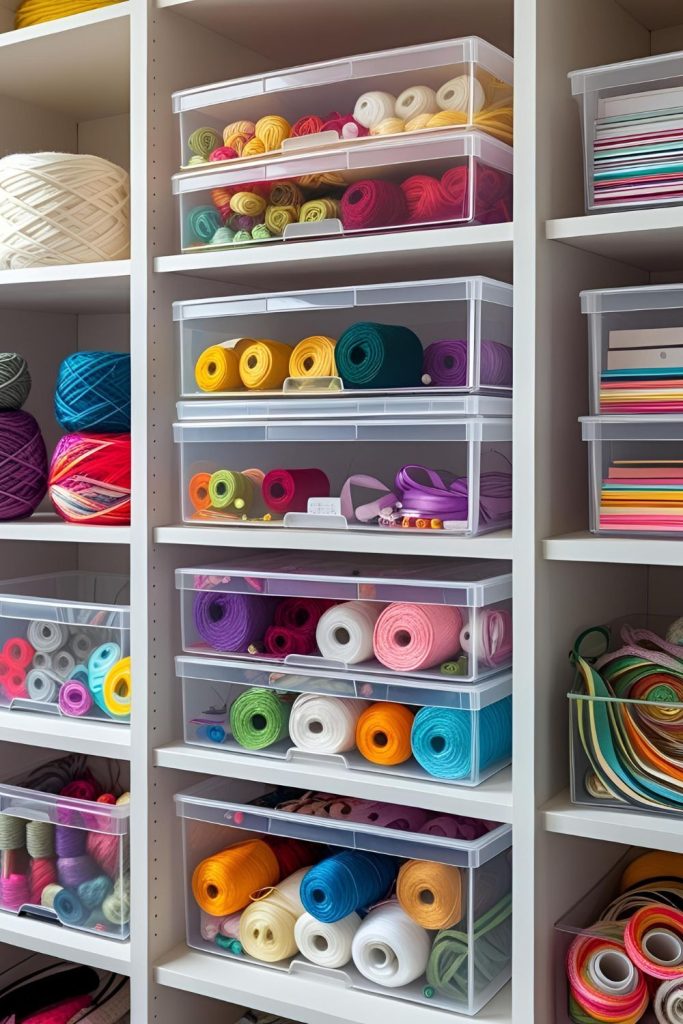
Clear containers make it easy to spot what you need at a glance. Stackable boxes maximize vertical space inside cabinets or on shelves. This approach cuts down on time wasted digging around and helps you keep an eye on inventory. I’ve got a bunch of these lined up—color-coded and ready to go.
Mix vintage and modern furniture for style and function
A blend of old and new pieces adds charm and personality to your space. Maybe a vintage desk pairs with sleek modern shelves, giving you both character and practicality. Vintage pieces often come with hidden storage or sturdy build quality, making them perfect for crafty setups. Plus, you avoid that cookie-cutter look.
Keep the space minimalist to reduce distractions
It’s easy to go overboard with supplies, but a clean, minimal setup actually sparks more creativity. Limit your tools to what you use most and store extras out of sight. Minimalism doesn’t mean boring—it means a calm canvas for your ideas to flow freely.
Use wall-mounted fabric racks for sewing projects
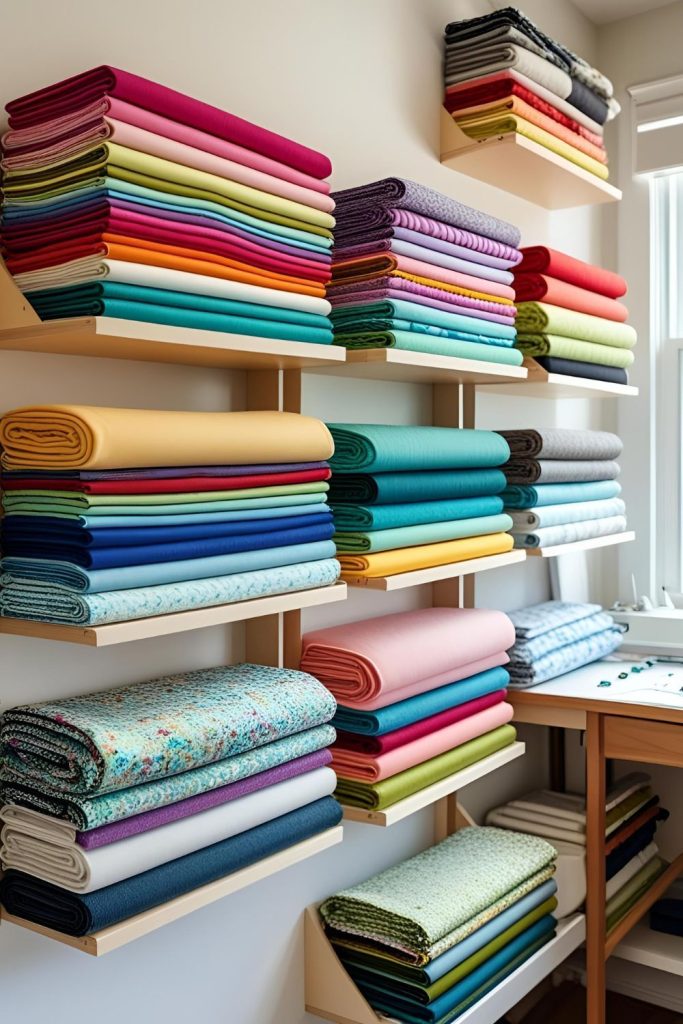
Fabric can take over quickly. Wall-mounted racks keep your textiles visible and wrinkle-free while saving drawer space. They make picking out colors and patterns a breeze. I rigged a simple rack above my sewing station and now fabric chaos is history.
Incorporate modular furniture that adapts over time
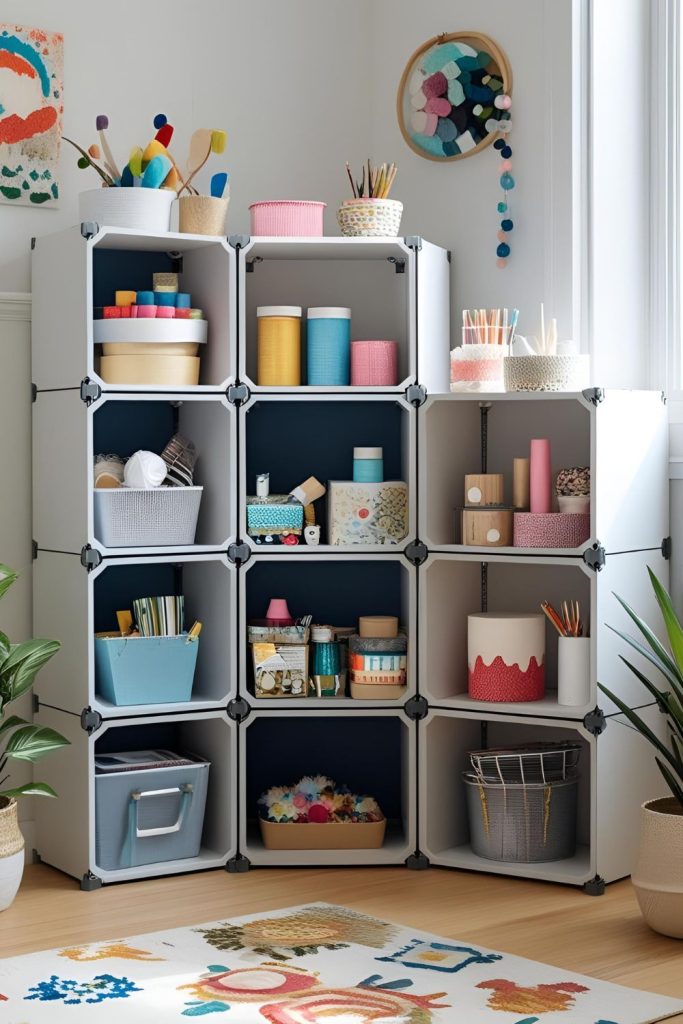
Modular furniture flexes with your needs. Cubes, stackable shelves, and adjustable desks grow or shrink as your projects change. This keeps your craft room feeling fresh without full makeovers. If you’re someone who switches hobbies often, modular pieces are a blessing.
Maximize corner spaces with angled shelves or desks
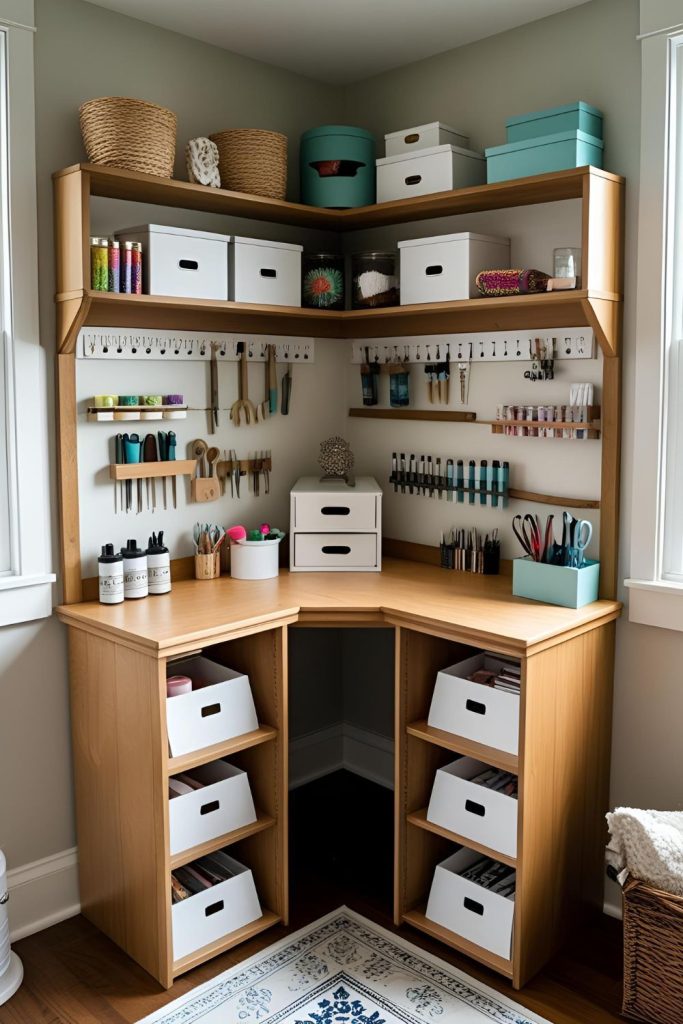
Corners are often wasted, but they can become focal points with the right furniture. Angled desks or corner shelves turn these nooks into handy work zones or storage spots. It’s surprising how much you can fit in a corner when you get creative.
Opt for foldable chairs and tables to save floor space
Foldable furniture tucks away when not in use, freeing up room instantly. Perfect for multi-use spaces or renters who can’t commit to bulky furniture. I keep a foldable chair that doubles as guest seating and craft chair—talk about multitasking!
Combine craft space with a guest room or office for dual purpose
If your home isn’t sprawling, your craft room might need to pull double duty. A Murphy bed, a fold-out desk, or a crafty console table can make the space flexible for guests or work. This keeps your craft passion alive without sacrificing livability.
Use pegboards for versatile vertical tool storage
Pegboards are crafty classics for a reason. Hooks, baskets, and shelves on pegboards let you rearrange your storage as your needs change. Plus, you can display your favorite tools like art. I like to swap out pegboard layouts seasonally for fresh vibes.
Create a supply wall with labeled cubbies or baskets
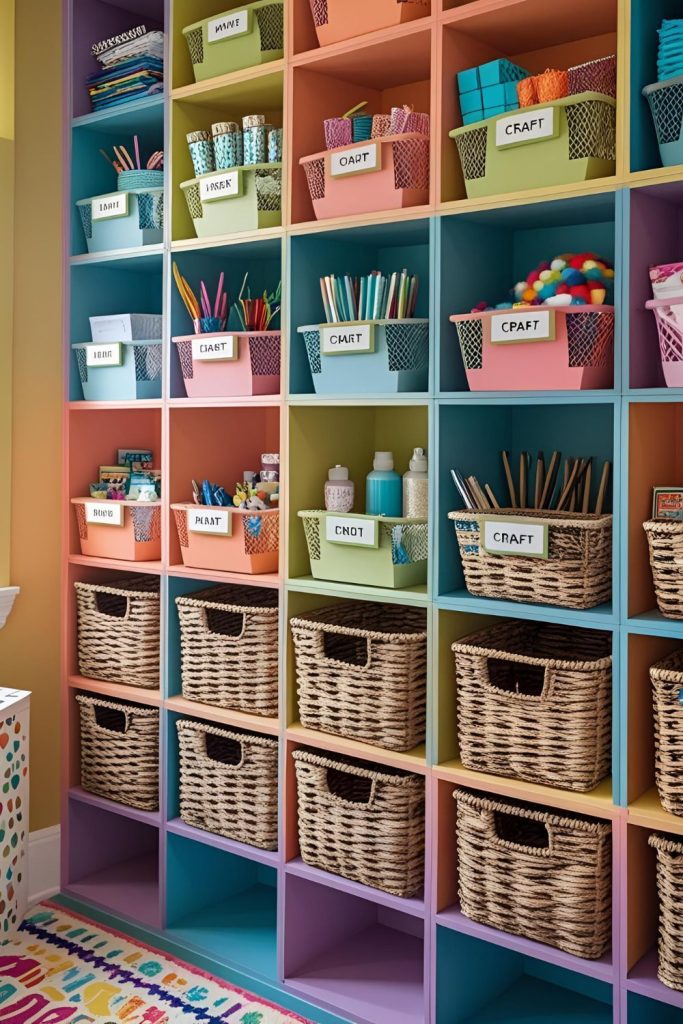
A wall filled with labeled baskets or cubbies makes supplies easy to find and return. Labels keep you honest and cut down on clutter creep. This setup also turns your storage into decor—functional and pretty.
Use under-desk drawers or baskets for hidden storage
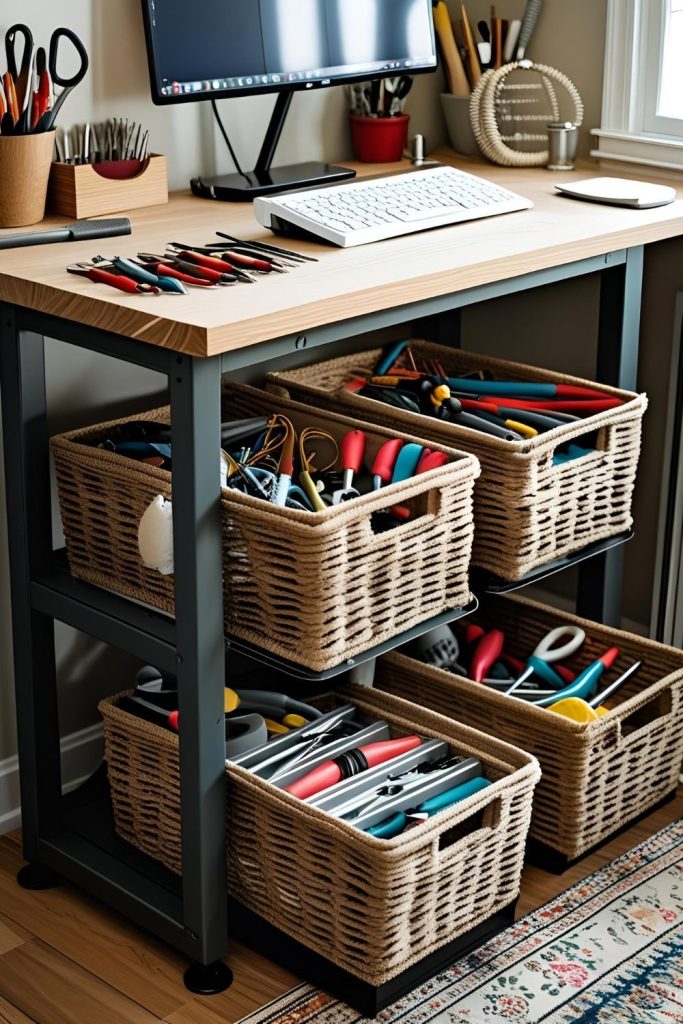
Under your desk is often forgotten, but it’s a prime place for drawers or baskets that hide supplies yet keep them handy. It’s perfect for storing smaller tools or scraps you want close but out of sight.
Organize supplies by color to enhance visual appeal
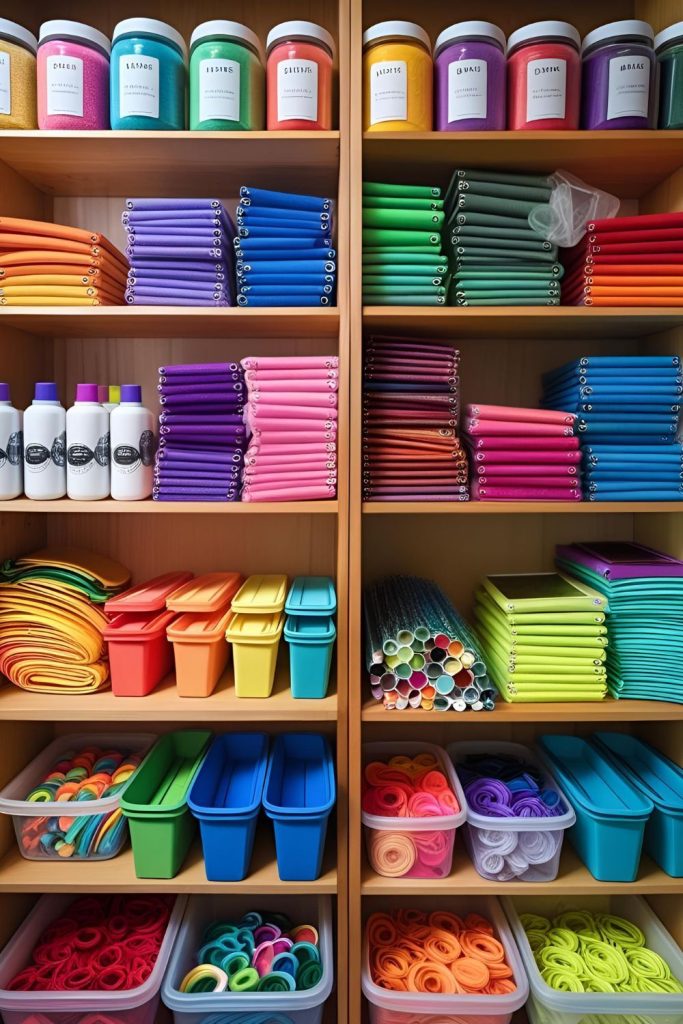
Sorting supplies by color isn’t just pretty—it helps you find what you want faster. It adds a spark of joy every time you open a drawer or shelf. I personally love the rainbow effect—it makes my room feel lively and cheerful.
Add inspirational artwork without overcrowding the space
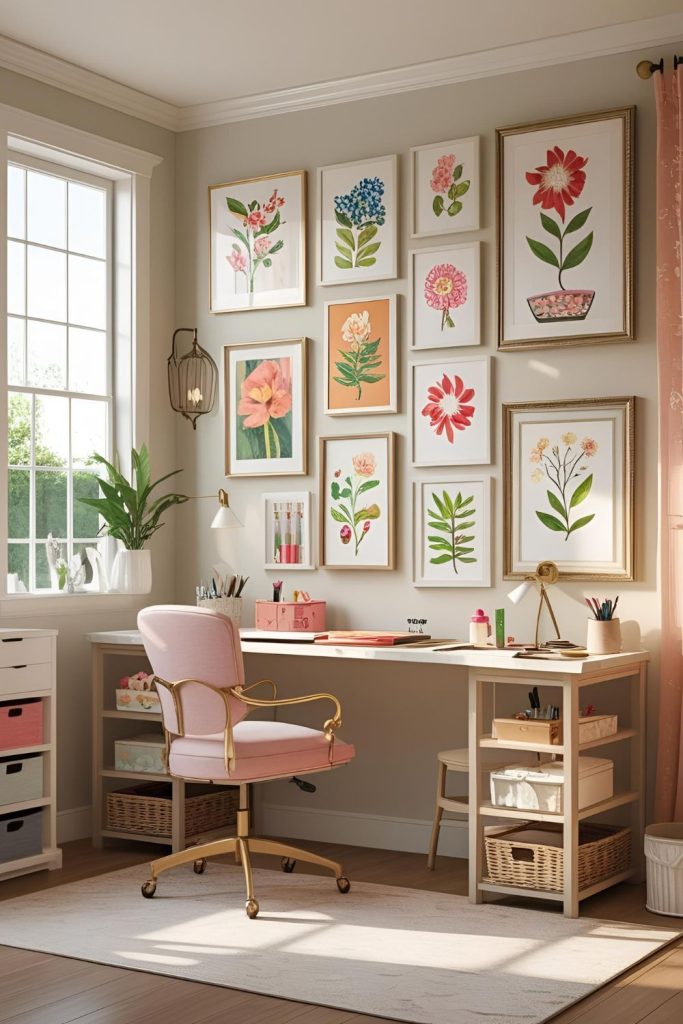
A few well-placed prints, photos, or quotes can keep motivation high without overwhelming your craft zone. Choose pieces that make you smile or push you to keep going. Keep it simple so the artwork complements, not competes with, your workspace.
Use stackable bins with wheels for easy mobility
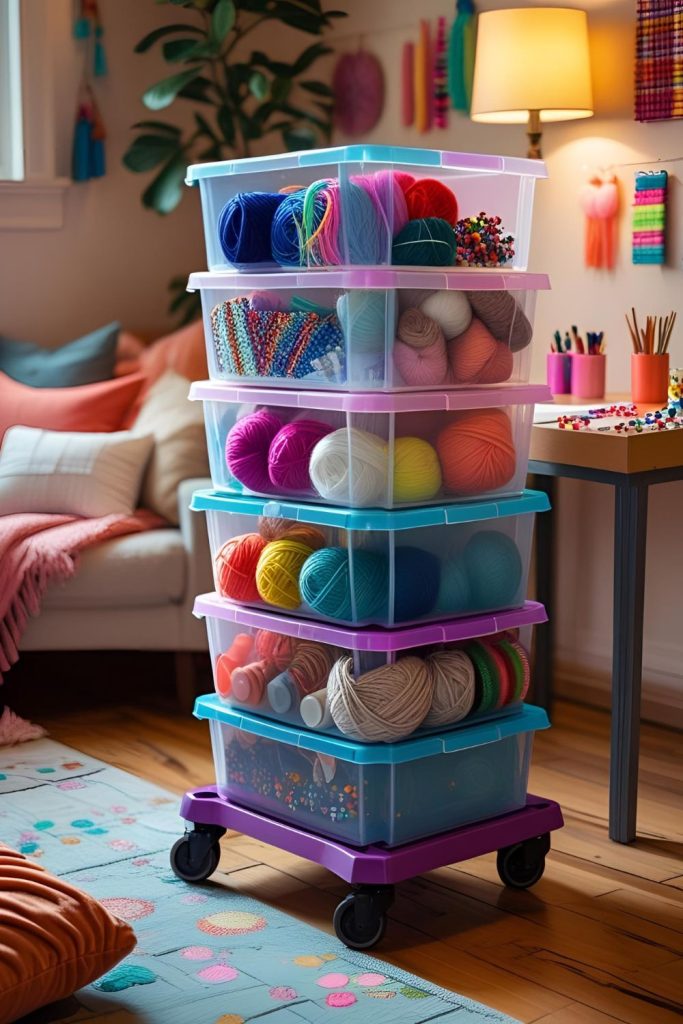
Stackable wheeled bins are the ultimate flexible storage. You can move your supplies around the room or even out of sight in a snap. This is especially handy if your craft space doubles as a living area.
Refresh your layout seasonally to keep your space inspiring
Switching things up every few months keeps your craft room feeling fresh. Rotate supplies, swap décor, or rearrange furniture. It’s a simple way to rekindle your creativity without a full remodel.