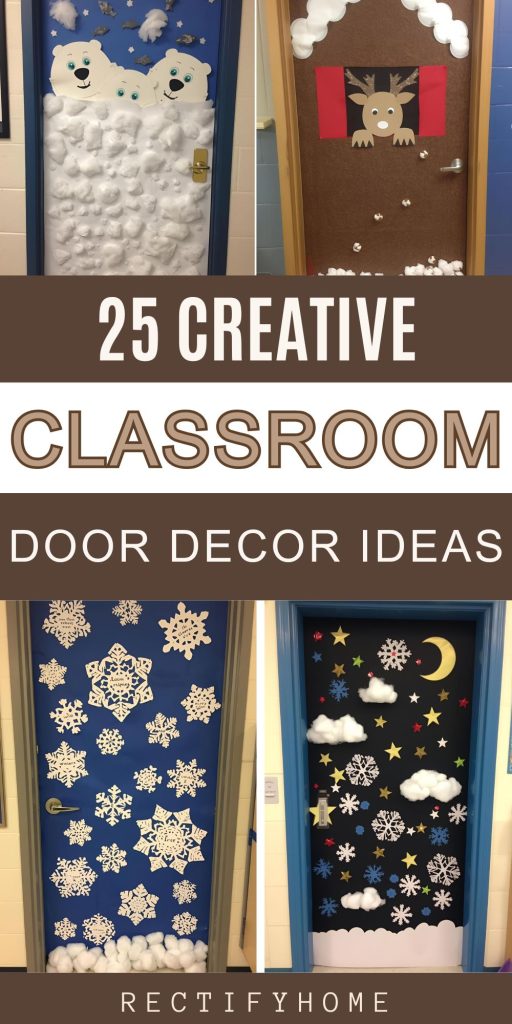
Winter is here, and nothing makes elementary classrooms feel warmer than fun, creative door decorations. Winter classroom door decorations do more than just brighten up a hallway—they invite students into a magical world of snowflakes, cozy cabins, and friendly animals, sparking excitement as soon as they enter. Whether you’re looking to make a snow globe come alive on your door or create a cozy fireplace scene, these ideas are designed to inspire joy and participation for both teachers and students.
Here are 25 hands-on, doable winter classroom door decoration ideas, each with step-by-step methods, that will transform your classroom door into a cheerful, playful, and inviting winter wonderland.
Snow Globe Wonderland
Imagine walking into a giant snow globe every morning. For this, cover your classroom door with light blue paper or wrapping paper. Cut a large circle from white or clear plastic to act as the globe. Add cotton batting at the bottom to resemble snow. Let students cut out winter-themed paper characters—snowmen, trees, little animals—and place them inside the circle. Sprinkle glitter for extra sparkle. Tape or tack the circle onto the door. To make it interactive, have each student write their name on a small cut-out snowflake and add it inside the globe, making it feel like they’re part of the scene.
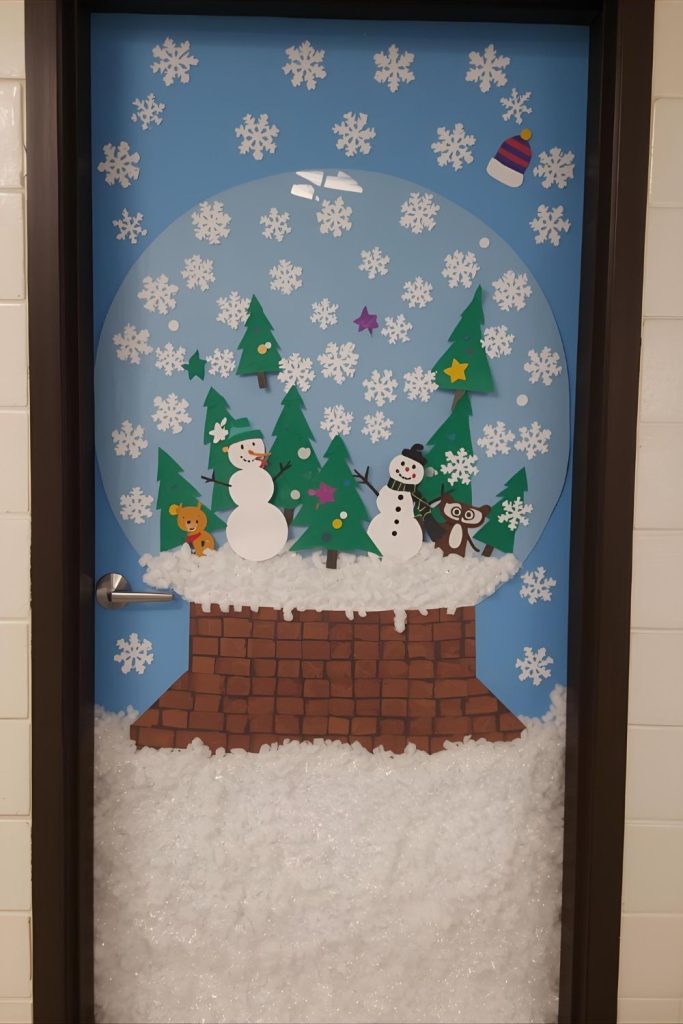
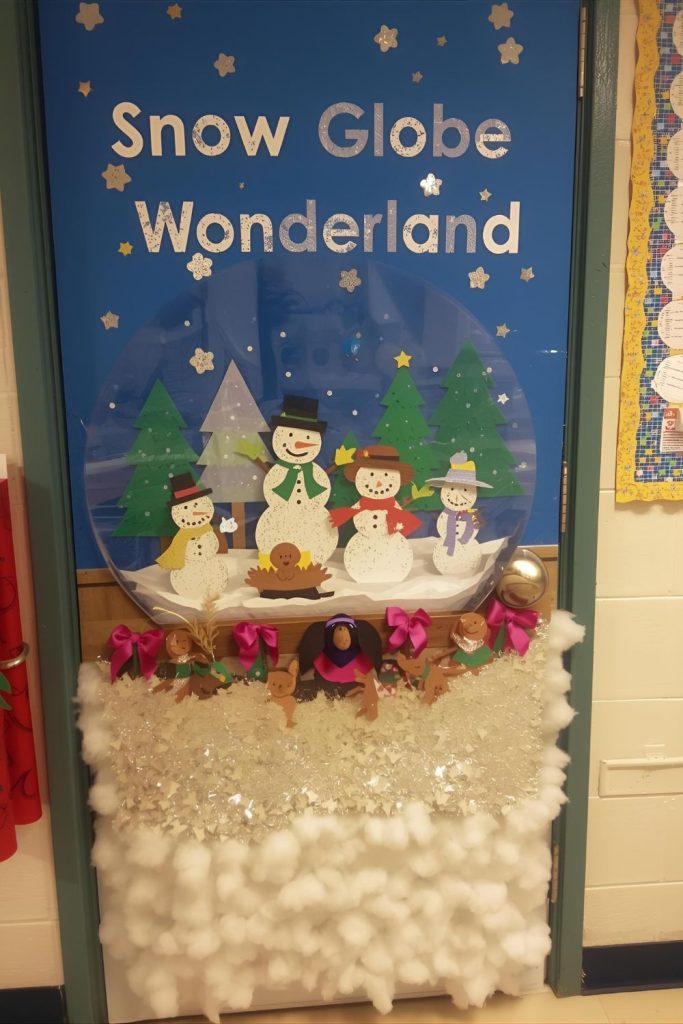
Step-by-step method:
- Cover the door with blue background paper.
- Cut a large circle from white or clear plastic and attach to the center.
- Add cotton at the bottom to mimic snow.
- Create winter-themed paper characters and let students decorate them.
- Sprinkle glitter or confetti for shimmer.
- Attach snowflakes with students’ names to personalize.
Giant Hot Cocoa Mug
Nothing says winter like a steaming cup of cocoa. For this decoration, start by cutting a huge mug from brown paper to fit your door’s height. Use white paper or cotton balls for marshmallows on top. Draw steam swirling upward with white markers or yarn. Students can add mini paper hearts or snowflakes floating around the steam. For a playful touch, write fun “flavors” like chocolate chip or peppermint on small tags hanging off the mug. This is a perfect interactive activity—students can stick their names on marshmallows as part of a class celebration.
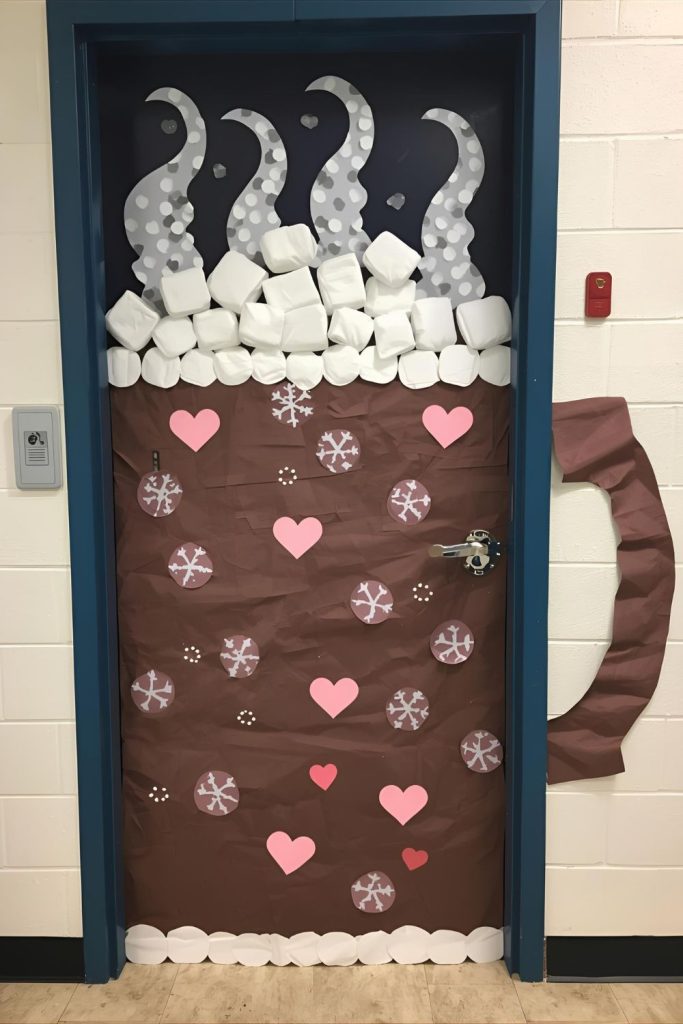
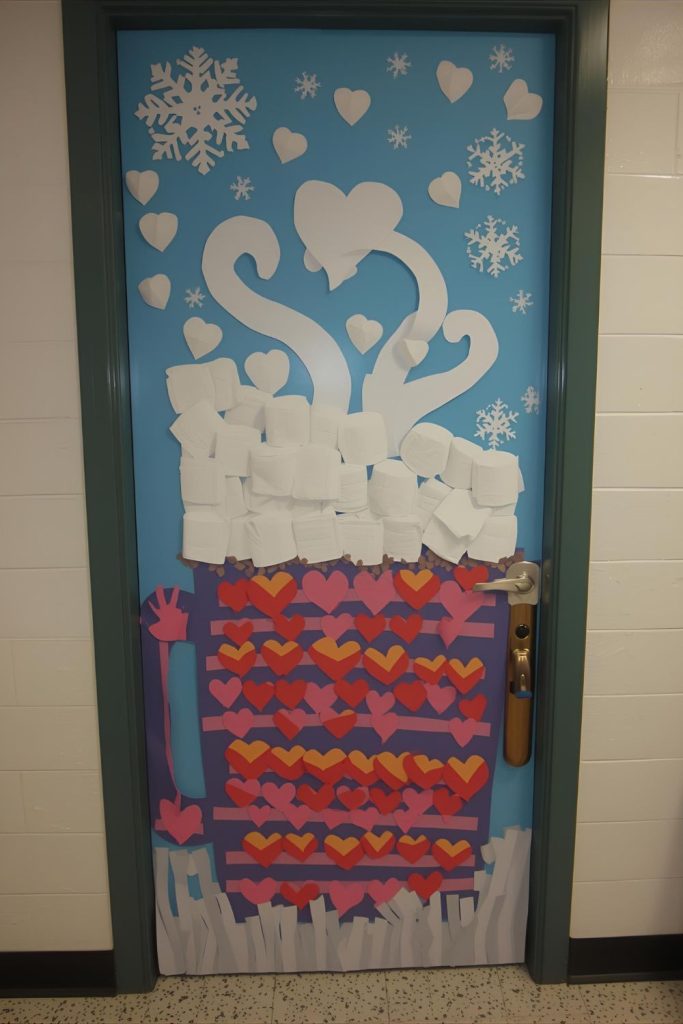
Step-by-step method:
- Cut out a mug shape from brown paper.
- Fill the mug with cotton ball “marshmallows.”
- Draw or attach yarn steam swirls rising from the mug.
- Add paper hearts, snowflakes, or name tags.
- Attach to door with tape or sticky tack.
Life-Size Gingerbread House
Bring holiday sweetness to your hallway. Cover your door with brown paper to act as the house walls. Use white paper strips, cotton, or ribbon to create “frosting” along the edges. Cut candy shapes from colored paper or use foam stickers for gumdrops, candy canes, and lollipops. Students can make small paper gingerbread people to stick around the door. You can even make a door “window” with yellow paper to mimic glowing light from inside.
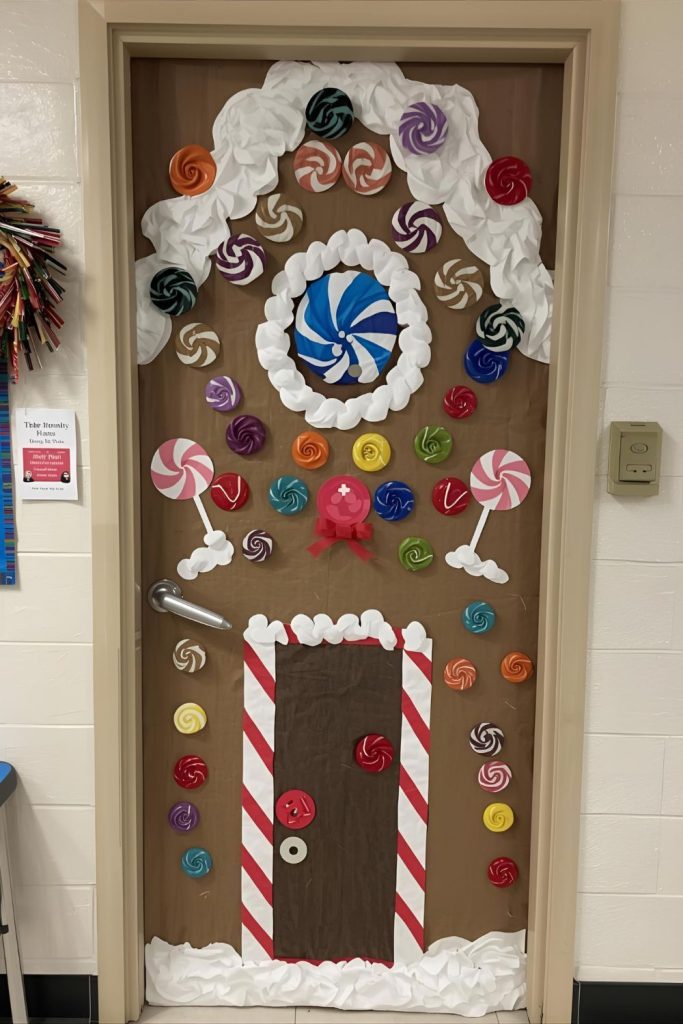
Step-by-step method:
- Cover the door with brown paper.
- Add white paper strips or cotton along edges for frosting.
- Create candy shapes from colored paper and attach them.
- Make gingerbread people with students’ names or faces.
- Optional: add a window or door detail with yellow paper.
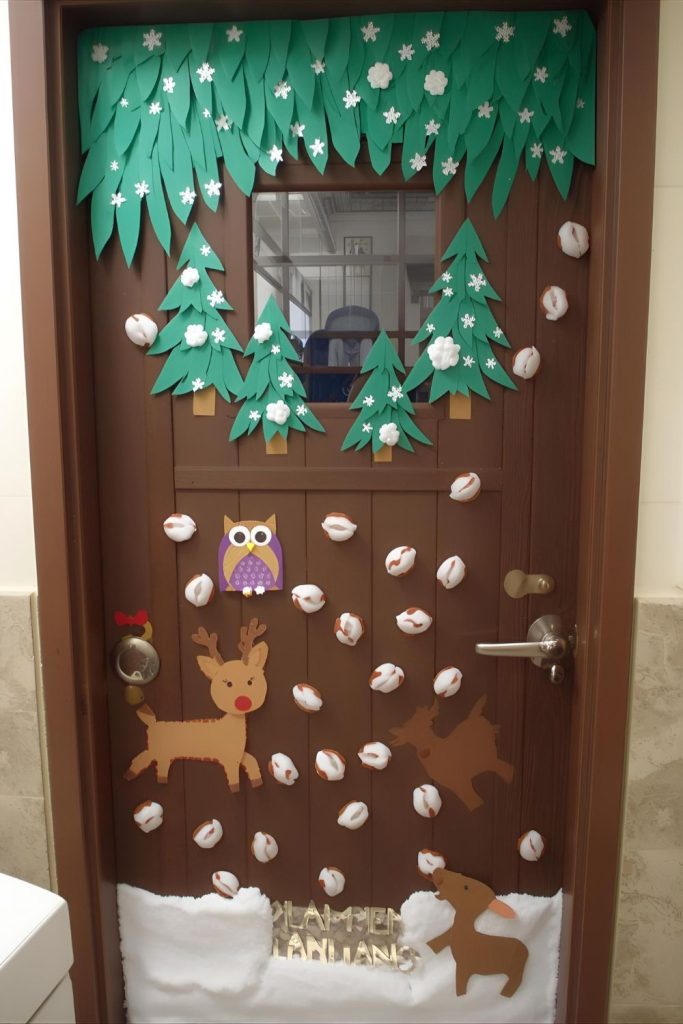
Cozy Woodland Cabin
This door transforms into a peaceful forest retreat. Start with brown paper for the cabin walls. Add a “roof” with darker brown or black paper. Cut small squares or rectangles for windows and doors, letting students decorate them with curtains or paper flames in the fireplace. Surround the cabin with green paper pine trees dusted with cotton for snow. Add woodland animals made from paper, like owls, foxes, or deer, for an extra touch of life.
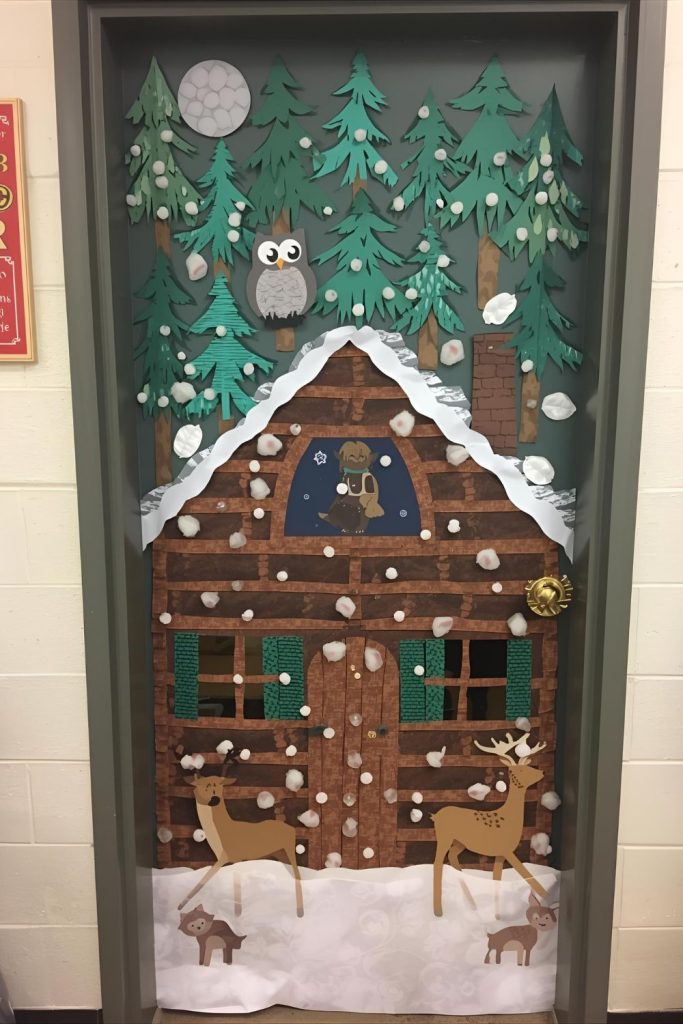
Step-by-step method:
- Cover the door with brown paper for cabin walls.
- Create a roof from darker brown or black paper.
- Cut windows and doors; students can decorate them.
- Make green paper pine trees and dust with cotton.
- Add woodland animal cut-outs for charm.
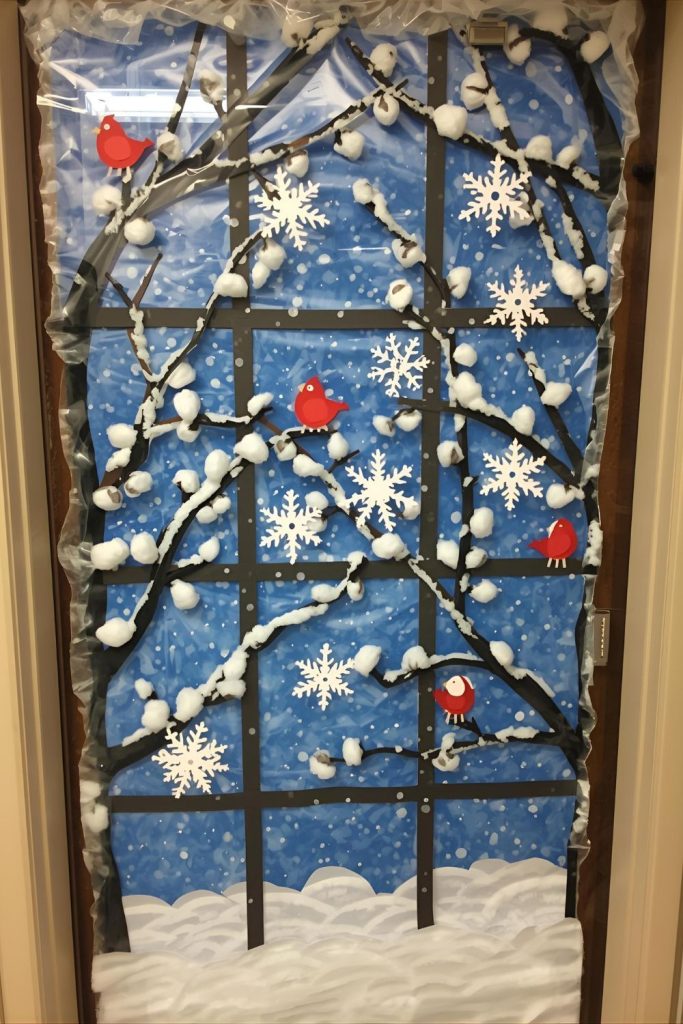
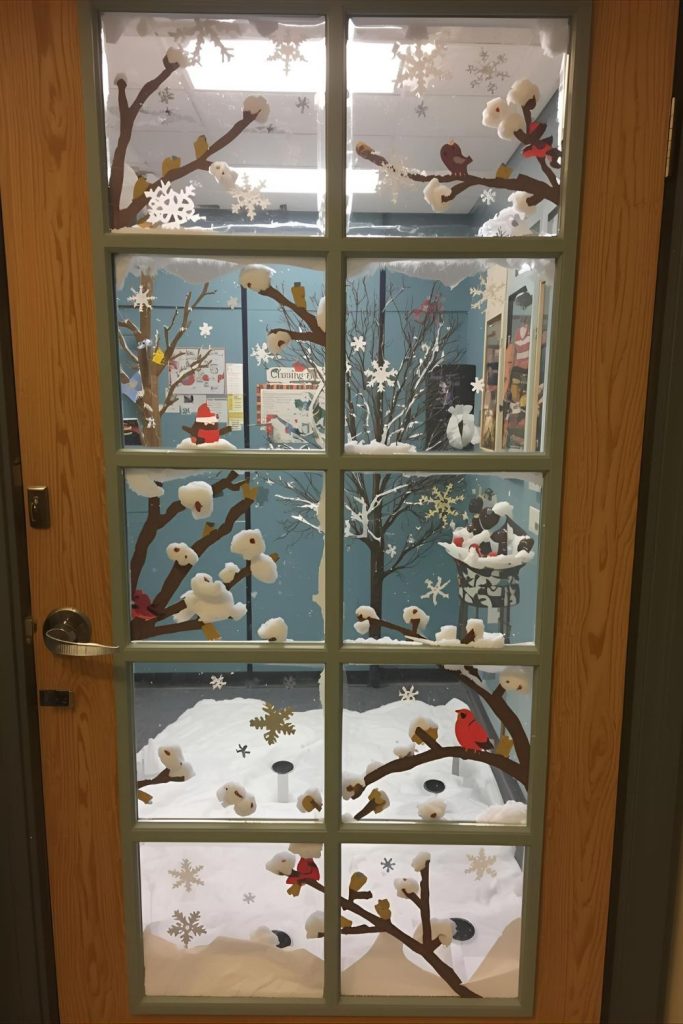
Winter Window View
This idea gives students a peek into a snowy scene. Create “window panes” with black or white strips to form the frame. Fill each pane with a winter scene: snow-covered trees, snowmen, or birds on branches. Students can create tiny snowflakes from paper and tape them on the panes. You can add cotton along the bottom for snow accumulation. For extra fun, attach small paper mittens, hats, or scarves “hanging” on a string in the scene.
Step-by-step method:
- Make window frame from strips of black or white paper.
- Fill each pane with snowy scenery drawn or cut out by students.
- Add paper snowflakes inside panes.
- Place cotton at the bottom for snow.
- Hang small paper mittens or accessories on string across the window.
Blizzard of Kindness
Turn your door into a kindness storm. Cover the door with light blue paper. Have students cut out paper snowflakes and write kind messages or compliments on each. Tape or tack the snowflakes across the door in a scattered, swirling pattern. Add small snowmen or winter characters peeking from behind some snowflakes to make it playful. This not only decorates the classroom but also encourages positive interactions.
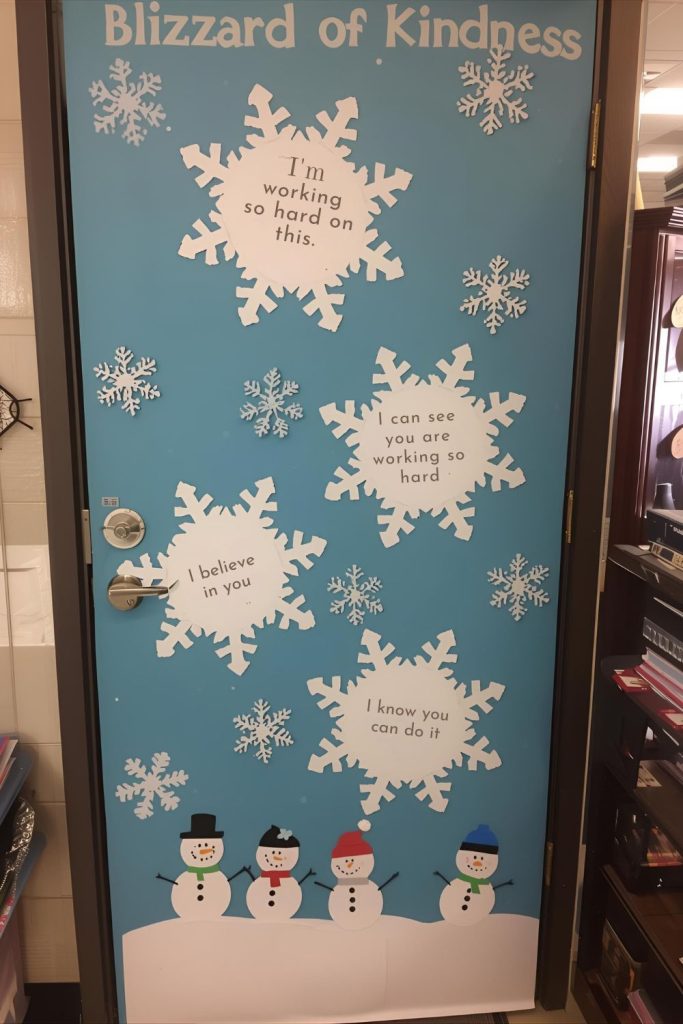
Step-by-step method:
- Cover door with light blue paper.
- Have students cut out snowflakes and write kind messages.
- Scatter and tape snowflakes across the door.
- Add winter characters peeking out from snowflakes.
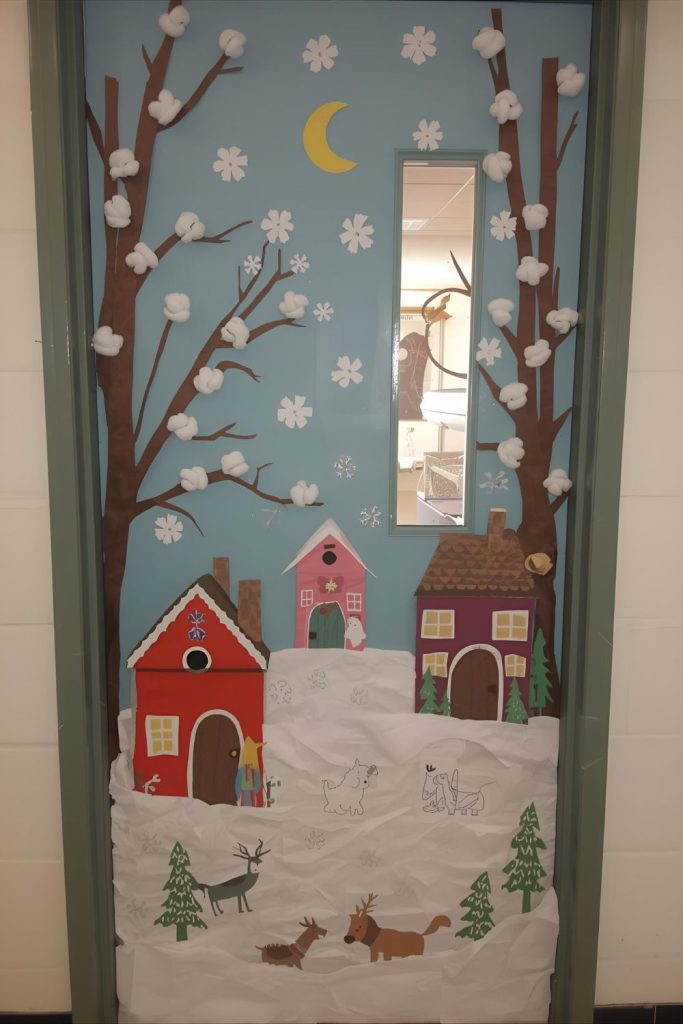
Reindeer Barnyard
Create a playful farm scene for your door. Cover the door with light blue or snowy background paper. Make a simple brown barn with roof and windows. Students can make paper reindeer and attach them around the barn, some peeking out of windows or doors. Use white paper or cotton to create snow on the roof and around the base. You can even make antlers from yarn or brown strips of paper to give texture.
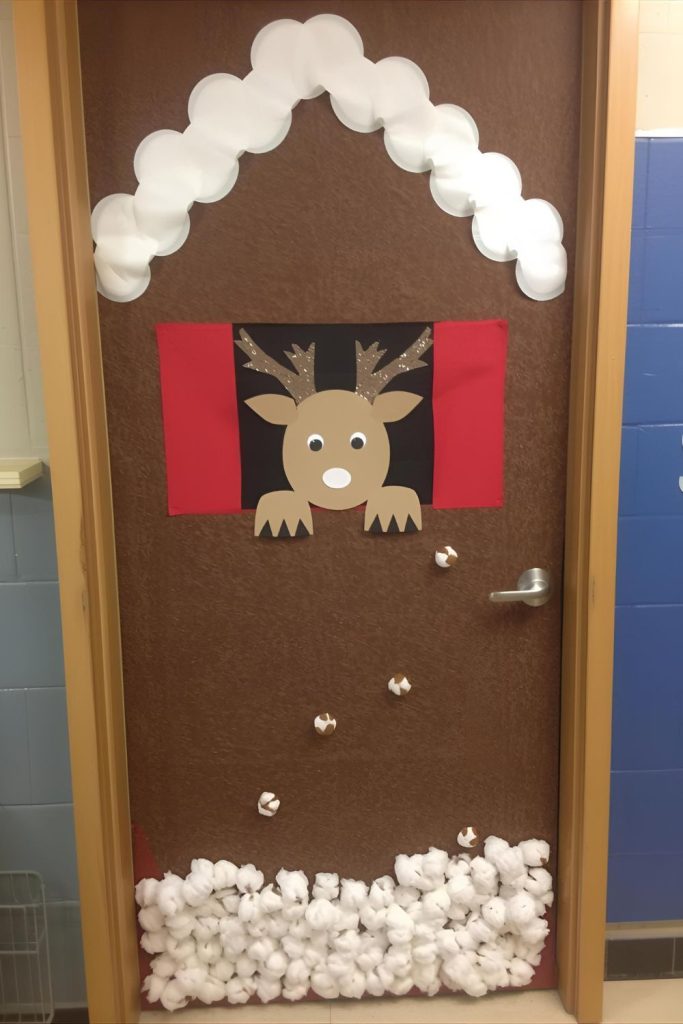
Step-by-step method:
- Cover the door with snowy background.
- Make a barn from brown paper.
- Students create paper reindeer to decorate barn.
- Add cotton or paper snow on roof and ground.
- Optional: add yarn antlers for 3D effect.
Frozen Ice Castle
Bring icy magic to your hallway. Use shiny blue or silver paper for the door background. Create towers and castle walls using light blue paper. Cut icicles from clear plastic or silver paper and attach them to the top. Students can make paper snowflakes or icy banners to hang around the castle. Add glitter for shimmer and snowflake confetti for sparkle.
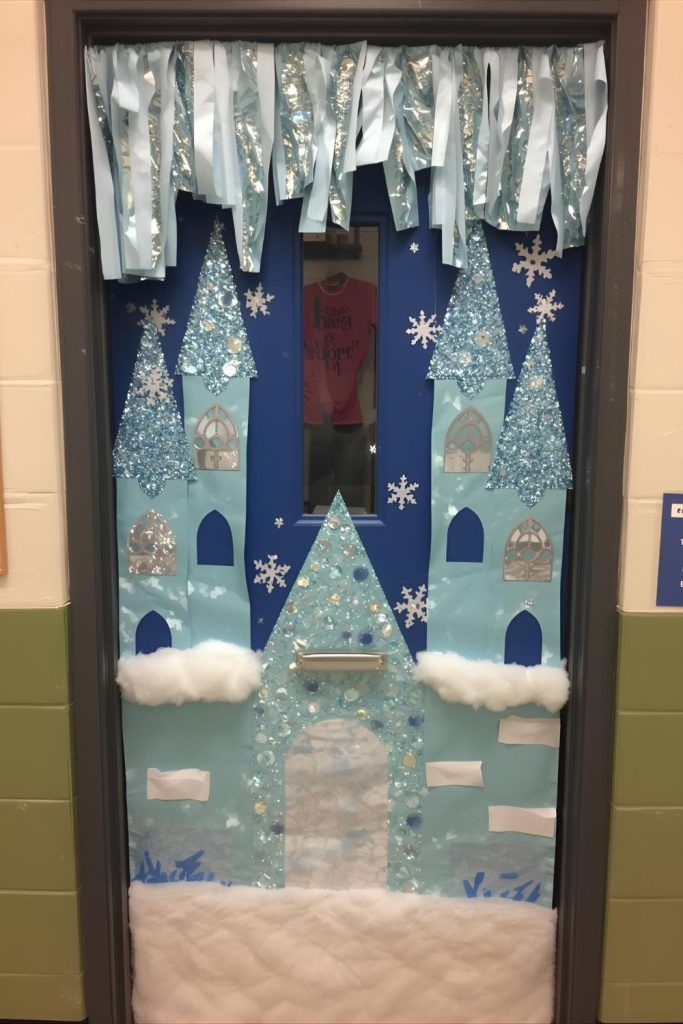
Step-by-step method:
- Cover door with blue or silver background paper.
- Create castle towers and walls with light blue paper.
- Make icicles from clear plastic or silver paper and attach.
- Add paper snowflakes and banners.
- Sprinkle glitter or confetti for shine.
Mitten Clothesline
A fun interactive door idea. Cover the door with a solid background. Have students decorate paper mittens. Punch holes and string them on yarn or string across the door like a clothesline. You can overlap mittens slightly for depth and vary colors to make it festive. Students’ names can go inside mittens or on small tags attached.
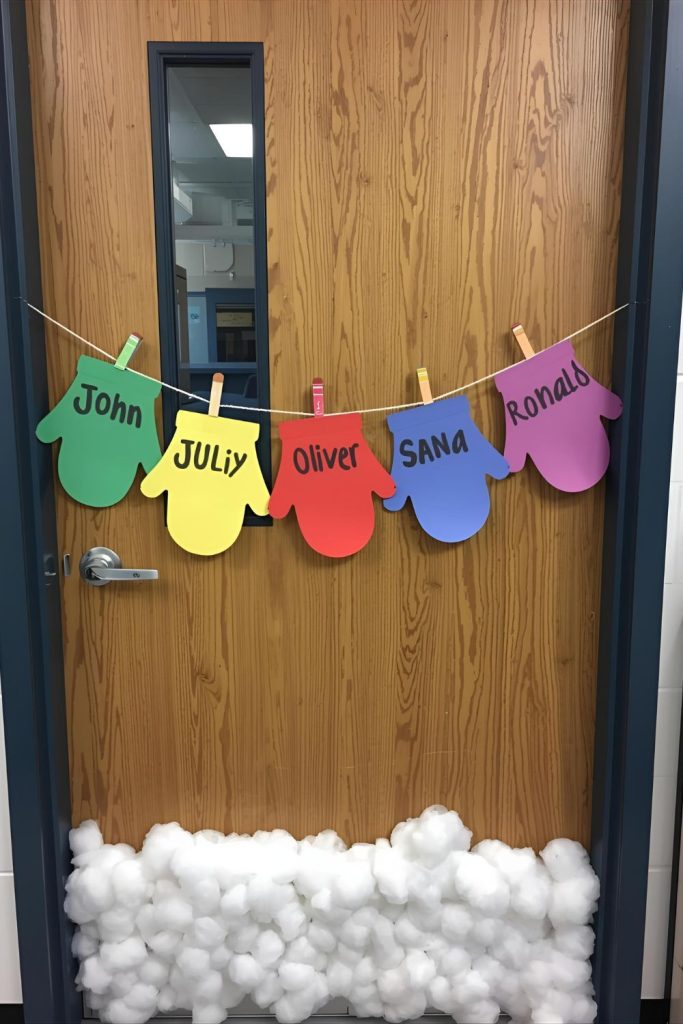
Step-by-step method:
- Cover door with background paper.
- Students decorate mittens from paper.
- Punch holes and string mittens on yarn across door.
- Vary colors and placement for visual interest.
Hibernation Cave
Turn your door into a sleepy winter scene. Cover it with brown paper to act as a cave wall. Cut white cotton snow for the ground outside the cave. Students can make paper bears or other hibernating animals and attach them inside the cave. Add pine trees, snowflakes, or little footprints leading to the cave for storytelling effect.

Step-by-step method:
- Cover door with brown paper for cave.
- Add cotton snow at the bottom.
- Students create hibernating animal cutouts.
- Place trees, snowflakes, or footprints for storytelling.
Snowflake Science Display
Turn math and science into decoration. Cover the door with a cool blue background. Students cut out paper snowflakes and write one fun fact about snow, winter animals, or weather on each. Arrange the snowflakes across the door in swirling patterns. Add 3D cotton snowballs to make it pop.
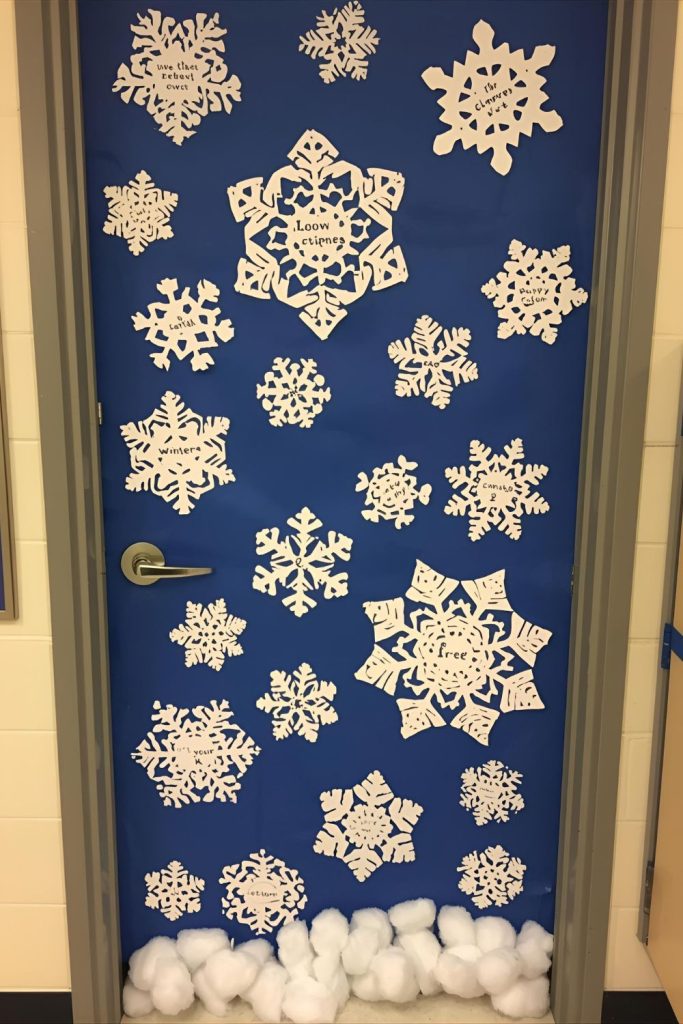
Step-by-step method:
- Cover door with blue paper.
- Students cut out snowflakes and write facts.
- Arrange snowflakes on door.
- Add cotton balls for 3D snow effect.
Winter Village Street
Create a charming mini town. Cover the door with light blue or white paper. Have students make small houses, trees, and streetlamps from paper or cardstock. Arrange them along a “street” on the door. Add cotton for snow on rooftops and along the street. Optional: add small paper cars or animals to add life.
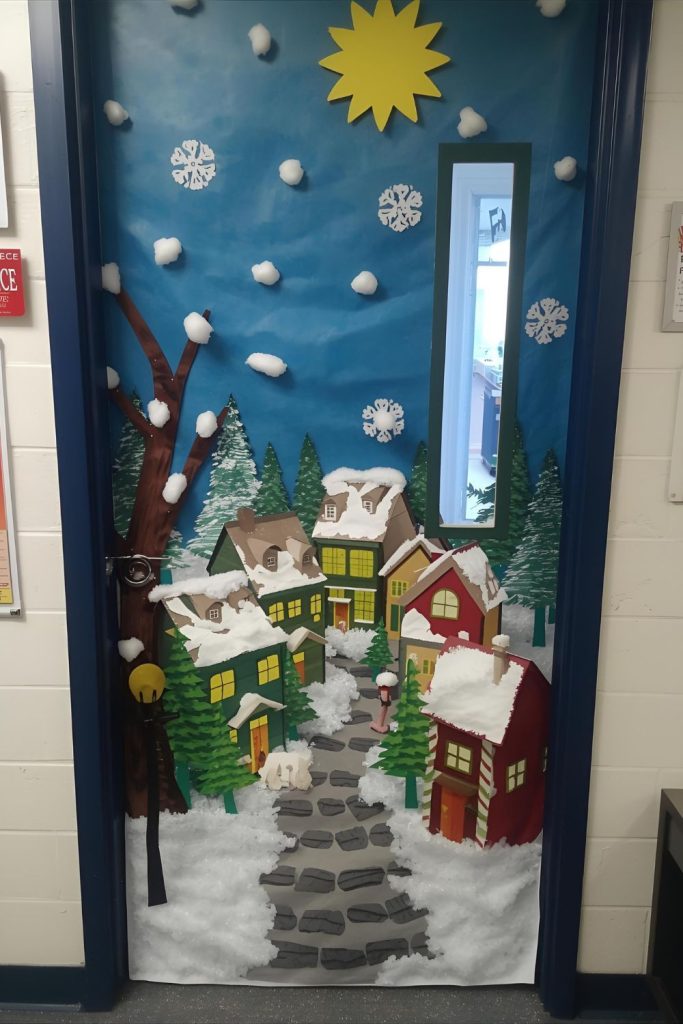
Step-by-step method:
- Cover door with background paper.
- Students make houses, trees, and streetlamps.
- Arrange on door along a street layout.
- Add cotton for snow.
- Optional: add small animals or cars.
Sledding Hill Adventure
Cover door with white paper for snow. Cut a curved hill shape from white or light gray paper. Students can make sleds with their names or faces on them. Tape sleds onto the hill as if sliding down. Add small trees or snowflakes in the background for depth.
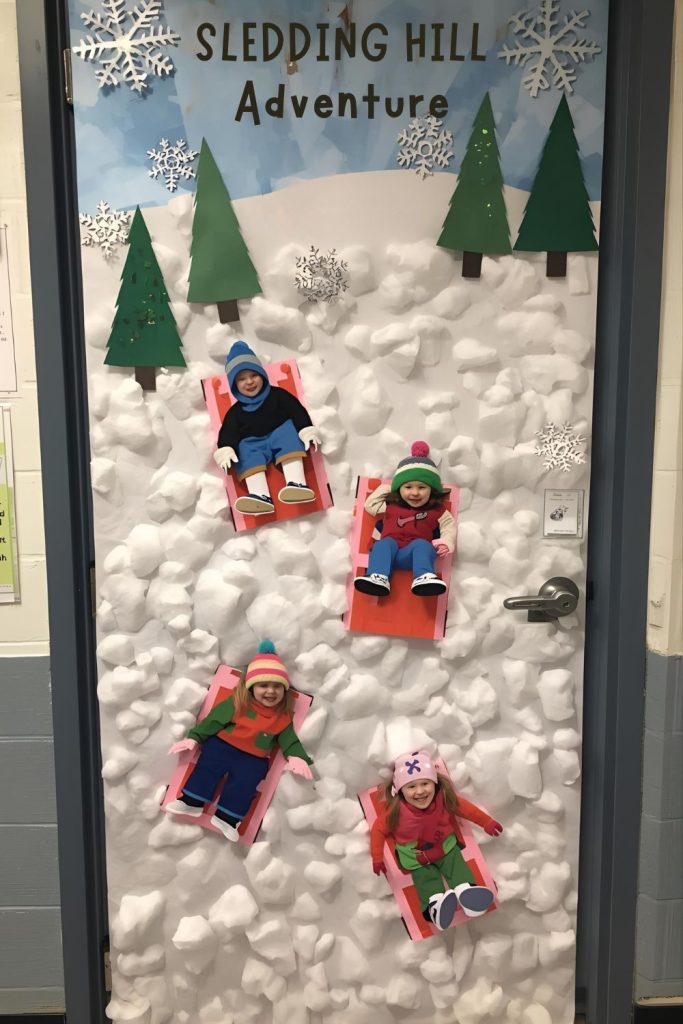
Step-by-step method:
- Cover door with white background.
- Make a paper hill and attach.
- Students make sleds with their faces.
- Tape sleds onto hill.
- Add trees or snowflakes.
Snowball Battle Scene
Cover door with blue background paper. Students make small crumpled tissue balls to represent snowballs. Attach paper kids or winter characters having a playful snowball fight. You can create motion lines with white paper or markers for effect.
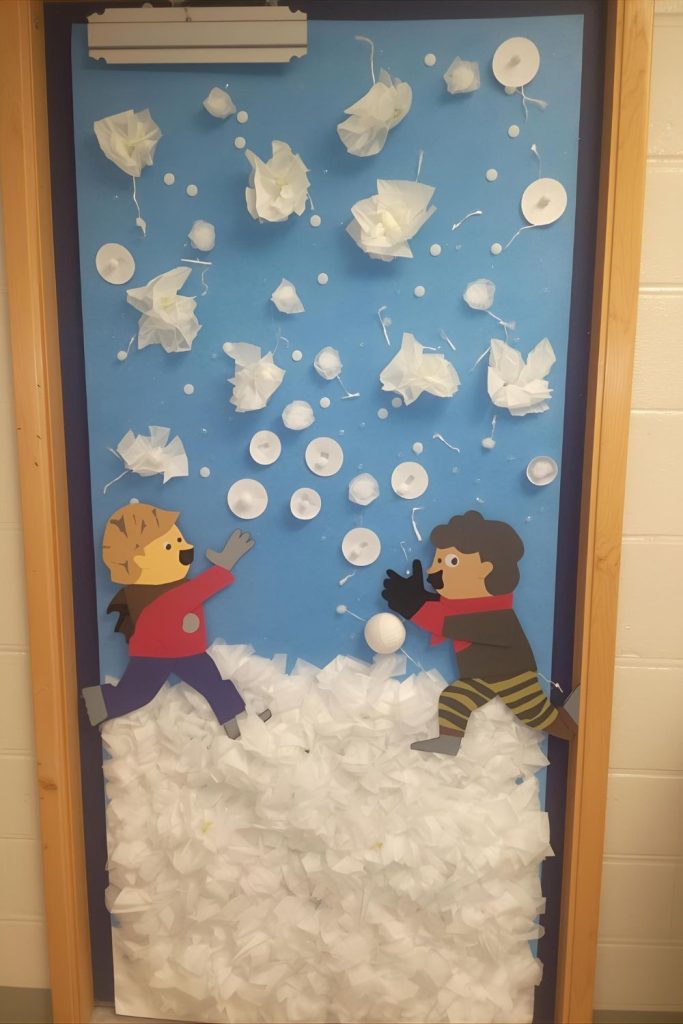
Step-by-step method:
- Cover door with blue paper.
- Make tissue paper snowballs.
- Create winter characters throwing snowballs.
- Add motion lines for playful effect.
Storybook Winter Wonderland
Turn your door into a storybook scene. Use white paper as a background. Students create characters or scenes from their favorite winter storybooks. Add cotton snow and glitter for magic. Include elements like snowy trees, animals, or cottages.
Step-by-step method:
- Cover door with white paper.
- Students create storybook characters.
- Arrange characters in snowy scene.
- Add cotton and glitter for magic.
Polar Bear Peekaboo
Create playful peekaboo bears. Cover door with icy blue background. Students make polar bears peeking from behind snow mounds or ice blocks. Add cotton snow for texture and paper fish for extra detail.
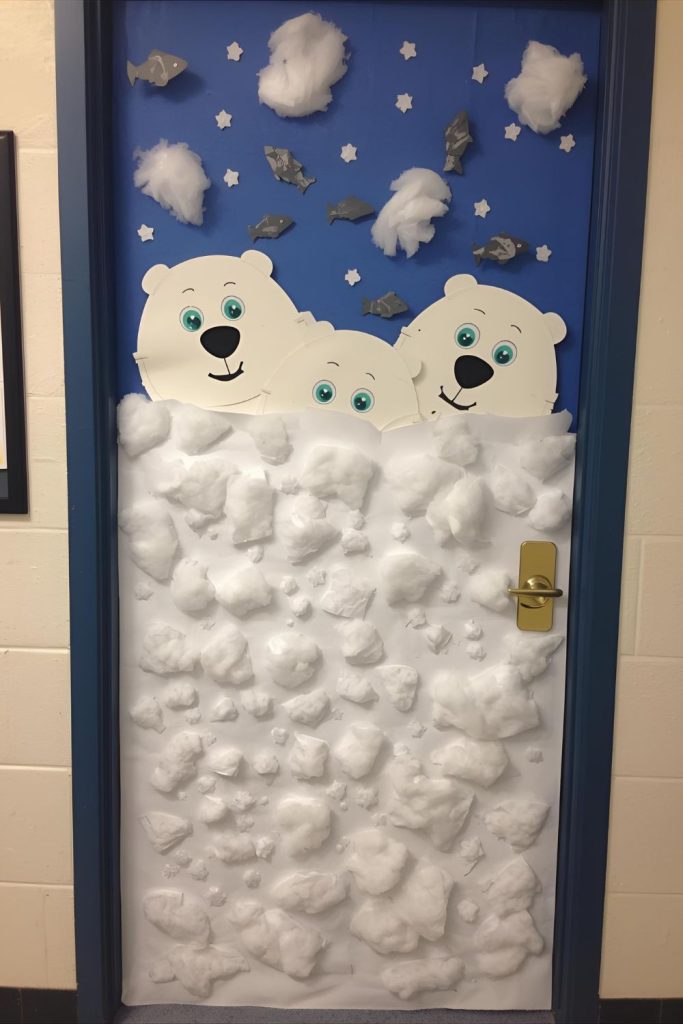
Step-by-step method:
- Cover door with blue paper.
- Students make polar bear cutouts.
- Place behind cotton snow or ice blocks.
- Add fish or small details.
Warm Wishes Wall
Create a door of positivity. Cover door with light background. Students cut out mittens, scarves, or winter items. On each item, they write a positive message or wish for classmates. Arrange items on the door in a collage or pattern.
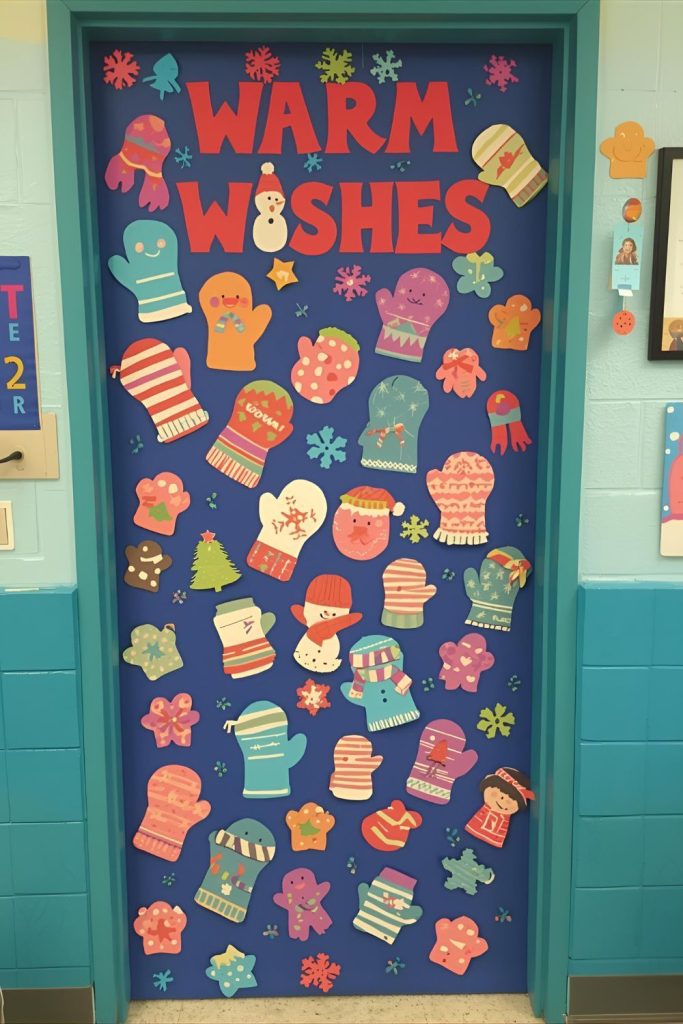
Step-by-step method:
- Cover door with light paper.
- Students create winter items.
- Write positive messages on items.
- Arrange on door as collage.
Snowman Family Parade
Cover door with white background. Students make snowmen cutouts of varying sizes. Decorate with scarves, hats, buttons, and faces. Arrange snowmen marching across the door like a parade. Add snowflakes or small animals for effect.
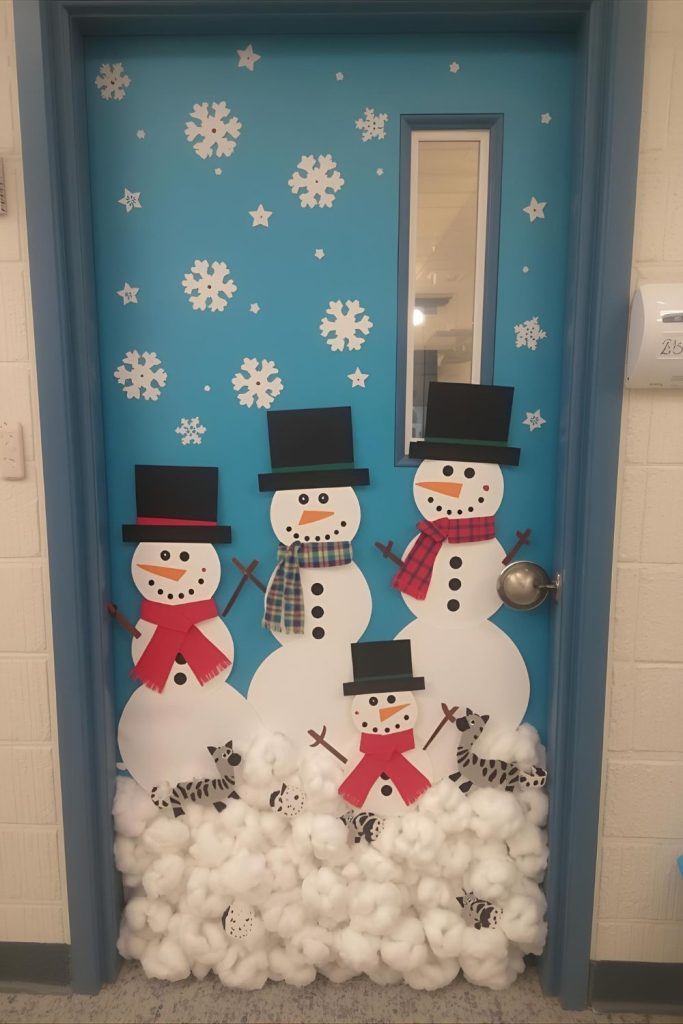
Step-by-step method:
- Cover door with white paper.
- Students create snowmen of different sizes.
- Add scarves, hats, and buttons.
- Arrange marching across door.
Gratitude Tree in Winter
Cover door with blue or snowy background. Make a tree trunk and branches with brown paper. Students create paper leaves or ornaments with things they’re grateful for. Attach to branches and sprinkle cotton snow around.
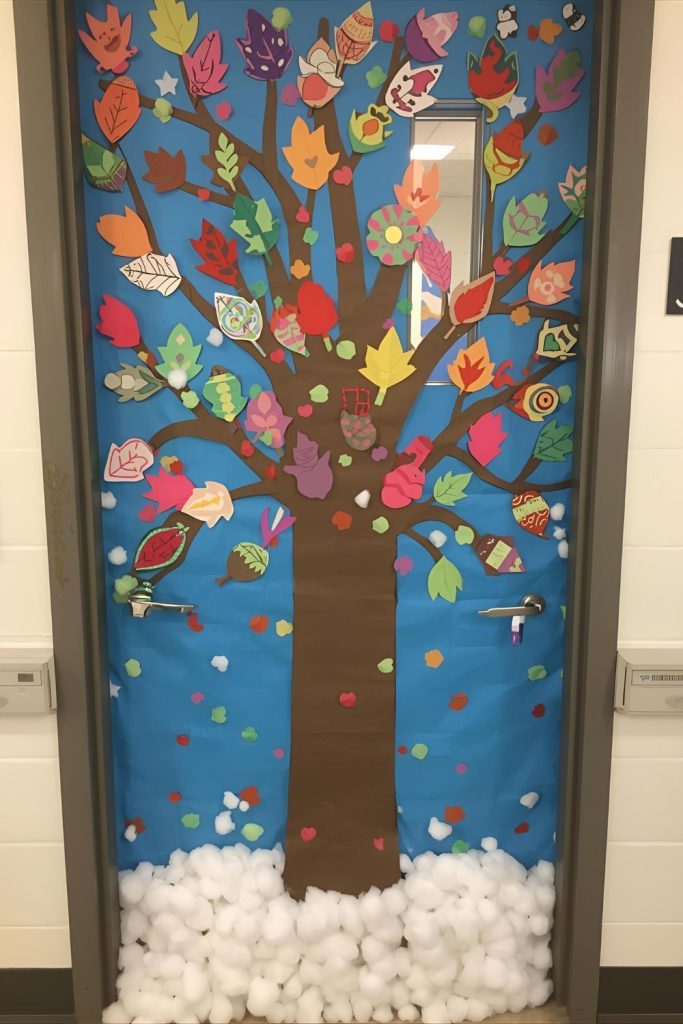
Step-by-step method:
- Cover door with blue or white background.
- Make tree trunk and branches.
- Students write gratitude notes on leaves/ornaments.
- Attach to tree and add cotton snow.
Northern Lights Sky
Create a magical night sky. Cover door with dark blue or black paper. Students use tissue paper strips in green, purple, and pink to mimic northern lights. Add white snowflakes or stars with paper or markers for depth.

Step-by-step method:
- Cover door with dark background.
- Attach tissue paper strips for aurora effect.
- Add stars and snowflakes.
- Layer for more depth.
Winter Sports Spectacular
Celebrate winter fun. Cover door with snowy background. Students make cutouts of winter sports: skiing, ice skating, snowboarding. Arrange them on door as if moving across a hill or ice rink. Add snowflakes and cotton for texture.
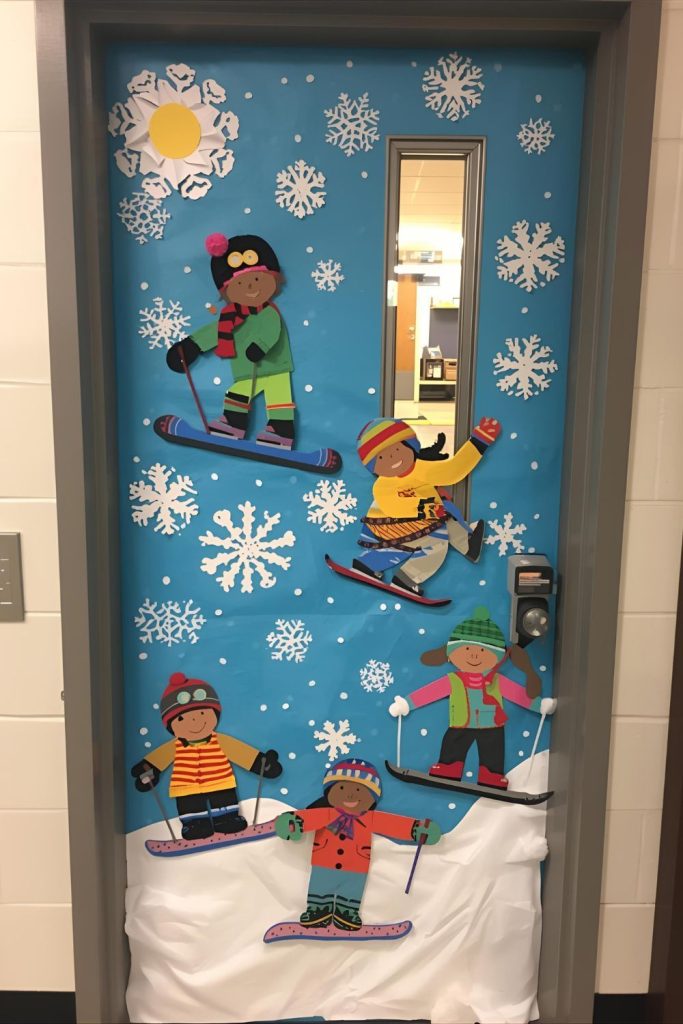
Step-by-step method:
- Cover door with snowy background.
- Students create winter sports cutouts.
- Arrange in action poses across door.
- Add snowflakes and cotton for texture.
Candy Cane Lane
Cover door with red and white striped background. Students create candy canes, lollipops, and gingerbread decorations. Arrange along “street” across the door. Optional: add small paper elves or gifts.
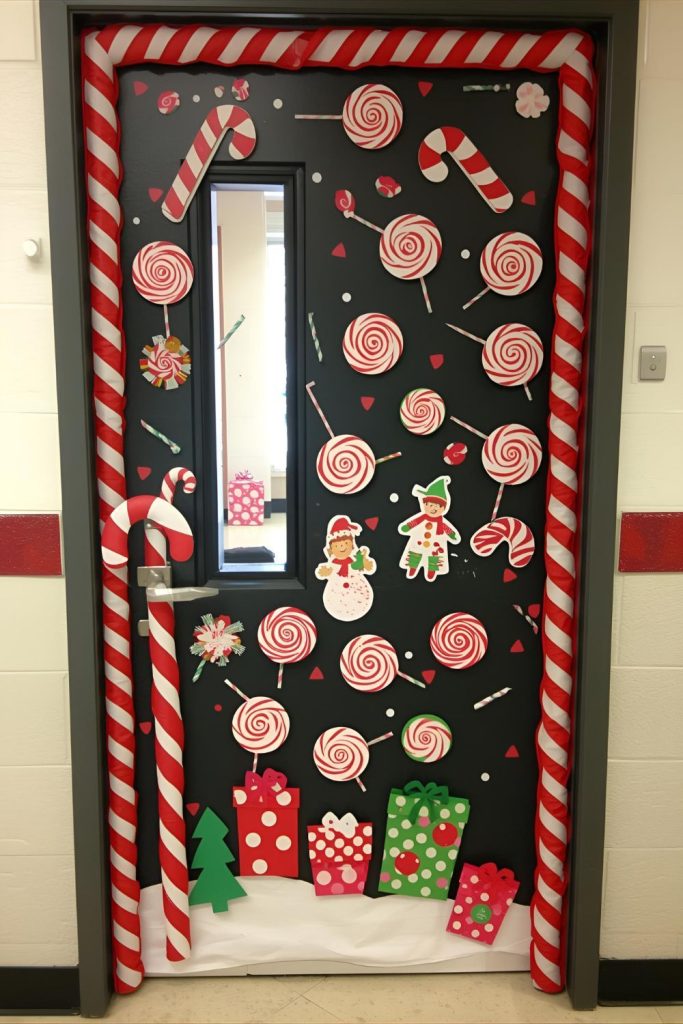
Step-by-step method:
- Cover door with stripes.
- Students create candy decorations.
- Arrange along street pattern.
- Optional: add elves or gifts.
Cozy Fireplace Scene
Bring warmth to winter. Cover door with brick or brown paper for fireplace. Use red, orange, and yellow paper for flames. Students create stockings, logs, and small winter items to hang around fireplace. Add cotton snow for contrast outside.
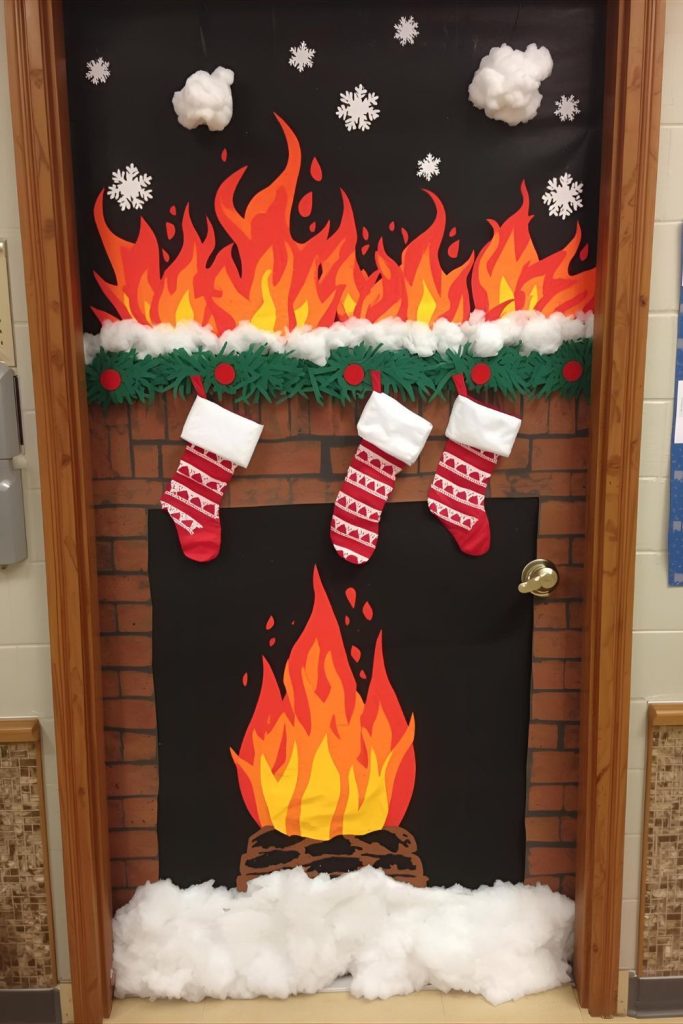
Step-by-step method:
- Cover door with brick or brown paper.
- Make paper flames and attach.
- Students create stockings or logs.
- Arrange around fireplace and add cotton snow.
Snowy Mountain Scene
Create a mountainous door. Cover door with light blue background. Cut white paper triangles for snowy peaks. Students add skiers, animals, or trees on slopes. Add cotton for snow texture at the base.
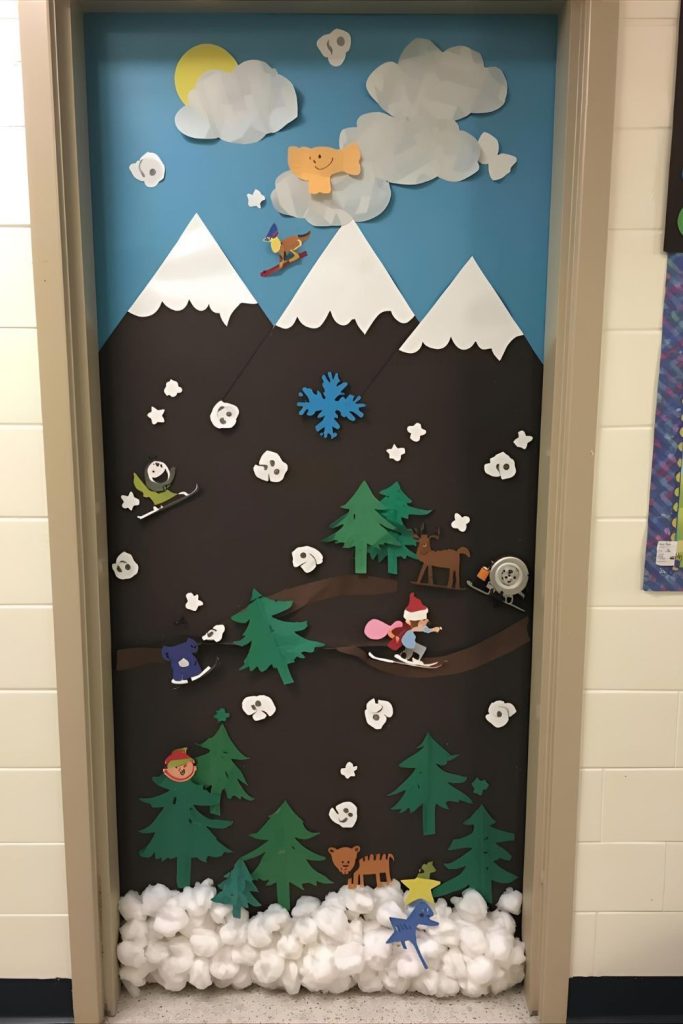
Step-by-step method:
- Cover door with blue paper.
- Make white triangles for mountains.
- Students add winter figures.
- Add cotton snow at base.
Starry Night Snowfall
Cover door with dark blue or black paper. Students cut out stars and moons, attaching them to background. Add small paper snowflakes falling across door. Optional: layer cotton clouds or snow for 3D effect.
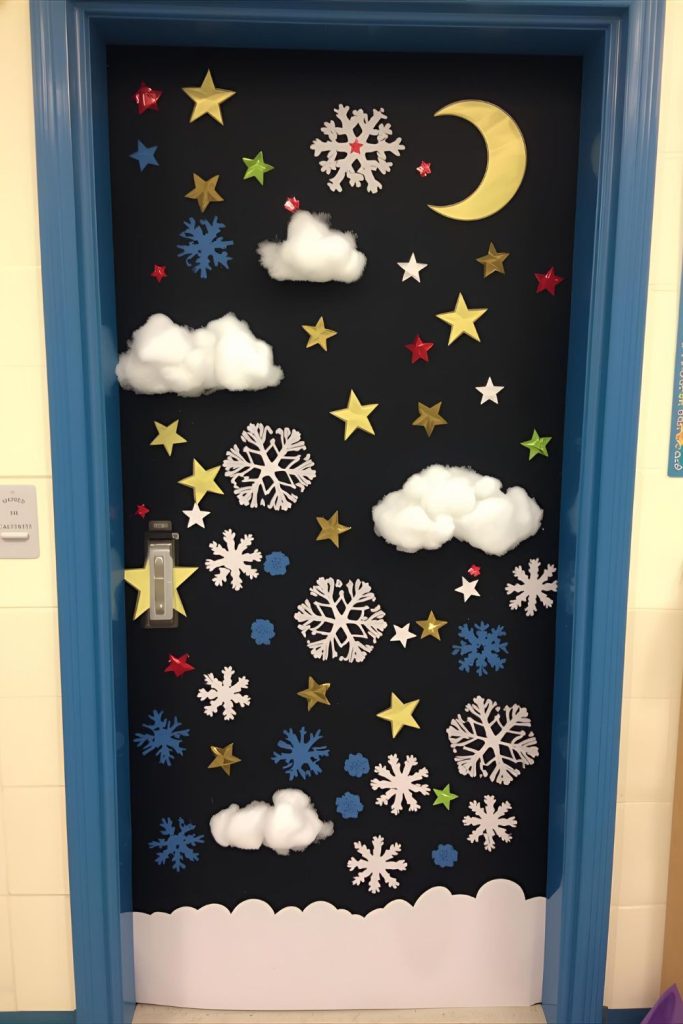
Step-by-step method:
- Cover door with dark background.
- Add stars and moons.
- Attach snowflakes falling across door.
- Optional: add cotton clouds.
Conclusion
Winter classroom door decorations offer more than just a pretty view—they bring students into the season, encourage creativity, and promote collaboration. Each of these 25 ideas is hands-on, doable, and sure to bring excitement to the classroom. From cozy cabins to sparkling northern lights, these doors can become a cheerful, interactive space where students feel welcome and inspired. Transforming your door into a winter scene is an easy, fun way to spark joy, showcase student work, and make every day in the classroom feel special.