
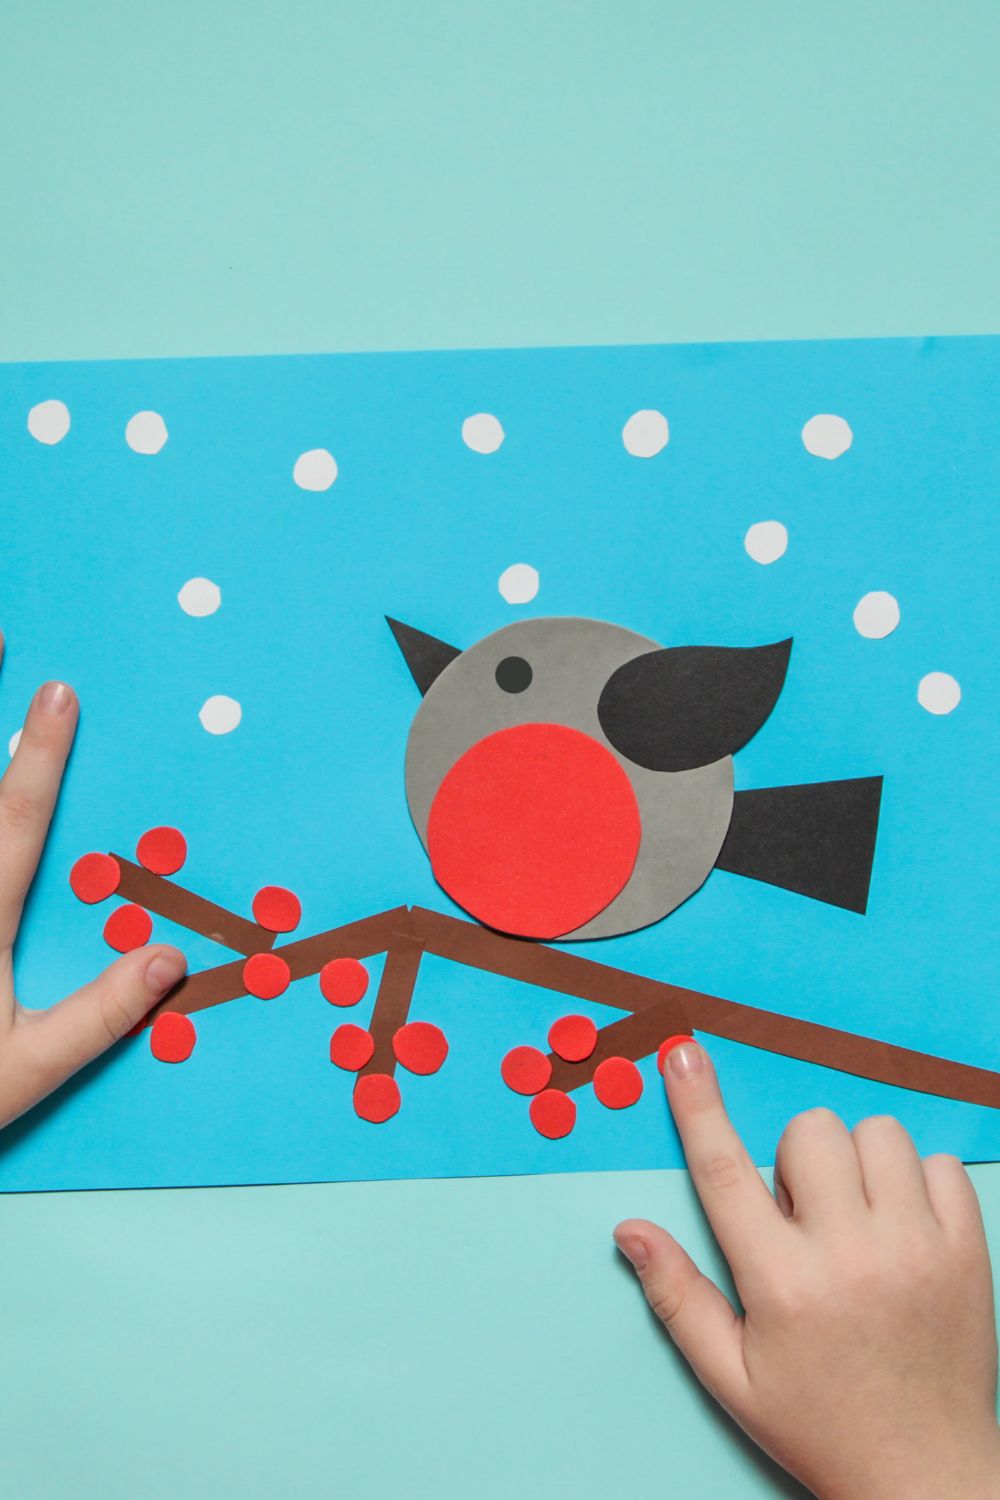
Winter is the perfect time for preschoolers to enjoy fun, hands on art activities indoors. These 21 winter crafts for preschool teachers use simple, affordable materials to help children ages 3–5 develop creativity, fine motor skills, and hand eye coordination while making snowmen, penguins, snowflakes, and other winter themed projects. Each activity includes a materials list and easy step by step instructions for the classroom.
1. Cotton Ball Snowman Craft With Paper Hats and Colorful Yarn Scarves
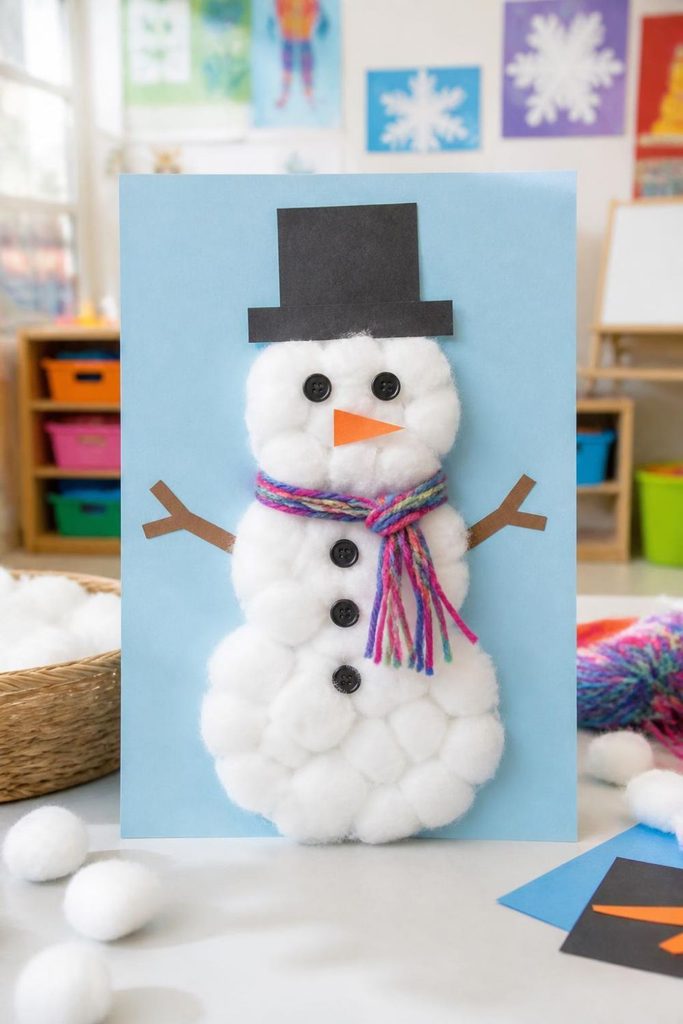
A cotton ball snowman is a simple winter art activity for preschoolers who enjoy soft textures and making funny faces. Children can practice spreading glue, placing cotton balls, and choosing colors for their snowman’s hat and scarf.
Materials needed
- White cotton balls
- Blue or light blue construction paper
- Child safe glue
- Black construction paper
- Orange paper
- Colorful yarn
- Child safe scissors, used with adult help
- Crayons or washable markers
Step by step method
- Give each child a sheet of blue paper and ask them to draw or trace three circles, one large, one medium, and one small.
- Help children spread glue inside the circles.
- Press cotton balls onto the glued areas until the snowman’s body looks fluffy.
- Cut a small hat from black paper and glue it above the snowman’s head.
- Cut a tiny orange triangle for the nose and add eyes and a smiling mouth with markers.
- Tie a short piece of yarn loosely into a scarf shape and attach it across the snowman’s neck with glue.
Invite children to name their snowmen and describe the colors they chose. Teachers can also ask them to count the cotton balls or identify which snowman has the biggest body.
2. Coffee Filter Snowflakes Colored With Washable Markers and Water
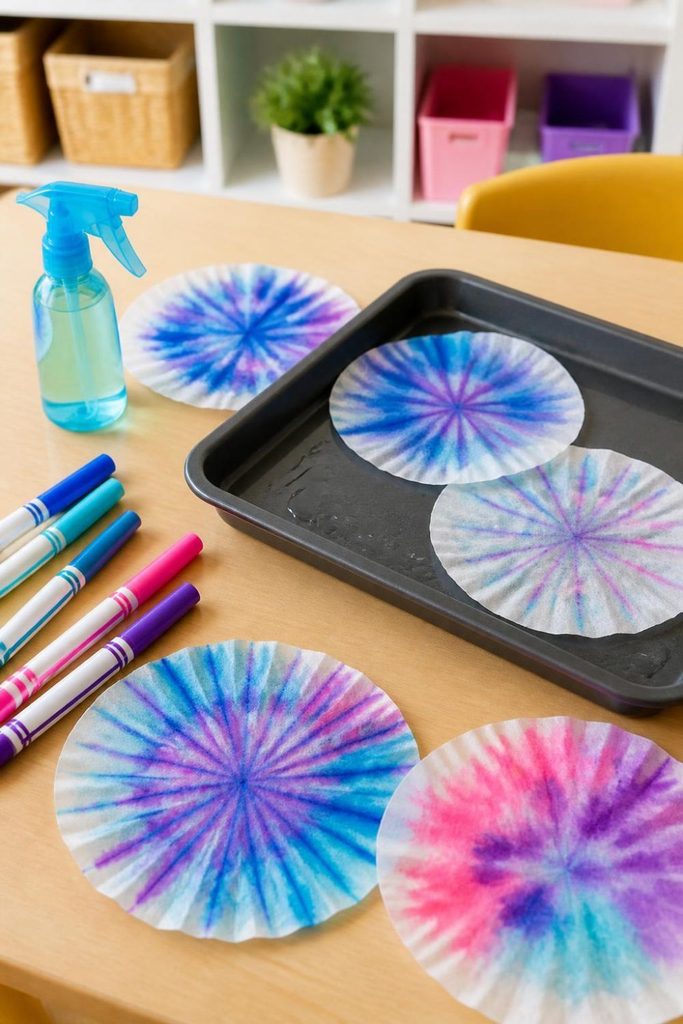
Coffee filter snowflakes give preschoolers a chance to experiment with color blending while making decorations for the classroom windows. The thin paper absorbs water, allowing washable marker colors to spread into soft patterns.
Materials needed
- White basket style coffee filters
- Washable markers
- A small spray bottle filled with water
- A waterproof tray
- Paper towels
- Child safe scissors
- String or tape for display
Step by step method
- Place a dry coffee filter on a tray and invite children to draw lines, dots, and circles with washable markers.
- Let them choose two or three colors to see how different shades mix.
- Help children lightly spray the filter with water until the colors begin to spread. Avoid soaking it.
- Leave the filter flat on a tray or paper towel until it dries completely.
- Fold the dry filter in half, then in half again.
- With adult assistance, cut a few small shapes along the folded edges.
- Open the filter slowly to reveal the snowflake pattern.
Display the finished snowflakes near a sunny window. Explain that real snowflakes have six sided structures, while paper snowflakes can take many different shapes. Children can compare their patterns and describe which colors blended together.
3. Handprint Penguin Craft With Orange Paper Feet and a Yellow Paper Beak
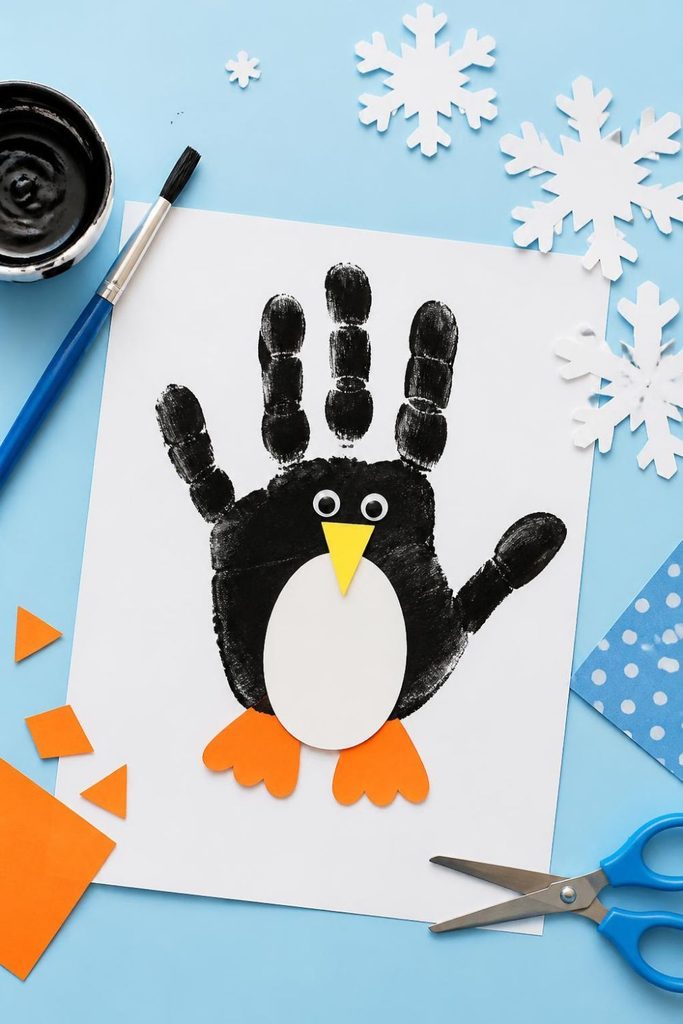
This handprint penguin makes a sweet winter keepsake and gives children a chance to connect art with a lesson about animals that live in cold regions. The handprint forms the penguin’s body, while paper shapes add its face and feet.
Materials needed
- White construction paper
- Black washable paint
- Paintbrush or sponge
- Orange paper
- White paper
- Black paper
- Child safe glue
- Washable markers
- A damp cloth for cleaning hands
Step by step method
- Help each child paint the palm and fingers of one hand with black washable paint.
- Press the painted hand onto white paper with the fingers pointing downward.
- Lift the hand carefully and allow the print to dry.
- Cut a white oval or egg shape and glue it onto the center of the handprint to form the penguin’s belly.
- Cut two orange feet and a small orange beak from paper.
- Glue the feet near the bottom and the beak near the top of the body.
- Add two eyes with black marker or paper circles.
Ask children to flap their arms like penguin wings and waddle across the classroom. Teachers can explain that penguins are birds, but they cannot fly through the air. They use their flippers to swim, which makes this art activity a fun starting point for a short science discussion.
4. Popsicle Stick Snowflake Craft Painted Blue and White
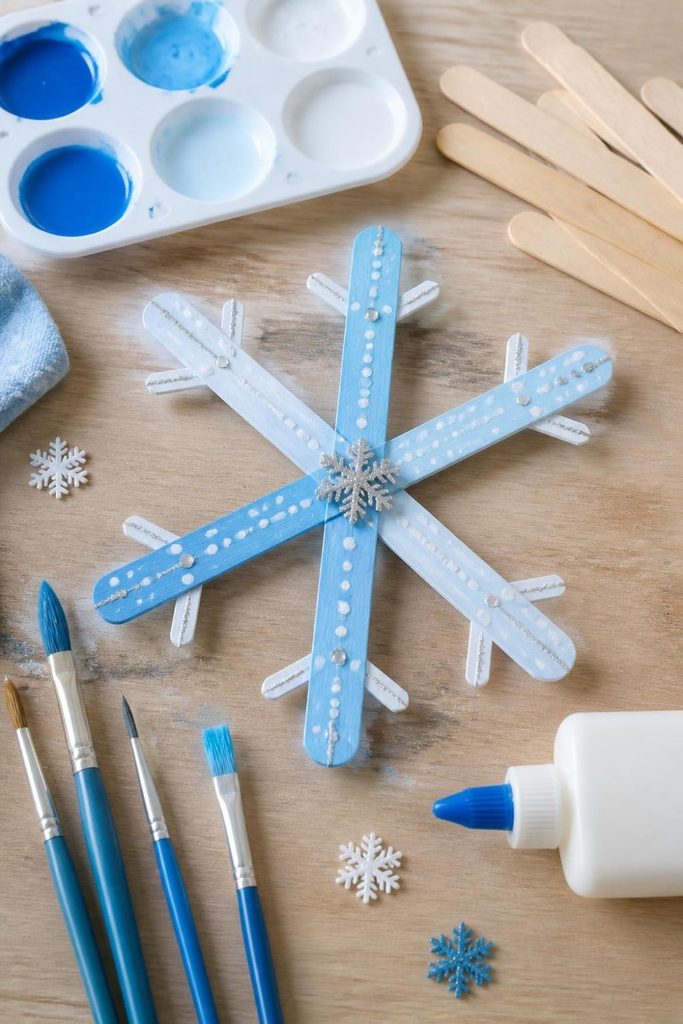
Popsicle stick snowflakes are easy to make and can become winter decorations for classroom walls or a seasonal display. Children practice painting, arranging lines, and noticing how a pattern can look balanced on both sides.
Materials needed
- Six wide craft sticks per snowflake
- Washable blue and white paint
- Paintbrushes
- Child safe glue
- A paper plate for mixing paint
- Large paper scraps to protect the table
- Large craft gems or paper dots, optional
Step by step method
- Give each child six craft sticks and let them paint the sticks blue, white, or a mixture of both colors.
- Place the painted sticks on paper to dry completely.
- With adult help, arrange two sticks into a cross and glue them together at the center.
- Place the remaining sticks diagonally across the cross to create a snowflake with several arms.
- Hold the center in place until the glue sets, following the glue manufacturer’s instructions.
- Add paper dots or a little extra paint to decorate the ends.
- Leave the snowflake flat until it is fully dry before displaying it.
Teachers can encourage children to count the snowflake’s arms, name the colors, and compare the different patterns. For younger preschoolers, prepare the stick arrangement in advance so they can focus on painting and decorating.
5. Paper Plate Snow Globe Craft With Cotton Snow and Paper Snowmen

A paper plate snow globe lets preschoolers create a snowy scene that they can personalize with trees, snowmen, and falling snow. The activity combines cutting, gluing, and arranging shapes into a picture with a clear theme.
Materials needed
- White paper plates
- Blue construction paper
- White cotton balls
- White paper
- Green paper
- Black and orange paper scraps
- Child safe glue
- Crayons or washable markers
- Child safe scissors, with adult help
Step by step method
- Cut a large circle from blue paper that fits inside the paper plate.
- Glue the blue circle onto the plate to make the background of the snow globe.
- Help children cut or tear small white paper pieces to represent snow on the ground.
- Make a snowman from two or three white paper circles and glue it onto the blue background.
- Add small green paper trees and decorate the snowman with a hat, eyes, and an orange nose.
- Pull apart a few cotton balls and glue small pieces around the scene as fluffy snow.
- Add a paper rectangle at the bottom of the plate to look like the base of a snow globe.
Invite each child to tell a short story about what is happening inside their snow globe. They might add a house, an animal, or a path through the snow. This helps build vocabulary and encourages children to describe their artwork in complete sentences.
6. Cotton Ball Polar Bear Craft With Black Paper Ears and Nose
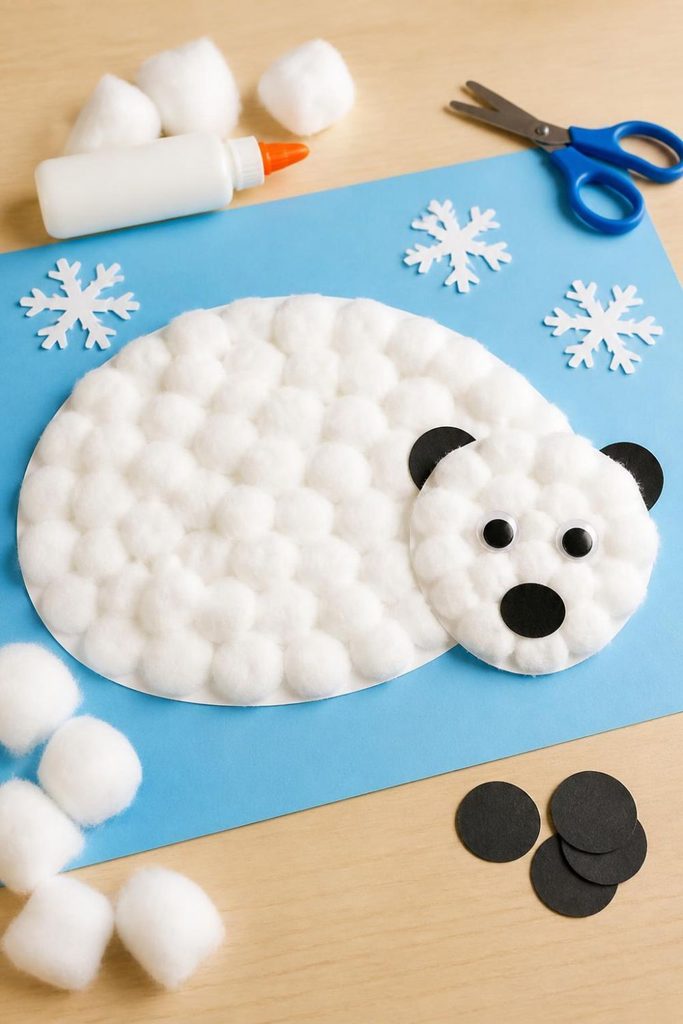
A cotton ball polar bear is a fun project for introducing Arctic animals and their thick fur. The soft cotton creates a textured surface, while black paper features help children identify the bear’s face.
Materials needed
- Light blue construction paper
- White cotton balls
- Child safe glue
- White paper
- Black paper
- Child safe scissors
- Black crayon or marker
Step by step method
- Draw a large oval for the polar bear’s body and a smaller circle for its head on white paper.
- Help children cut out the shapes, or prepare them before the activity.
- Glue the body and head onto the blue background.
- Spread glue across the white shapes and press cotton balls into place.
- Cut two small black circles for ears and a larger oval for the nose.
- Glue the ears near the top of the head and the nose in the center of the face.
- Draw two eyes and add four simple paper paws around the body.
Talk about how polar bears live in the Arctic and have thick fur that helps them cope with cold conditions. Ask children to touch a cotton ball and compare its soft texture with the smooth paper underneath. Teachers can also introduce words such as soft, round, white, and cold.
7. Fork-Painted Evergreen Tree Craft With White Snowy Branches
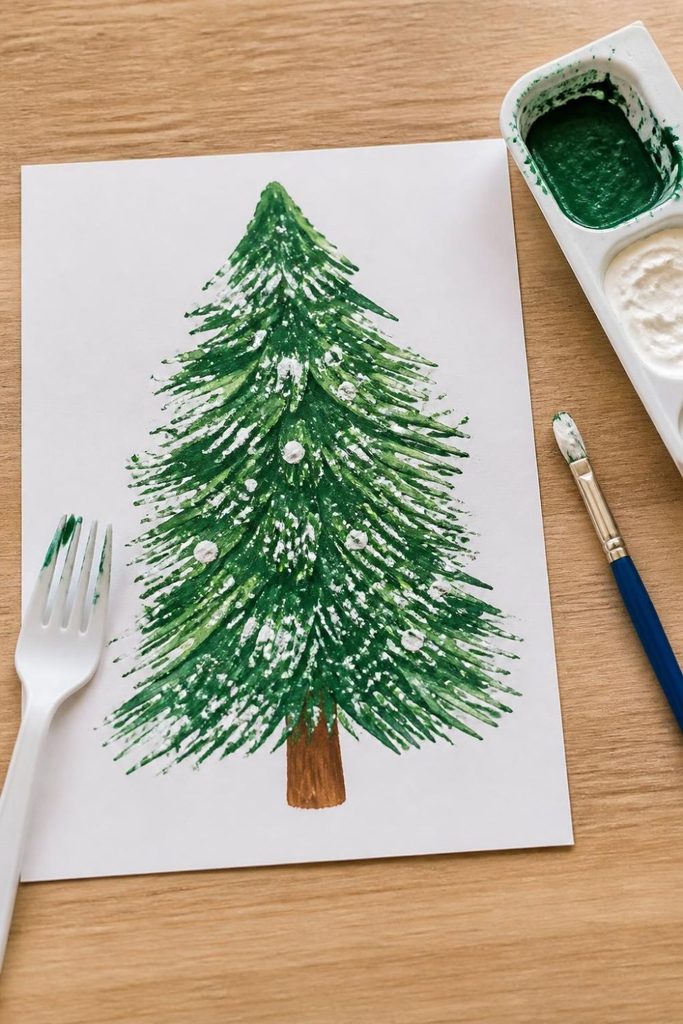
Fork painting is a playful way to make evergreen trees with short, branch like marks. Instead of using a regular paintbrush, children dip a plastic fork into green paint and press it onto paper to create the tree’s shape.
Materials needed
- White or light blue paper
- Washable green paint
- White washable paint
- A clean plastic fork for each child
- Small paint trays
- Brown paper or washable brown paint for the trunk
- Table coverings
- Smocks or old shirts
Step by step method
- Draw a simple triangle on each sheet of paper to guide the shape of the tree.
- Pour a small amount of green paint onto a tray.
- Show children how to dip the back of the fork lightly into the paint.
- Press the fork onto the paper, starting near the top of the triangle and moving downward in rows.
- Add a short brown paper strip or painted line for the trunk.
- Let the green paint dry before adding small dots of white paint for snow.
- Add a paper star or colorful circles if children wish to decorate their trees.
Ask children to notice how the tree gets wider near the bottom. This project supports pattern recognition, hand control, and early shape awareness. Teachers can also compare evergreen trees with trees that lose their leaves during colder months.
8. Torn Paper Winter Mitten Collage With Colorful Paper Scraps
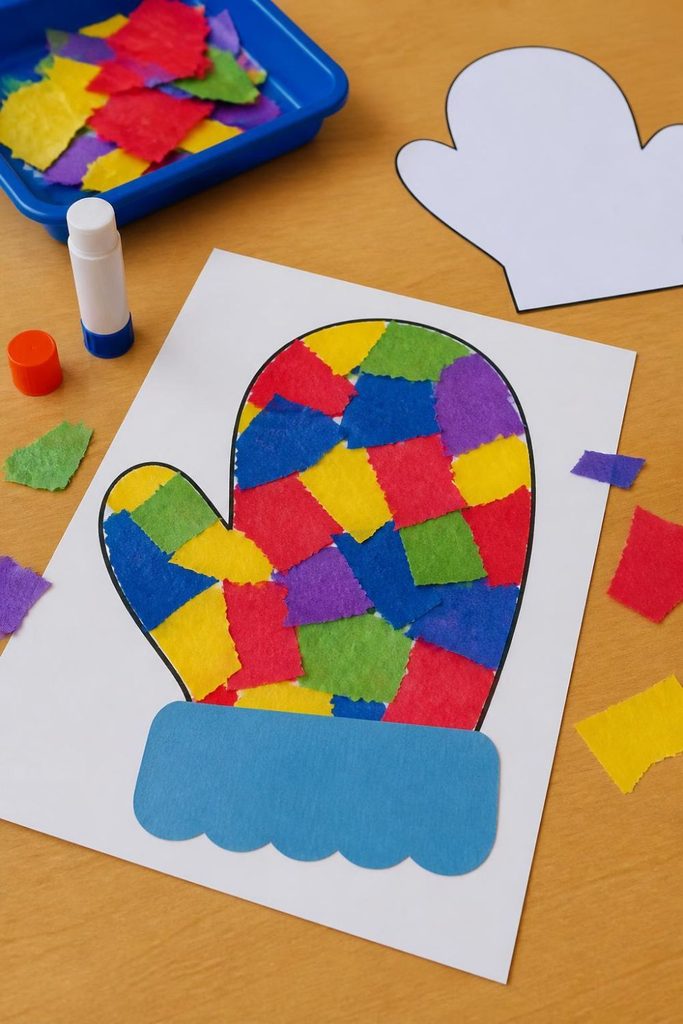
Torn paper mittens are a great choice for preschoolers who are learning to control their fingers and hands. Children can tear paper into small pieces, arrange colors, and create a warm mitten design without needing complicated cutting skills.
Materials needed
- White construction paper
- Blue, red, yellow, and purple paper scraps
- Child safe glue
- Crayons or washable markers
- Mitten shaped paper templates
- A tray for collecting paper scraps
Step by step method
- Draw a large mitten shape on white paper, or give each child a prepared template.
- Demonstrate how to tear colored paper into small pieces using both hands.
- Invite children to choose their favorite colors and place the scraps inside the mitten outline.
- Spread glue over a small section of the mitten at a time.
- Press the paper pieces onto the glued areas until most of the mitten is covered.
- Add a strip of paper at the wrist to represent a knitted cuff.
- Draw small dots, lines, or circles in any empty spaces to finish the design.
Teachers can ask children why people wear mittens during cold weather and how mittens keep their hands warm. Encourage them to compare the colors and shapes they used. This activity works well for a winter clothing lesson and gives every child room to make their own design.
9. Toilet Paper Roll Penguin Craft With Paper Wings and a Red Paper Bow
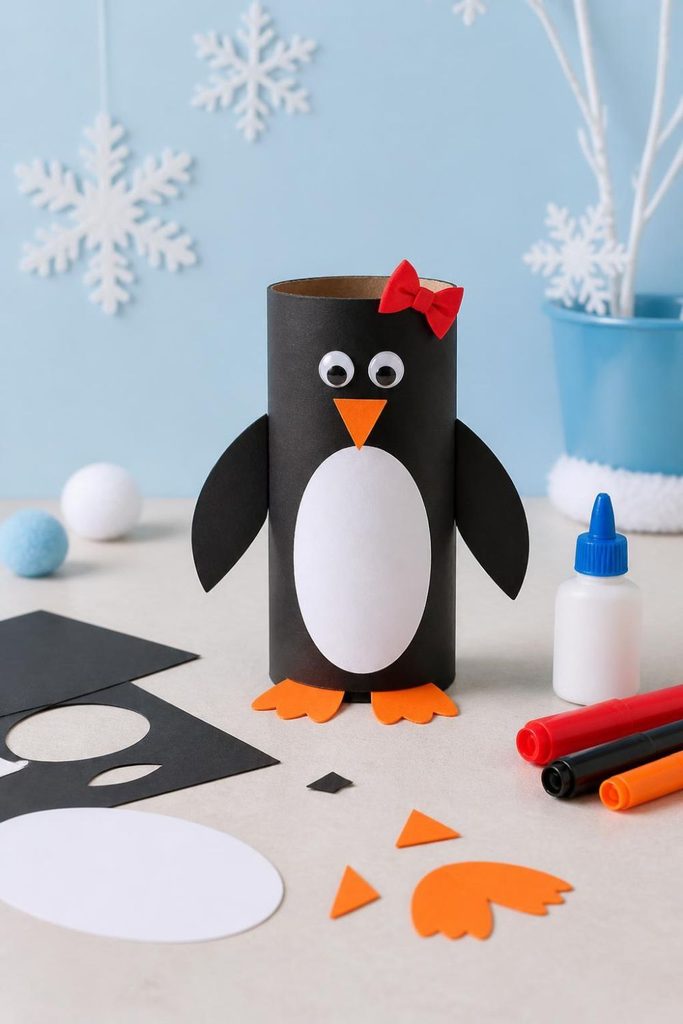
A cardboard tube penguin turns an everyday recyclable item into a standing winter animal. Preschoolers can paint, glue, and decorate the tube while learning about penguins and their body features.
Materials needed
- Clean, empty cardboard toilet paper tubes
- Black washable paint or black construction paper
- White paper
- Orange paper
- Red paper
- Child safe glue
- Paintbrushes
- Washable markers
Step by step method
- Give each child a clean cardboard tube and cover the work surface with paper.
- Paint the tube black and leave it to dry. Alternatively, wrap it with black construction paper.
- Cut a white oval for the penguin’s belly and glue it onto the front.
- Cut two black paper wings and attach one to each side of the tube.
- Make two orange feet and glue them to the bottom edge.
- Cut a small orange triangle for the beak and add two eyes above it.
- Fold a small piece of red paper into a bow shape and attach it below the penguin’s face.
Once the penguins are ready, children can line them up and pretend they are walking across an icy beach. Teachers can ask them to count the penguins, compare their sizes, or describe the body parts. This project also encourages reuse of clean household materials rather than buying new supplies for every activity.
10. Fingerprint Snowfall Painting on Dark Blue Construction Paper
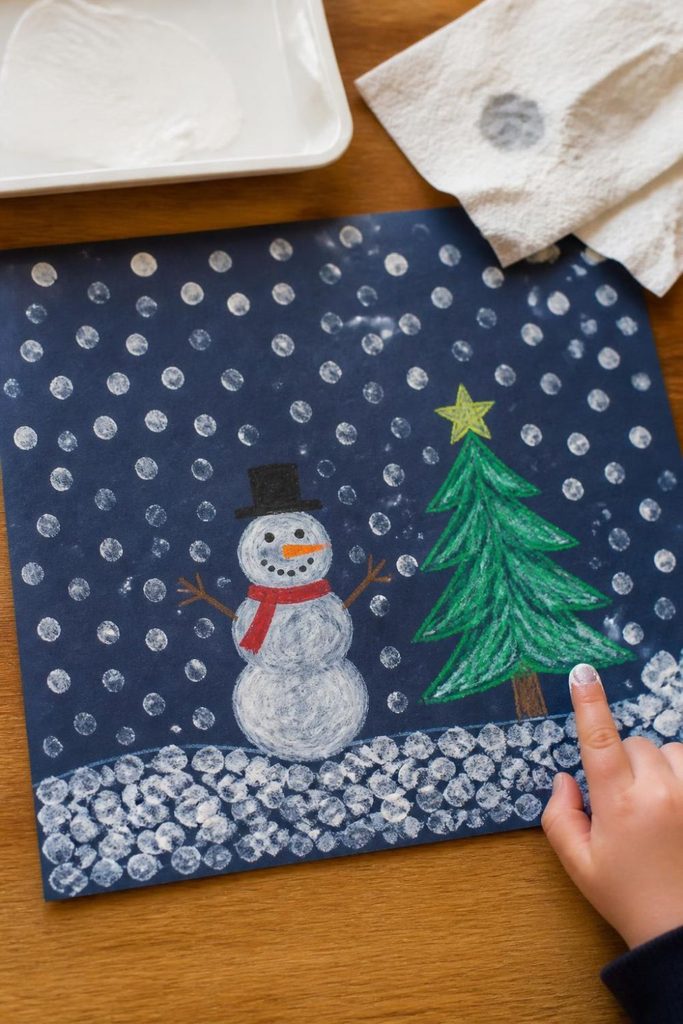
Fingerprint snowfall painting is a simple art activity that lets preschoolers create a snowy night sky using just their fingers and washable paint. The contrast between white paint and dark blue paper makes every little fingerprint easy to see.
Materials needed
- Dark blue construction paper
- White washable paint
- Shallow paint trays
- Washable blue or silver crayons
- Paper towels
- Smocks or old shirts
Step by step method
- Give each child a sheet of dark blue paper.
- Pour a small amount of white washable paint into a shallow tray.
- Show children how to dip one fingertip into the paint and press it gently onto the paper.
- Encourage them to make dots of different sizes across the page to represent falling snow.
- Add a few larger dots near the bottom to show snow collecting on the ground.
- Use crayons to draw a simple house, tree, or snowman beneath the falling snow.
- Leave the paintings flat until the paint has dried completely.
This activity helps children practice controlled finger movements while learning about dots, spacing, and color contrast. Teachers can ask children whether their snow looks light or heavy and invite them to count five or ten snowflakes. It is also a useful option for a short art session because the preparation and cleanup are simple.
11. Bubble Wrap Winter Tree Painting With White Snow Dots
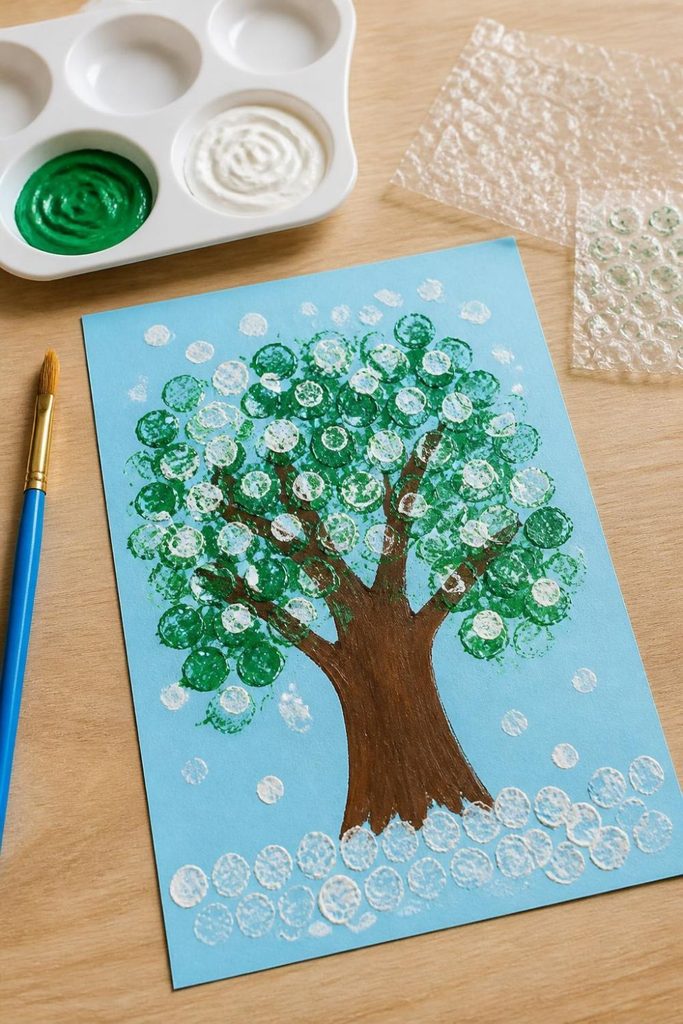
Bubble wrap painting creates a dotted effect that resembles snow resting on tree branches. Preschoolers enjoy pressing the textured material into paint and seeing how a simple object produces a pattern on paper.
Materials needed
- White or pale blue construction paper
- Clean bubble wrap
- Washable green and white paint
- Small paint trays
- Brown washable paint or brown paper strips
- Paintbrushes
- Table coverings
- Paper towels
Step by step method
- Draw a simple tree trunk and branches on the paper, or let children paint them with a brush.
- Cut small pieces of clean bubble wrap that children can hold comfortably.
- Pour green paint into a shallow tray and show children how to press the bubble wrap lightly into it.
- Press the painted bubble wrap onto the tree branches to add textured green marks.
- Let the green paint dry before using a clean piece of bubble wrap with white paint.
- Press the white paint onto and around the branches to represent snow.
- Add a few white dots on the ground and let the painting dry.
Ask children to describe the bumpy texture of the bubble wrap and compare its marks with those made by a regular paintbrush. Teachers can explain that snow may settle on tree branches during cold weather. This project combines sensory discovery with art and helps children notice how different tools create different patterns.
12. Handprint Winter Tree Craft With Fingerprint Snowflakes
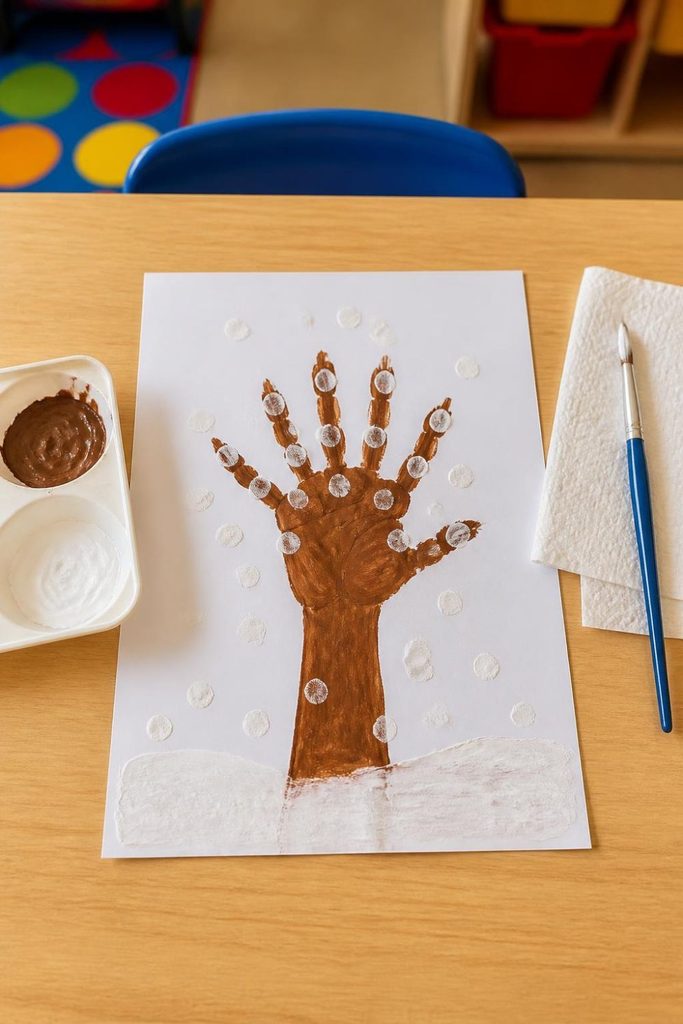
A handprint winter tree is an easy way to turn a child’s hand and arm into a tree trunk with branching limbs. Fingerprint snowflakes finish the scene and let children practice making small marks with their fingertips.
Materials needed
- White construction paper
- Brown washable paint
- White washable paint
- Blue washable paint, optional
- Paintbrushes
- Shallow paint trays
- Paper towels
- Smocks
Step by step method
- Place a sheet of white paper on a protected table.
- Paint the child’s palm and forearm with a thin layer of brown washable paint.
- Press the hand and forearm onto the paper with the fingers spread apart.
- Lift the arm carefully and wash the child’s hand.
- Allow the brown print to dry before adding small white fingerprint dots.
- Dip a fingertip into white paint and press it around the branches to create falling snow.
- Add a blue sky, a snowy ground, or small paper birds if desired.
Children can compare the shape of their handprint trees and count the visible branches. Teachers may explain that some trees lose their leaves during colder months, leaving their branches exposed. The activity also provides a gentle way to talk about how trees change with the seasons. Since each handprint is different, the finished paintings can become a classroom display that celebrates every child’s work.
13. Paper Plate Arctic Fox Craft With Pointed Ears and a Fluffy Paper Tail
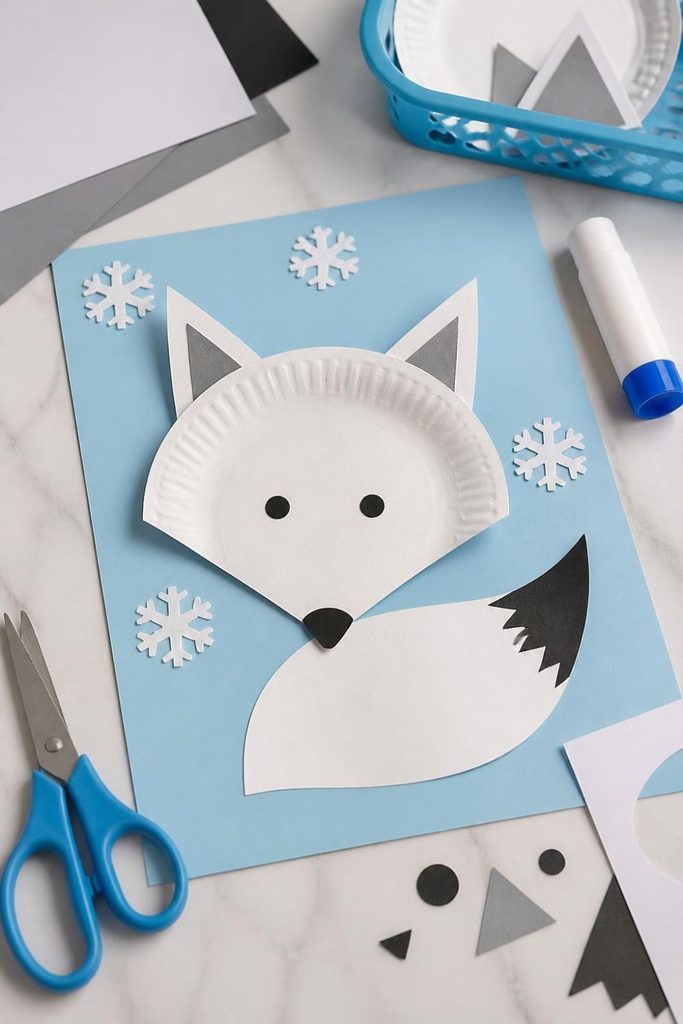
An Arctic fox paper plate project introduces preschoolers to a winter animal while giving them practice with simple shapes and paper collage. The pointed ears and large fluffy tail help children recognize the fox’s shape.
Materials needed
- White paper plates
- White construction paper
- Light gray paper
- Black paper
- Child safe glue
- Child safe scissors, with adult help
- Cotton balls, optional
- Washable markers
Step by step method
- Give each child a white paper plate to use as the fox’s face.
- Cut two pointed white ears and smaller gray inner ear shapes.
- Glue the ears to the top edge of the plate.
- Cut two small black eyes and a black nose, then attach them to the face.
- Draw a curved mouth beneath the nose using a washable marker.
- Cut a large bushy tail from white paper and add a gray or black tip.
- Glue the tail onto a sheet of blue paper beside the fox’s face.
- Add a few paper snowflakes around the animal to complete the picture.
Teachers can explain that Arctic foxes live in cold northern regions and have thick fur. Their coats can change color with the seasons, depending on the population. Ask children to point to the fox’s ears, eyes, nose, and tail. This activity helps them learn animal vocabulary and identify simple shapes while producing an attractive winter picture.
14. Q Tip Snowflake Painting With Blue Watercolor Backgrounds
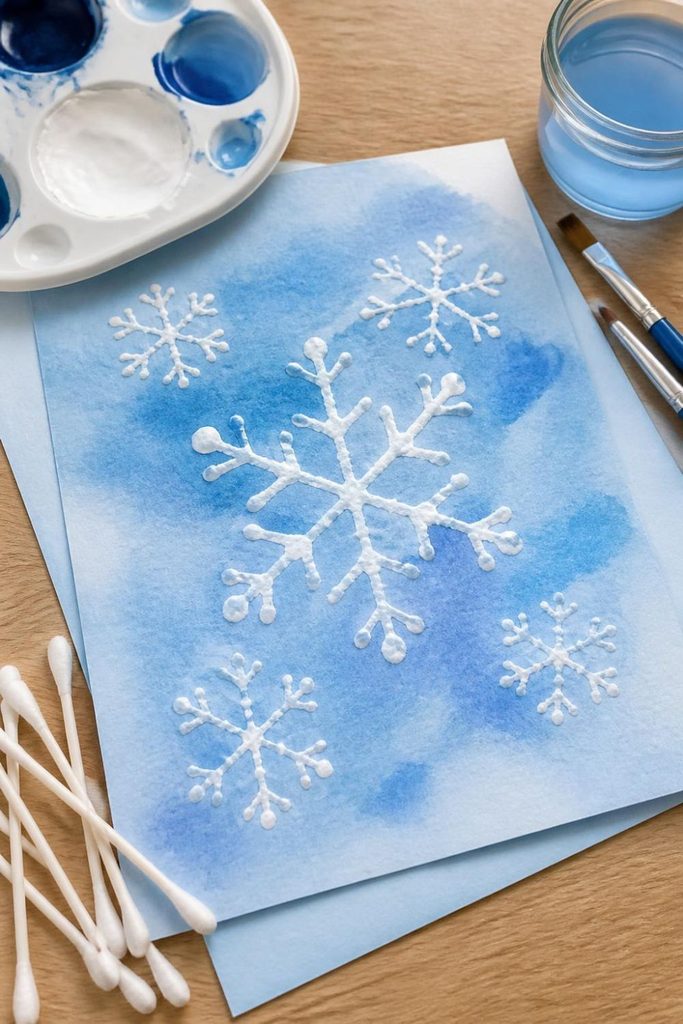
Q tip snowflake painting is a useful activity for preschoolers who are beginning to control small tools. Children use cotton swabs to make dots and short lines that form snowflake patterns on a blue background.
Materials needed
- White drawing paper
- Blue watercolor paint
- Watercolor brushes
- Cotton swabs
- White washable paint
- Water cups
- Paper towels
- Paint trays
Step by step method
- Give each child a sheet of white paper and a watercolor brush.
- Help children paint the paper with a light blue wash, then leave it to dry.
- Pour a small amount of white paint into a tray.
- Demonstrate how to dip a cotton swab into the paint and make a dot in the center of the paper.
- Draw or paint three short lines extending from the center to create a basic snowflake shape.
- Add small dots along the lines using the cotton swab.
- Repeat the pattern across the paper, leaving space between the snowflakes.
- Allow the painting to dry completely before displaying it.
Remind children to use cotton swabs for painting rather than putting them in their mouths or ears. Teachers can encourage them to make one large snowflake and several smaller ones. This helps children compare size, direction, and position while practicing gentle hand movements.
15. Yarn Wrapped Cardboard Mitten Craft With Bright Winter Colors
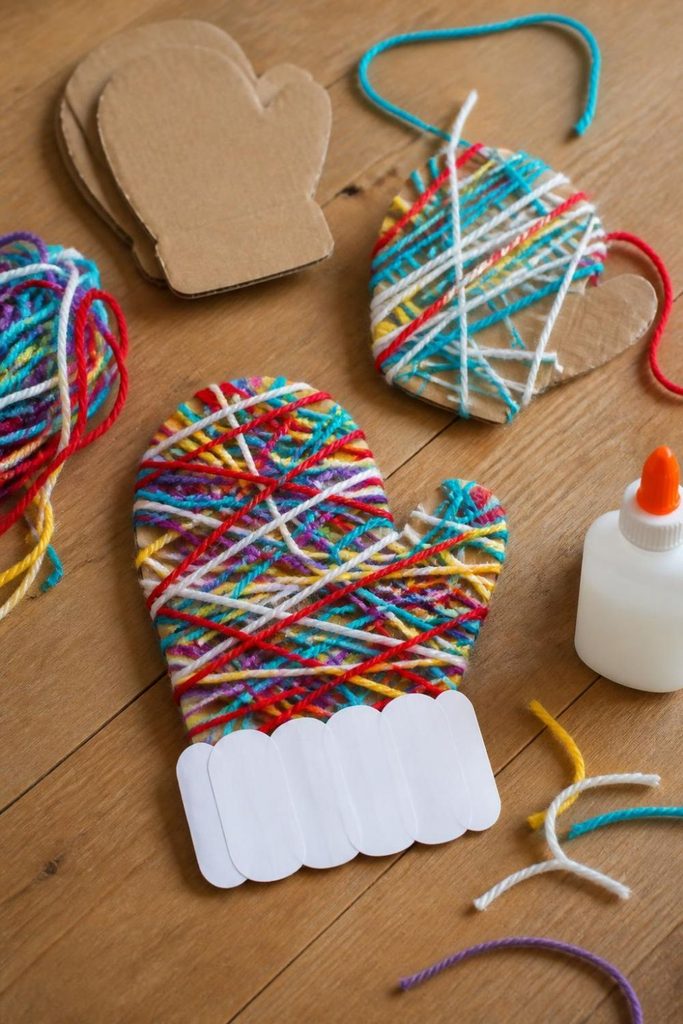
Yarn wrapping gives preschoolers a chance to work with a different texture while decorating a cardboard mitten. The repeated wrapping motion can help develop hand control and coordination, especially when adults prepare the mitten shapes in advance.
Materials needed
- Thin cardboard from a clean box
- Soft, thick yarn in bright colors
- Child safe scissors
- Large paper mitten templates
- Child safe glue
- Paper clips or masking tape, used by an adult
Step by step method
- Trace a large mitten onto cardboard and cut it out before the activity.
- Give each child a short piece of yarn and show them how to place its end against the cardboard.
- Secure the yarn end with a small piece of tape on the back, or use a dab of glue.
- Help the child wrap the yarn around the mitten, moving from the wrist toward the fingertips.
- Encourage children to change colors by attaching another piece of yarn to the back.
- Continue wrapping until most of the cardboard is covered.
- Glue a short strip of yarn or paper around the wrist to form a cuff.
For younger children, use short lengths of thick yarn and keep the mitten large enough to hold easily. Teachers can ask children to identify the colors and count the yarn changes. The finished mittens make attractive classroom decorations and connect naturally to a discussion about winter clothing and keeping warm.
16. Sponge Stamped Snowman Family Craft With Different Sized Snowballs
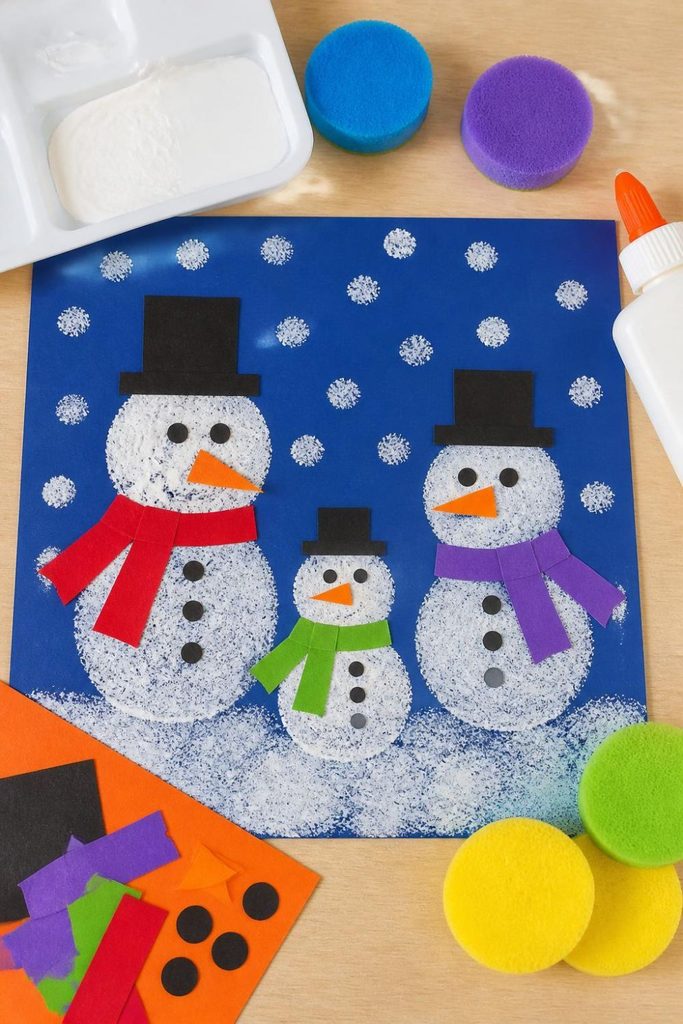
A sponge stamped snowman family lets preschoolers create several snowmen with round bodies without drawing every circle themselves. Using different sponge sizes also introduces the idea of large, medium, and small shapes.
Materials needed
- Blue construction paper
- Clean sponges cut into large and small circles
- White washable paint
- Shallow paint trays
- Black paper
- Orange paper
- Child safe glue
- Washable markers
- Paper towels
Step by step method
- Place a sheet of blue paper in front of each child.
- Pour white paint into a shallow tray.
- Show children how to dip a round sponge lightly into the paint.
- Press a large sponge near the bottom of the paper to create a snowman’s body.
- Use a smaller sponge to stamp the head above the body.
- Repeat the process to make a family of two or three snowmen.
- Once the paint is dry, add paper hats, orange noses, and black paper eyes.
- Draw simple scarves, arms, and buttons with washable markers.
Invite children to give each snowman a name and describe which one is tallest or shortest. Teachers can use the activity to practice counting, comparing sizes, and arranging shapes from large to small. The family theme also encourages children to tell stories about who is standing together in the snowy scene.
17. Paper Strip Icicle Craft With Layered Blue, Silver, and White Paper
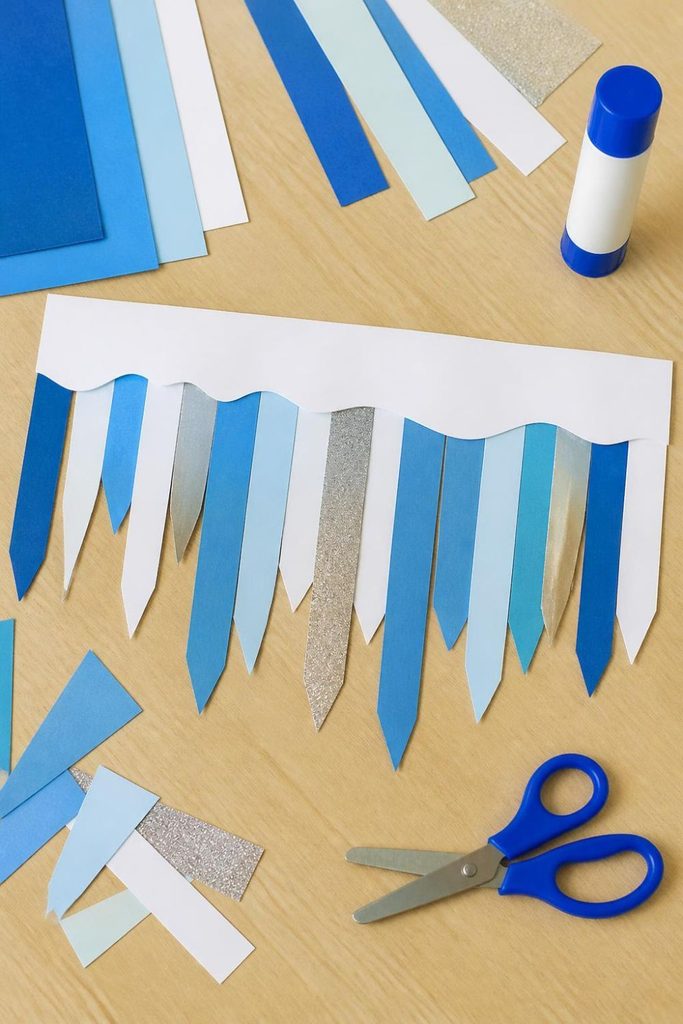
Paper strip icicles are an easy winter decoration that helps preschoolers practice tearing, arranging, and gluing long pieces of paper. The finished project resembles icicles hanging from the edge of a snowy roof.
Materials needed
- White construction paper
- Blue, silver, and light blue paper
- Child safe glue
- Child safe scissors, with adult help
- Crayons
- A long strip of cardboard or paper for the top edge
Step by step method
- Cut a long strip of white paper to serve as the snowy roof edge.
- Prepare strips of blue, silver, and white paper in different lengths.
- Show children how to arrange the strips so that some hang lower than others.
- Apply glue to the top end of each strip and attach it beneath the white paper edge.
- Alternate colors to create a repeating pattern.
- Add small paper snowflakes or white crayon marks along the top.
- Hang the finished decoration on a classroom wall, at a child’s eye level.
Explain that icicles can form when melting snow or ice freezes again in cold conditions. Remind children never to touch or pull down icicles outdoors because they can fall and cause injuries. In class, they can safely explore the idea through paper art. Teachers can also invite children to arrange strips from shortest to longest to practice early measurement concepts.
18. Paper Cup Winter Bird Feeder Craft Using Birdseed and Natural Materials
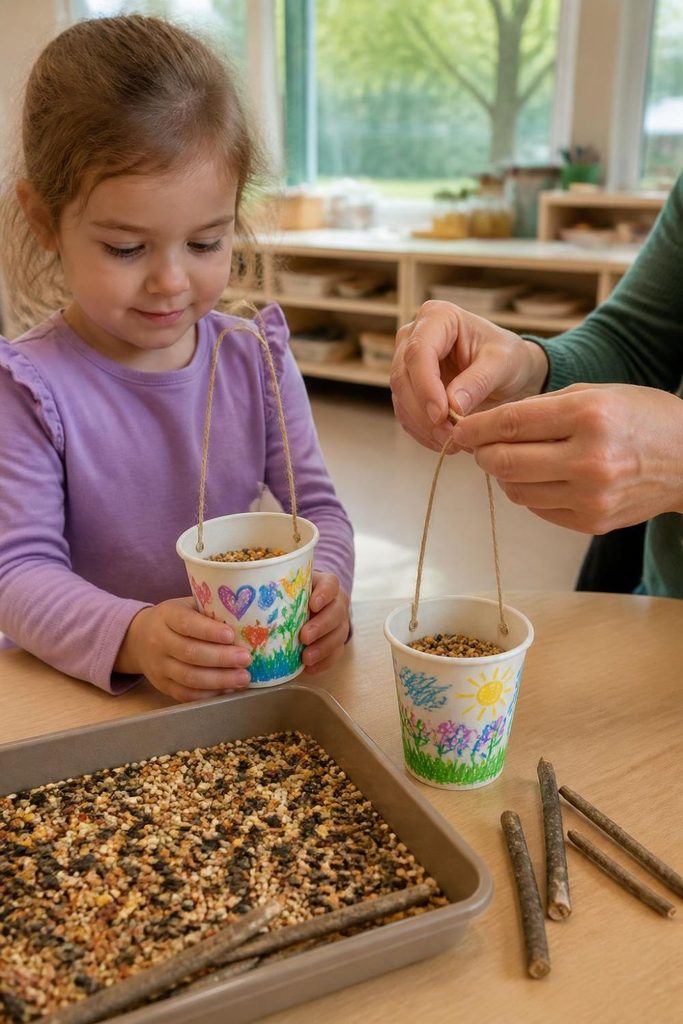
A winter bird feeder activity connects art with caring for wildlife. Preschoolers can decorate a paper cup feeder and observe birds outdoors, while teachers explain that wild animals need suitable food and safe places during cold weather.
Materials needed
- Plain paper cups
- Washable markers
- Natural cotton string
- Child safe glue
- Birdseed suitable for local wild birds
- A shallow tray
- A hole punch, used by an adult
- A safe outdoor hanging location
Step by step method
- Give each child a paper cup and let them decorate the outside with washable markers.
- Ask an adult to make two small holes near the top of the cup.
- Thread a piece of string through the holes and tie a secure loop for hanging.
- Place the cup on a tray and add a small amount of birdseed suitable for birds in your area.
- With adult help, hang the feeder in a safe place where children can observe it without disturbing wildlife.
- Check the feeder regularly and remove wet or spoiled seed.
- Invite children to draw any birds they see visiting the feeder.
Use only appropriate bird food and avoid offering bread or salty snack foods. Follow local wildlife guidance, since feeding practices differ by region and species. Teachers should also check for allergies and supervise children during the activity. If outdoor feeding is not suitable, children can decorate the cup and make bird observation drawings instead.
19. Shaving Cream Free Puffy Snow Painting Using Child Safe White Paint and Cotton
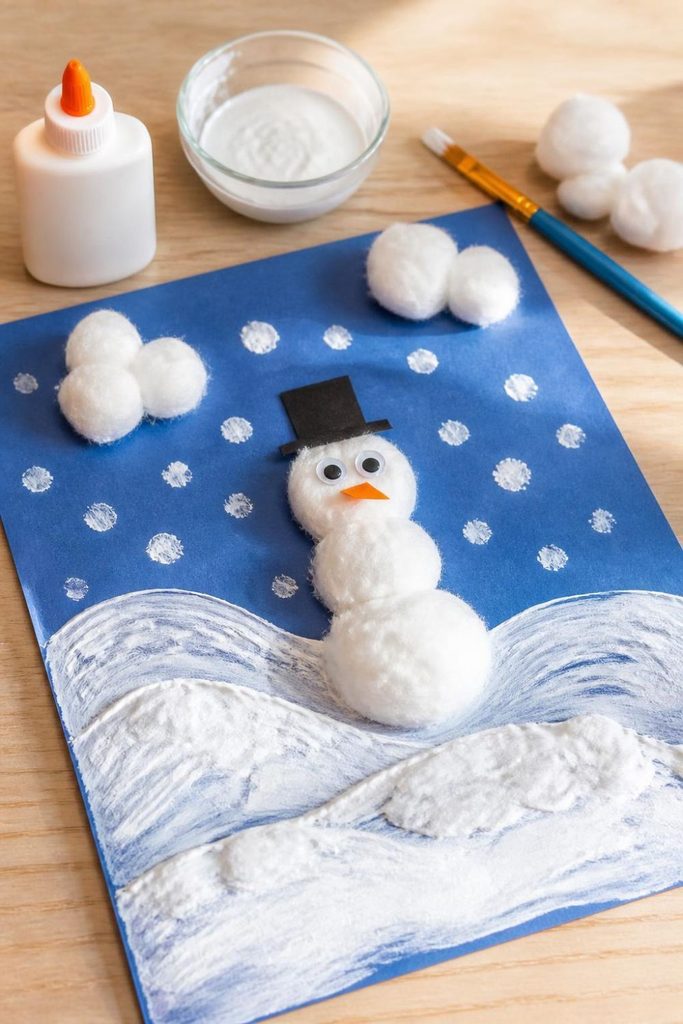
Puffy snow painting gives preschoolers a raised, snowy effect without shaving cream. Cotton and thick white paint create soft looking snow that stands out against a blue background, making this a useful choice for children who enjoy textured art.
Materials needed
- Blue construction paper
- Child safe white washable paint
- White cotton balls
- Child safe glue
- Thick paintbrushes
- Paper plates or paint trays
- Paper towels
- Smocks
Step by step method
- Give each child a sheet of blue paper.
- Help children paint a simple snowy hill, cloud, or tree using thick white washable paint.
- Before the paint dries, press a few small cotton pieces onto selected areas, or glue them on after the paint has dried.
- Add more white paint with a brush to create snow covered branches or falling snow.
- Use cotton balls to make a fluffy snowman or a small snowy mound.
- Add black paper eyes and an orange paper nose if children want to include a snowman.
- Leave the picture flat until all paint and glue have dried.
This project avoids shaving cream, which may irritate skin or eyes and should not be treated as a children’s art material. Use products labeled suitable for young children and check their instructions. Encourage children to describe the soft and rough textures they notice. The activity also gives teachers a chance to discuss snow, clouds, and winter weather in simple language.
20. Three Dimensional Paper Winter Cabin Craft With Cotton Ball Snow on the Roof
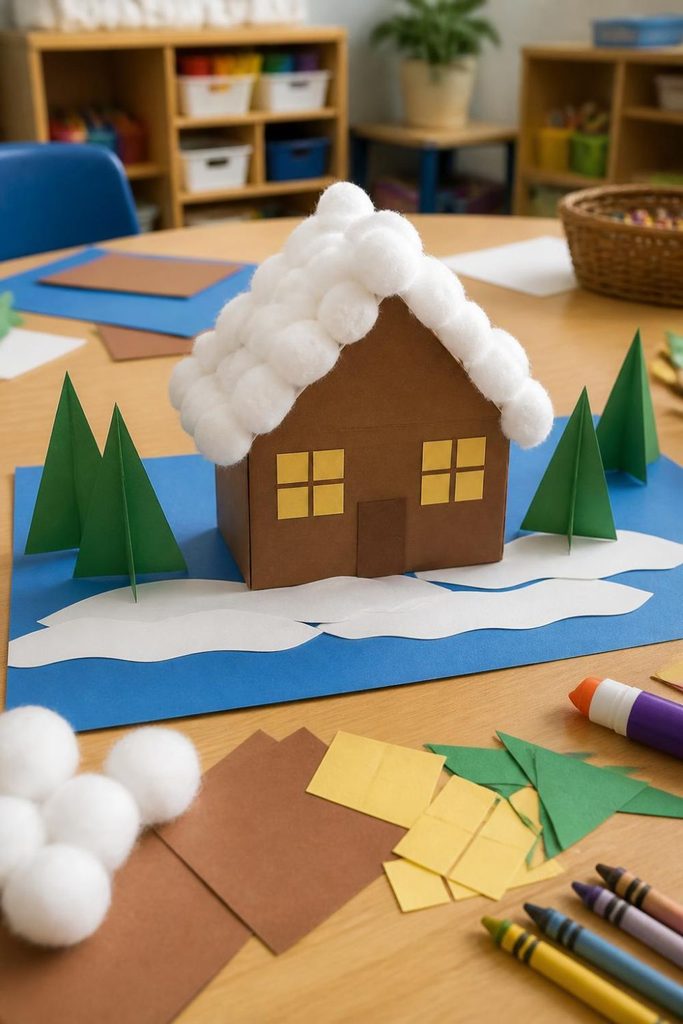
A paper winter cabin is a simple three dimensional project that allows preschoolers to build a small house from folded paper. Cotton on the roof adds a snowy finish, while doors and windows help children practice recognizing basic shapes.
Materials needed
- Brown construction paper
- White paper
- Blue construction paper
- Cotton balls
- Child safe glue
- Child safe scissors, used with adult help
- Crayons or washable markers
- Green paper for trees, optional
Step by step method
- Cut a rectangle of brown paper for the cabin’s main body.
- Fold the paper into a simple box shape, leaving a flap for gluing the sides together.
- Help children glue the flap so the cabin can stand upright.
- Cut a triangle or folded paper shape for the roof and attach it to the top.
- Add a paper door and square windows to the front of the cabin.
- Glue small pieces of cotton along the roof to represent freshly fallen snow.
- Place the cabin on blue paper and add paper trees, a snowy path, or white paper snowflakes.
Teachers can ask children to identify the cabin’s shapes and count its windows. They can also talk about the different kinds of homes people use in cold climates, while explaining that houses vary across regions. Adults should prepare difficult folds and cuts in advance, allowing preschoolers to focus on decorating and assembling the simpler parts.
21. Melting Snowman Watercolor Resist Craft Using White Crayon and Blue Watercolor Paint
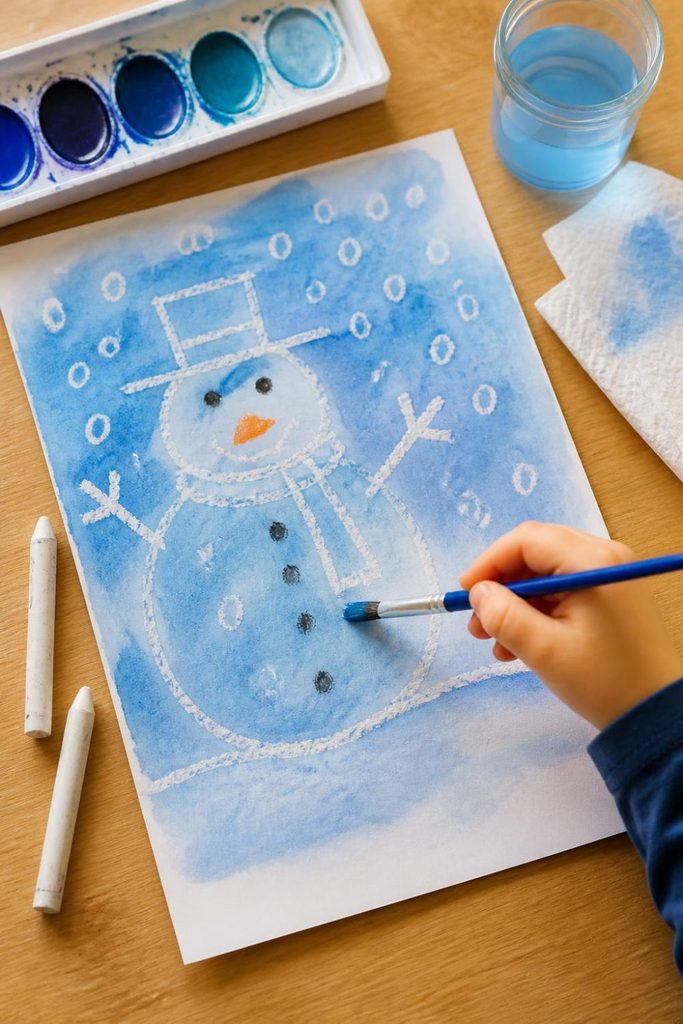
A melting snowman watercolor resist painting introduces preschoolers to a fun art technique. White crayon marks resist the watercolor, so hidden lines and shapes appear as children brush blue paint across the paper.
Materials needed
- White drawing paper
- White crayons
- Blue watercolor paint
- Watercolor brushes
- Water cups
- Paper towels
- Black and orange crayons, optional
- Table coverings
Step by step method
- Give each child a sheet of white paper.
- Draw a simple snowman using a white crayon. Adults can help children make three circles.
- Add a few white crayon lines around the snowman to represent melting snow or falling snowflakes.
- Invite children to brush light blue watercolor across the paper.
- Watch as the white crayon drawing becomes visible against the blue background.
- Add black eyes, an orange nose, and a few buttons with crayons once the paper is dry.
- Leave the paintings flat until the watercolor has completely dried.
Ask children what happens to snow when the weather becomes warmer. Explain that a snowman can melt when its snow warms up and turns into water. Teachers can also introduce words such as wet, dry, warm, cold, and melt. The activity combines art with a simple science concept, while allowing each child to create a slightly different snowy scene.
Tips for Planning Winter Crafts in a Preschool Classroom
A successful winter art session does not need a large budget or a long preparation period. Teachers can make activities easier by preparing templates, placing materials in small trays, and showing children one step at a time.
- Choose safe supplies: Use washable paints, child safe glue, and age appropriate tools. Adults should handle difficult cutting and supervise activities that involve small parts.
- Keep instructions short: Demonstrate one step, give children time to try it, and offer help when needed.
- Allow personal choices: Let children select colors, arrange shapes, and add their own details instead of expecting every project to look identical.
- Connect art with learning: Talk about animal habitats, winter clothing, shapes, colors, weather, and counting while children work.
- Plan for cleanup: Cover tables, keep paper towels nearby, and prepare a place for wet paintings.
- Adapt for different abilities: Offer larger shapes, thicker brushes, pre cut pieces, or extra assistance when needed.